Use cases
Add Checkout to your funnel for:- First-time purchases - Initial subscription or one-time payment.
- Trials - Free or paid trial activation.
- Offers - Introductory or promotional discounts (coupons) applied to the first charge to boost conversion.
Create Checkout
To set up a Checkout, you need at least one configured payment provider. Learn about payment integrations.
1. Product selection
You can skip this step if you’re creating a funnel for a single product.
- Add Options or Plan picker elements earlier in the funnel.
- Add one Checkout element for each product you sell.
- Go to the Parameters tab for your Checkout and set Visible to Conditional.
- Click + Add condition and select an answer from Plan pickers or Options leading to this Checkout.
- Repeat for each product you want to sell.
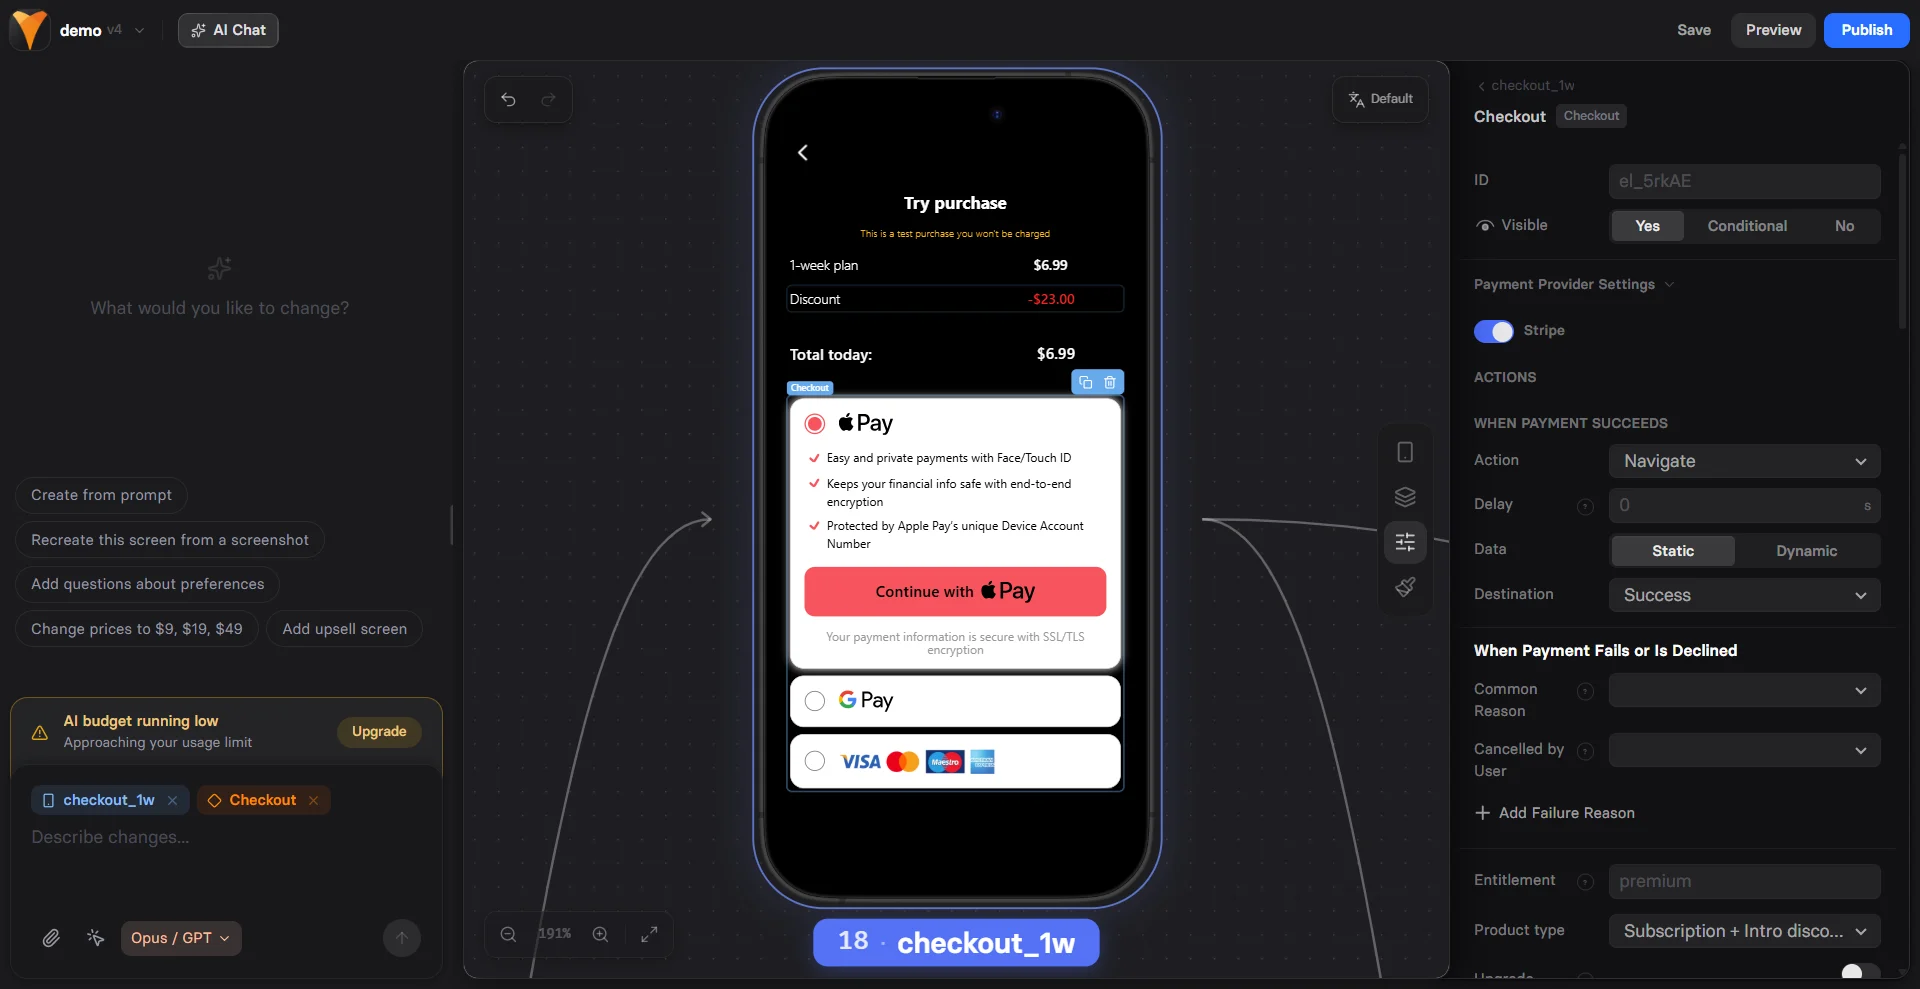
2. Payment provider
- Go to the Parameters tab for the Checkout.
- Toggle on the payment provider you’ve integrated and configure the following:
- Stripe
- Solidgate
- Paddle
- Billing
- FastSpring
- Paypal
- When payment succeeds: Navigation action to trigger when payment is completed.
- When payment fails or is declined: Navigation action that runs when the payment fails due to a decline or error, including 3DS.
- Common reason: Navigation that runs when the payment fails for any unspecified reason.
- Cancelled by user: Navigation action that runs when the user clicks the cancel button, if available.
- Add failure reason: Configure navigation based on a specific failure reason, such as
insufficient funds,invalid card detailsordo not honor.
- Entitlement: Access level ID for subscription manager.
- Account: Your Stripe account. Learn about multiple Stripe accounts in FunnelFox.
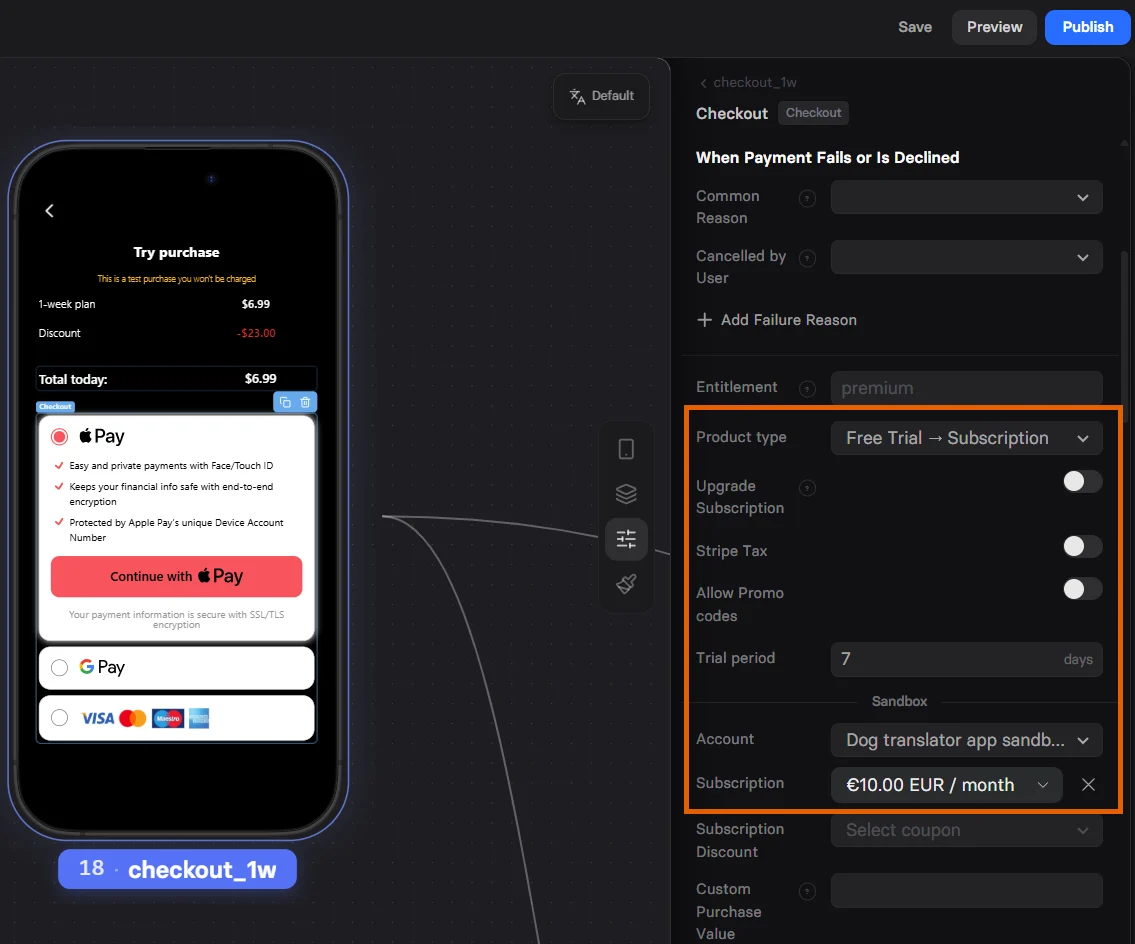
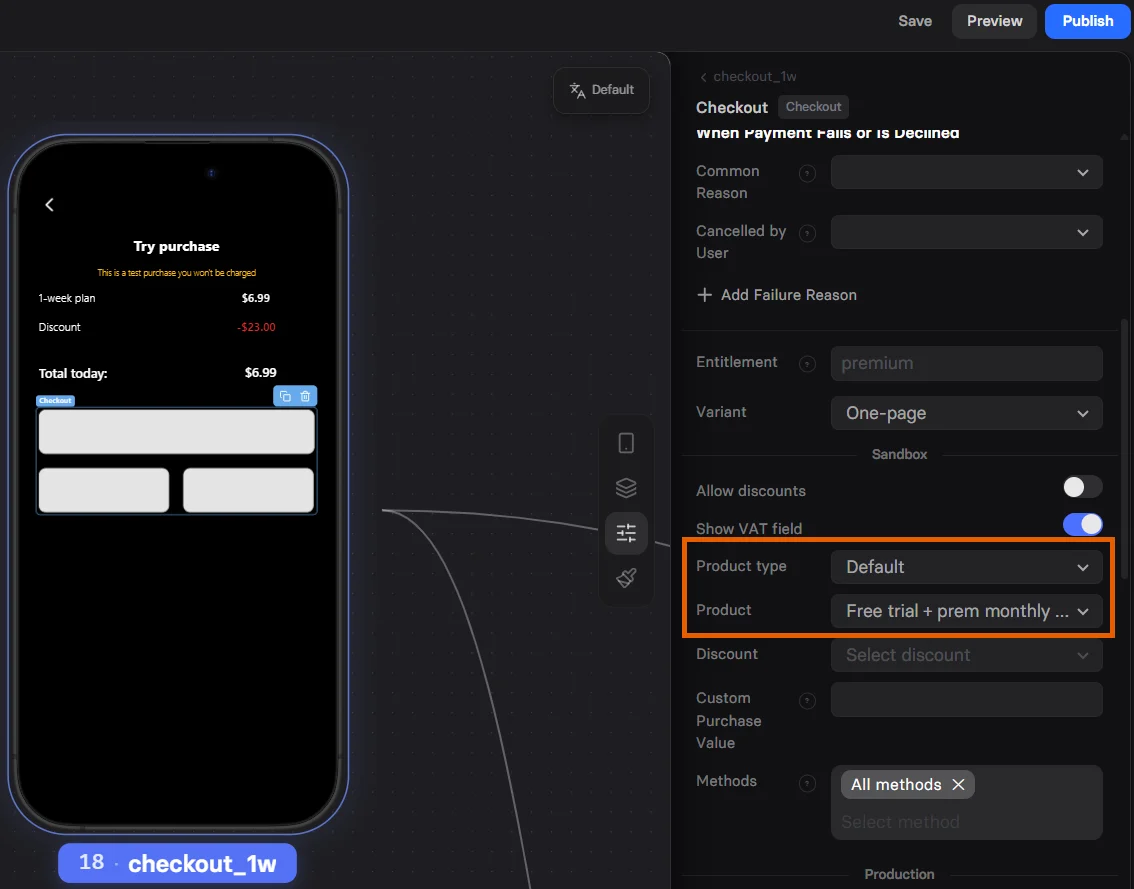
- Product type: Defines the payment flow depending on what you sell
- One-off product (for one-time payments)
- Subscription
- Subscription + discount
- Free trial -> Subscription
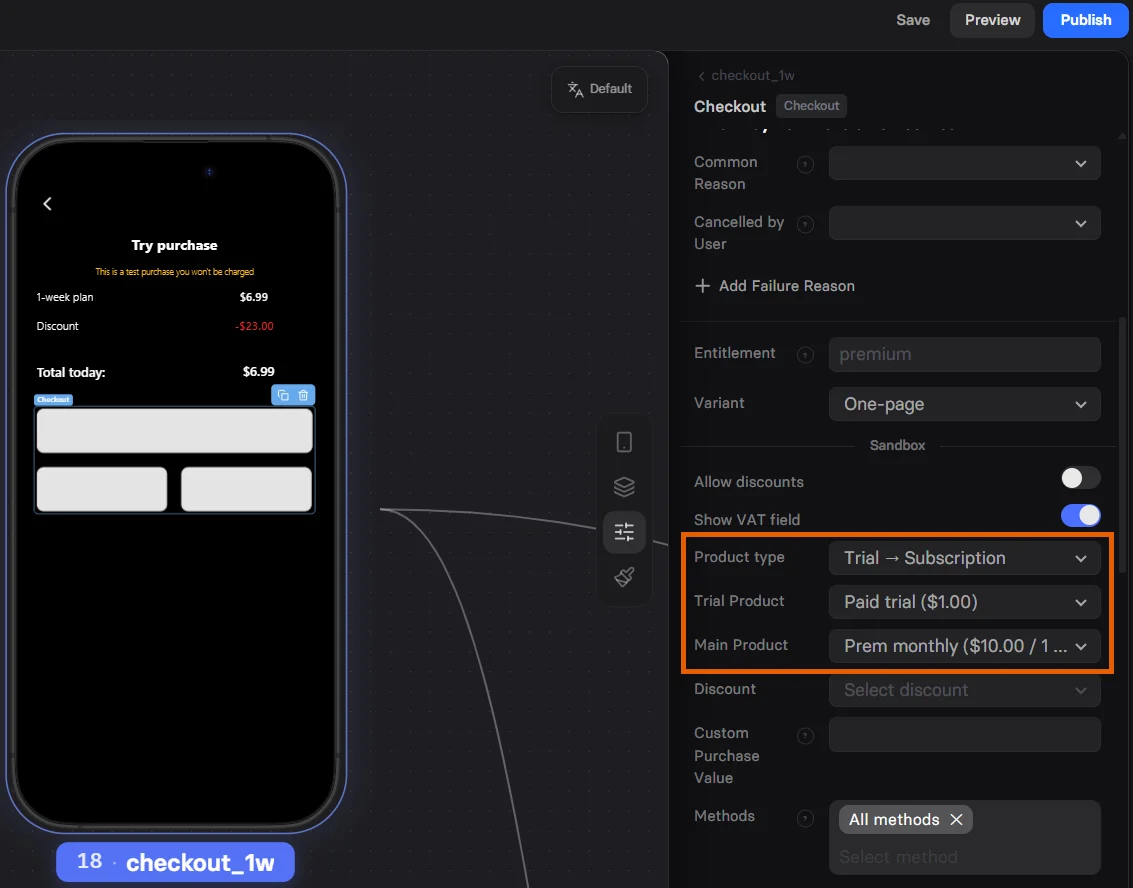
- Paid trial -> Subscription
- Upgrade subscription:
- No: Successful payment creates a new customer with the purchased subscription.
- Yes: Use for upsells. Successful payment seamlessly upgrades the customer’s subscription plan to this one.
- Stripe Tax: Enables tax calculations. Learn about Stripe Tax.
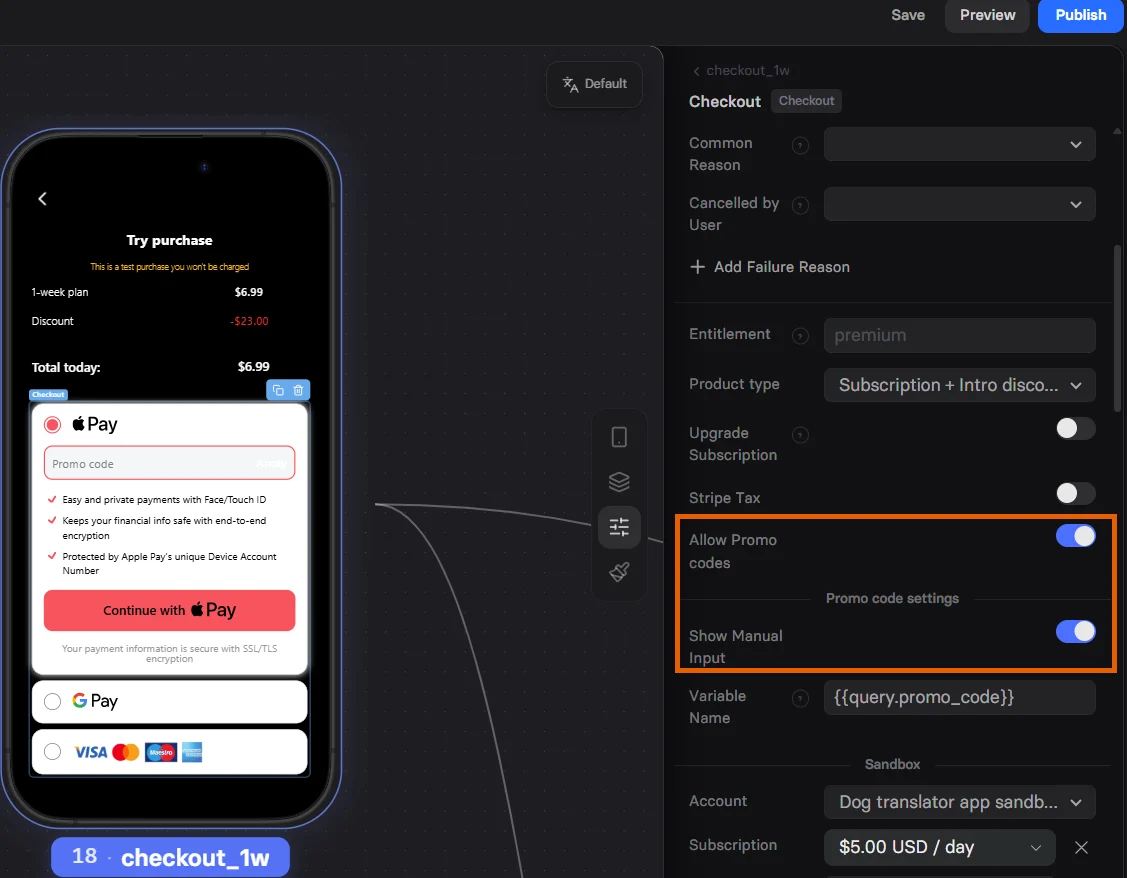
- Allow promo codes: Enables promo code settings. Learn about promo codes setup.
- Subscription: Define the Stripe subscription to sell.
- Subscription/Intro discount: Define the Stripe coupon to apply.
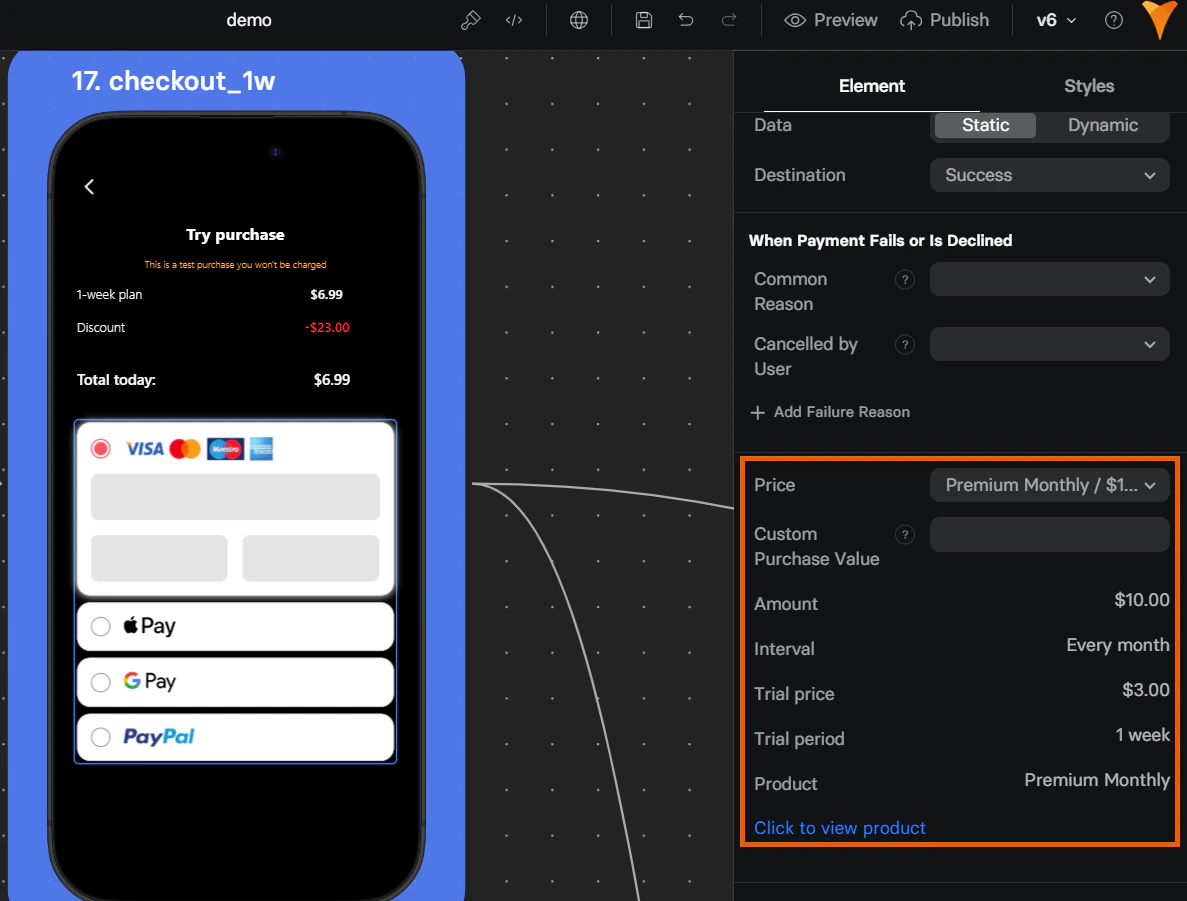
- Custom purchase value: Replaces the real price value in analytics & marketing tracking events. Use for value-based optimization where you can send a predicted LTV.
- The real price value of the purchased product is sent if this field is empty.
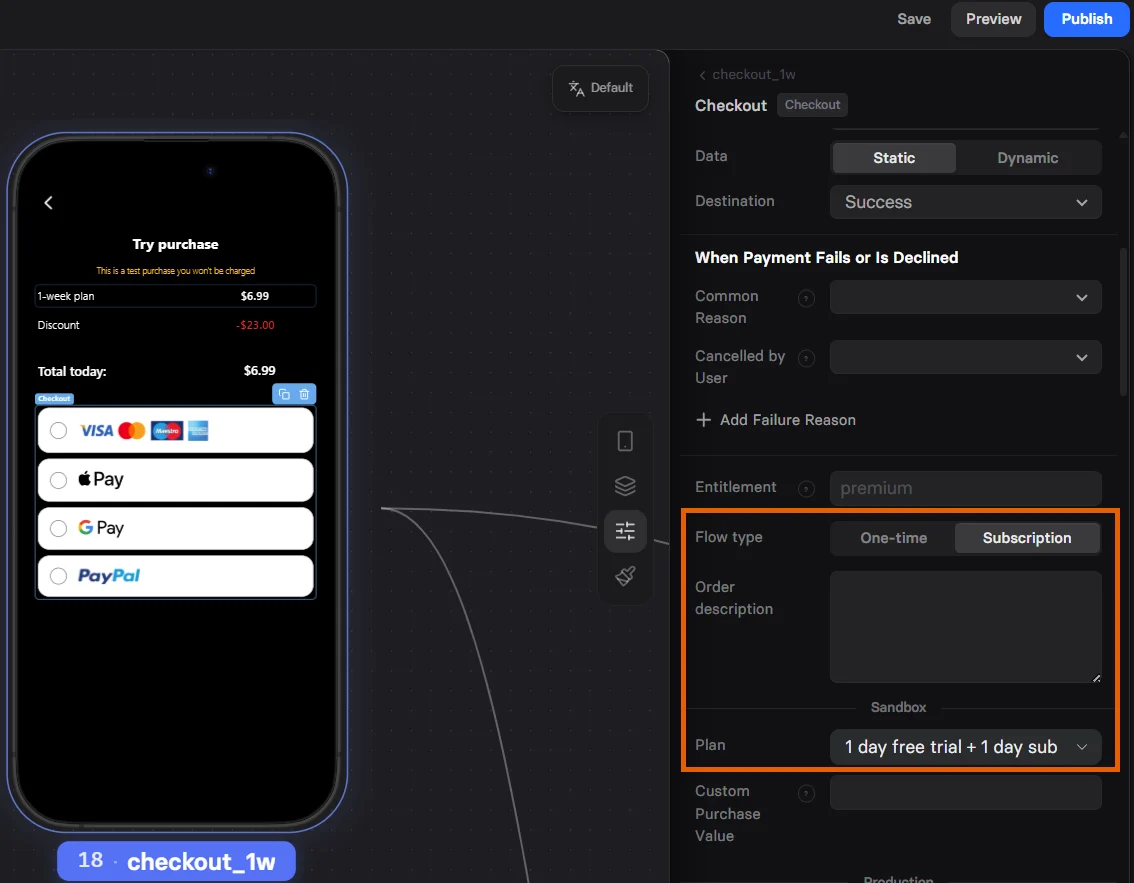
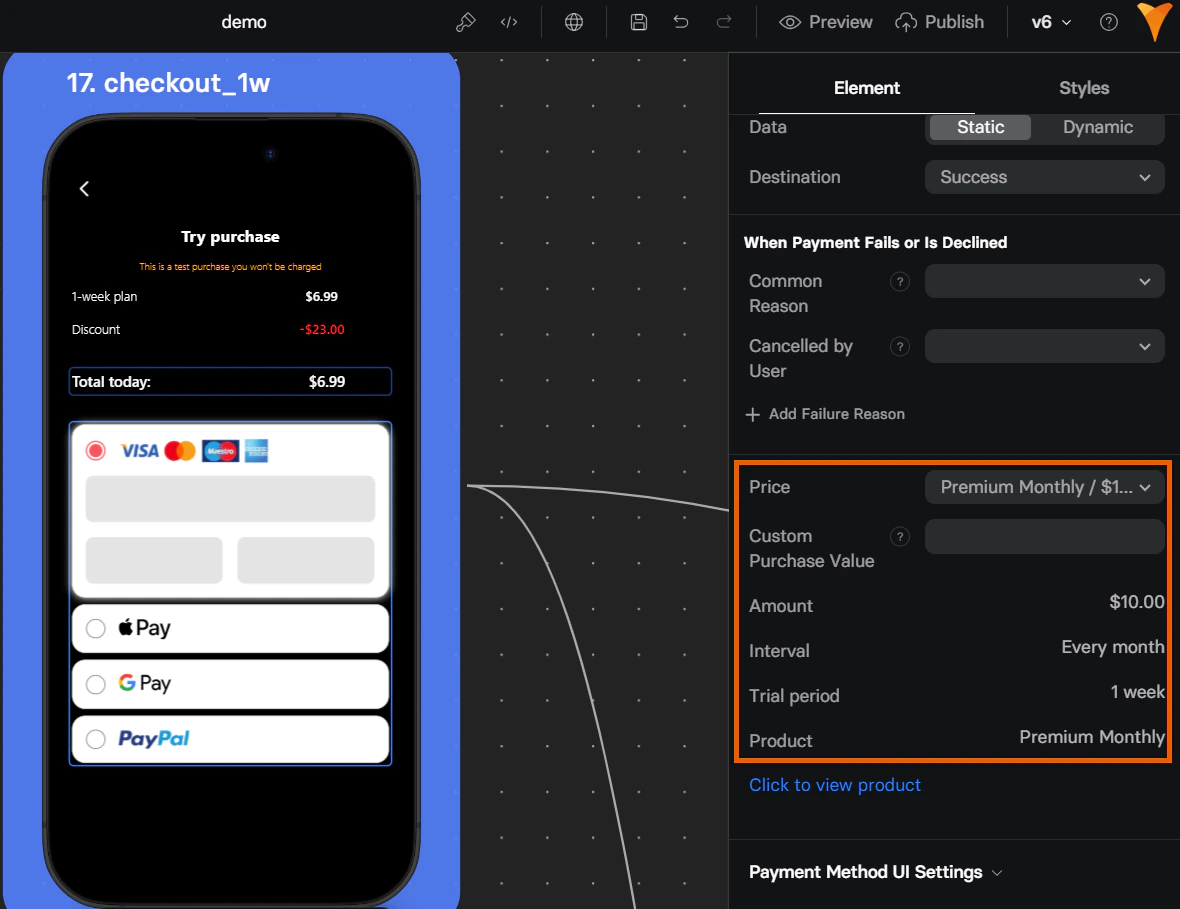
3. Payment method
Once you enable a payment provider, you will see payment methods to set up:Apple Pay and Google Pay here are rendered inside the Checkout as payment
methods. To place a standalone one-tap wallet button anywhere in your
funnel, use the Wallet button
element.
- Stripe
- Solidgate
- Paddle
- Billing
- FastSpring
- Paypal
- Toggle on the payment methods you need in the Parameters tab:
- Apple Pay
- Google Pay (not recommended for in-app browsers (e.g., Instagram or Telegram) due to low reliability)
- Card
- PayPal
- Optionally, customize how the payment method looks:
- Caption
- Bullet list
- Button prefix
- Custom icon
- Footer text
- Total label
- Require email field (cards only): Adds a required email field above the card form. This email overrides any email collected before checkout. If another email is collected later, it overrides the checkout email.
- Optionally, set Use as a fallback to Yes if you want to show this method only when other methods aren’t available. For example, you can choose to display only Card if Apple Pay fails to render.
To enable Stripe Link as a payment method, you don’t need to configure
anything here. Enable it in
Integrations > Stripe
instead.
4. Layout
Go to the Styles tab of your Checkout. Beyond the overall element layout in the Container section, you can also customize the appearance of the Accordion (payment methods list), Button, Errors, and Coupon Input (if enabled). For Apple Pay and Google Pay checkout buttons, styling is supported only by Stripe, Paddle, and PayPal.Subscription configuration
Regardless of which you integrated with FunnelFox, all subscriptions in your funnels are configured through the Parameters tab of the Checkout. While editing the Payment Provider Settings section, you can configure:Free trial
Start the subscription at no charge for a fixed period, then proceed with paid subscription.- Stripe
- Solidgate
- Paddle
- Billing
- FastSpring
- Paypal
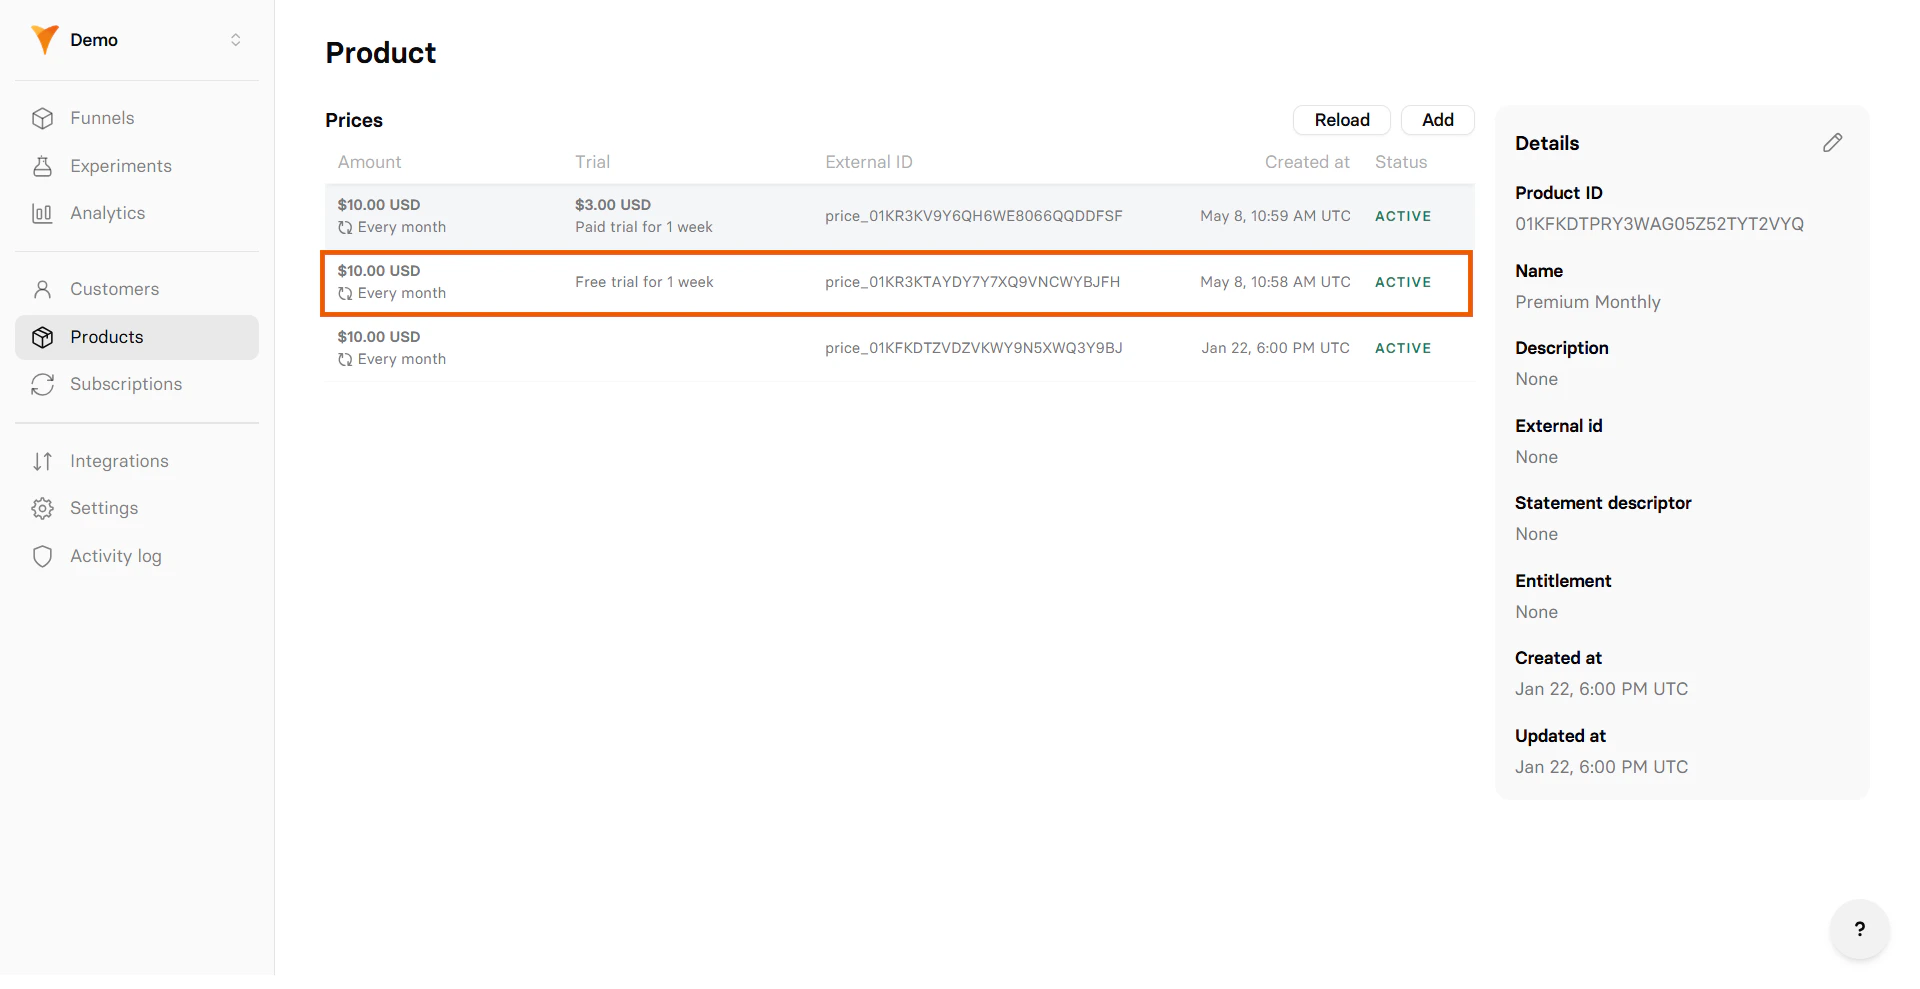
You can configure a free trial for any subscription created in Stripe:
- Select Free trial -> Subscription in the Product type.
- Set the number of days in the Trial period.
-
Select the product to sell in the Subscription.
Paid trial
Begin with a low, introductory payment for a limited period, then proceed with full-price subscription.- Stripe
- Solidgate
- Paddle
- Billing
- FastSpring
- Paypal
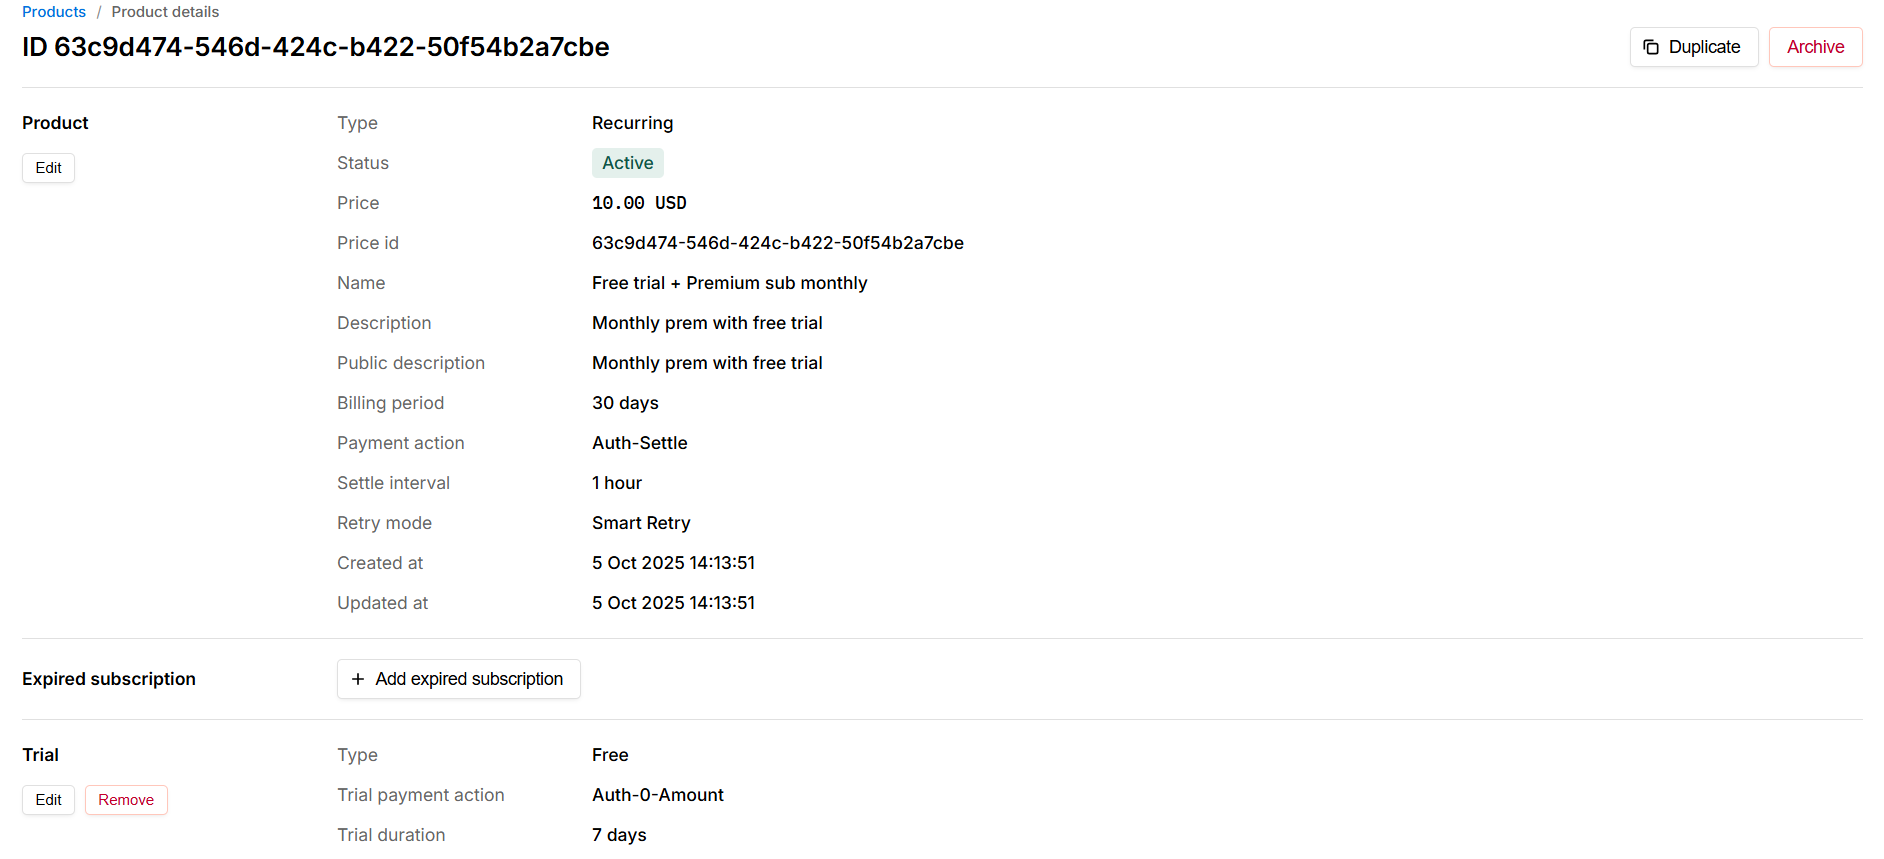
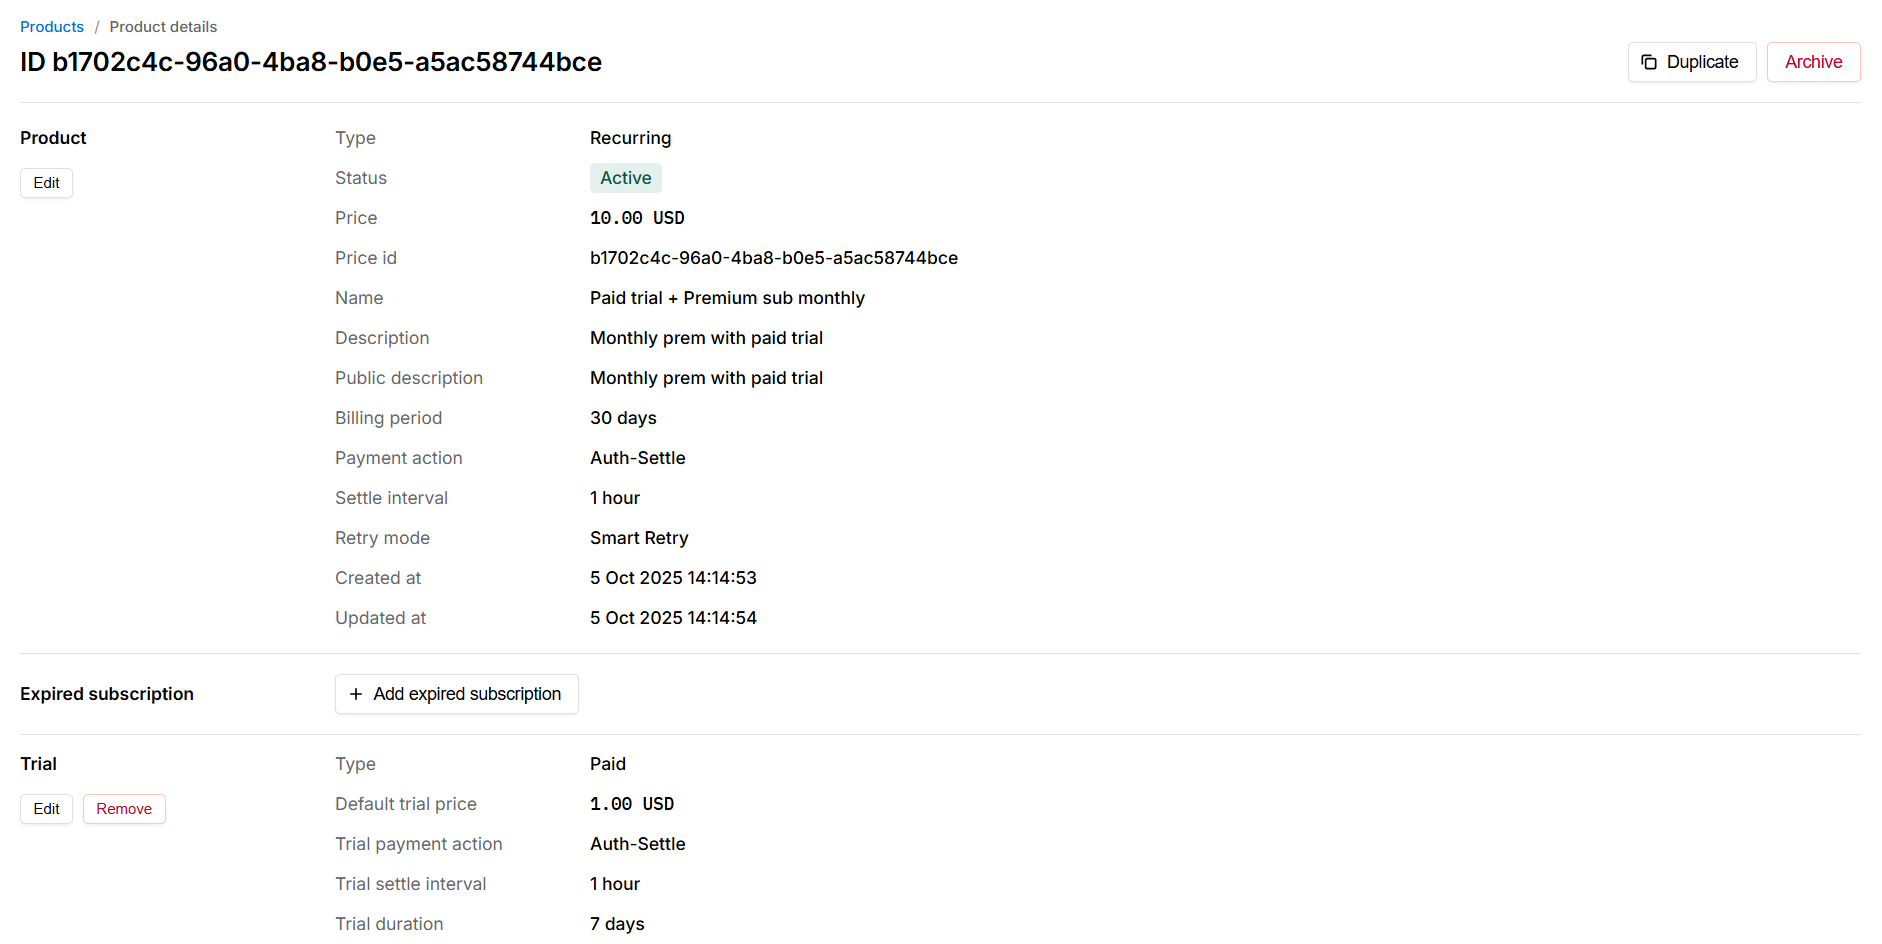
Before configuring a paid trial, you need: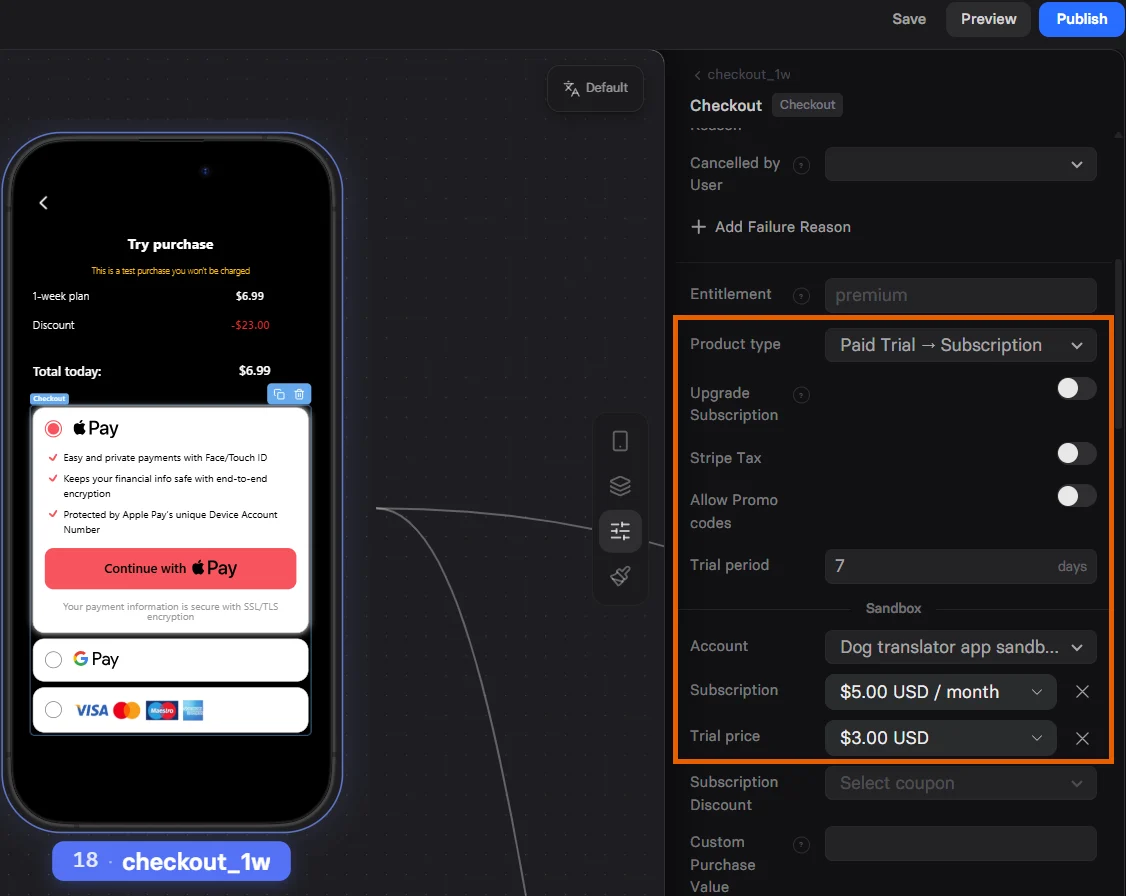
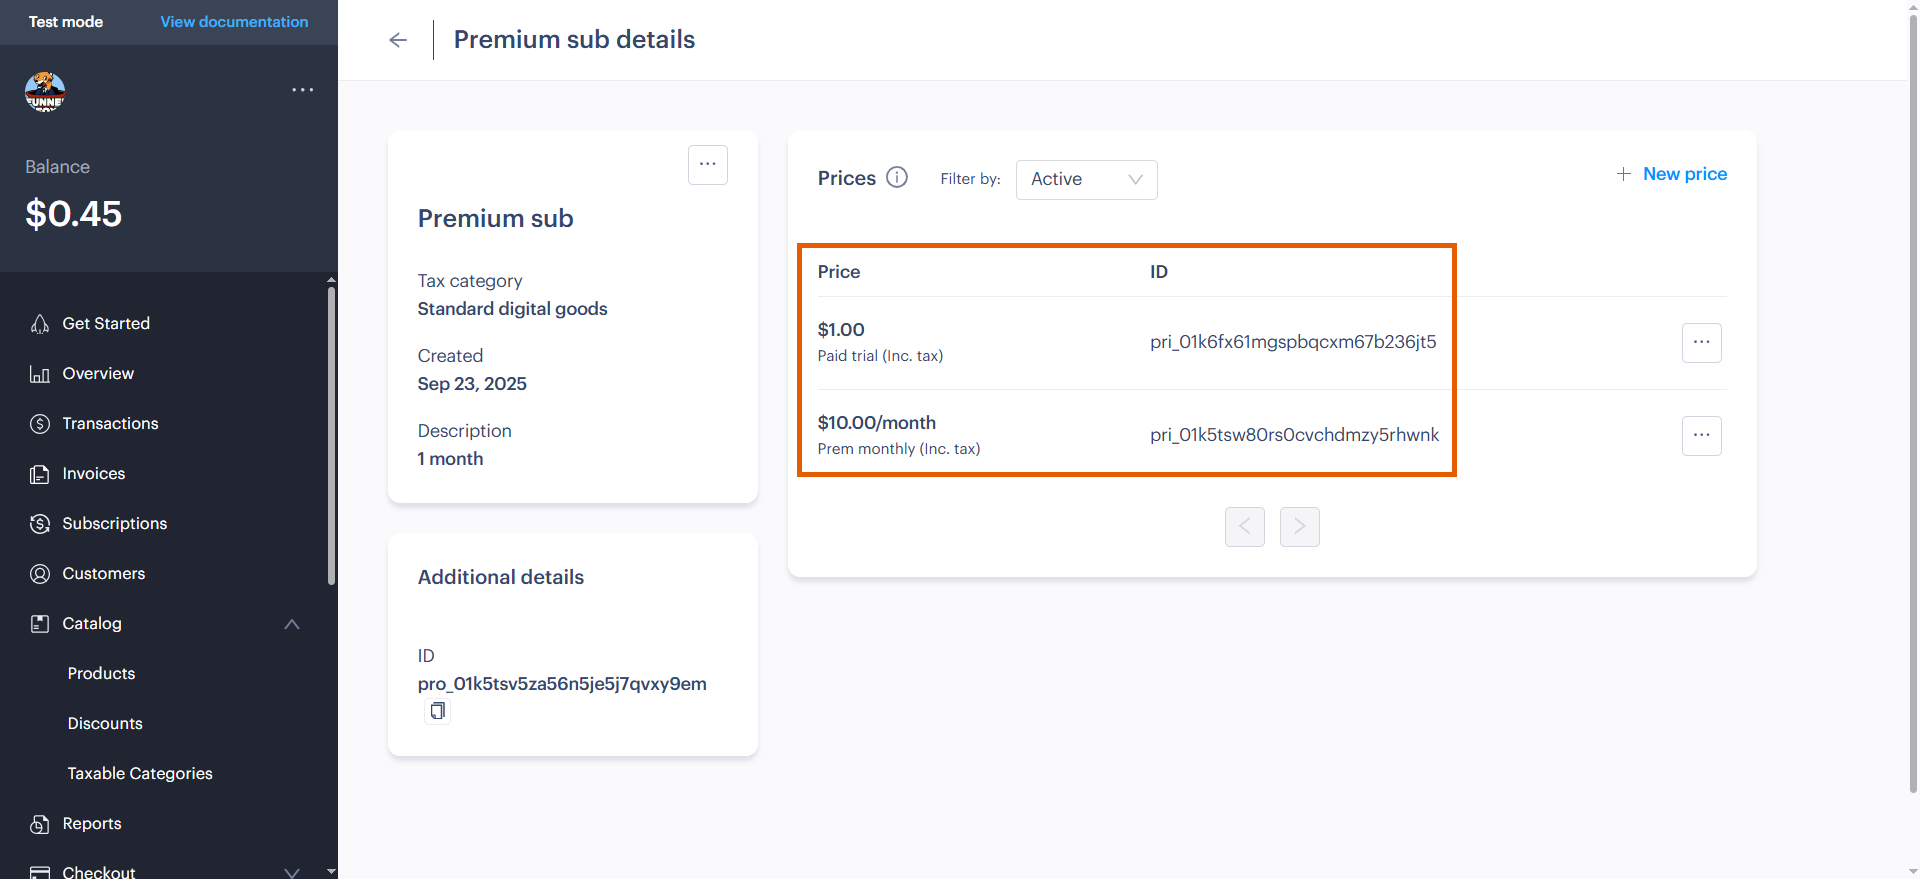
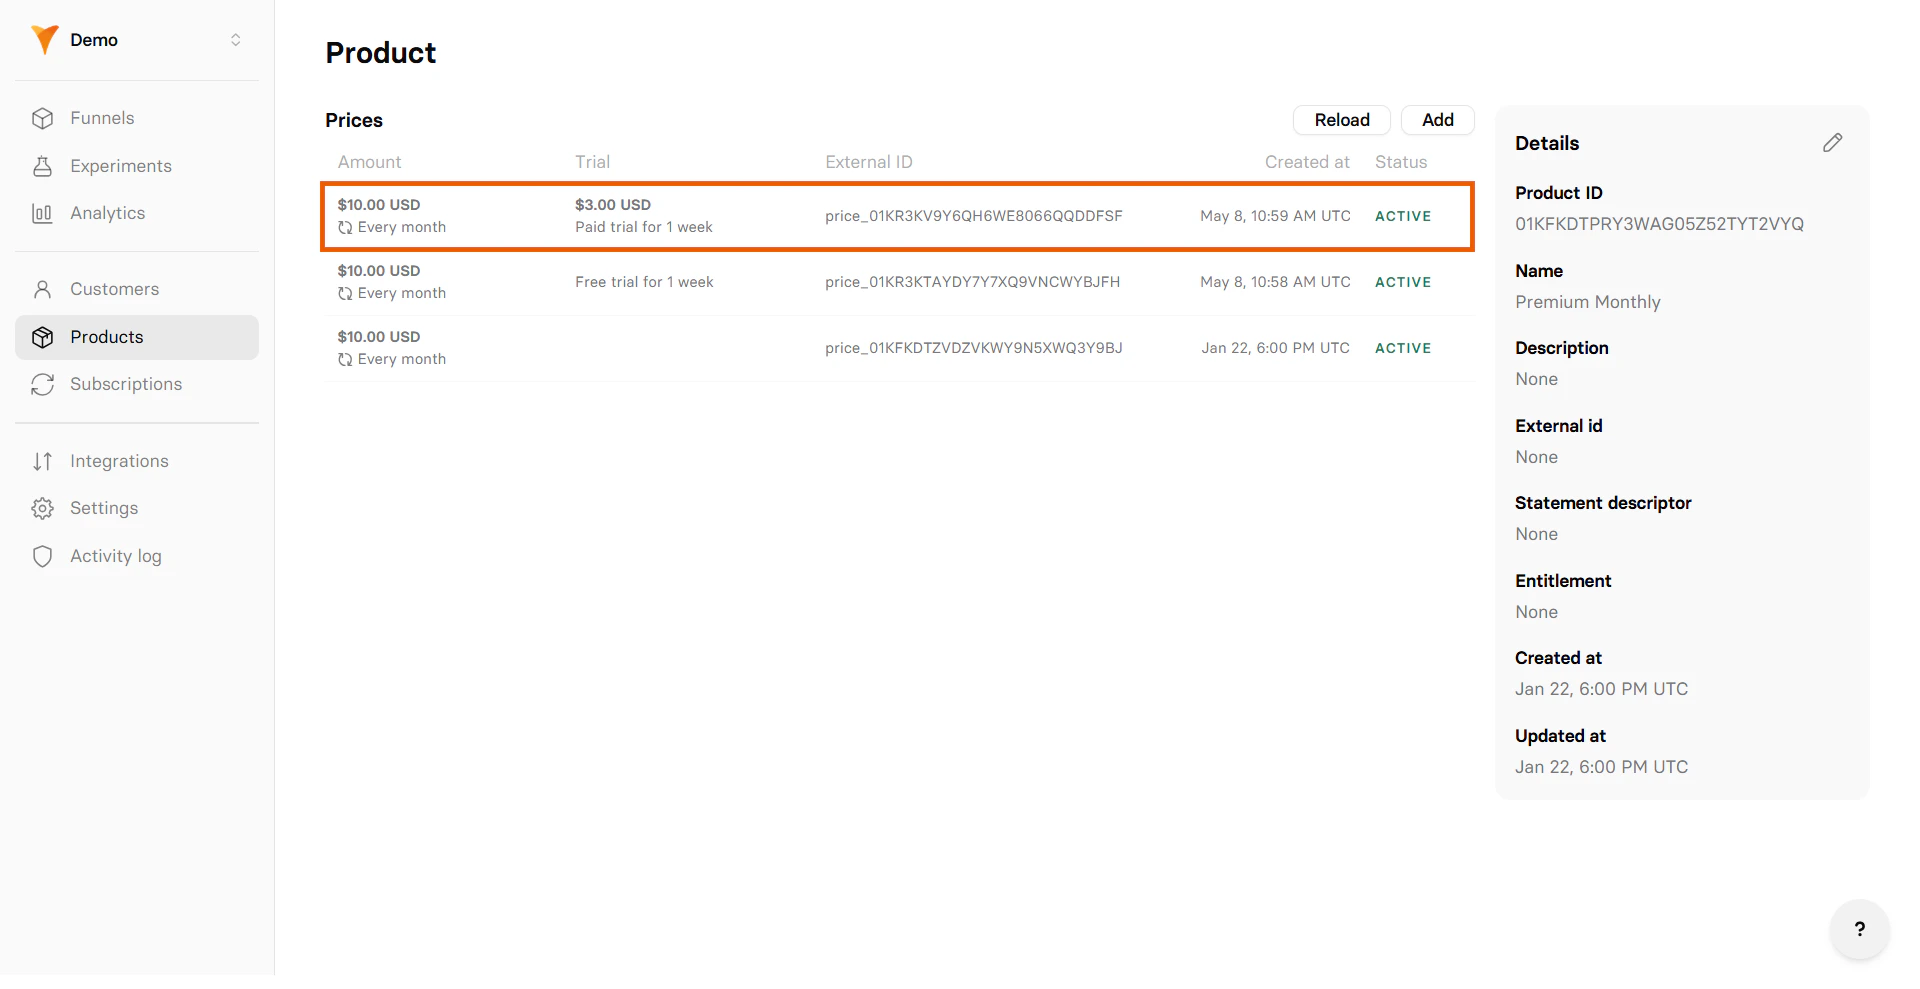
- Subscription product created in Stripe.
- One-time product created in Stripe that will represent the charge for the paid trial in Checkout configuration.
- Select Paid trial -> Subscription in the Product type.
- Set the number of days in the Trial period.
- Select the product to sell in the Subscription. This is the full-price subscription to be charged after the trial.
- Select the one-time product to sell in the Trial price. This is the one-time item to define the paid trial.
Offers
Introductory or promotional discounts (coupons) applied to the first charge to boost conversion.- Stripe
- Solidgate
- Paddle
- Billing
- FastSpring
- Paypal
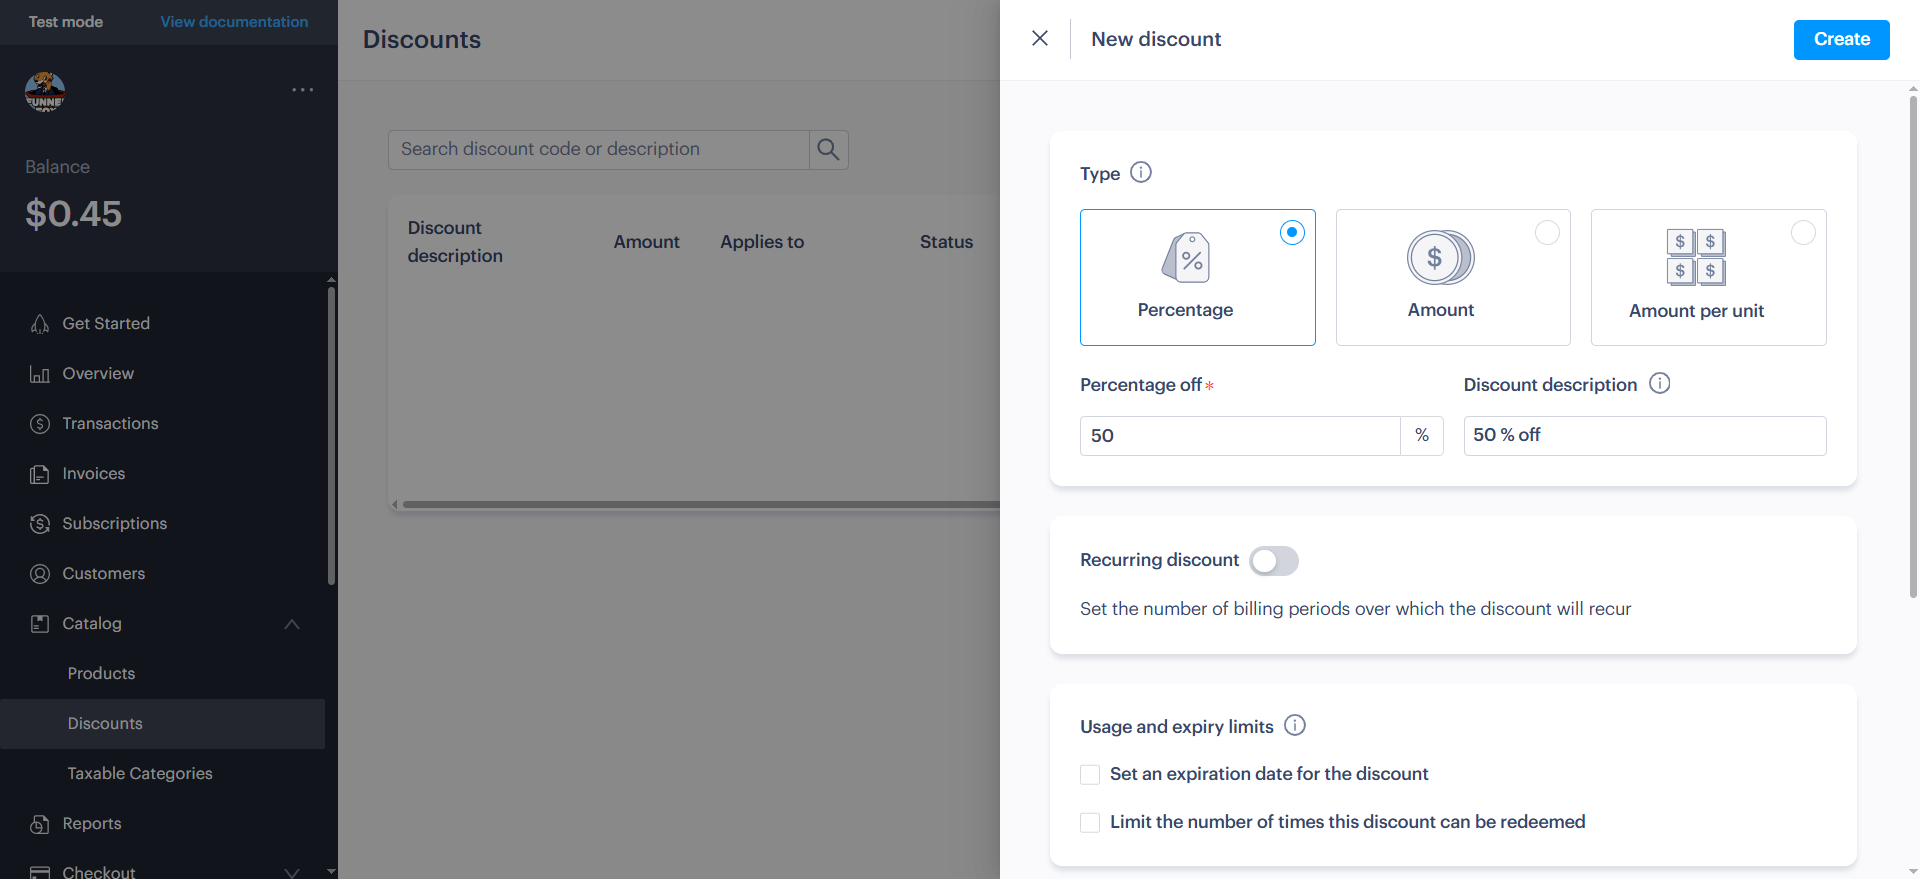
You can configure an intro or promo offer for any subscription created in Stripe.Additionally, you need to create a Stripe coupon to be applied to the first charge.Select how you want to implement your offer:
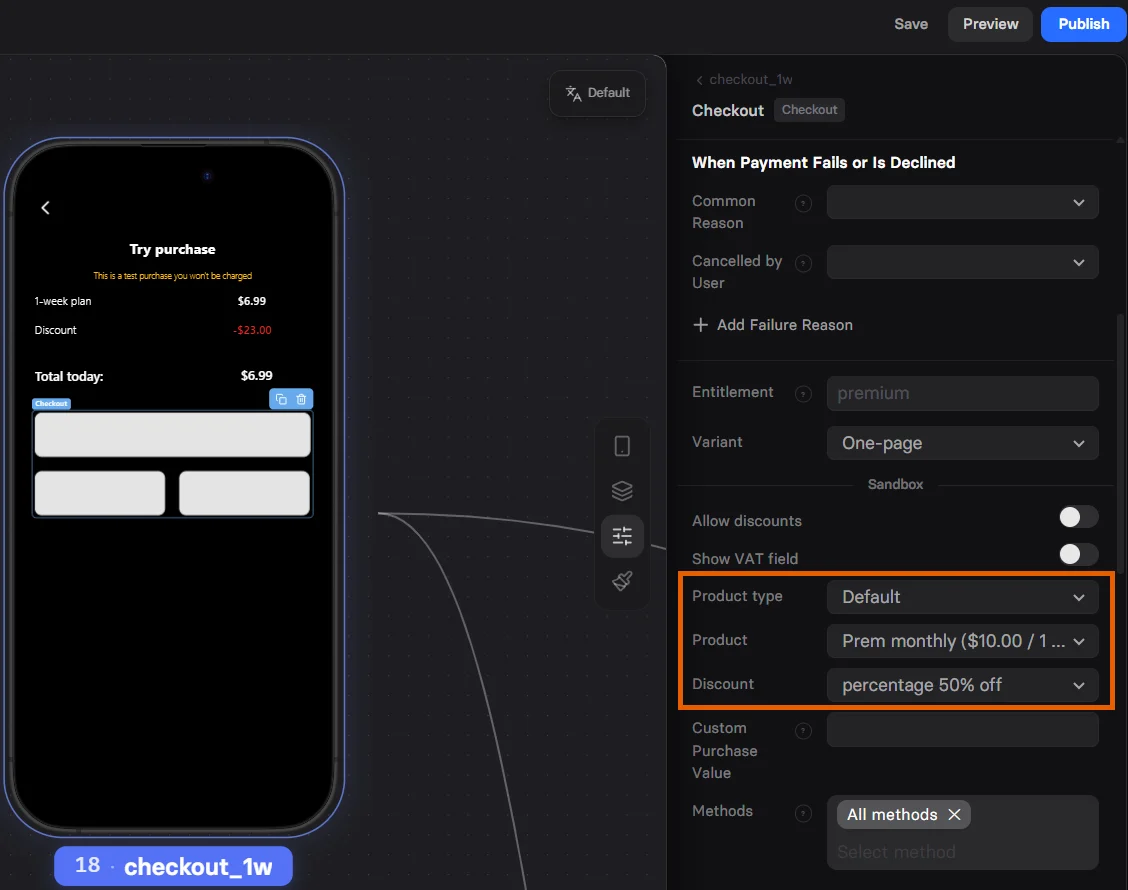
Intro discount
Intro discount
With intro discount: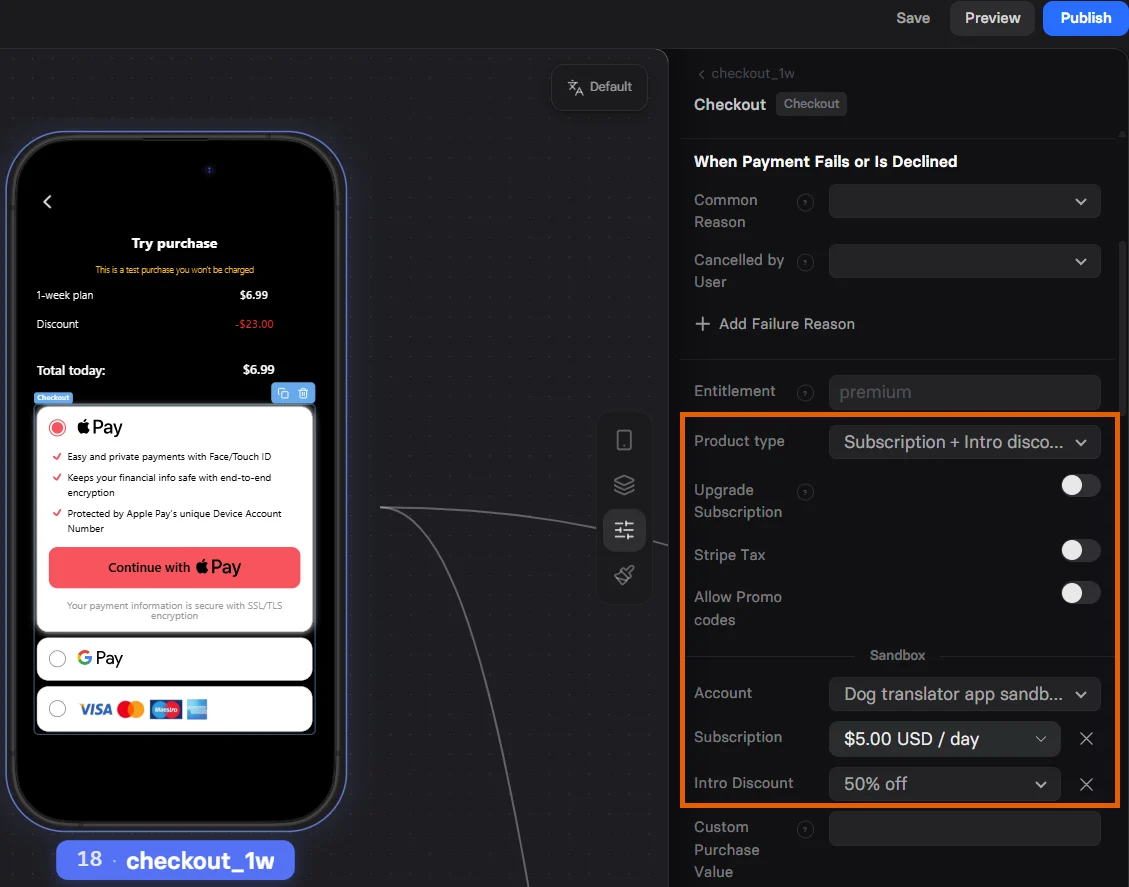
- You select a Stripe coupon to be applied to a specific subscription.
- Customers won’t have to input promo codes manually.
- Select Subscription + Intro discount in the Product type.
- Select the product to sell in the Subscription.
- Select the coupon to reduce the first charge in the Intro Discount.
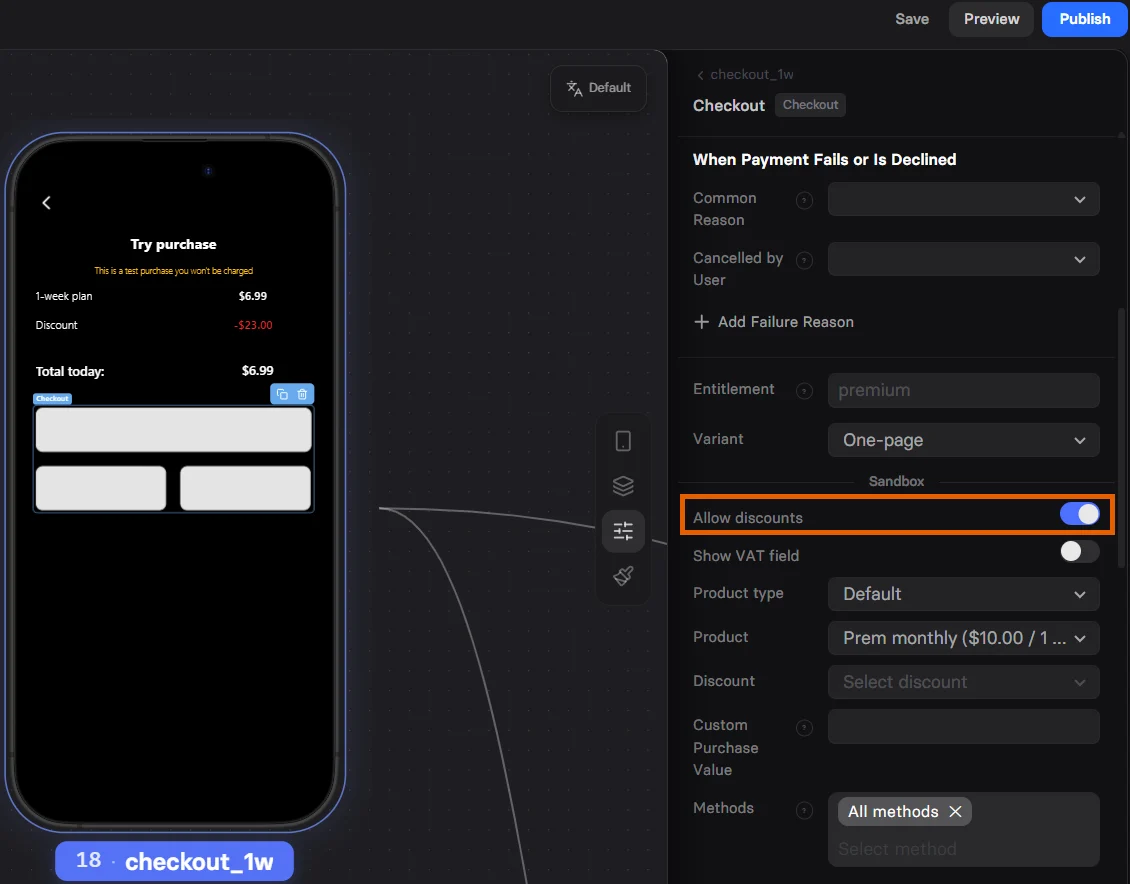
Promotional code - manual input
Promotional code - manual input
This option enables a promo code input field for your Checkout, allowing customers to enter a code manually.You will need to create a promotional code for your Stripe coupon.Once you have a Stripe promo code:
- Set Allow Promo codes to Yes.
-
Set Show Manual Input to Yes.
Promotional code - URL parameter
Promotional code - URL parameter
This option allows you to apply a promo code through a URL query parameter so your customers won’t have to enter it manually.You will need to create a promotional code for your Stripe coupon.Once you have a Stripe promo code: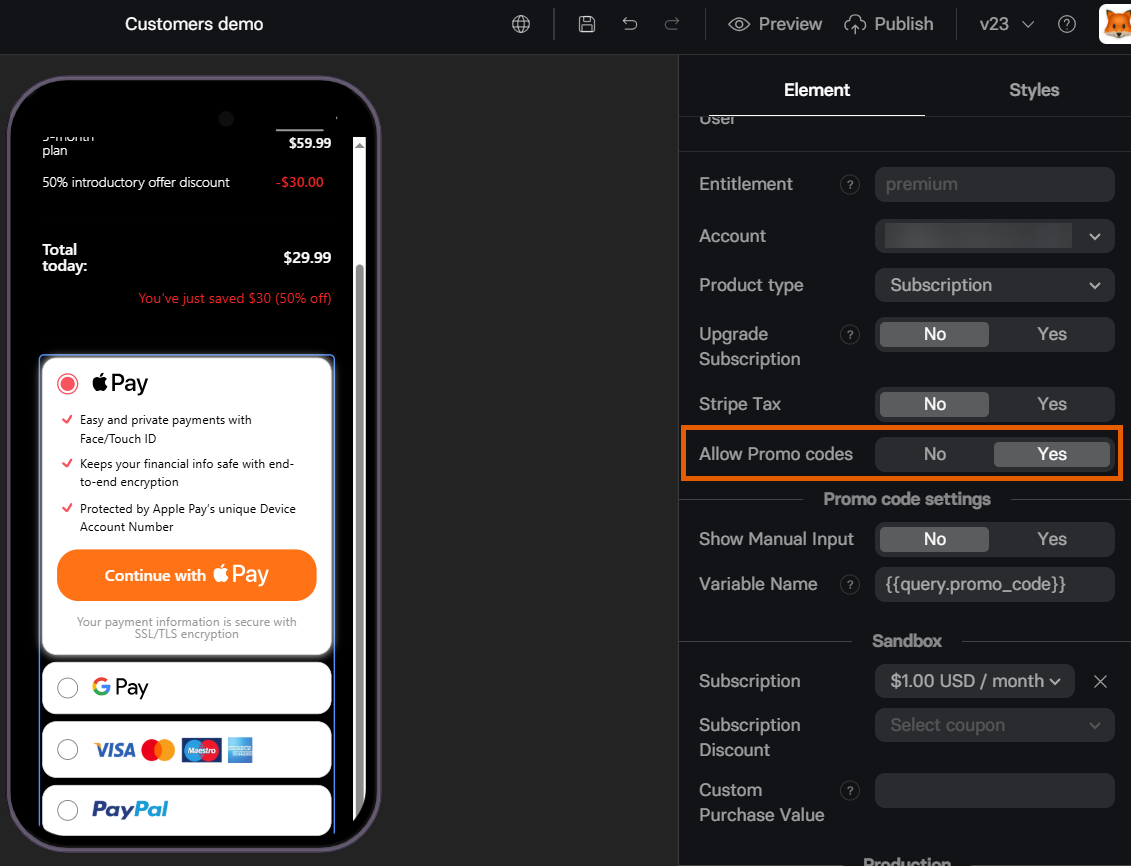
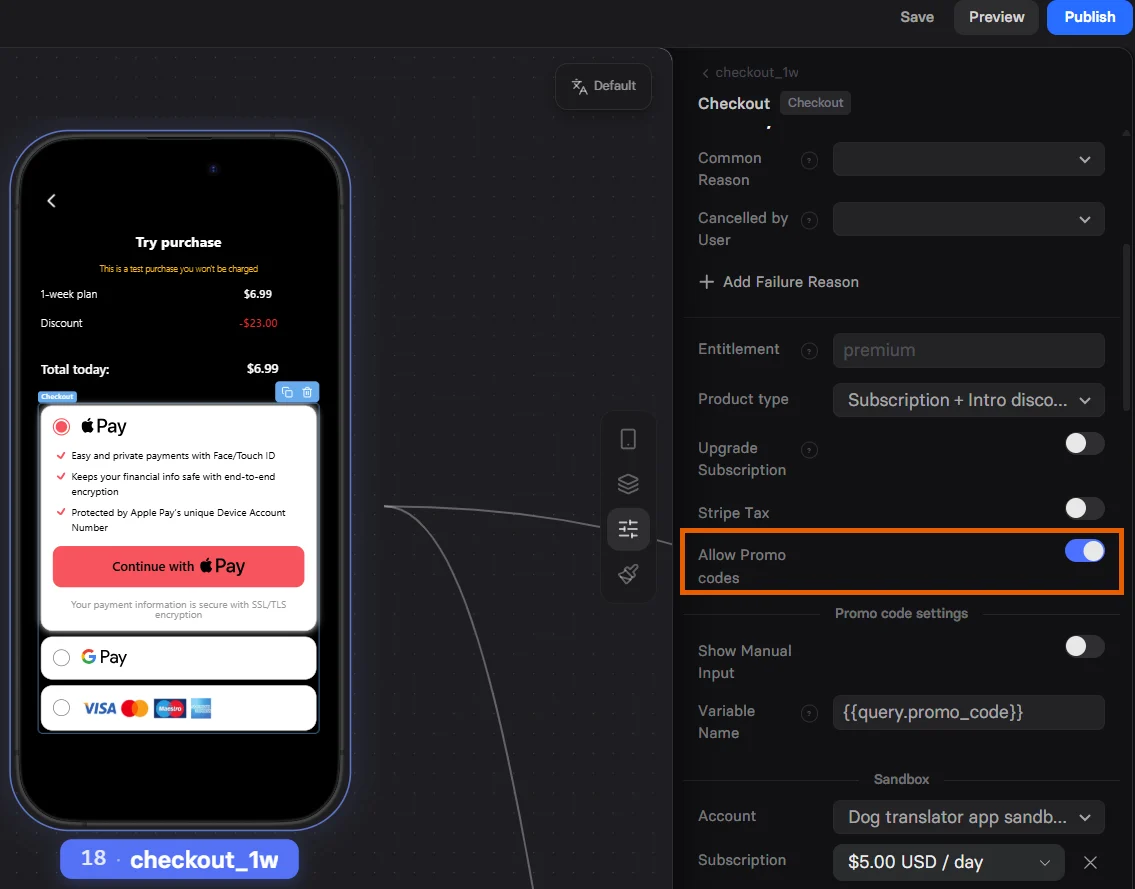
- Set Allow Promo codes to Yes.
- Add the promo code as a query parameter to the link leading customers to the funnel, for example,
promo_code=SEPT2025
Upsell
Present a higher-value plan or add-on to customers.- Stripe
- Solidgate
- Paddle
- Billing
- FastSpring
- Paypal
Stripe allows you to upsell one-time products, additional subscriptions, and subscription upgrades. Customers don’t need to provide their payment details again and will be charged with just one click.If the upsell payment is declined, for example due to insufficient funds after the initial purchase, the checkout pop-up is shown again so the customer can retry.
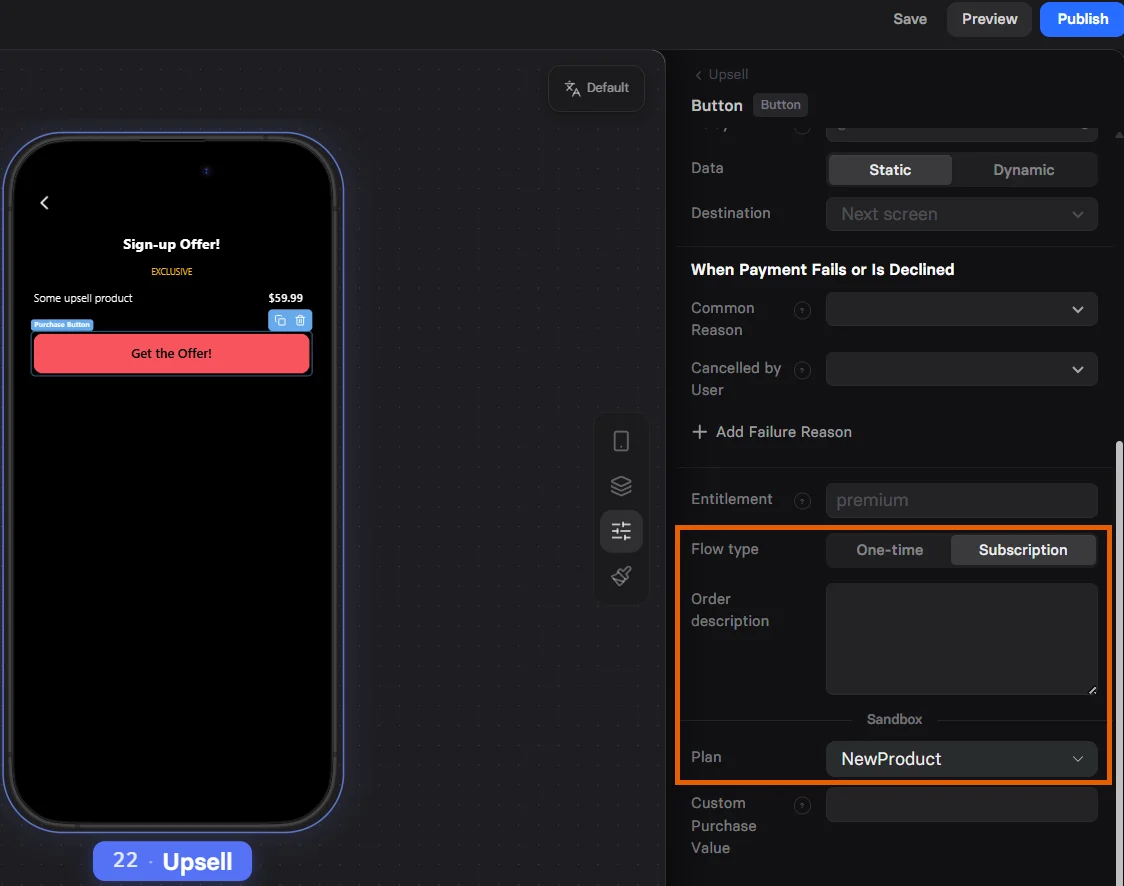
One-time product
One-time product
You can configure an upsell for any one-time product created in Stripe: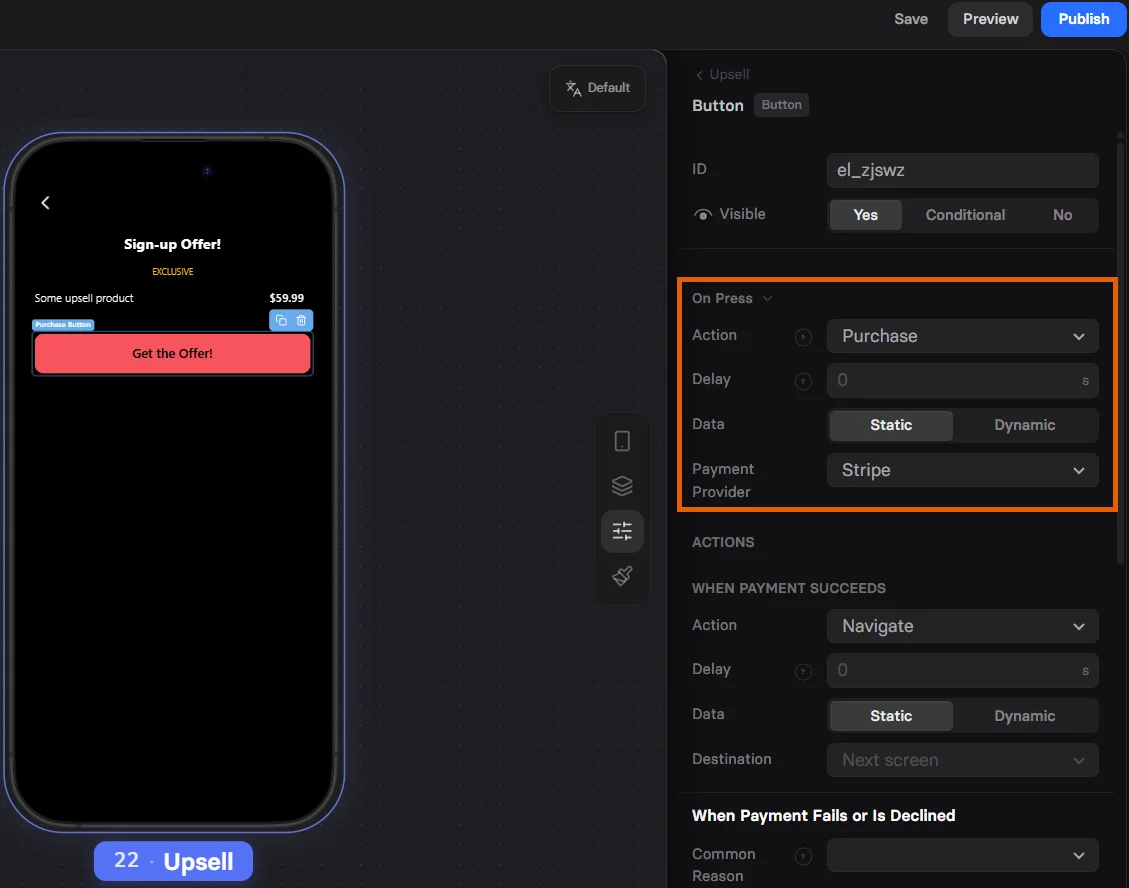
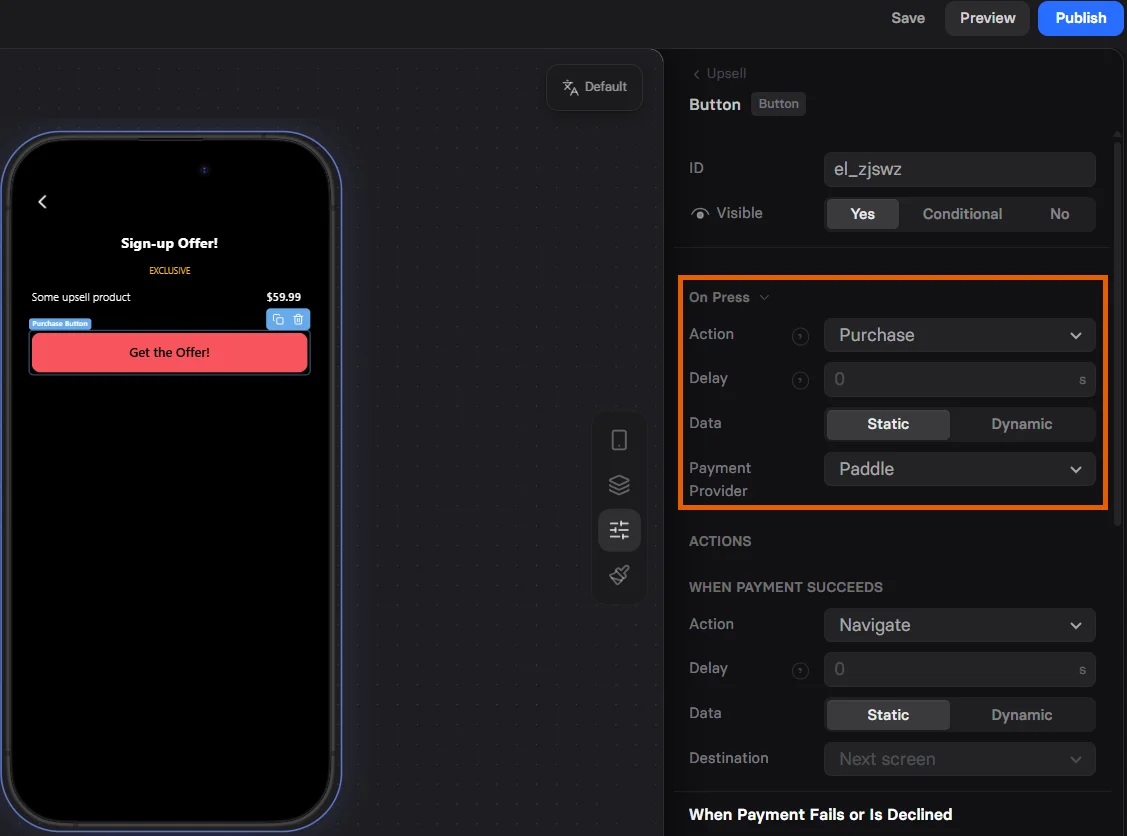
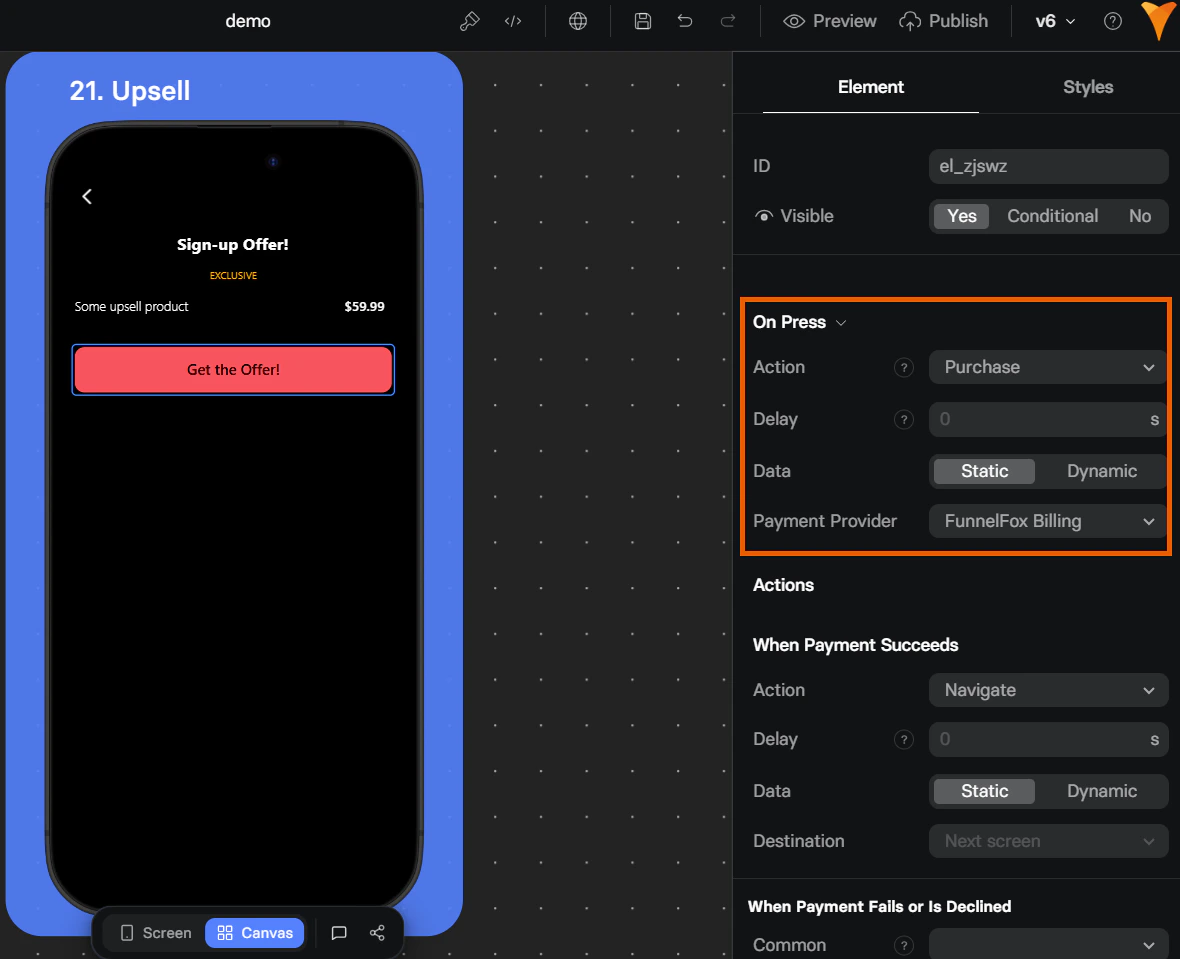
- Add a Button element to your upsell screen.
- Set up the On Press section of the Parameters tab:
- Action: Purchase
- Payment Provider: Stripe
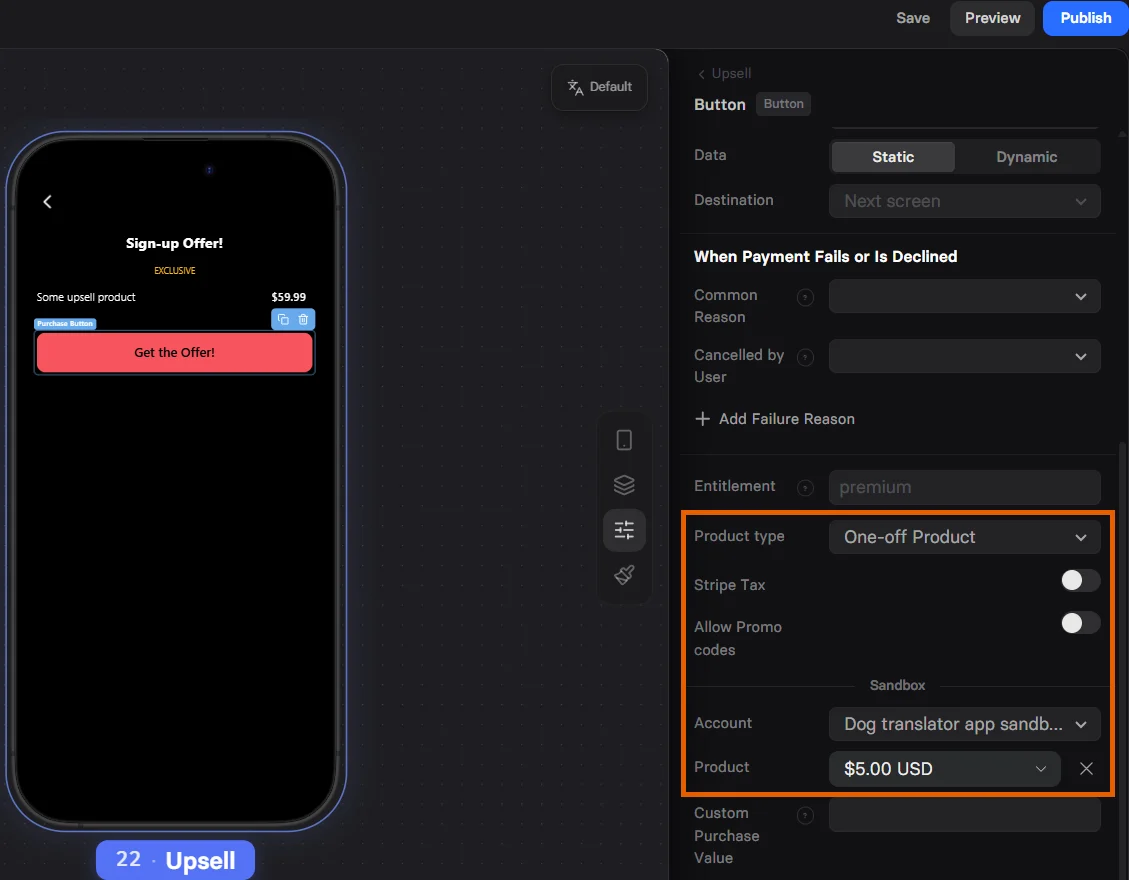
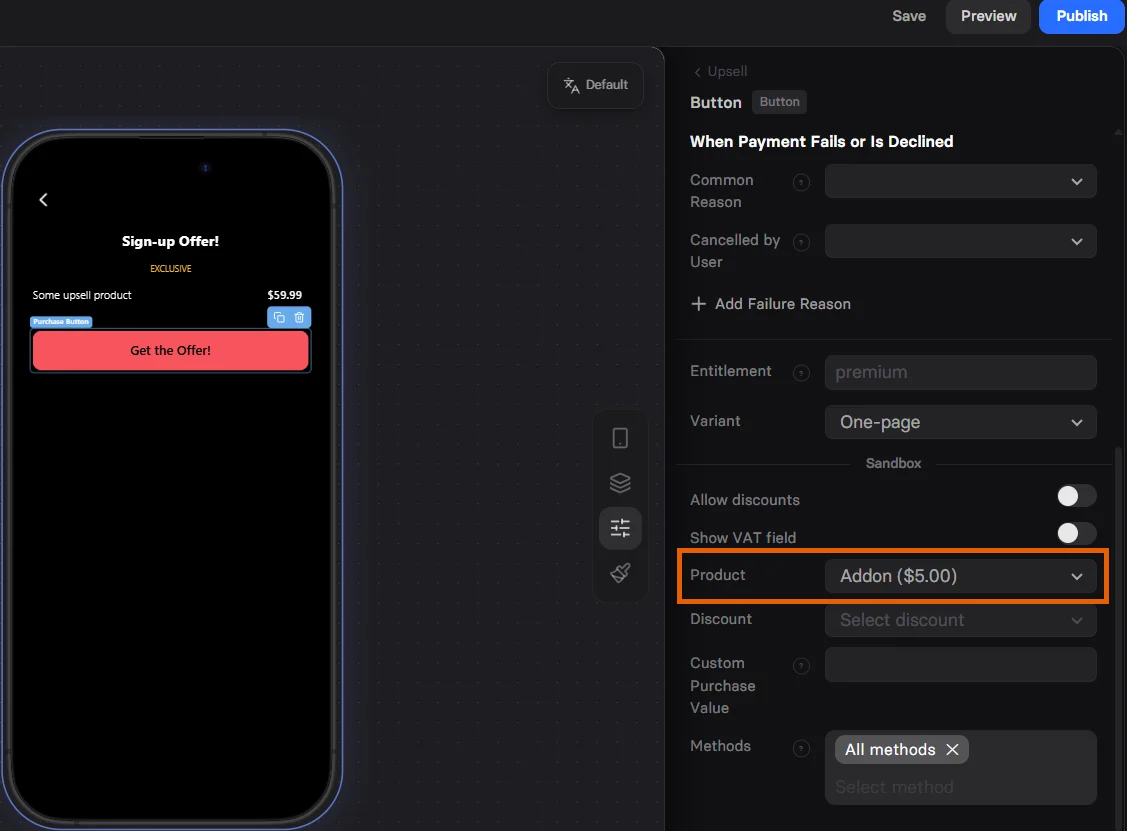
- Set up the one-time product to upsell:
- Product type: One-off product
- Product: Select the product to upsell
Subscription upgrade
Subscription upgrade
You can configure an upsell for any subscription created in Stripe. Customers will be charged for the price difference between the initial and final plan: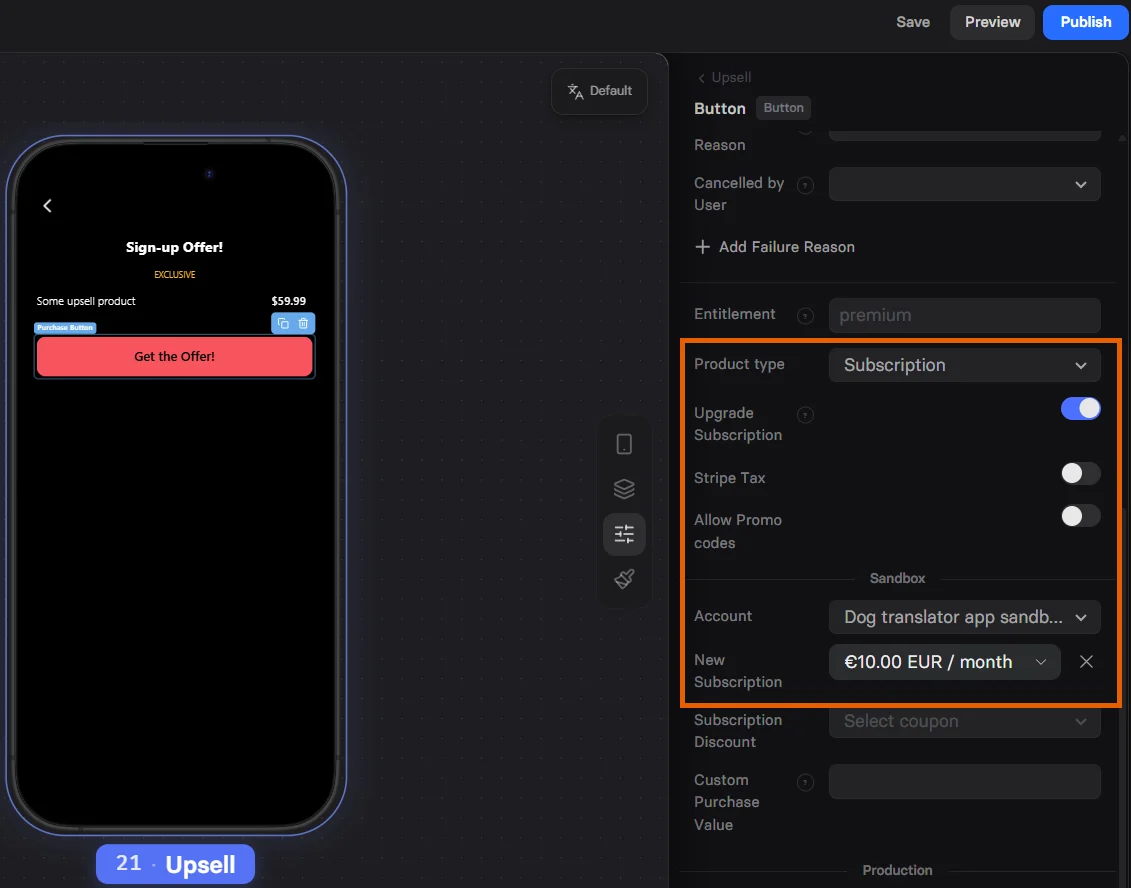
- Add a Button element to your upsell screen.
- Set up the On Press section of the Parameters tab:
- Action: Purchase
- Payment Provider: Stripe
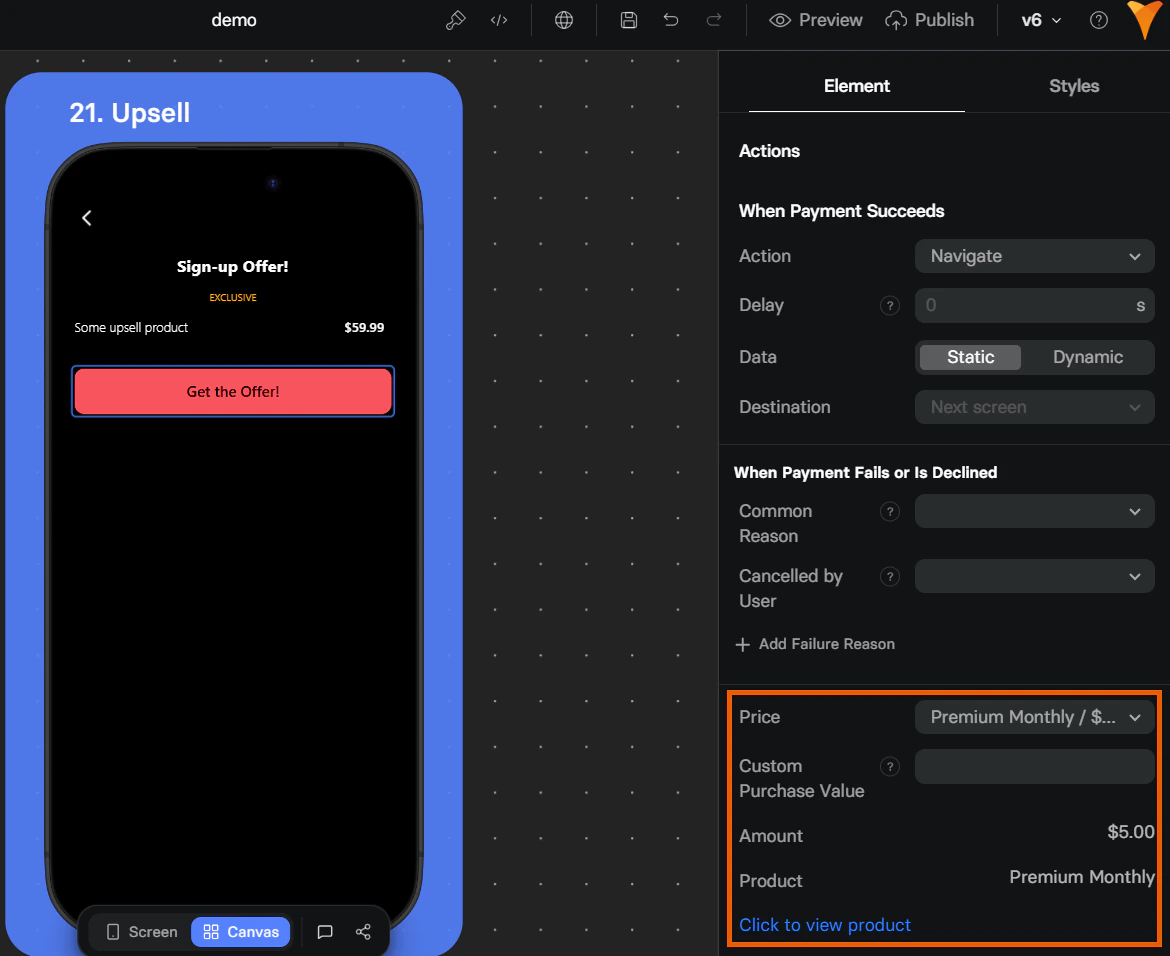
- Set up the subscription to upsell:
- Product type: Subscription
- Upgrade subscription: Yes
- New subscription: Select the subscription to upsell
Additional subscription upsell
Additional subscription upsell
Configuring and additional subscription upsell means your customer will purchase one more subscription instead of upgrading the initial one. As a result, customer finishes your funnel with two subscriptions.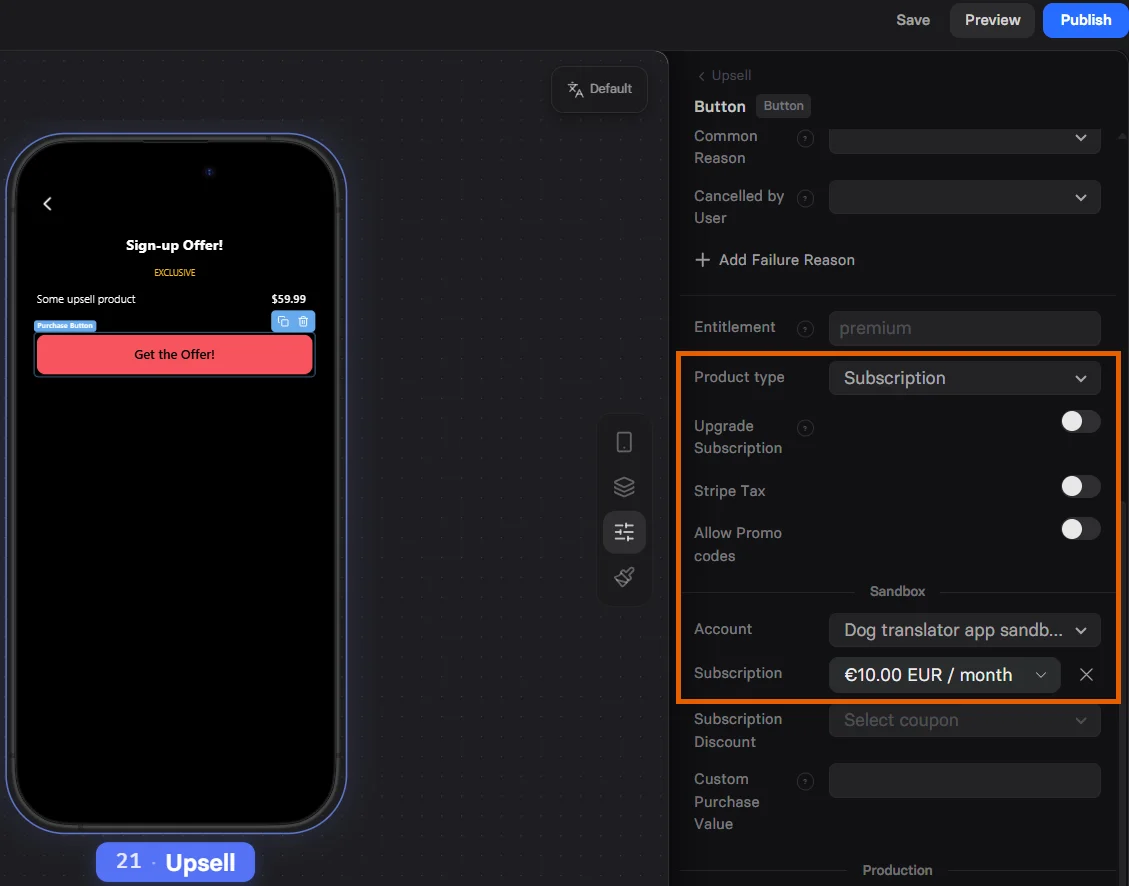
- Add a Button element to your upsell screen.
- Set up the On Press section of the Parameters tab:
- Action: Purchase
- Payment Provider: Stripe
- Set up the subscription to upsell:
- Product type: Subscription
- Upgrade subscription: No
- Subscription: Select the subscription to upsell

Event triggers
When a user interacts with a Checkout, the following events are triggered:checkout_presented: Each time the checkout element is shown.checkout_impression: When the user sees the checkout for the first time. Triggers only once per user session.checkout_screen_presented: When the user sees a screen with a checkout element.
For long paywall screens,
checkout_screen_presented might be triggered without checkout_presented if the user leaves the funnel before reaching the Checkout element.purchase_started: User enters payment details and taps Buy or taps a one-click purchase button for Apple Pay/Google Pay/PayPal.purchase_completed_success: User successfully completes a purchase.purchase_completed_fail: User fails to complete a purchase (e.g., due to wrong card details or insufficient funds).user_email_collected: User enters a valid email (if Email input field is available on the checkout).
Testing
Use test cards credentials to check how your Checkout works: No real charges occur while testing in Preview mode.Troubleshooting
Card/payment fields not visible
Card/payment fields not visible
Go to the Styles tab of your Checkout. Set Text Color and Background in the Accordion section so payment input fields are clearly readable (high contrast) in your design.
Next steps
- Configure payment providers
- Choose how your users sign in after purchase