Stripe
Paddle
Solidgate
FunnelFox Billing
FastSpring
PayPal
How it works
1
Connect your PSP
Choose your payment provider and enter your API keys, if needed. FunnelFox securely stores them and connects your account automatically.
2
Automatic product sync
FunnelFox automatically fetches your products, prices, and discounts from the PSP. They’re then available in Checkout elements.
3
Configure Checkout element
Add products to your Checkout element in the funnel Editor, and you’re ready to accept payments.
4
Add wallet buttons
Place a Wallet button on your
paywall to let customers pay in one click with Apple Pay or Google Pay.
FunnelFox never stores or processes payment card details. All sensitive
payment data is handled directly by your chosen PSP.
Get started
1. Choose payment provider
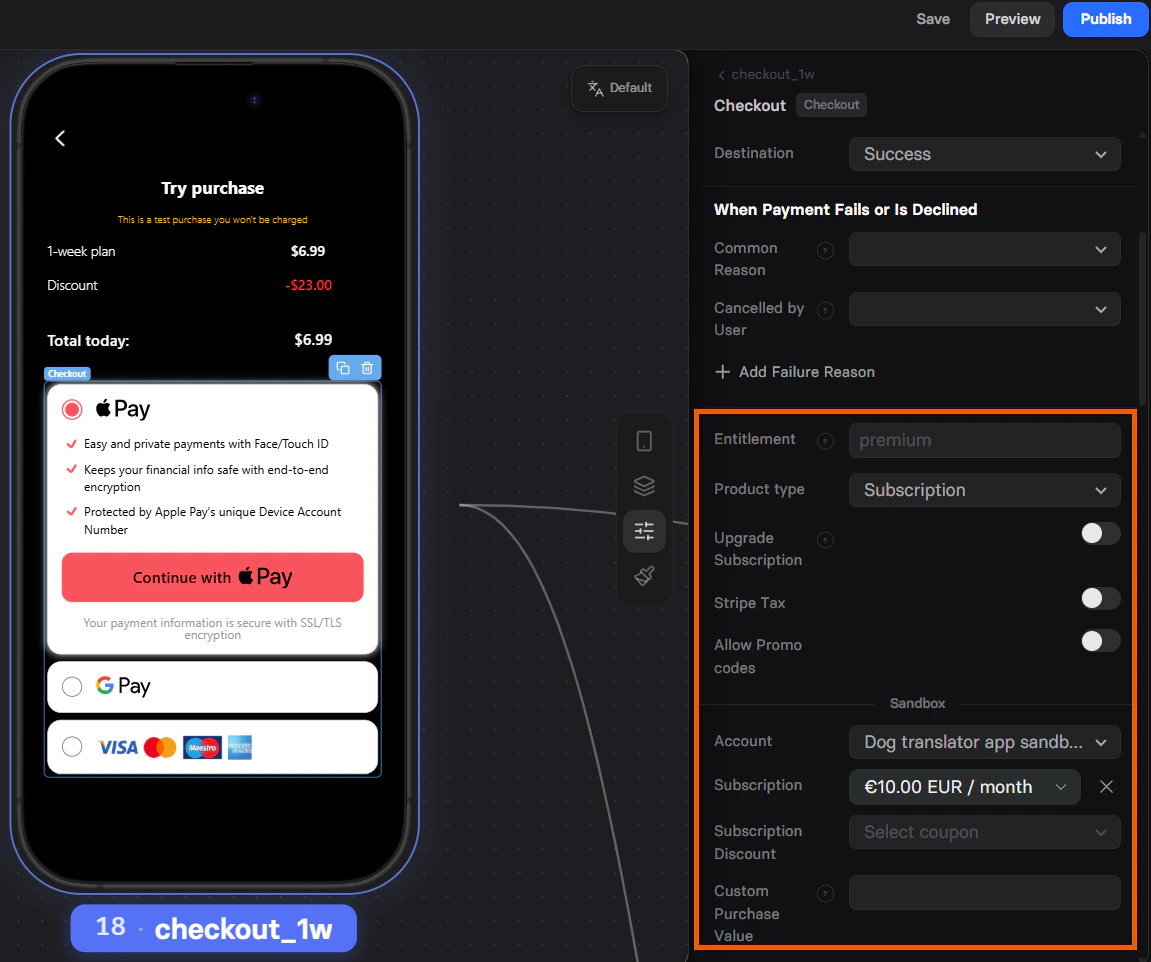
Here are the most popular payment providers available in FunnelFox. Select any for detailed setup instructions, or compare them below. PSP comparison:2. Configure products in funnel
Once integrated, FunnelFox automatically fetches your products, prices, and discounts from the PSP. No matter which PSP you connect, all subscriptions in your funnels are configured through the Element tab of the Checkout. While editing the Payment Provider Settings section there, you can configure:- Free trial
- Paid trial
- Offers (intro, promo, coupons)
- Upsells
3. Add wallet buttons
Wallet buttons let customers pay in one click using Apple Pay or Google Pay, without typing card details. Because they skip manual card entry and use payment credentials customers already have on their device, they reduce checkout friction and typically boost conversion rates by up to 30%. Wallet buttons are supported by Stripe, Solidgate, and FunnelFox Billing. With Paddle, the one-click experience is implemented as the Apple Pay Express Checkout instead. Go to the Wallet button article to set it up in your funnels.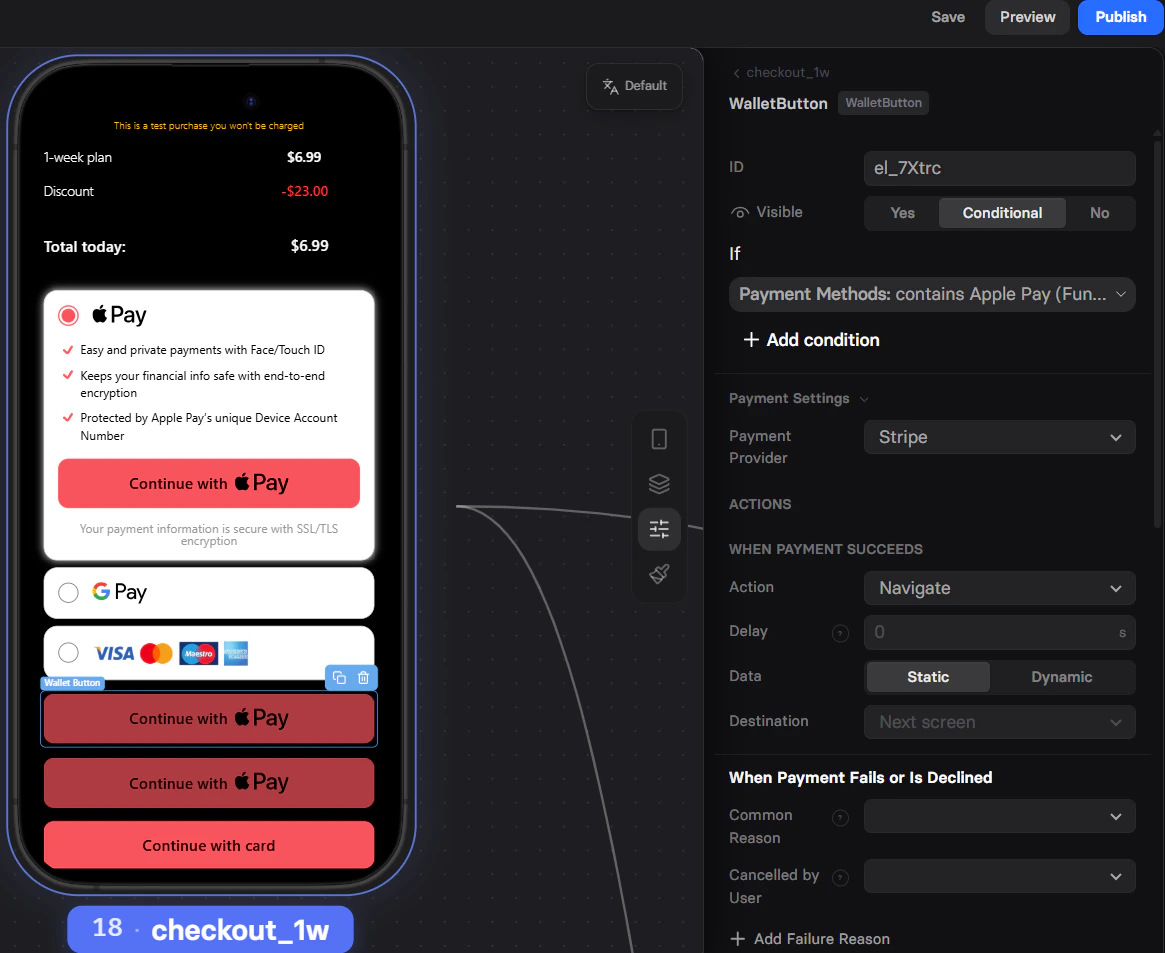
Next steps
- Set up your chosen PSP:
- Configure products in the Checkout element
- Configure the Wallet button