Editor interface
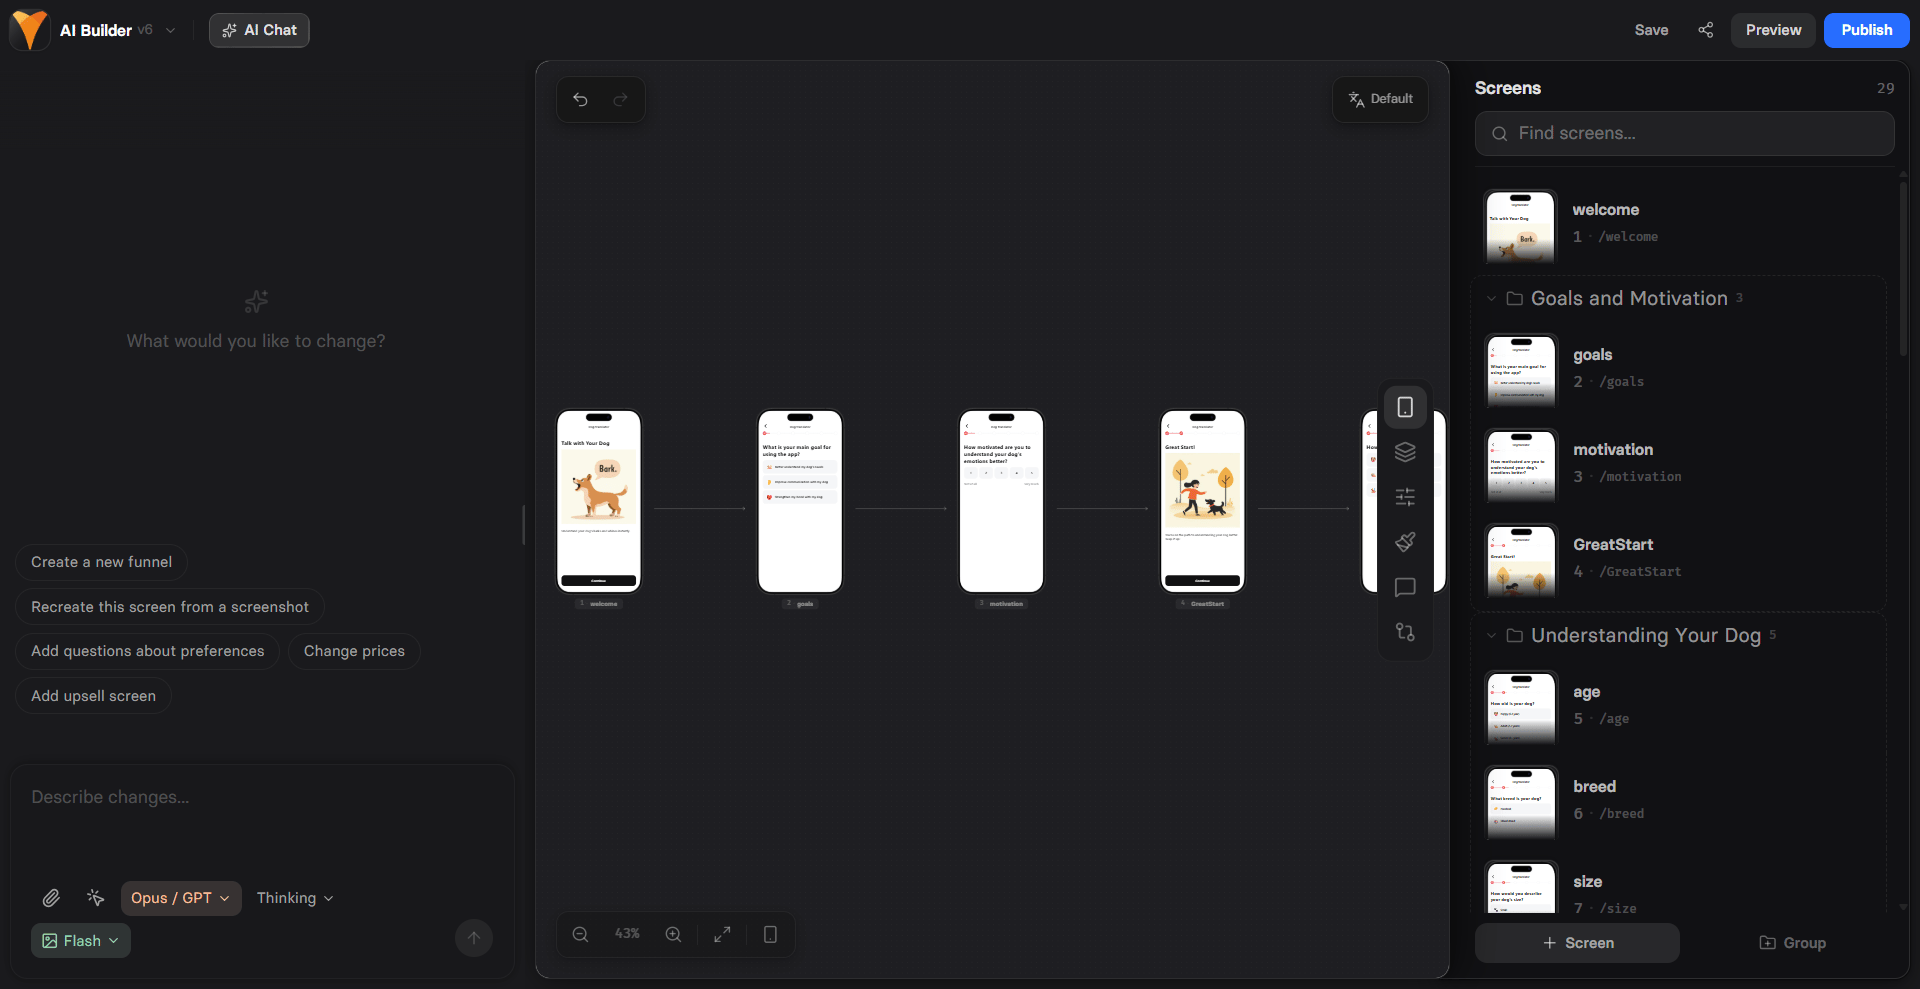
The editor displays a mobile preview by default
because most funnel traffic comes from mobile devices. Your funnels
automatically work on all screen sizes.
AI Chat in Editor
AI Chat in Editor lives on the left side of the Editor and lets anyone on your team edit any element, screen, or the whole funnel by prompt without any builder skills required. You can also build from a reference image, such as a paywall, onboarding, or quiz screen screenshot. The agent recreates it with your copy, colors, and components. Learn more about AI Chat in Editor.Canvas
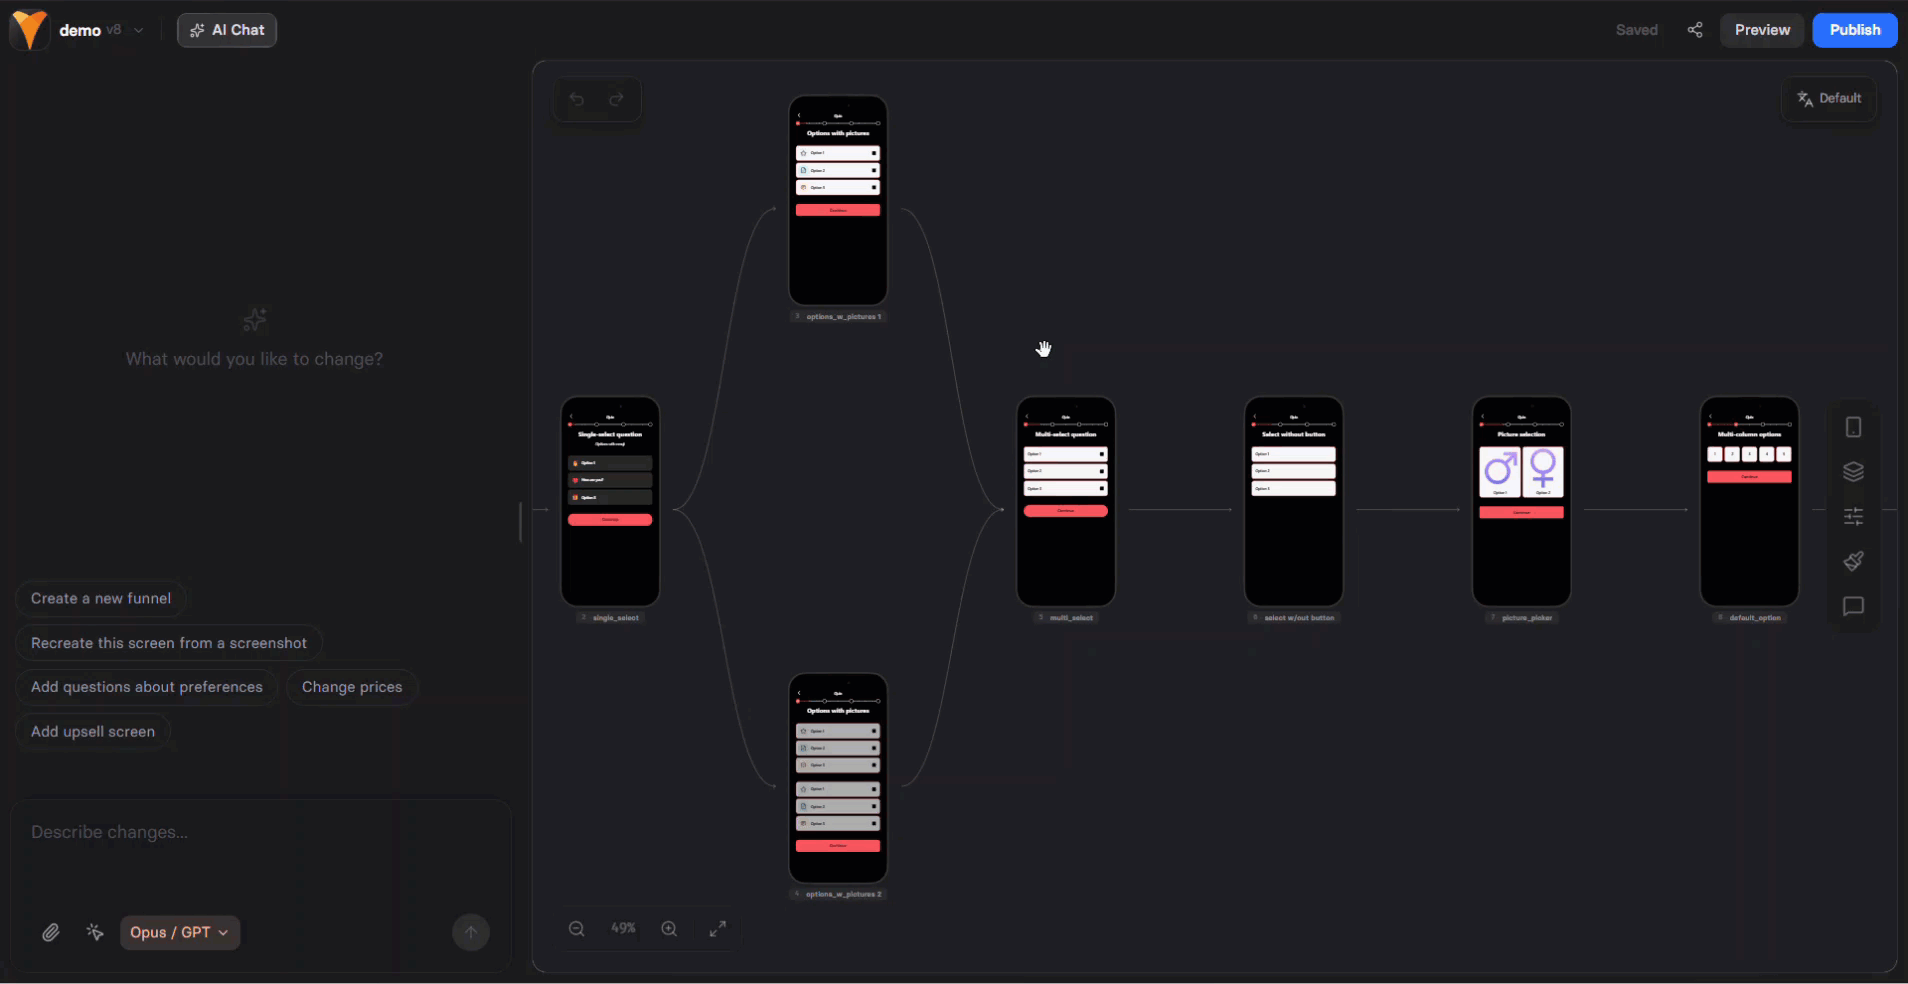
Your main funnel view with a canvas interface. Browse your funnel flow here in mobile device frames and click any screen to start editing it. You can zoom in or out to see all funnel branches at once. Canvas is especially helpful for managing dynamic navigation flows. To collaborate on your launch, share the canvas with your team and use comments if needed.Screens
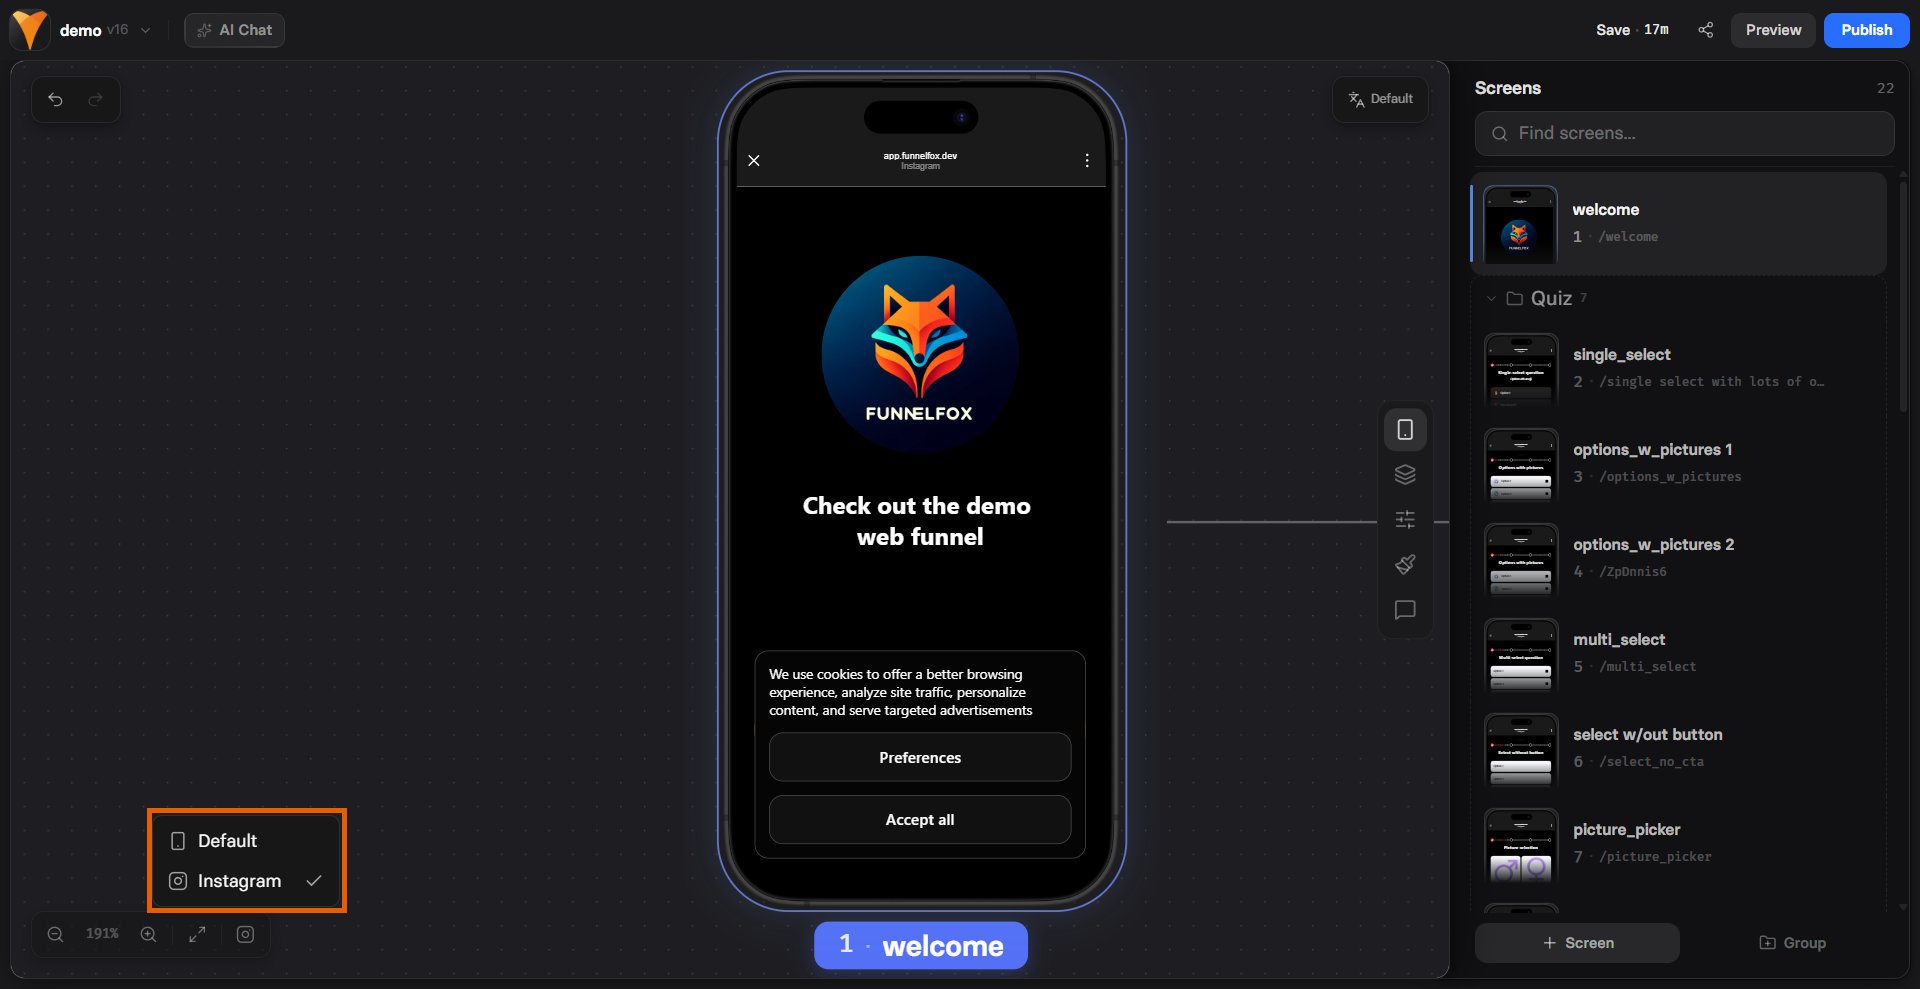
Available in the selector on the right. View all screens in your funnel, add new ones, reorder them by dragging, and group them.Element layers
Available in the selector on the right. Browse the layer tree of elements on the current screen, reorder them, and select directly from the list.Parameters
Available in the selector on the right. Configure the selected screen: ID, title, type, back button, progress bar, auto-navigation, and other screen-level settings.Styles
Available in the selector on the right. Adjust layout and visual styling for the selected screen or element.Key features
Screens
/funnel-slug/screen-id. Always use descriptive screen IDs
(e.g., ‘welcome’, ‘benefits’, ‘checkout’) for clean URLs and better
analytics tracking.
- Screen Types
- Screen Properties
Set screen types for analytics tracking:
- Default: Standard content screens
- Auth: Login or registration
- Checkout: Payment processing
- Finish: Success or confirmation
- Paywall: Pricing presentation
- Upsell: Additional offers
Screen types are for analytics only. They don’t change functionality
but help track conversion metrics like “Start to Paywall” rates.
Elements
- Visual styling (colors, fonts, spacing)
- Content (text, images, placeholders)
- Behavior (actions, conditions)
Version history
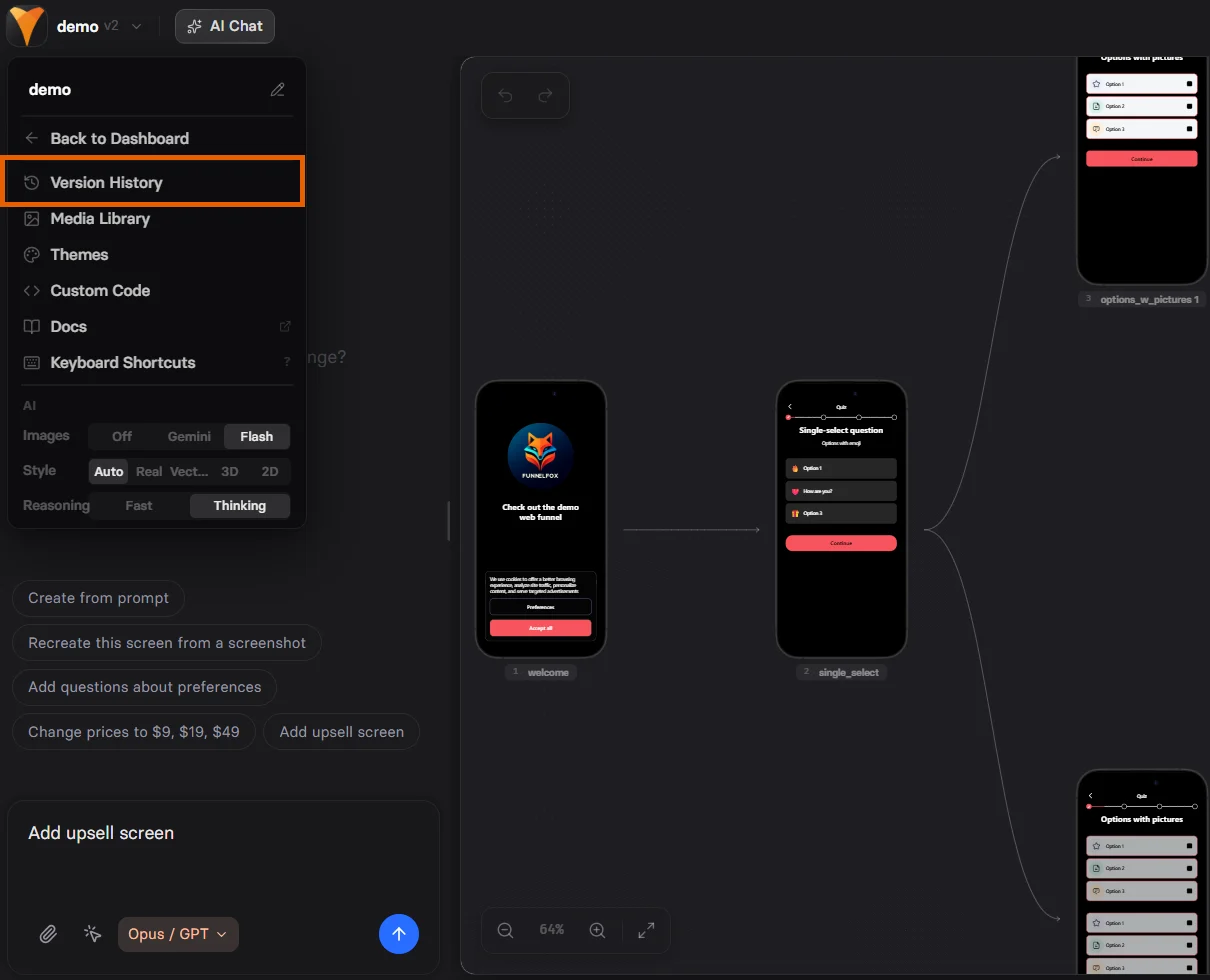
- Each save creates a new version (v1, v2, v3…).
- Click the restore arrow to roll back to any previous save.
- The version you’re editing right now is marked as Current.
- Each version has a timestamp when it was saved.
Build your funnel
Before you start, describe your app or paste an App Store, Google Play, or website link in the Project context. Once set, open a funnel in the Editor and start with the AI Chat on the left.1
Set up the agent
Click the Editor menu at the top left and select how the agent builds your funnel, then choose the model, if needed.
2
Provide a prompt
Trigger agent with something like
build me a funnel from scratch and press Enter.Generation typically takes 2–4 minutes.3
Review and refine
Review your outcomes and refine by prompt or manually, when needed.
4
Set screen types
Mark screens appropriately (Paywall, Checkout, etc.) for analytics
tracking.
5
Preview and test
Use Preview mode to test your funnel with sandbox payments before
going live.
Group funnel screens
Go to the Screens tab using the selector on the right, then click the + Group button in the bottom right to group screens.
- Group related screens (e.g., “Quiz Questions”, “Checkout Flow”)
- Collapse groups for cleaner navigation
- Reorder entire groups at once
- Each group becomes a progress point
- Users see completion as they advance
- Visual feedback improves conversion
Example: Three groups with 3 screens each shows 3 dots in the progress
bar. Completing group 2 fills the second dot.
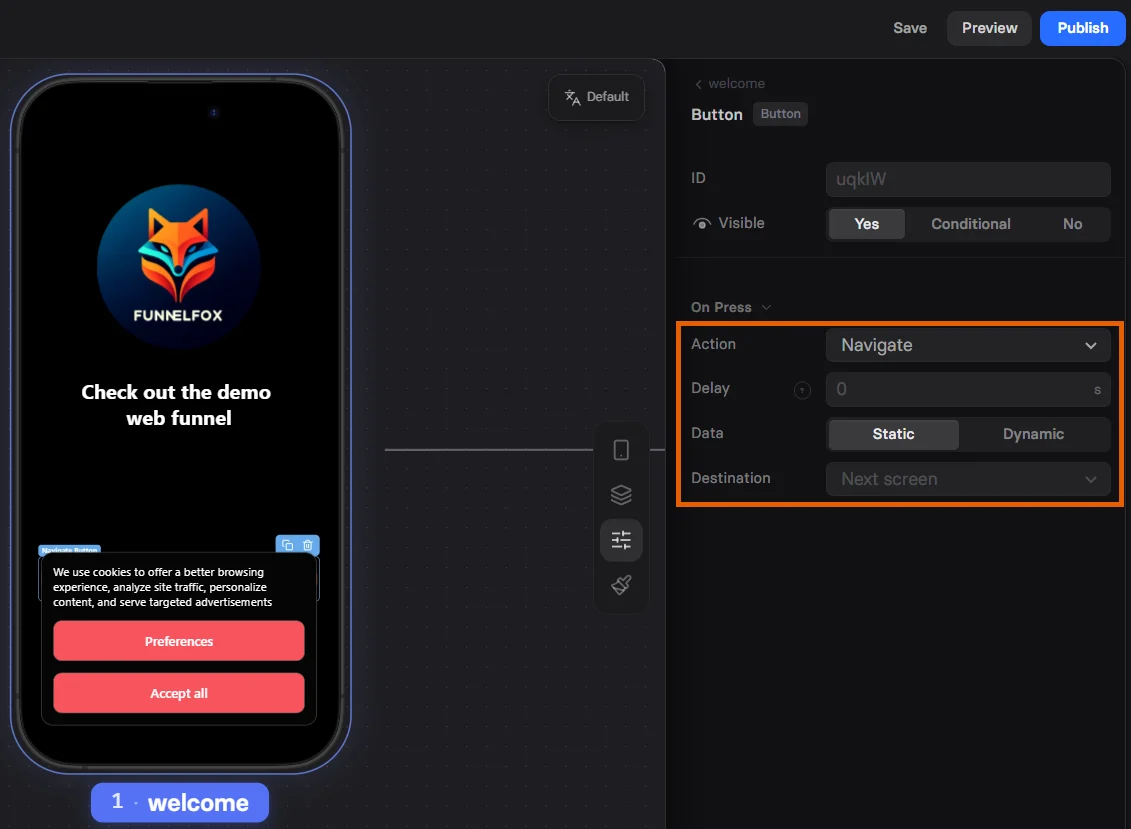
Navigation flow
Unlike traditional page builders, funnel screens aren’t directly linked. Instead, they follow a sequence with navigation controlled by actions. You can easily visualize the entire user journey through your funnel using the canvas view. Default flow:- Screens appear in the order shown in the Screens selector on the right
- Next screen action follows this order
- Users progress linearly through the funnel
- Use Destination to [specific screen] button action for branching
- Create conditional navigation based on user choices
- Build dynamic paths with personalization
Share canvas
You can share your funnel while building it in two ways:- Click the Share button at the top right.
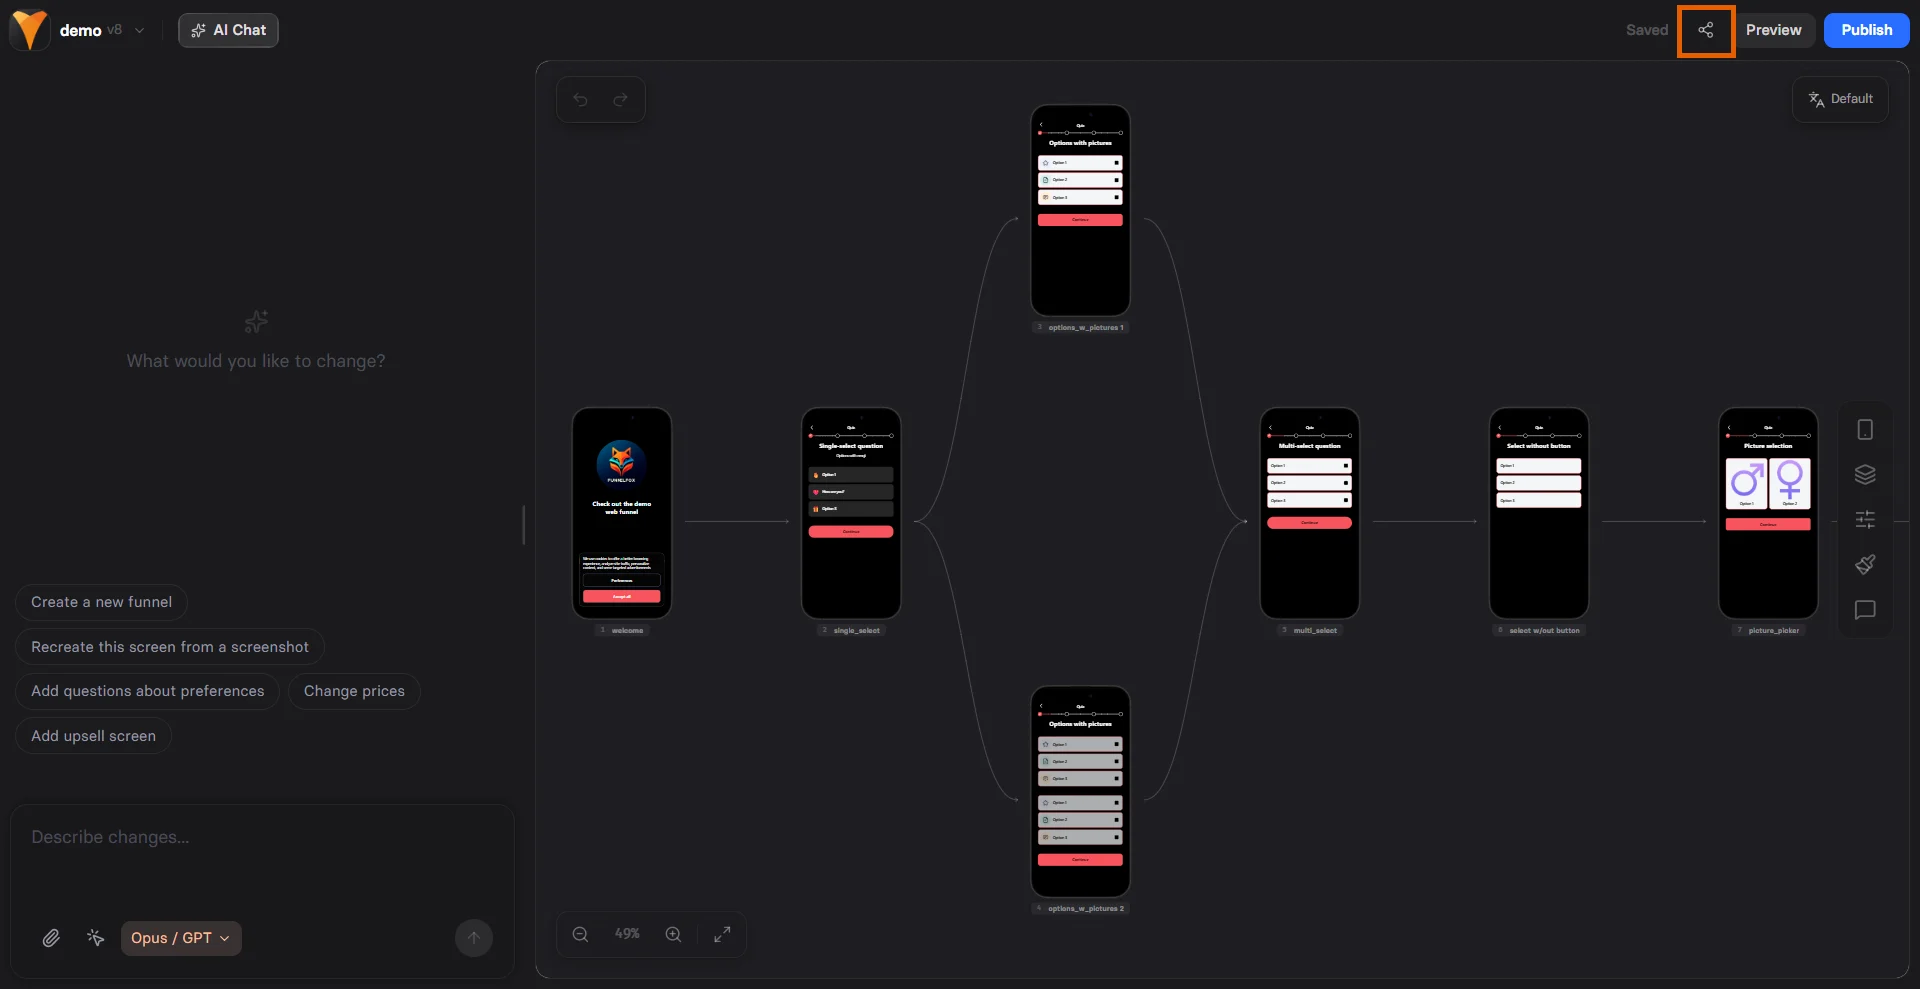
- Select how you share the canvas:
- Share for editing together: For users with builder access. Use this to allow them to comment on the canvas. If your team has multiple projects, the link will automatically lead to the right one.
- Share for viewing only: For public viewing of the current canvas (without editing).
Comments
Use comments in the canvas to collaborate with your team — address feedback, discuss designs, and accelerate funnel building. Commenting is available to any user logged in to your FunnelFox project.Comments are not available when the canvas is shared with preview access rights.
- Click the in the selector on the right to enter comment mode. Your cursor will change to a .
- In comment mode, you can:
- Hover over existing comments to view them.
- Click any comment to reply or resolve it. Resolved comments disappear from the canvas.
- Click anywhere on the canvas to add a new comment.
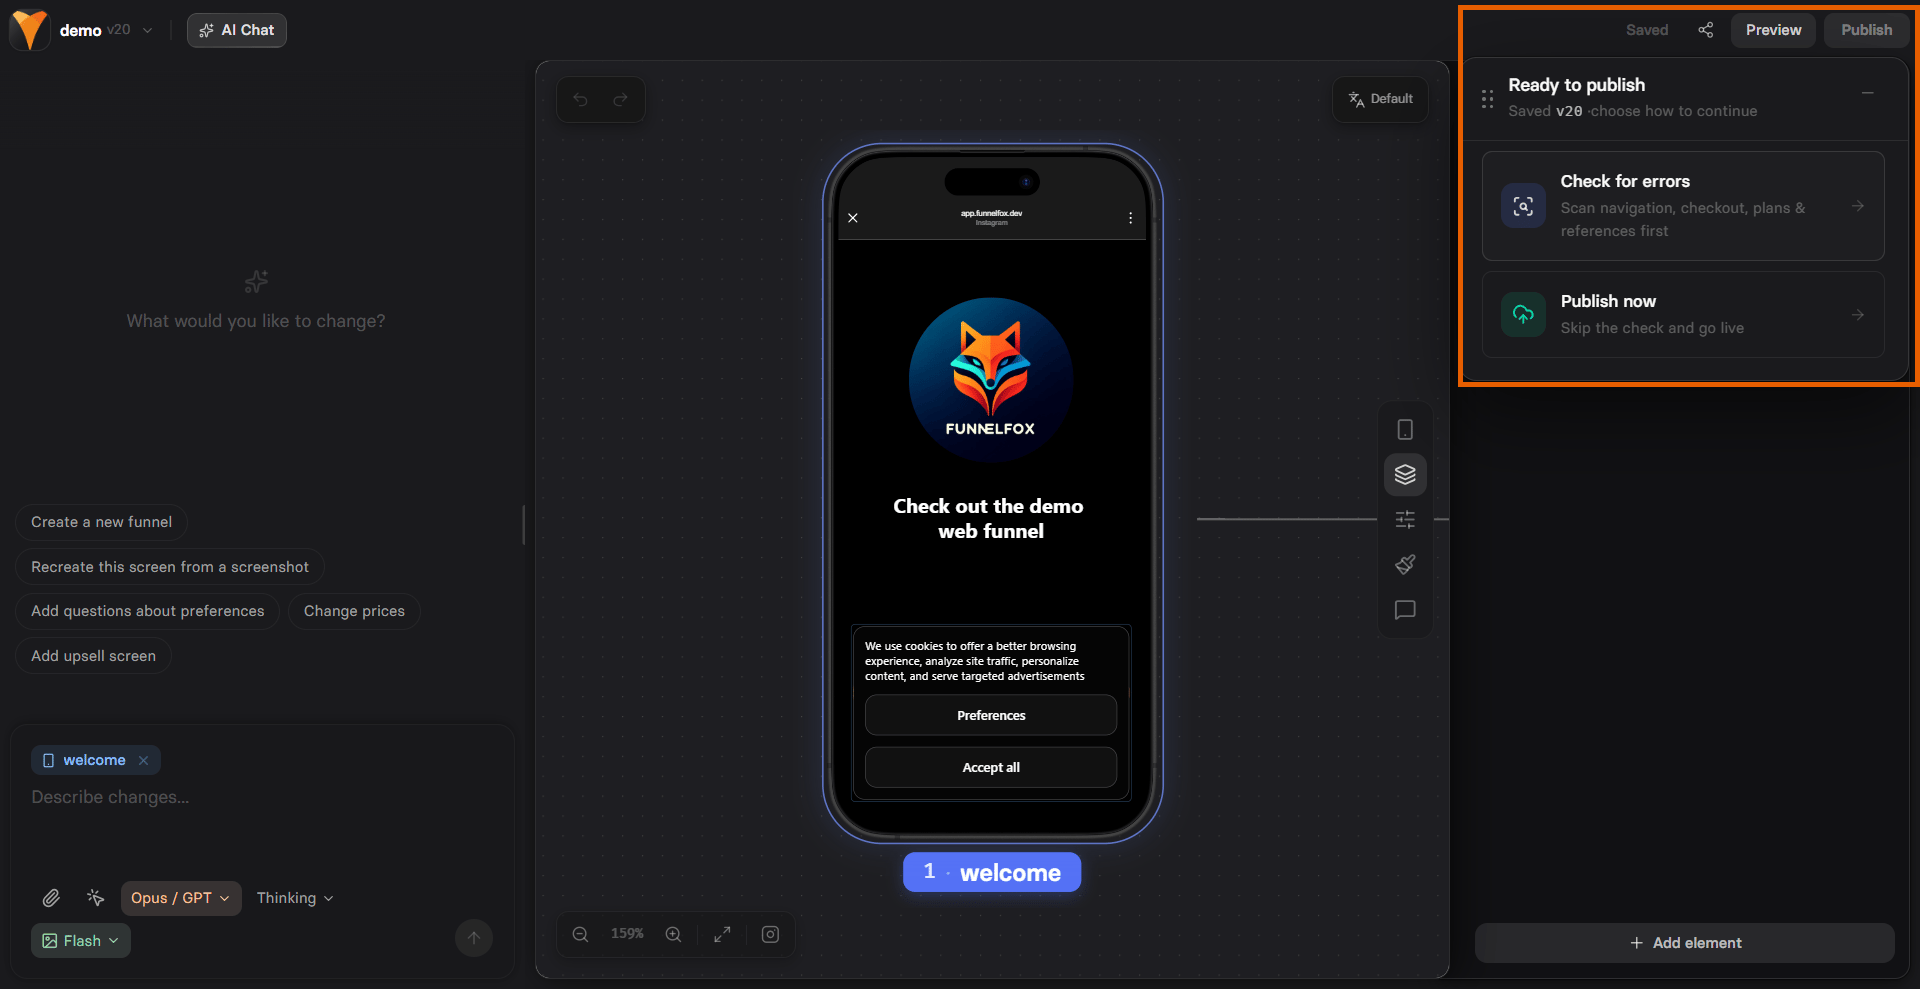
Preview vs production
You can view each funnel in Preview or Publish mode:- Preview mode
- Published mode
For testing and development:
- Instant updates
- Sandbox payments (test cards)
- Faster builds
- Share preview links for public viewing without builder access
Check for errors is available only in the new Editor with AI Chat.
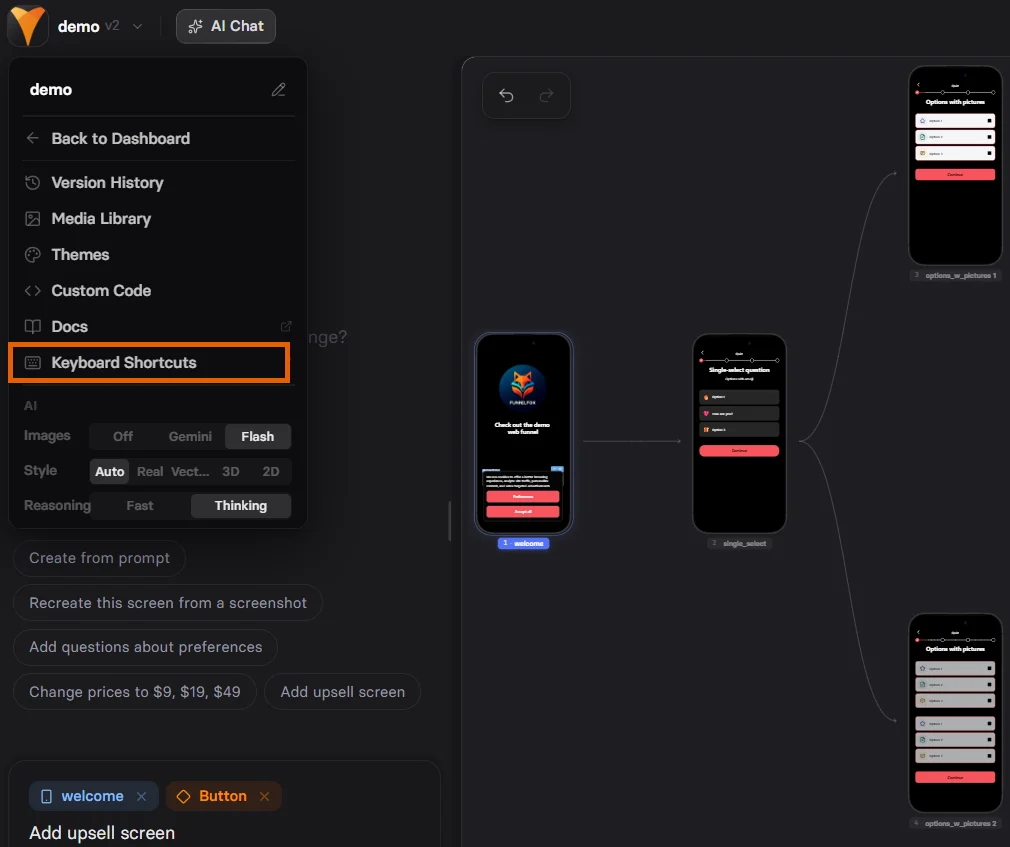
Keyboard shortcuts
Speed up your workflow with shortcuts. Click the Editor menu at the top left and select Keyboard shortcuts to view the full list inside the Editor. Common ones:- Cmd/Ctrl + Z: Undo
- Cmd/Ctrl + Shift + Z: Redo
- Cmd/Ctrl + C: Copy element
- Cmd/Ctrl + V: Paste element
- Delete: Remove selected element
- Cmd/Ctrl + S: Save changes
Troubleshooting
Elements duplicate, lag, or behave unexpectedly
Elements duplicate, lag, or behave unexpectedly
- Save your funnel.
- Delete the problematic element.
- Add the element back and reconfigure it.
- Reload the page and test again.
Error: “Failed to fetch dynamically imported module” when editing visibility conditions
Error: “Failed to fetch dynamically imported module” when editing visibility conditions
- Save the funnel.
- Reload the page.
- Edit the conditions again.
Bad Editor performance on Safari
Bad Editor performance on Safari
The Editor is not compatible with Safari. For best performance, use Chrome or a Chrome-based browser instead.
Next steps
- Element reference - Detailed element documentation
- Actions & triggers - Configure interactions
- Localization - Multi-language funnels