Key features
FunnelFox supports the following payment methods and transaction types with Stripe:
Learn more about configuring each transaction type in your funnel.
PayPal is available for API keys setup with European Stripe accounts only. For other cases, use the direct PayPal integration.
Additional features
- Cancellation funnels: Full support for cancellation flows with options to offer discounted subscriptions, gifts, or pauses instead of losing customers completely.
- Wallet button: One-click payment button for Apple Pay and Google Pay. Includes a fallback option when Apple Pay or Google Pay isn’t available.
- Stripe Link: Faster checkout for returning Stripe customers using their saved payment details.
- Failed payment recovery: Automatic support for Stripe retries to reduce revenue loss from failed payments.
- Stripe Managed Payments: Use the merchant of record (MoR) solution from Stripe in FunnelFox to offload tax compliance, fraud prevention, disputes, and post-purchase support to Stripe.
Setup
You need an active, verified Stripe account to connect Stripe. If you have one, the connection takes just a few clicks. Follow the steps below to configure both environments using the same connection method (Stripe App or API keys).Install Stripe App for sandbox
- Go to Integrations > Stripe > Stripe App in FunnelFox.
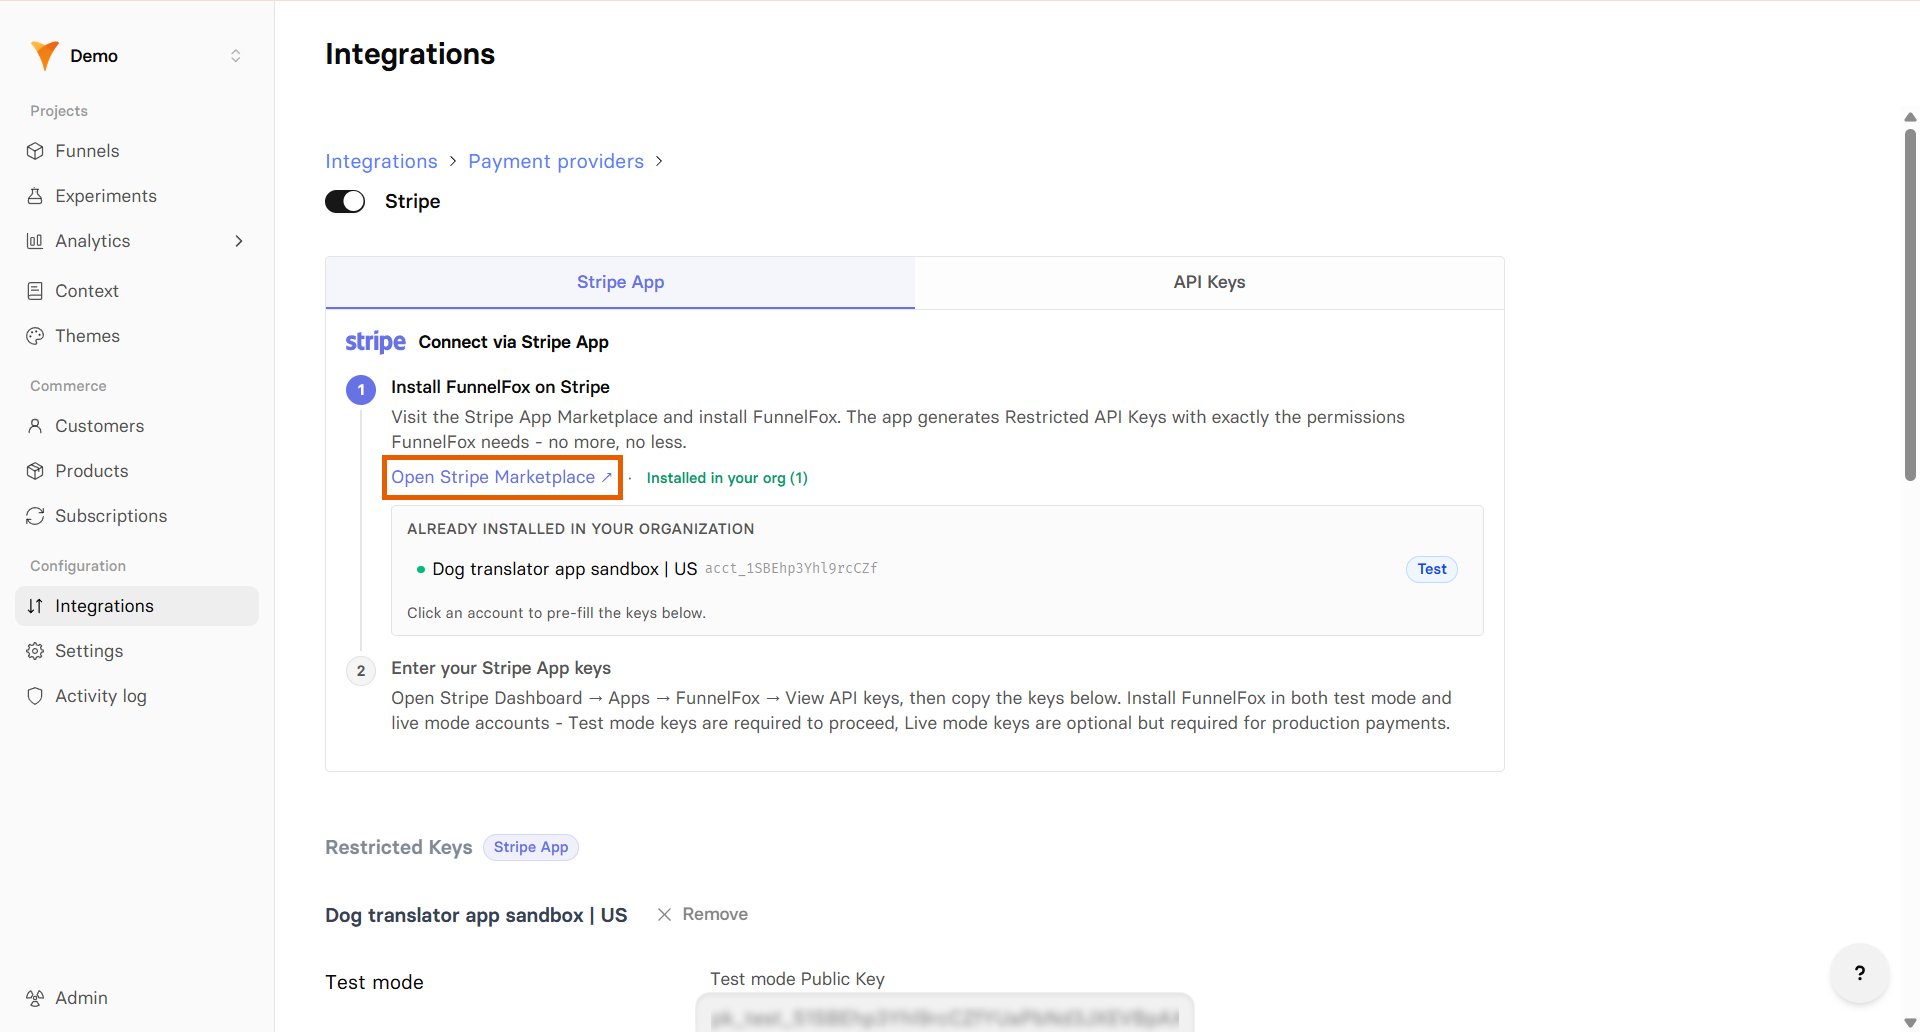
- Click Open Stripe Marketplace.
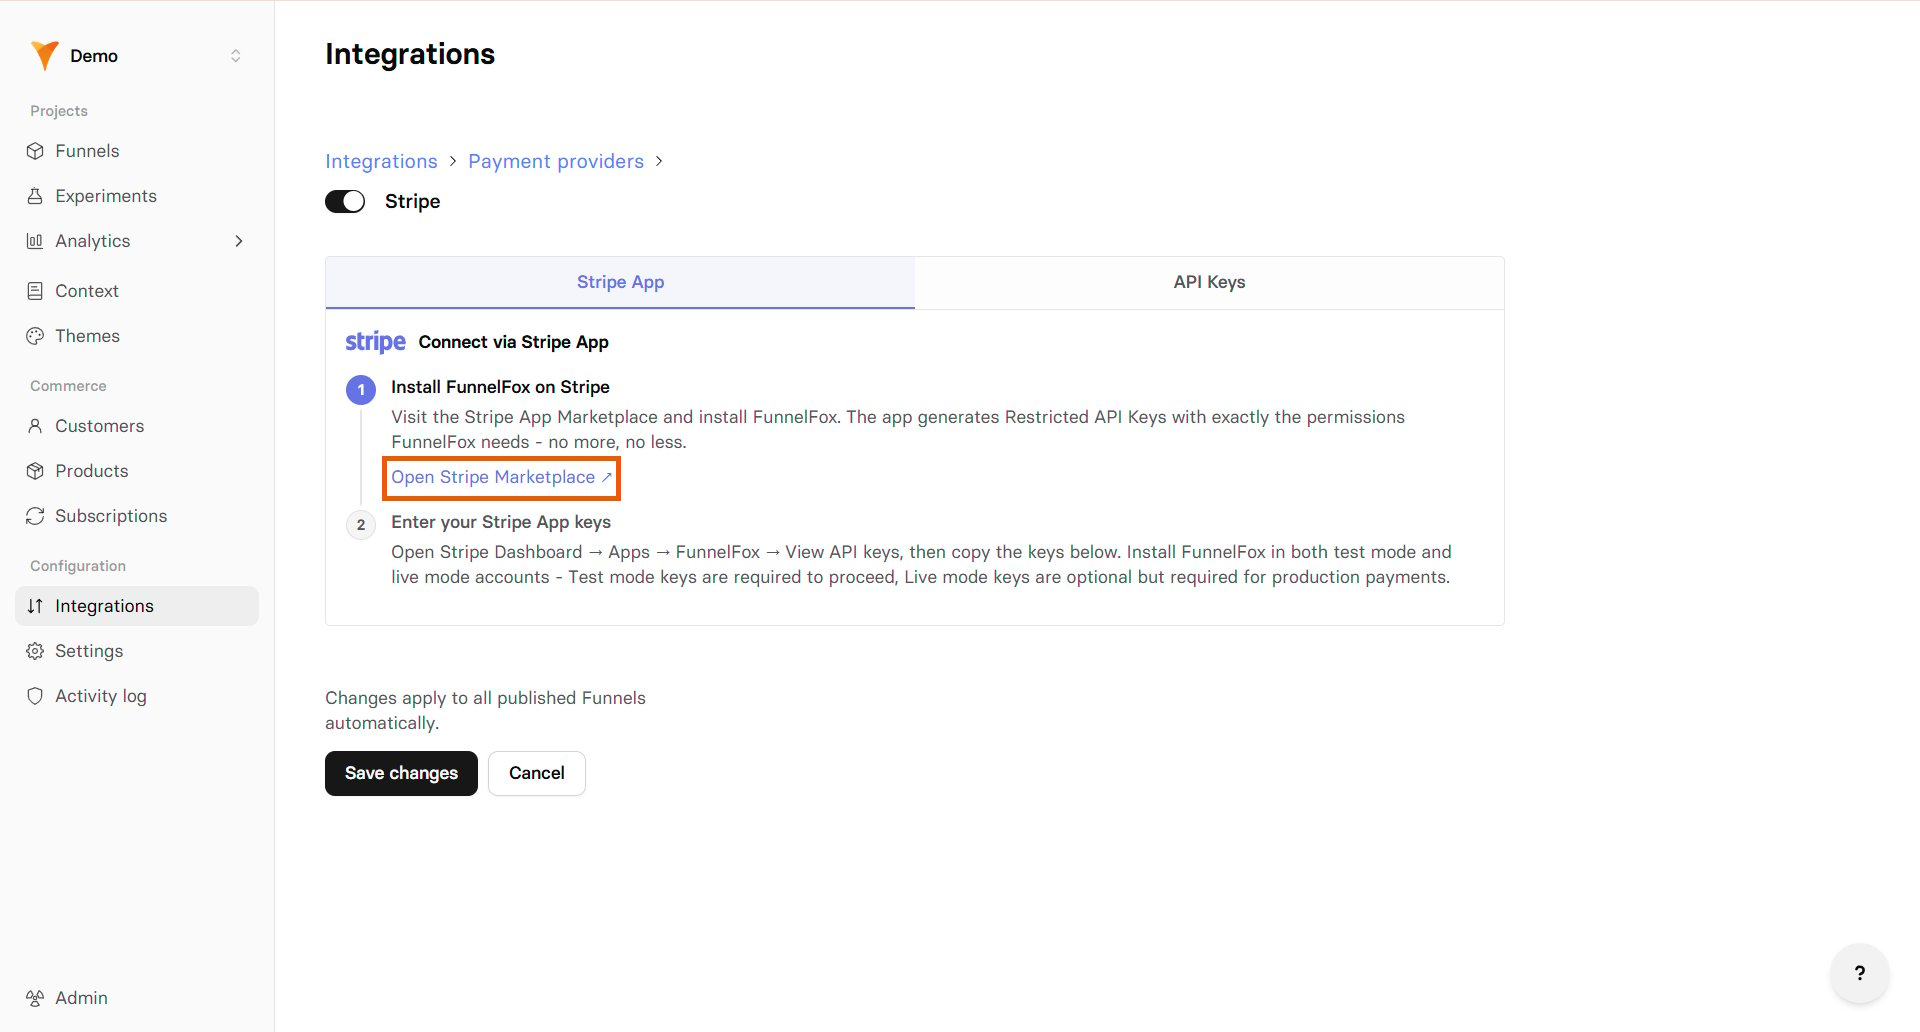
- Select your Stripe Sandbox account.
Stripe recommends using sandbox accounts for testing purposes instead of production accounts in test mode.

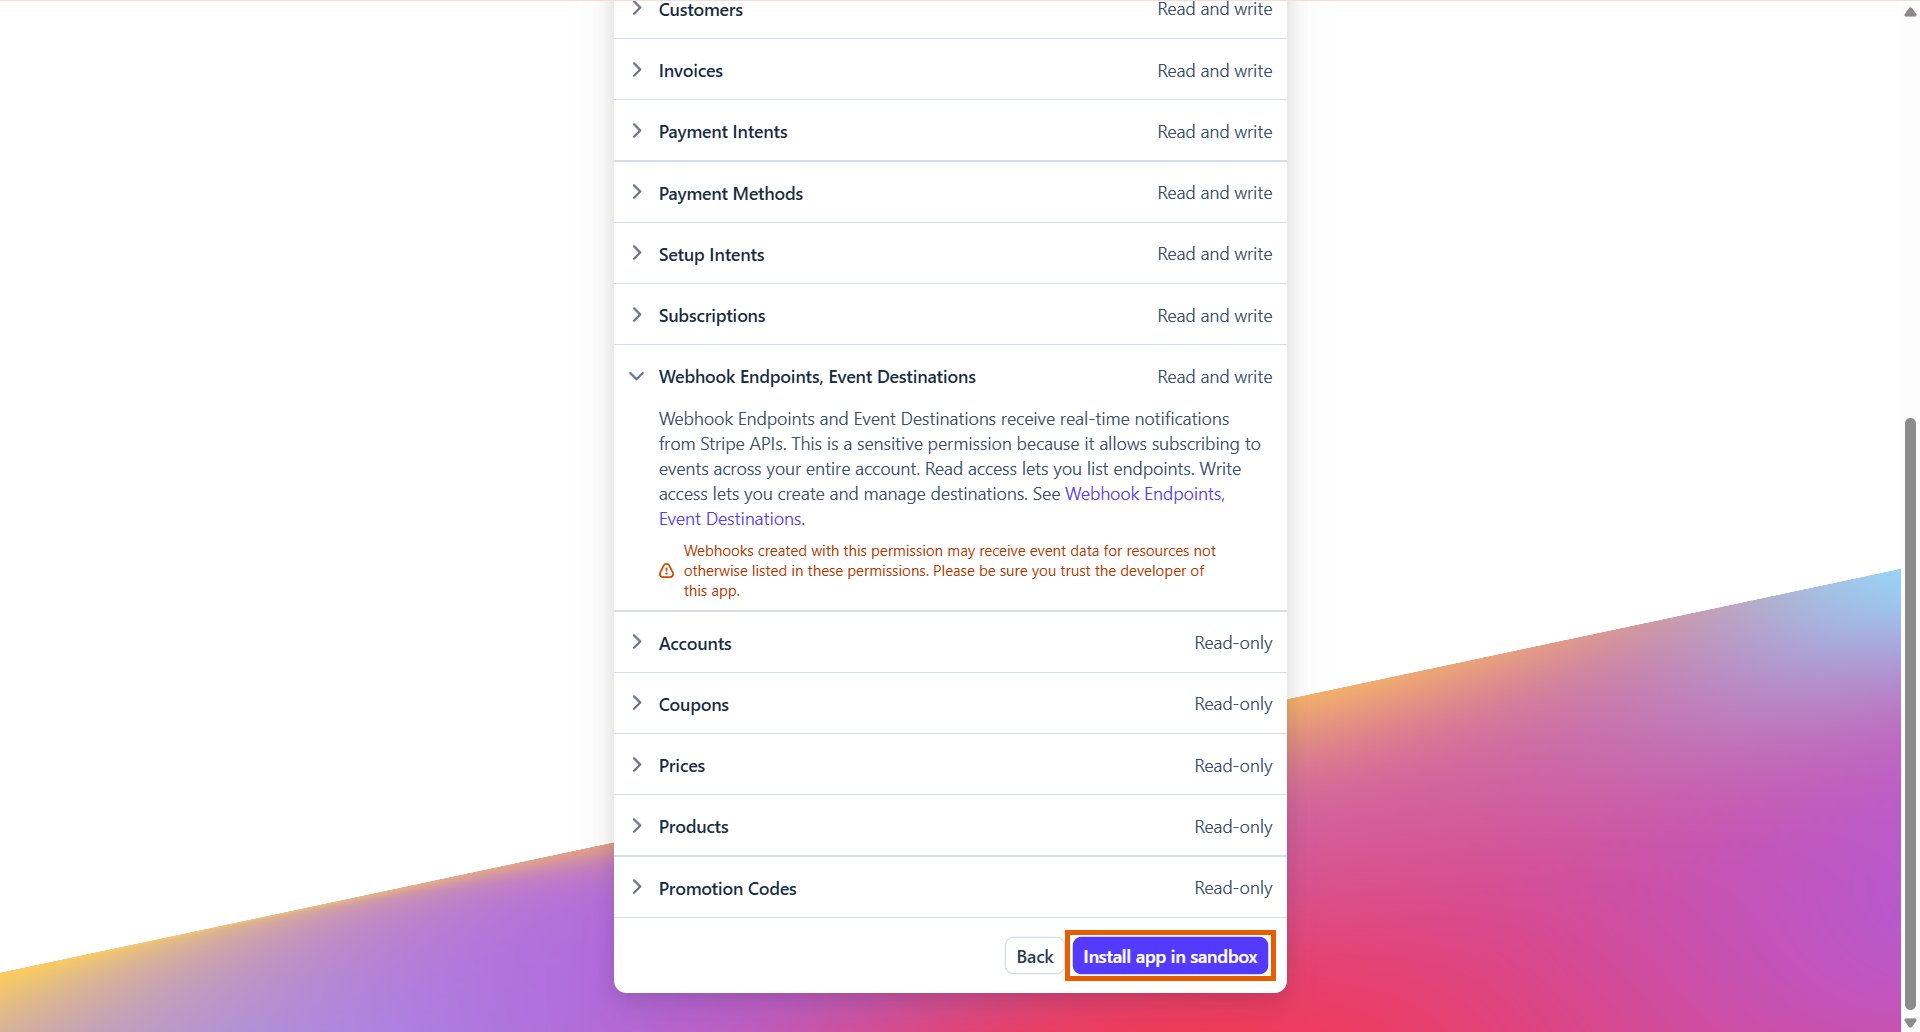
- Keep the access rights as is and click Install app in sandbox.
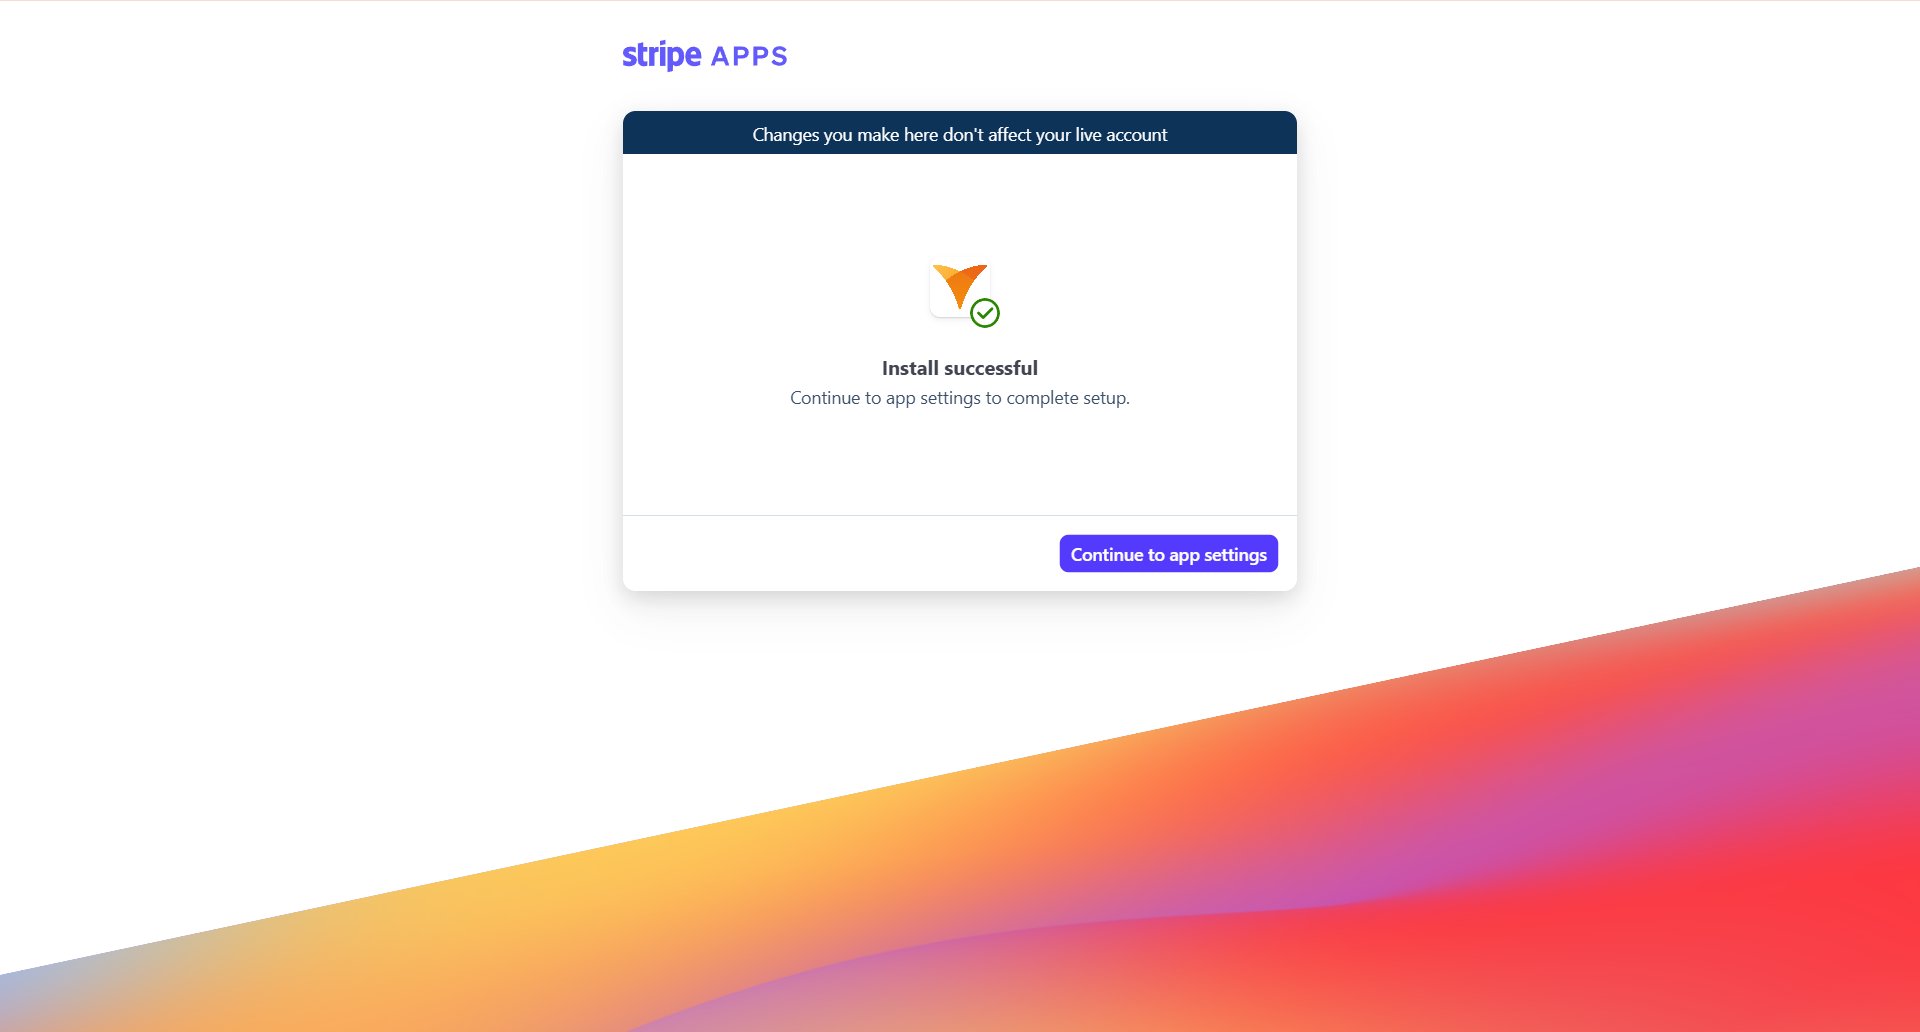
- Click Continue to app settings.
- Copy your Publishable key.

- Go back to the Stripe integration in FunnelFox and paste the key into the Test Publishable key field.
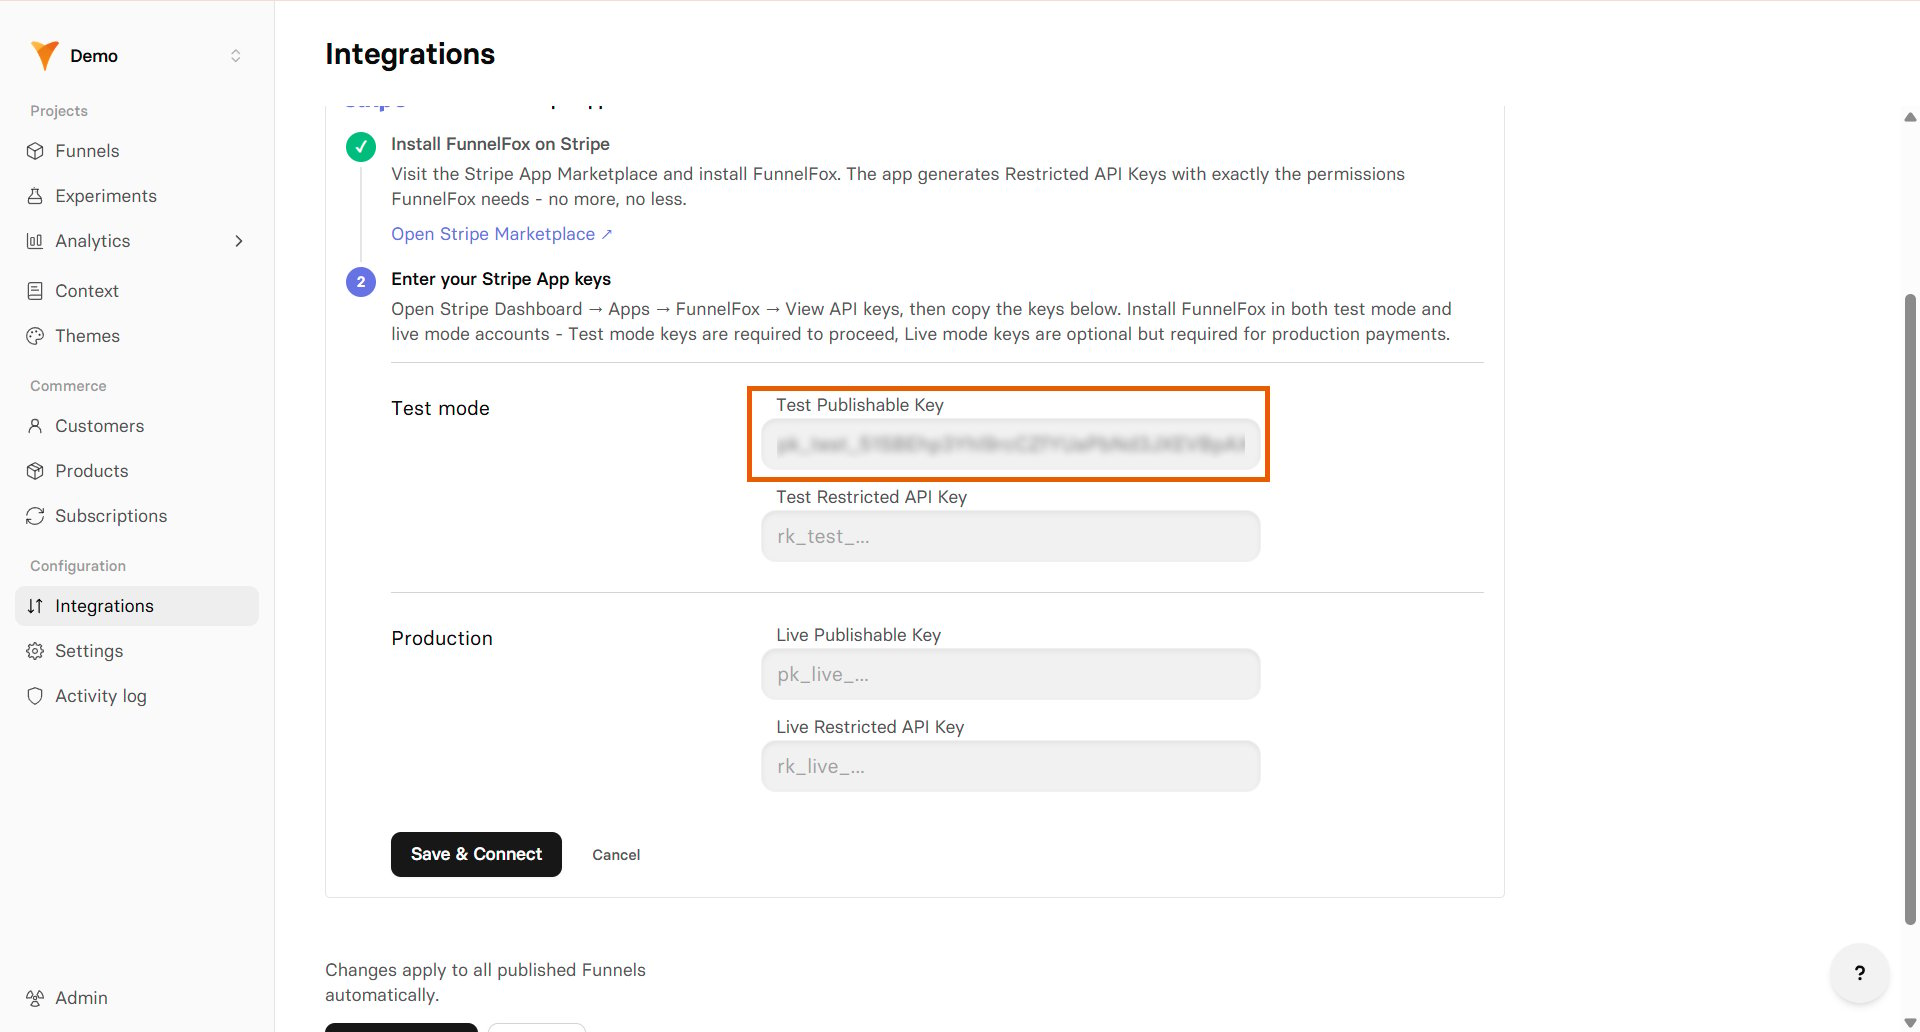
- Reveal and copy your Restricted key in Stripe.
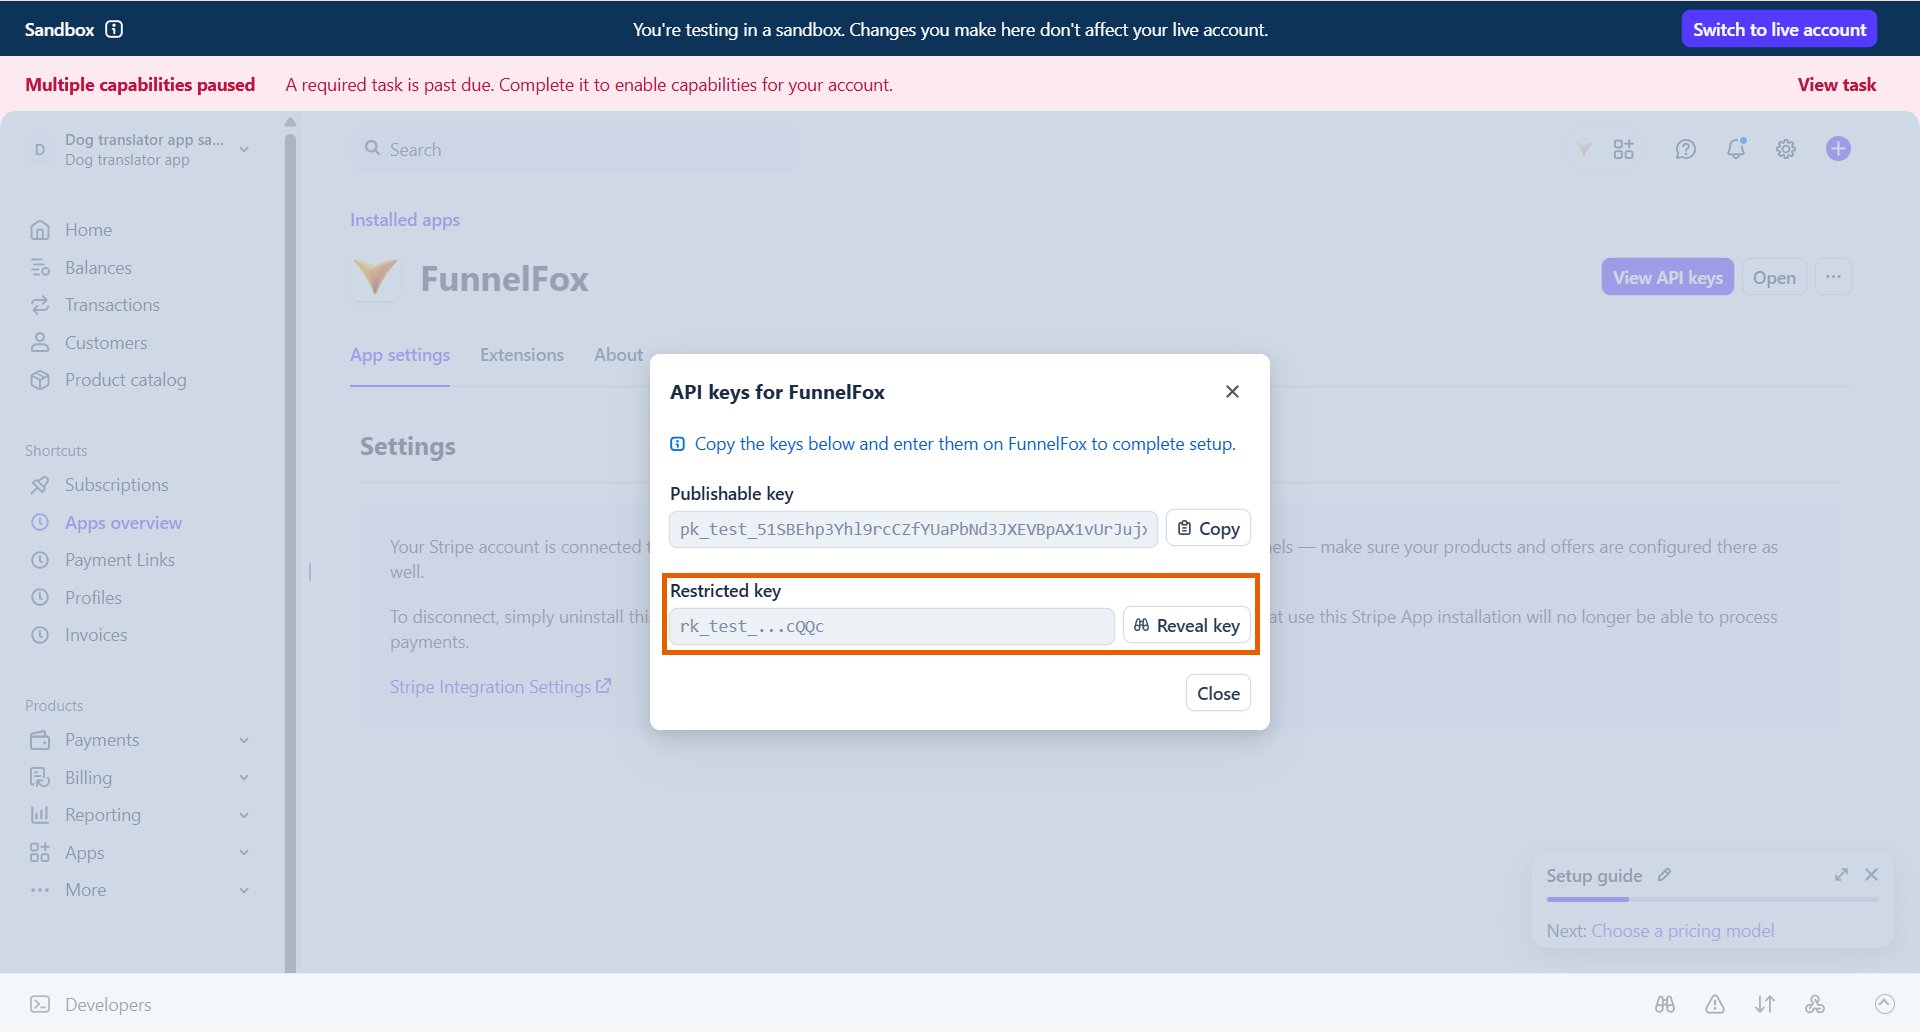
- Go back to the Stripe integration in FunnelFox and paste the key into the Test Restricted API Key field.
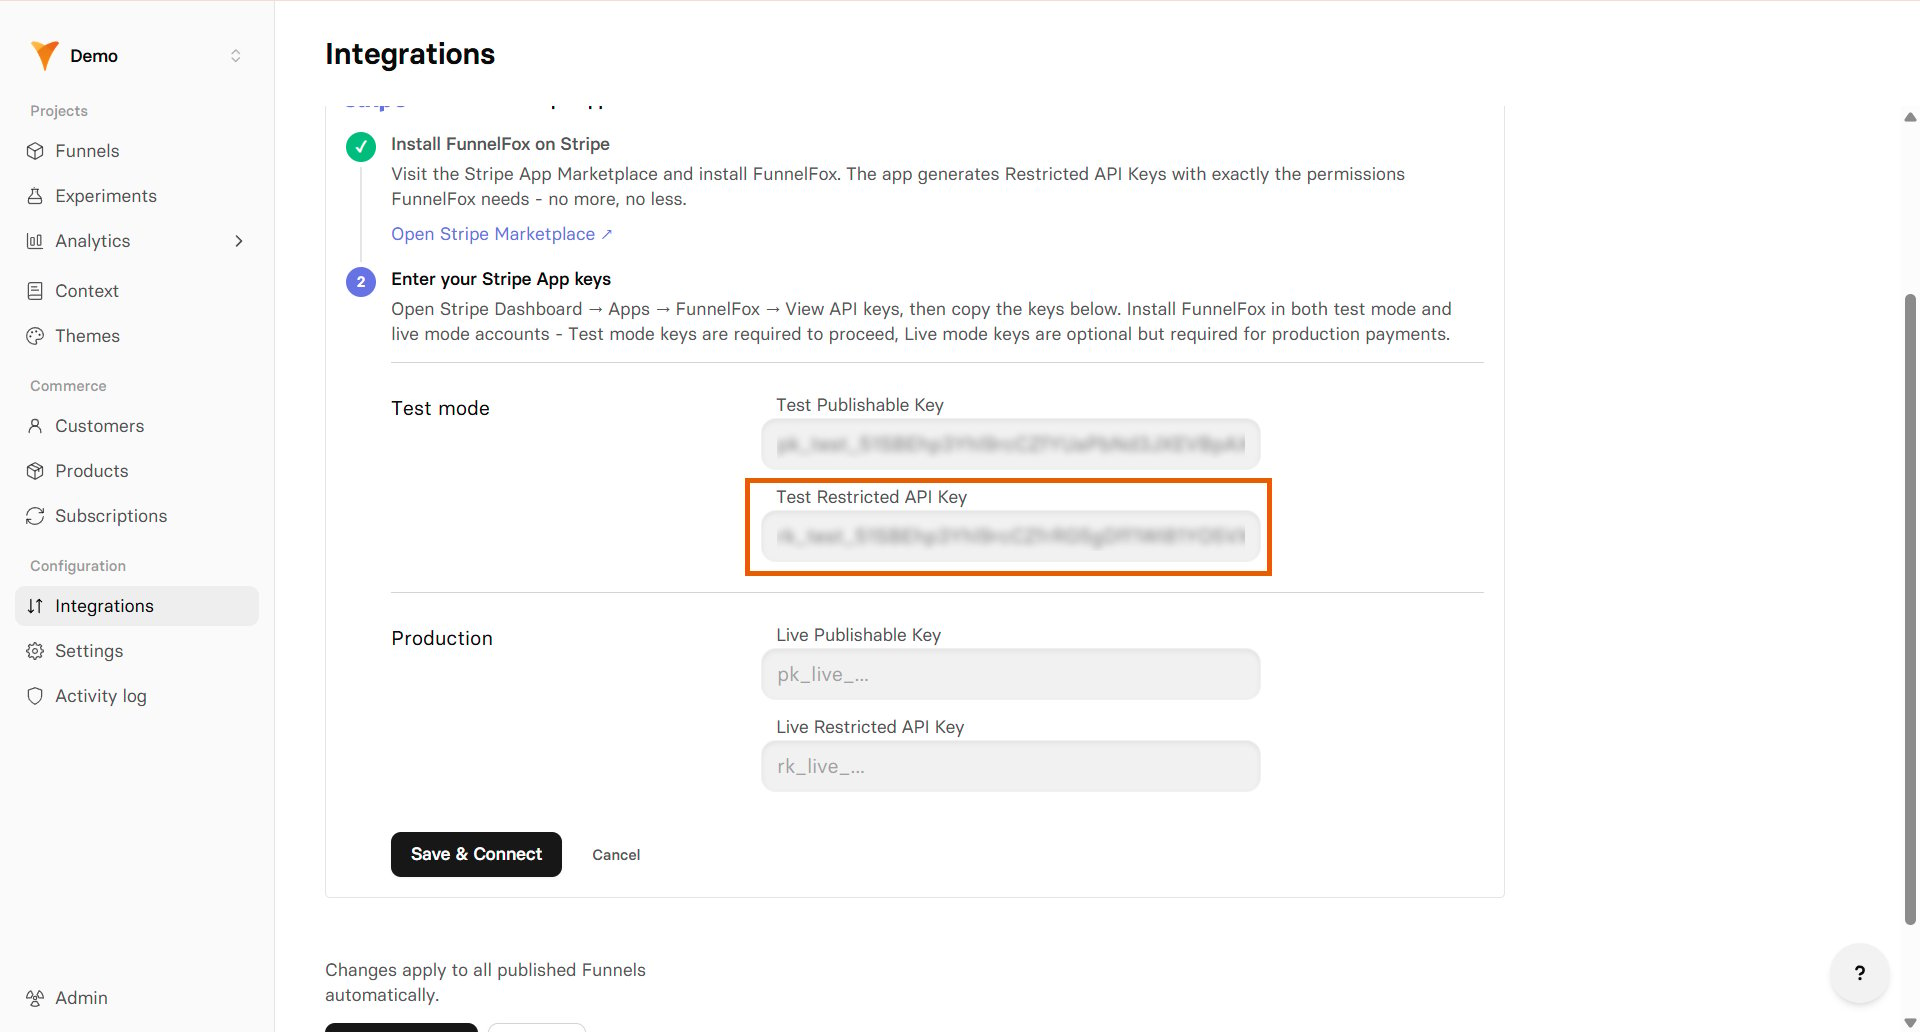
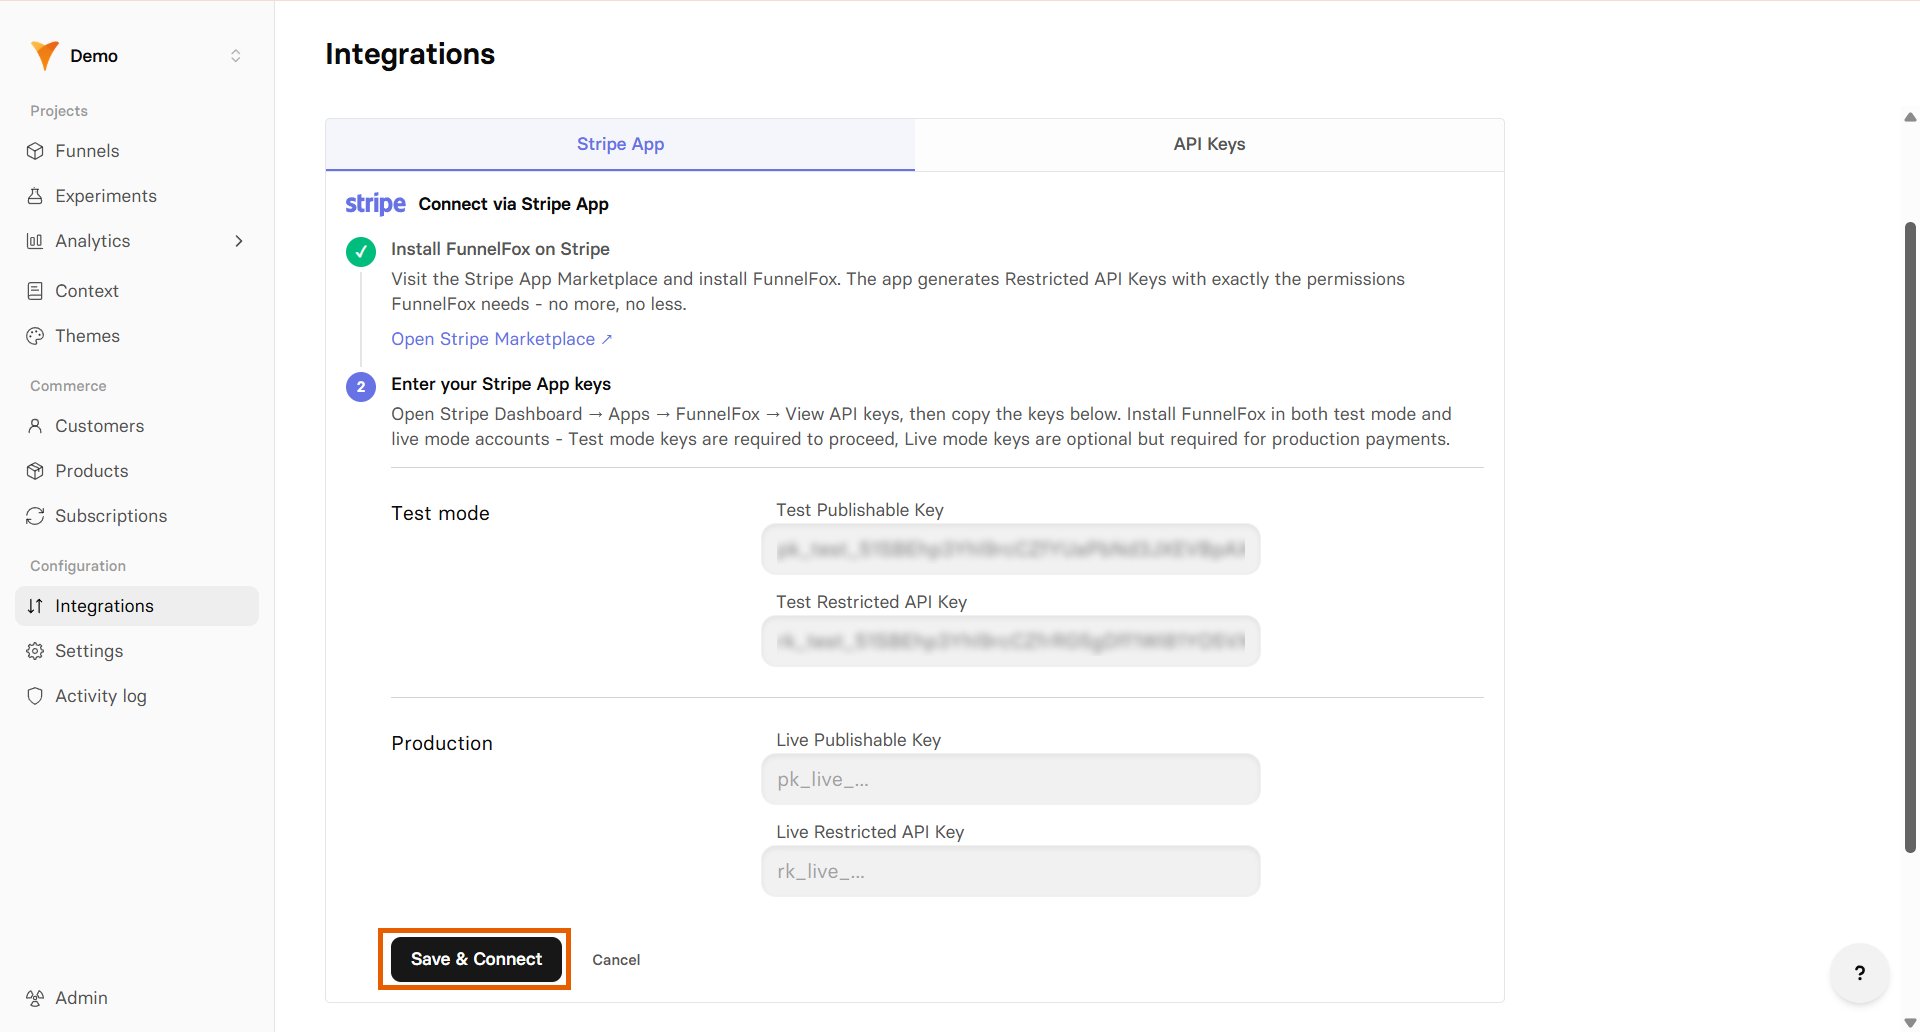
- Click Save & Connect.
Install Stripe App for production
- Click Open Stripe Marketplace.
- Select your Stripe Production account.
- Follow the same steps above to install the app and paste your keys into the Live keys fields in FunnelFox.
Your Stripe integration is now active! Remember to republish your funnels to apply the changes.
Migrating from deprecated API keys setup
If you previously connected Stripe using the deprecated API keys setup, we recommend migrating to the new Stripe App installation.- Follow the setup flow above and connect both environments:
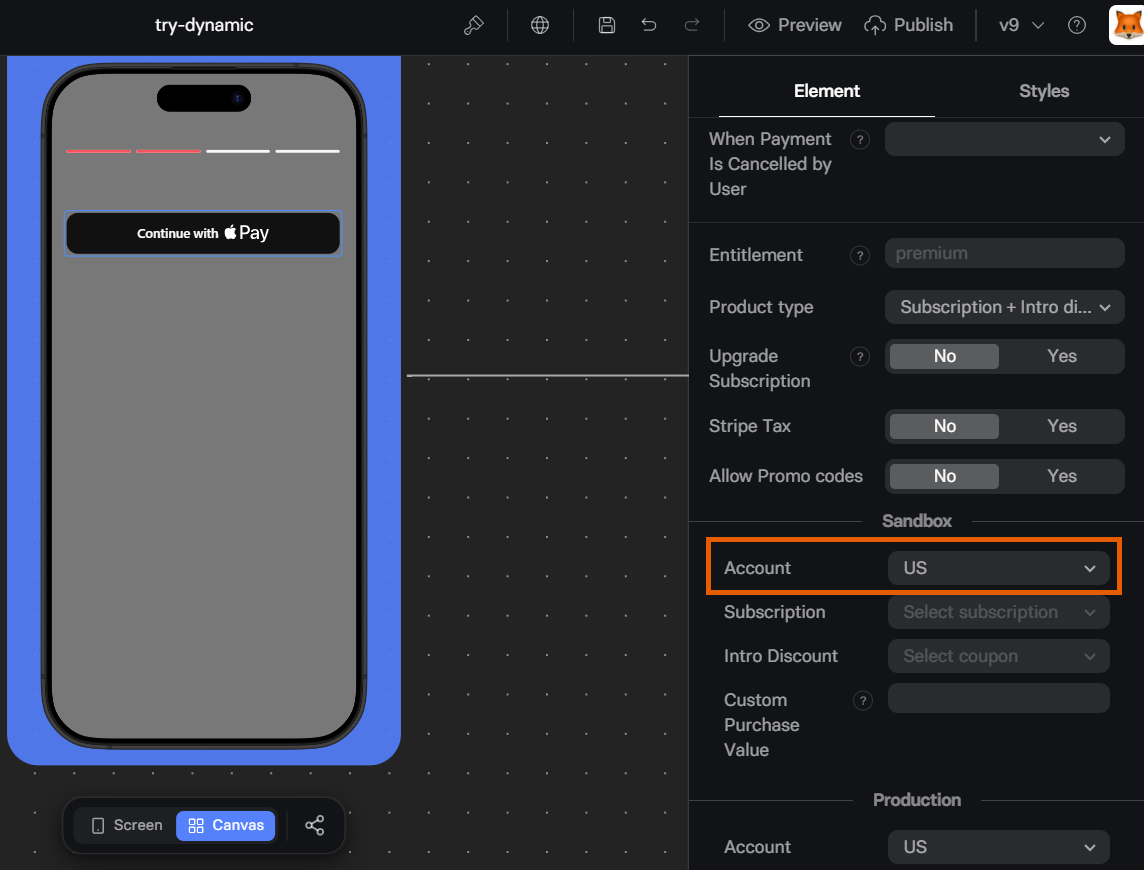
- Sandbox account: Used for testing in funnel previews. Create products there to select them later in the Sandbox section of the Checkout element.
- Production account: Used for live traffic on published funnels. Create products there to select them later in the Production section of the Checkout element.
- Republish your funnels.
- Verify that all products from the previous setup are available in your Checkout element.
Deprecated API keys setup flow
Deprecated API keys setup flow
FunnelFox doesn’t support Stripe Sandboxes. Use your live Stripe account with Test mode enabled instead. Learn about Stripe testing environments.
1. Live API keys
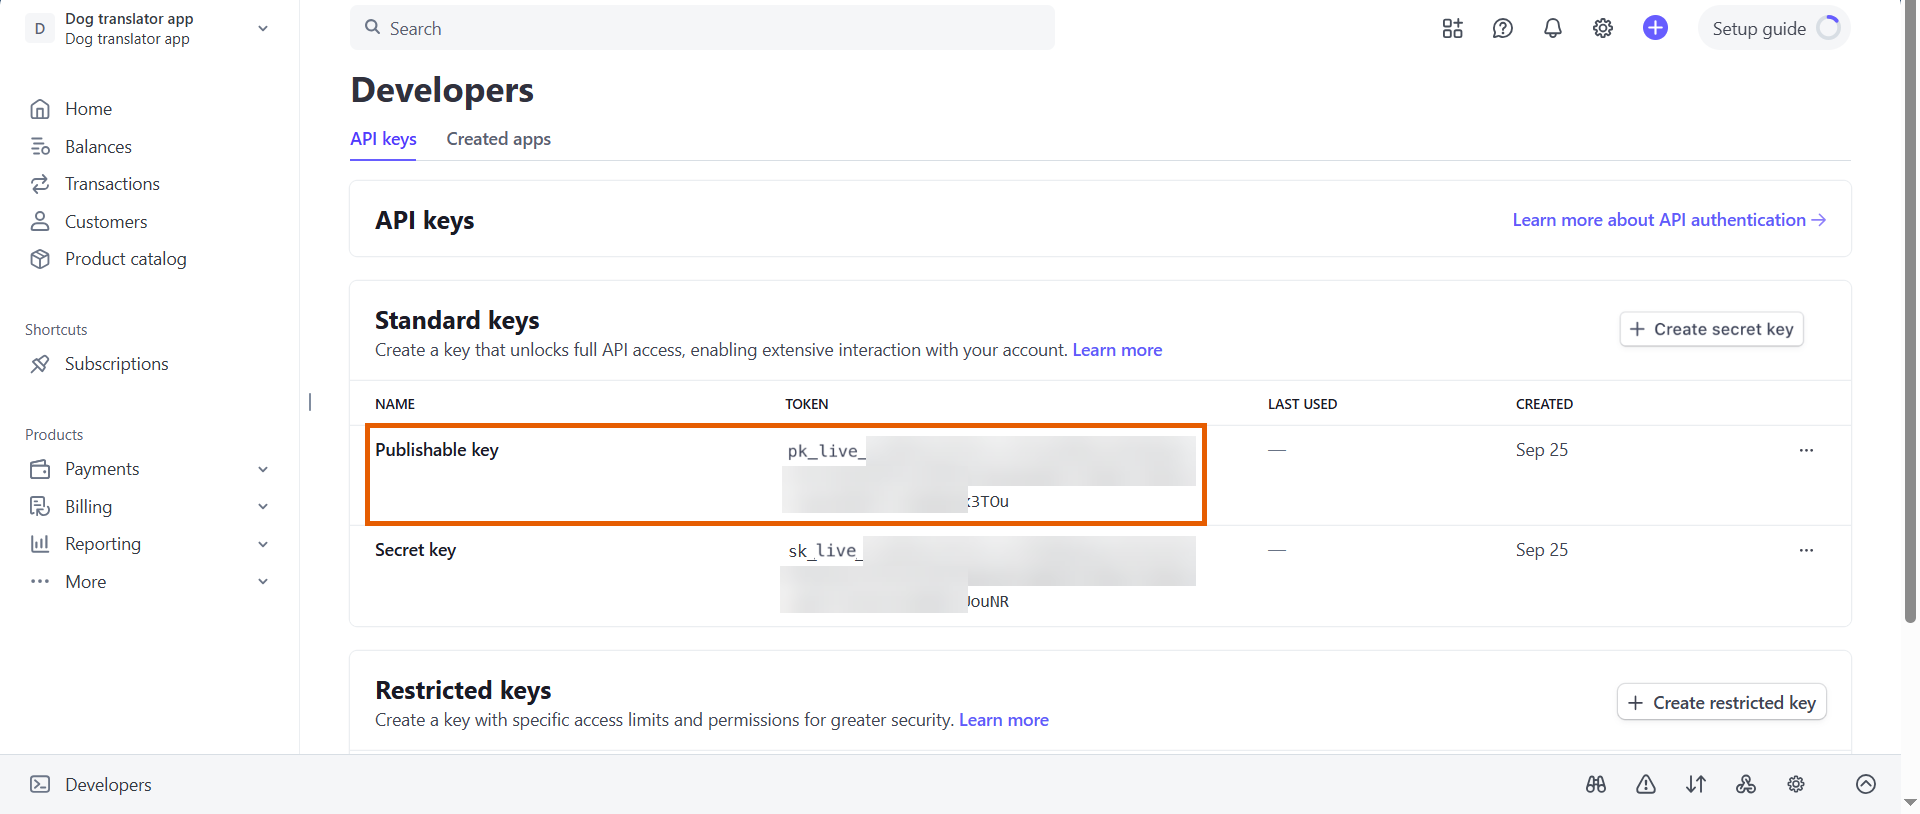
You need to add both publishable and secret keys from your live Stripe account.Publishable key:- Go to Developers > API keys in Stripe Dashboard.
- Copy your Publishable key (starts with
pk_live).
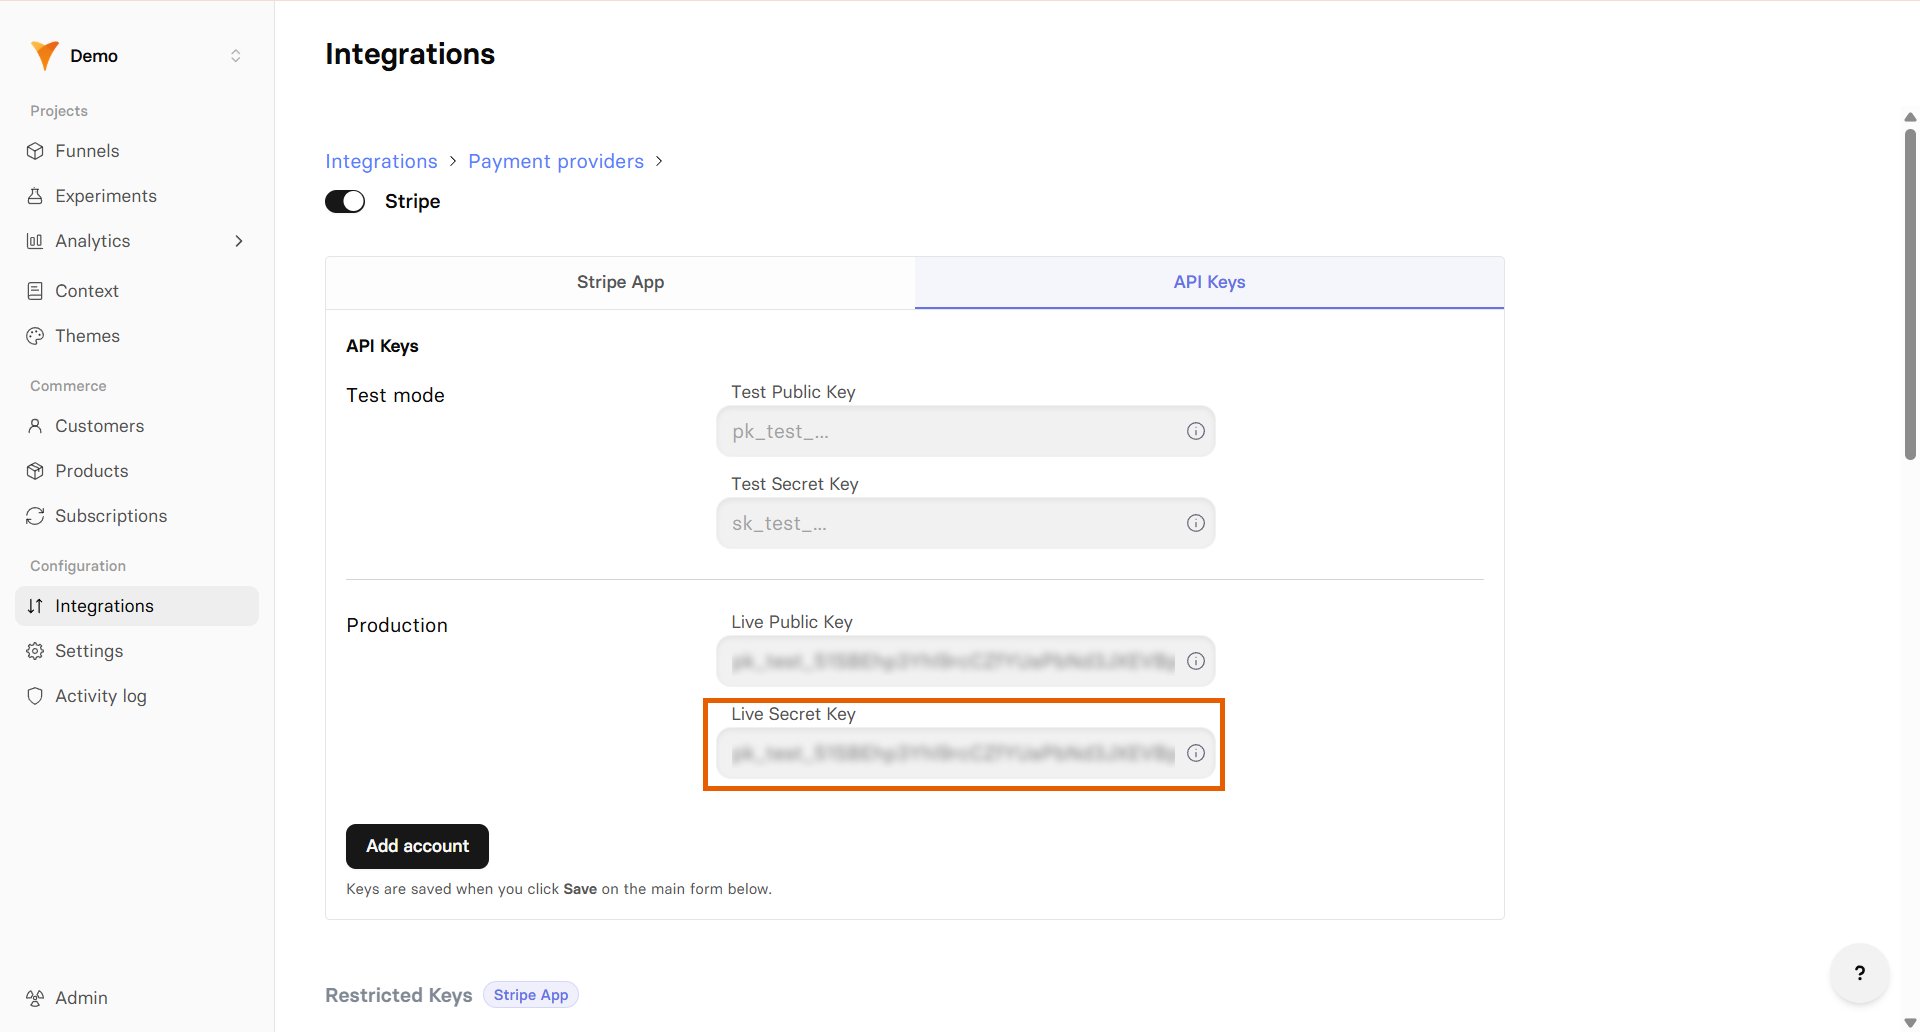
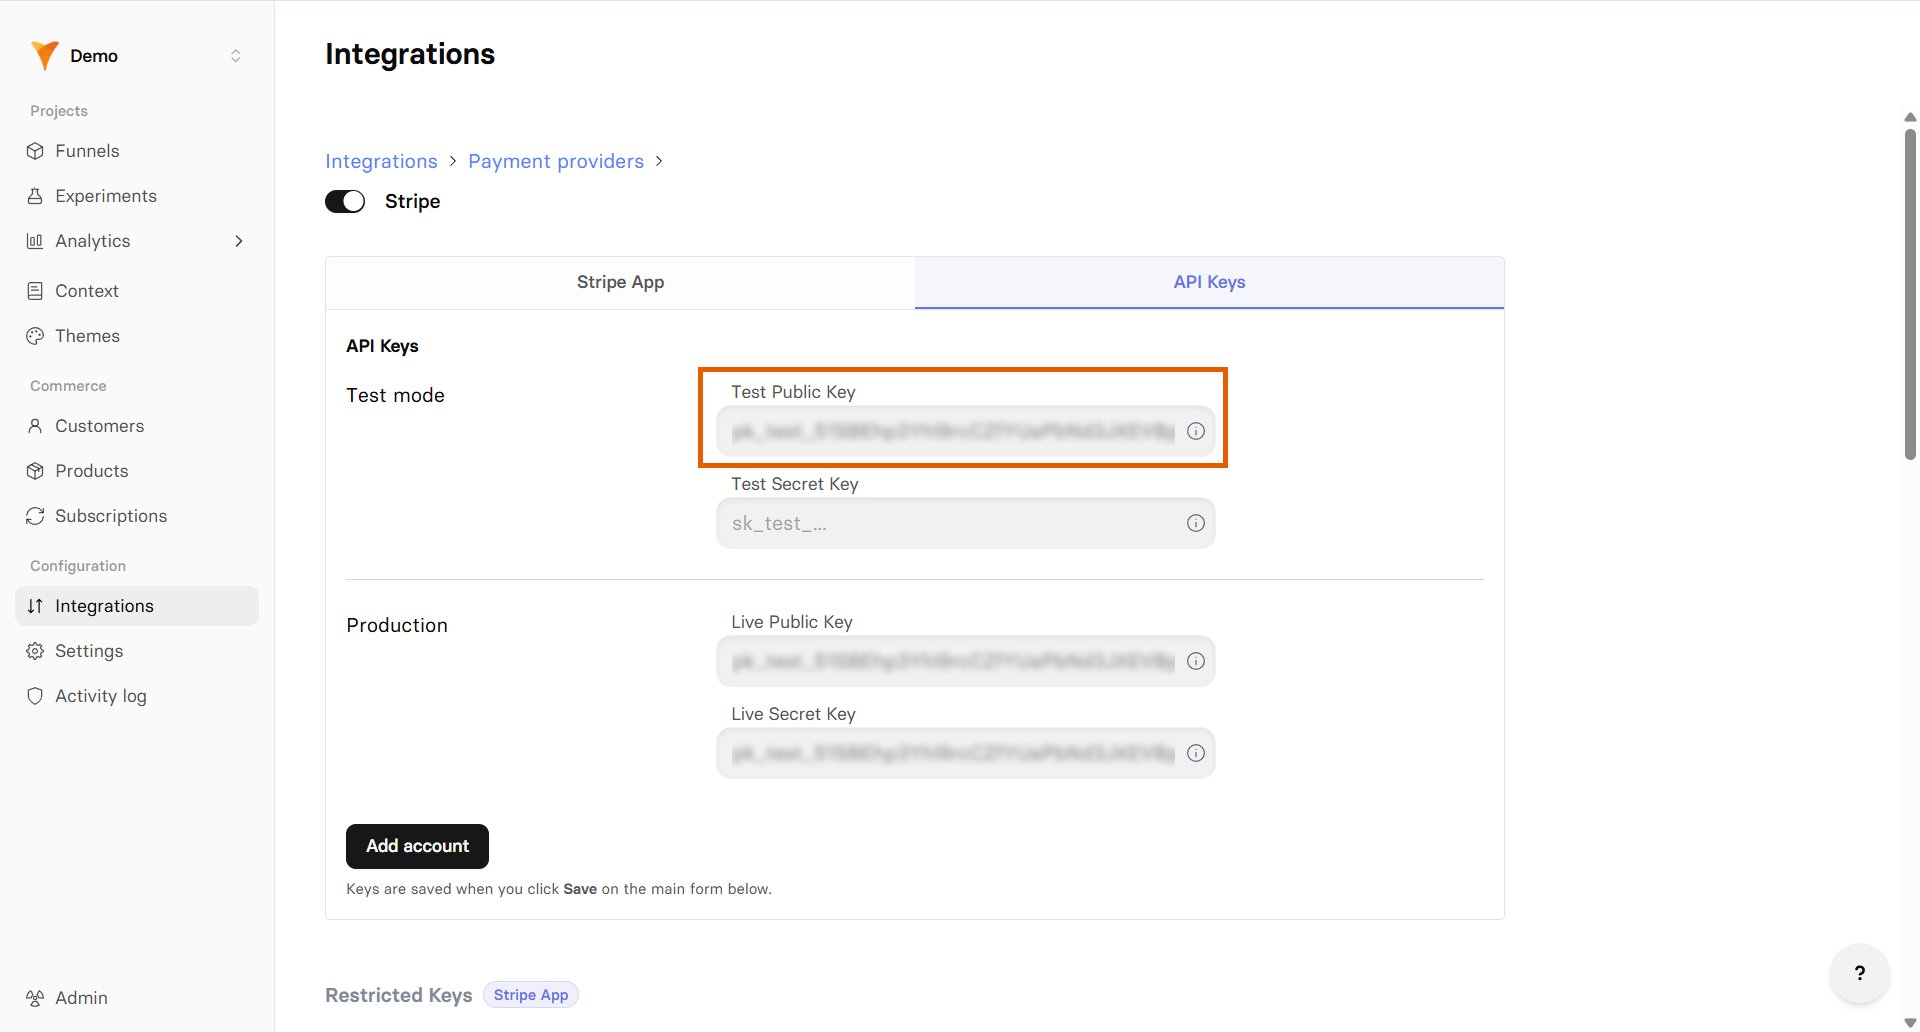
- Go to Integrations > Stripe > API Keys tab in FunnelFox.
- Paste the publishable key into the Live Public Key field under Production.

Keep your FunnelFox Stripe settings page open throughout the setup process.
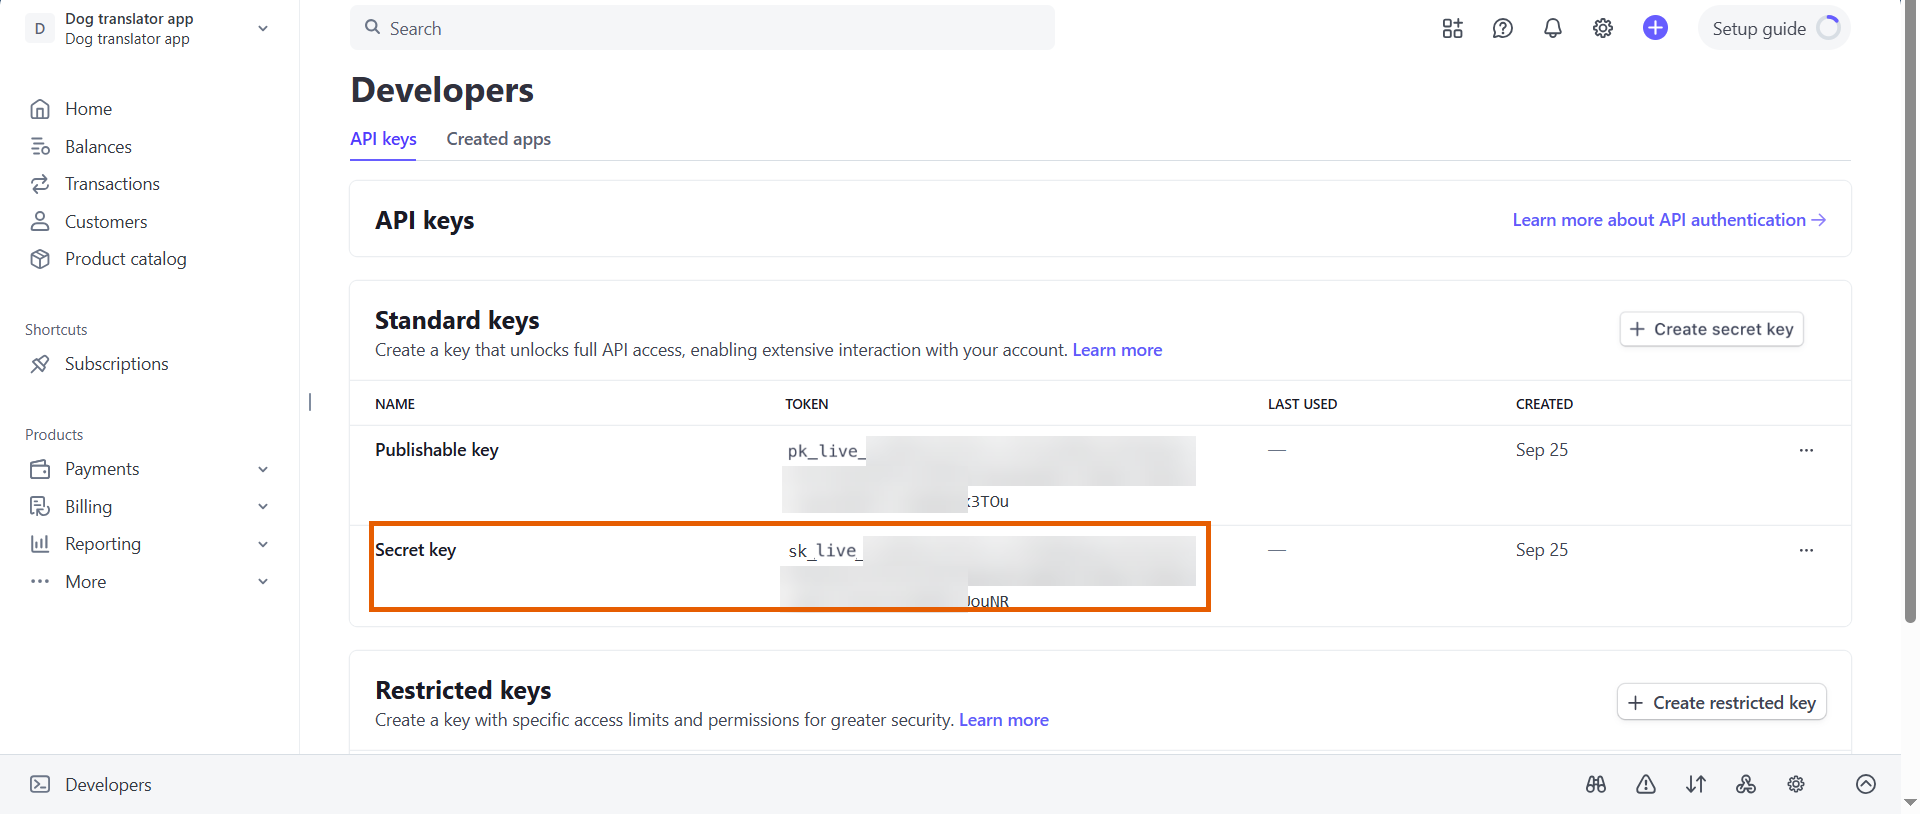
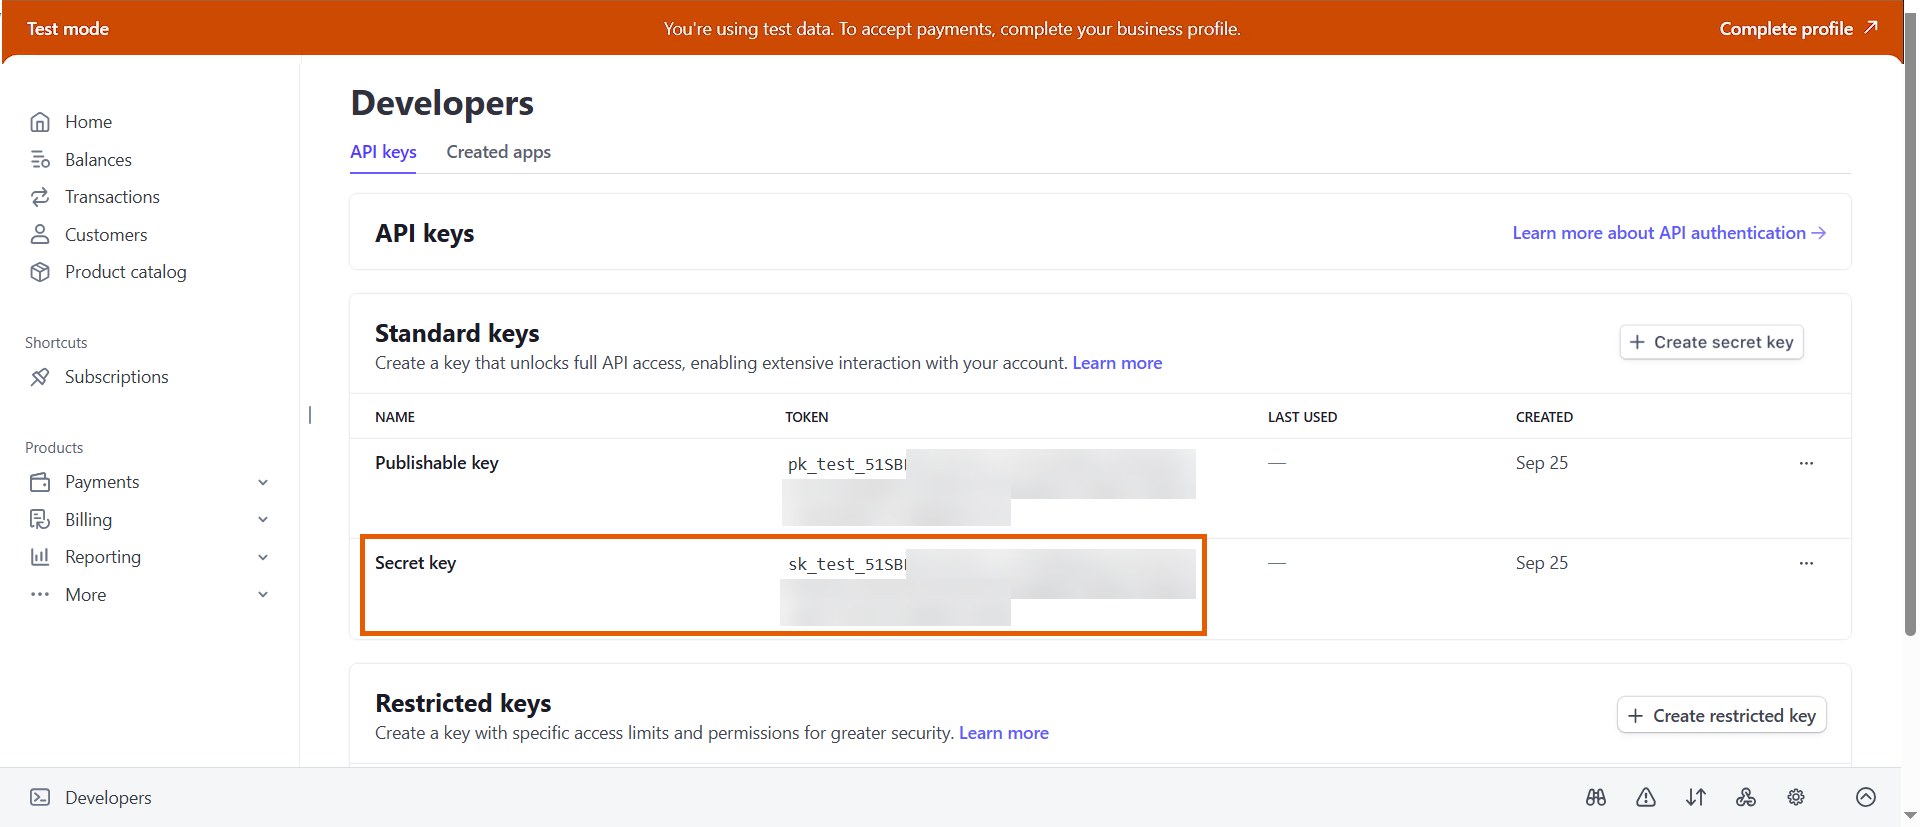
- Go back to Developers > API keys in Stripe.
- Copy your Secret key (starts with
sk_live).
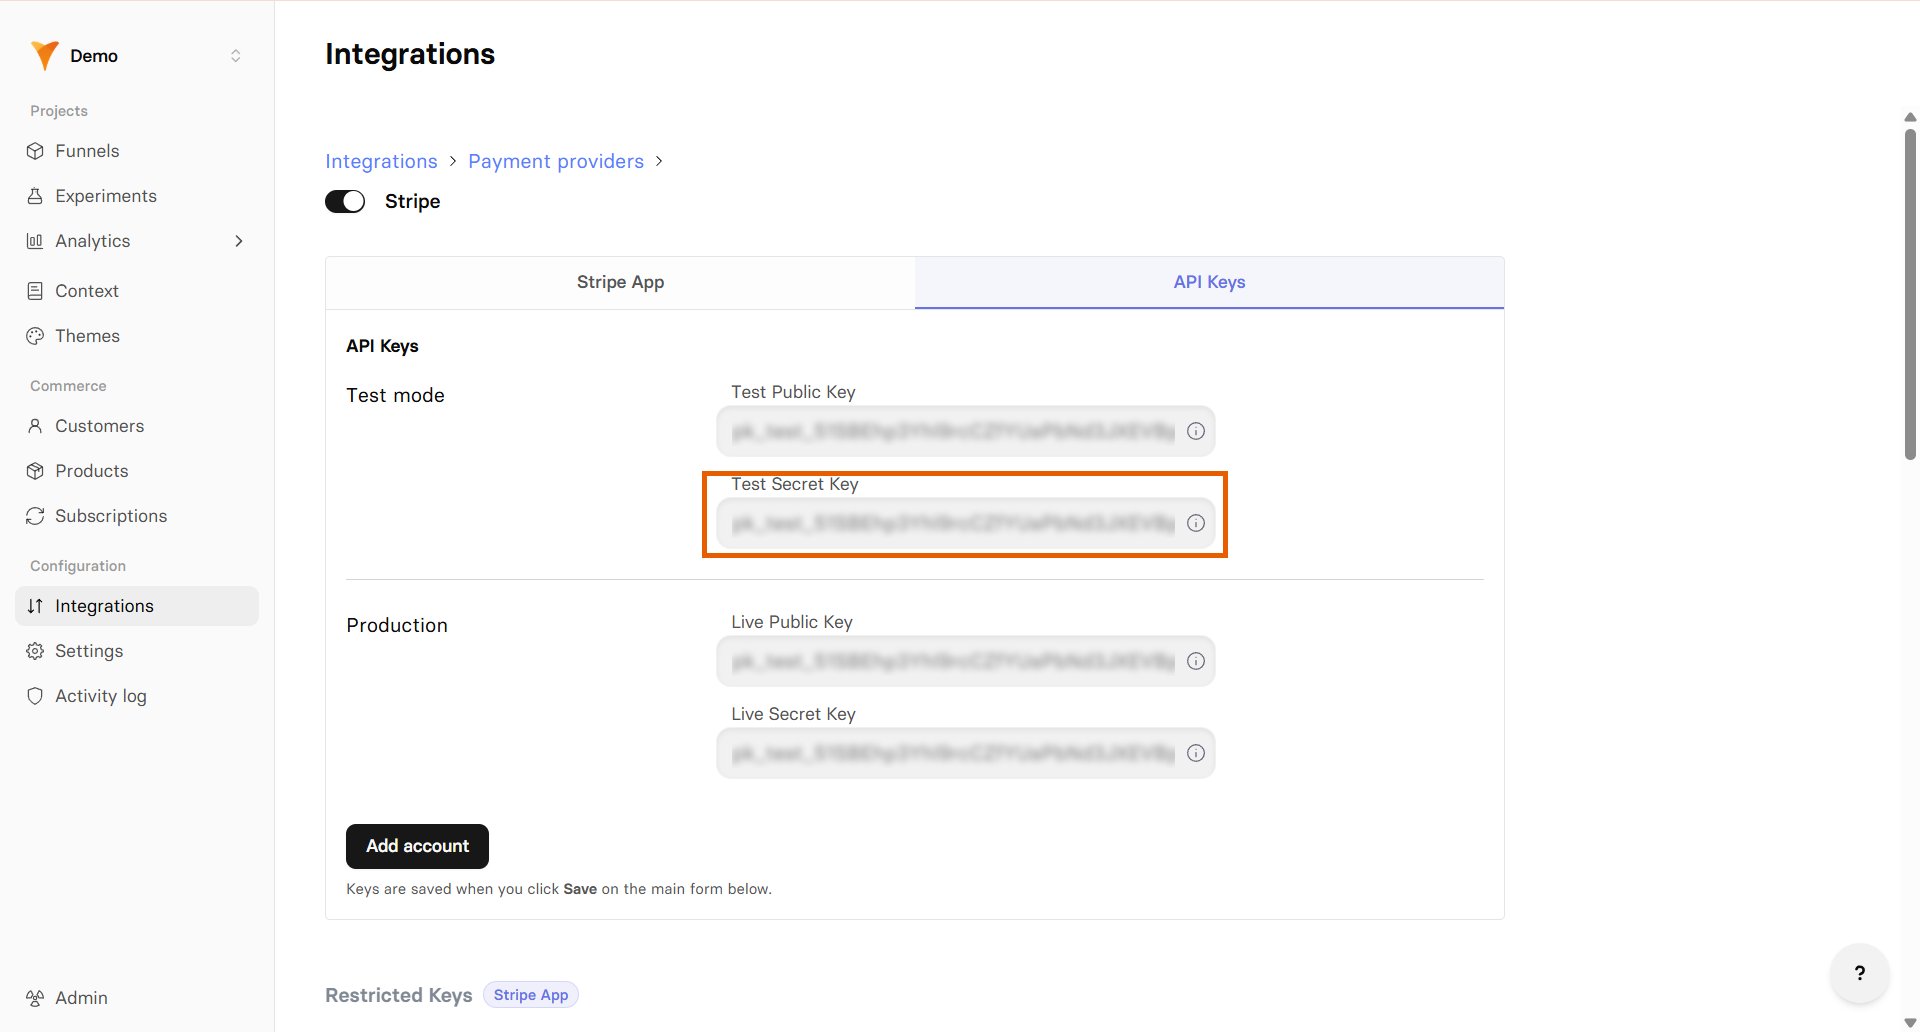
- Go back to your Stripe settings in FunnelFox.
- Paste the secret key into the Live Secret Key field under Production.
2. Test API keys
Next, add your test keys for testing payments before going live.Test Publishable key:- Go to back to your Stripe Dashboard.
- Click your account picker at the top left and toggle on Test mode.
- Go to Developers > API keys.
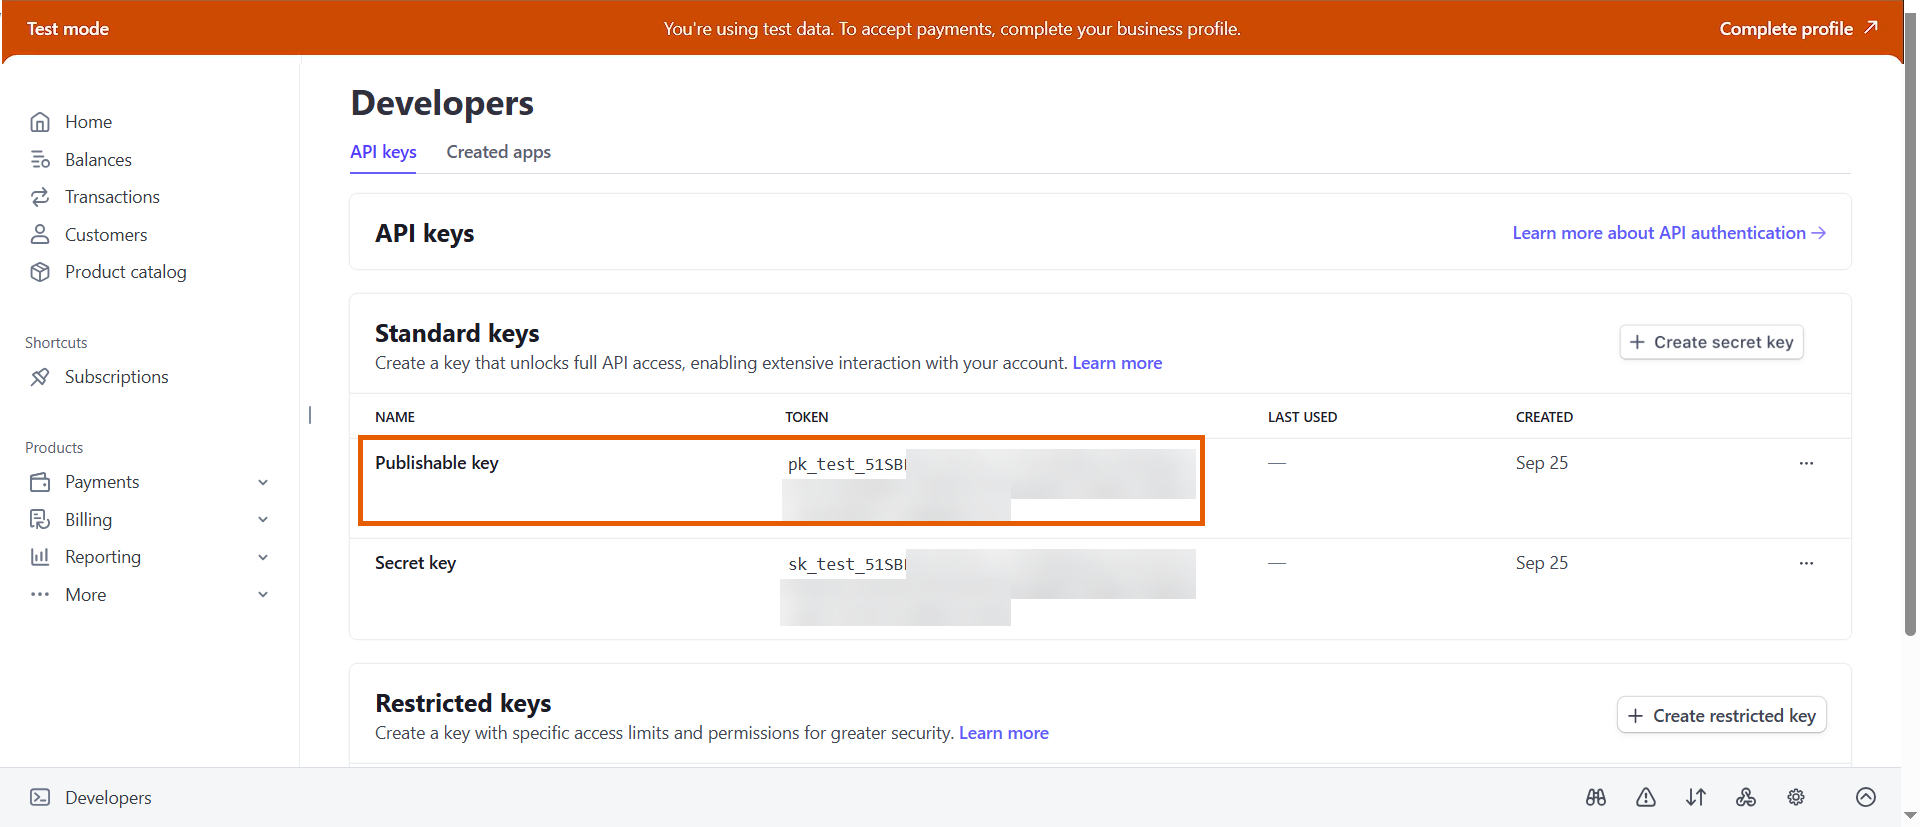
- Copy your test Publishable key (starts with
pk_test).
- Go back to the Stripe settings in FunnelFox.
- Paste the test publishable key into the Test mode Public Key field under Test mode.
- Go back to Developers > API keys in Stripe.
- Copy your test Secret key (starts with
sk_test).
- Go back to your Stripe settings in FunnelFox.
- Paste the test secret key into the Test mode Secret Key field under Test mode.
- Save changes.
Products configuration
FunnelFox automatically creates webhooks in your Stripe account and syncs your products after setup. Products created in your Stripe Sandbox account are available for funnel preview testing under the Sandbox section of the Element tab in your Checkout element. Similarly, products created in the production environment are available under the Production section. Configure Stripe products in your funnels: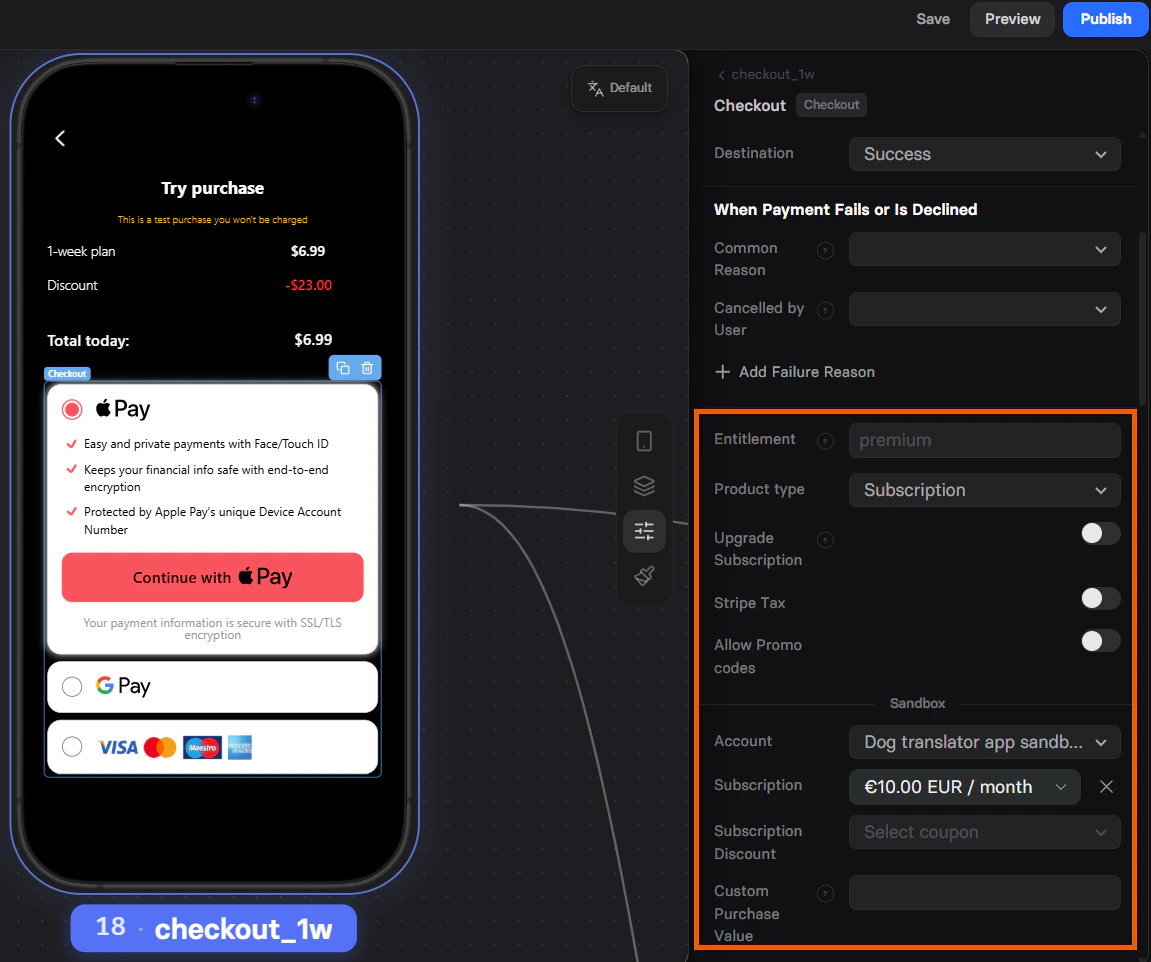
Digital wallets
FunnelFox supports Apple Pay and Google Pay wallet buttons with Stripe for faster checkout. Apple Pay requires domain verification, while Google Pay works by default. Once your setup is complete, add a Wallet button to your funnels.Apple Pay
Apple Pay for Stripe requires domain verification before you can use it. To enable Apple Pay:- Go to Settings > Payments > Payment method domains in your Stripe Dashboard.
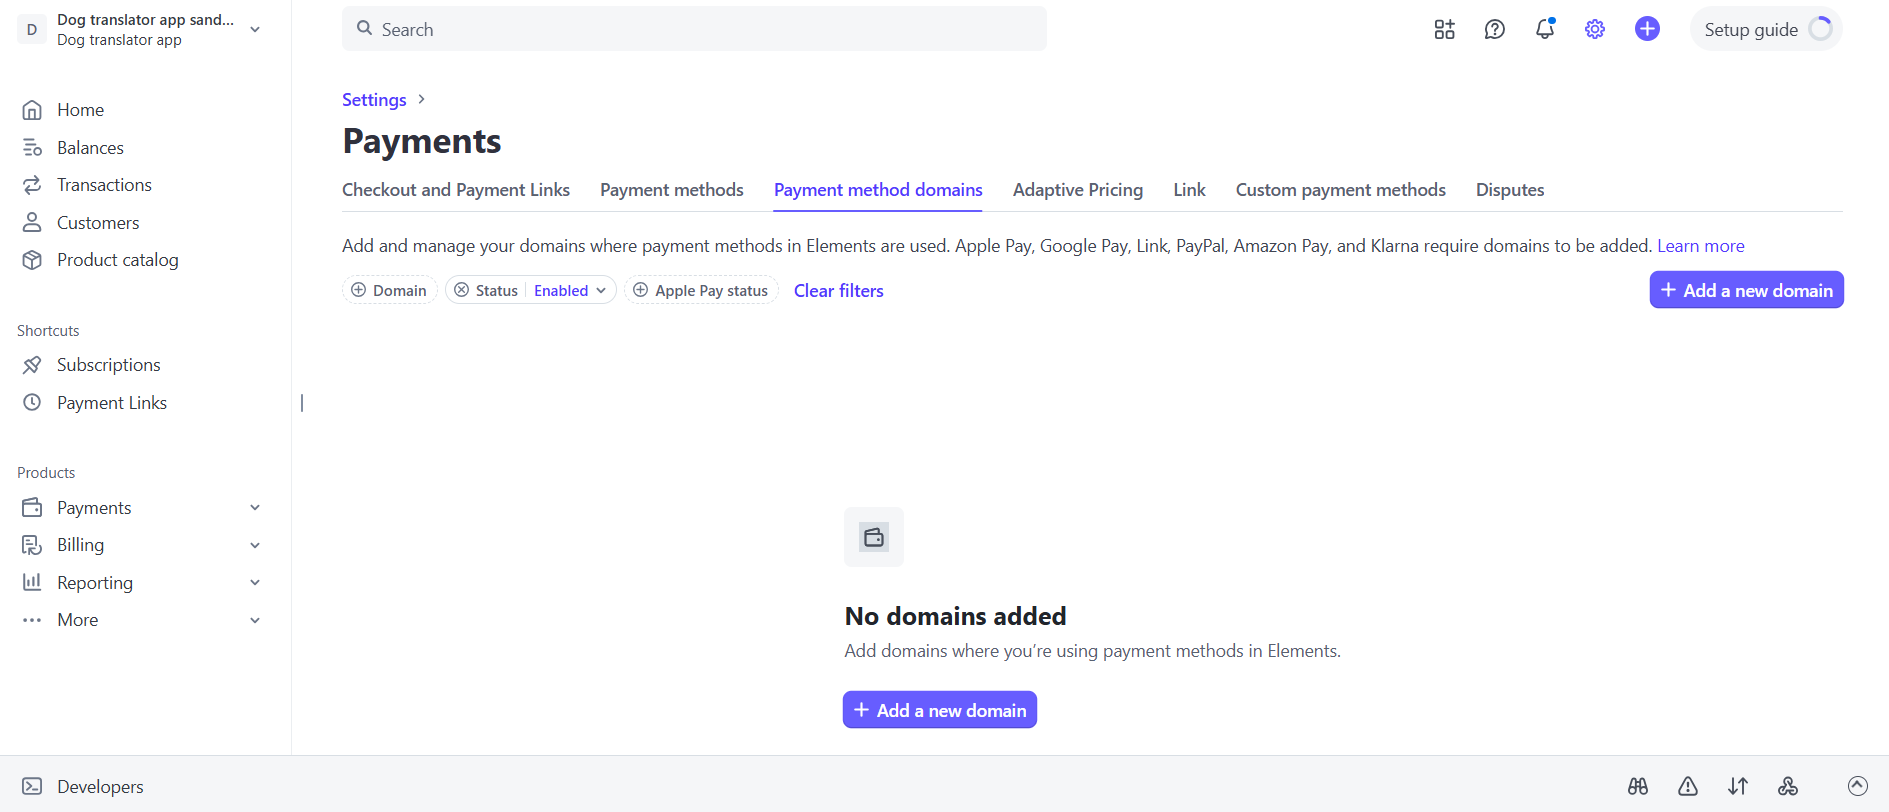
- Click + Add a new domain.
- Add your project domain from Settings > Domains in FunnelFox and click Save. If you have a custom domain, add it as well.
To use Apple Pay in funnel preview mode, add
http://app.funnelfox.com/ as a domain.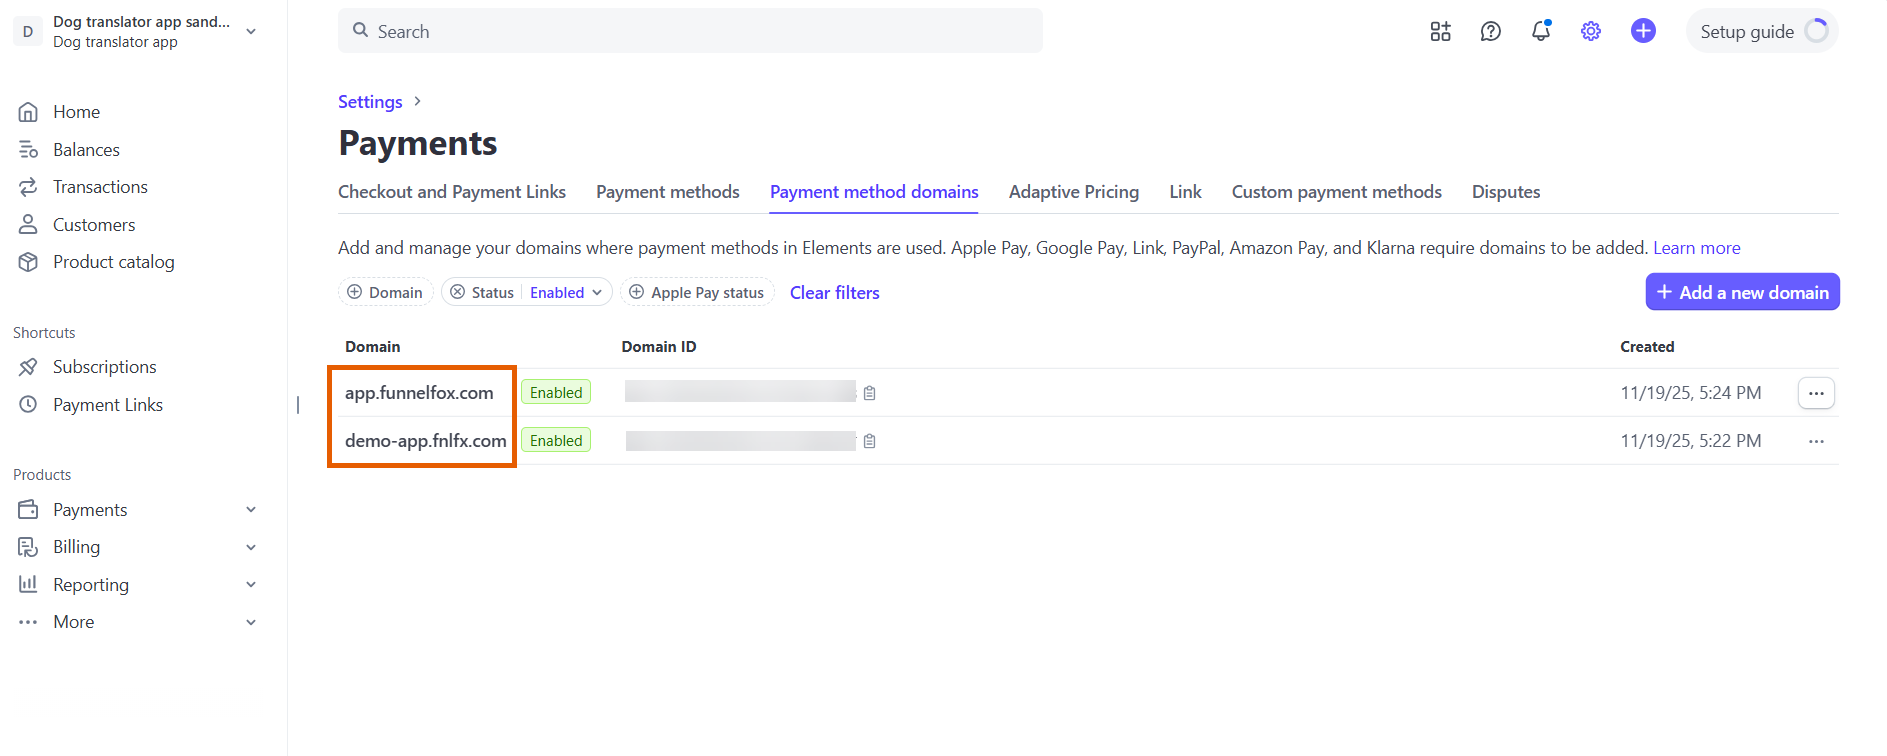
- Go to Settings > Domains in FunnelFox.
- Select Stripe under Apple Pay domain verification.
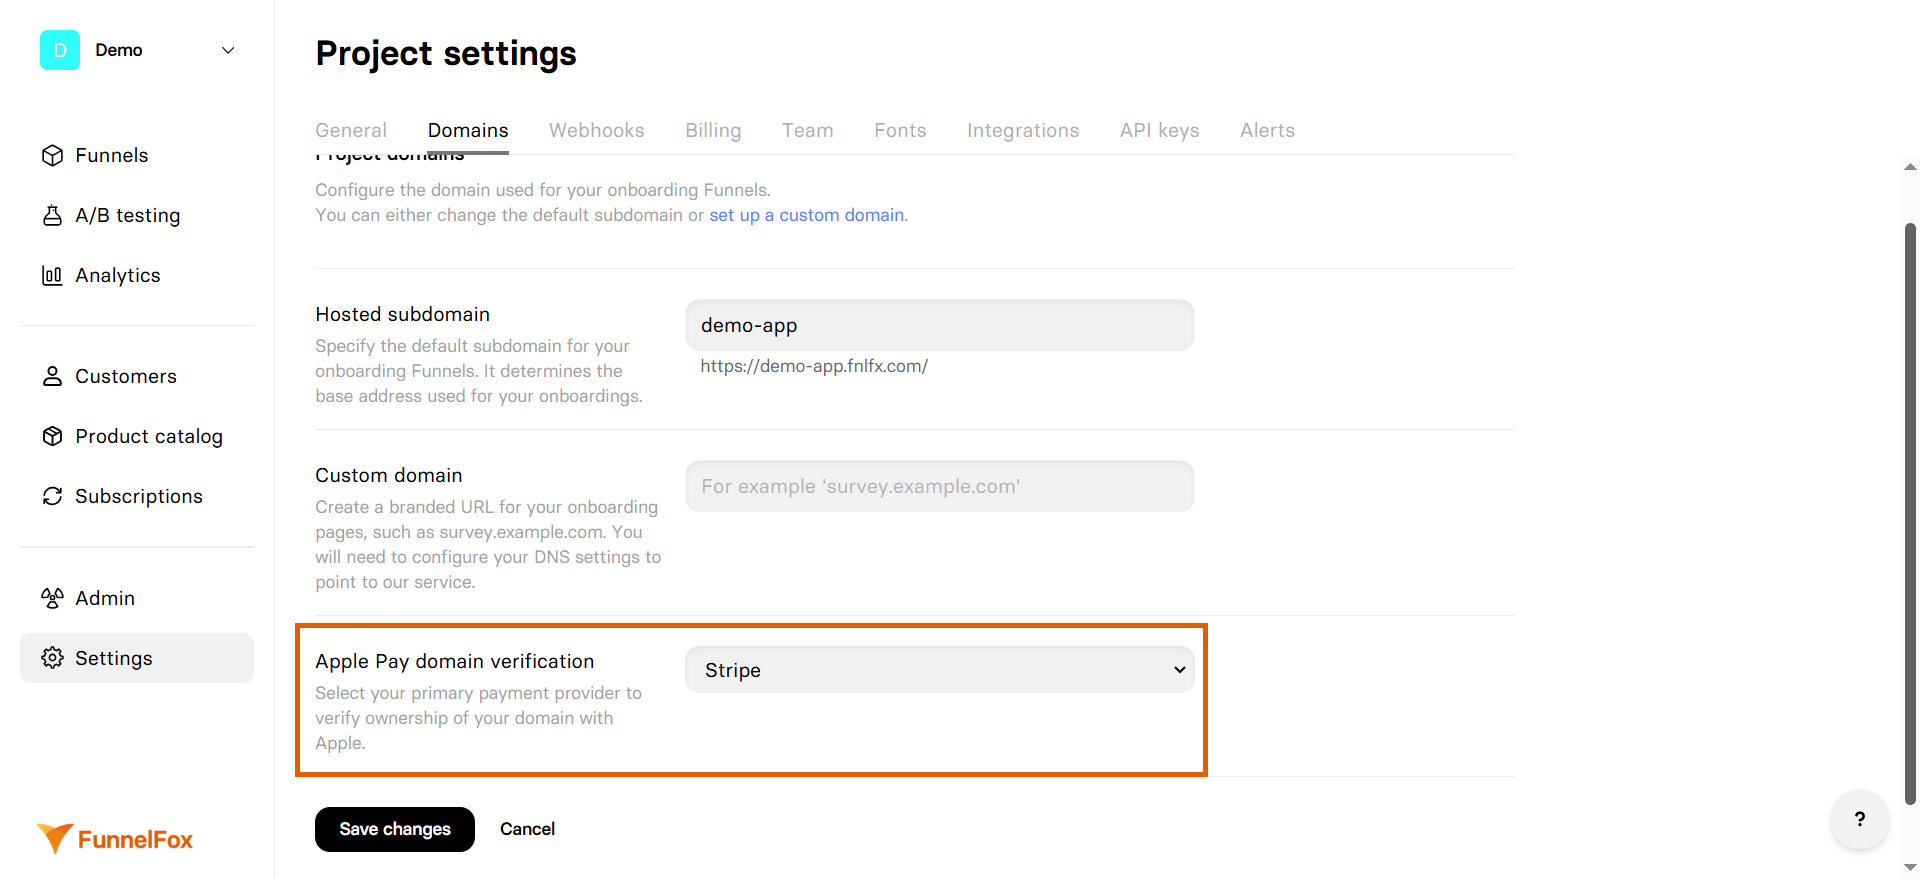
- Click Save.
Apple Pay Wallet button will become available in your funnels after domain verification completes.
Google Pay
Google Pay wallet buttons with Stripe works by default and requires no configuration. Simply add the Wallet button to your funnels.Stripe Link
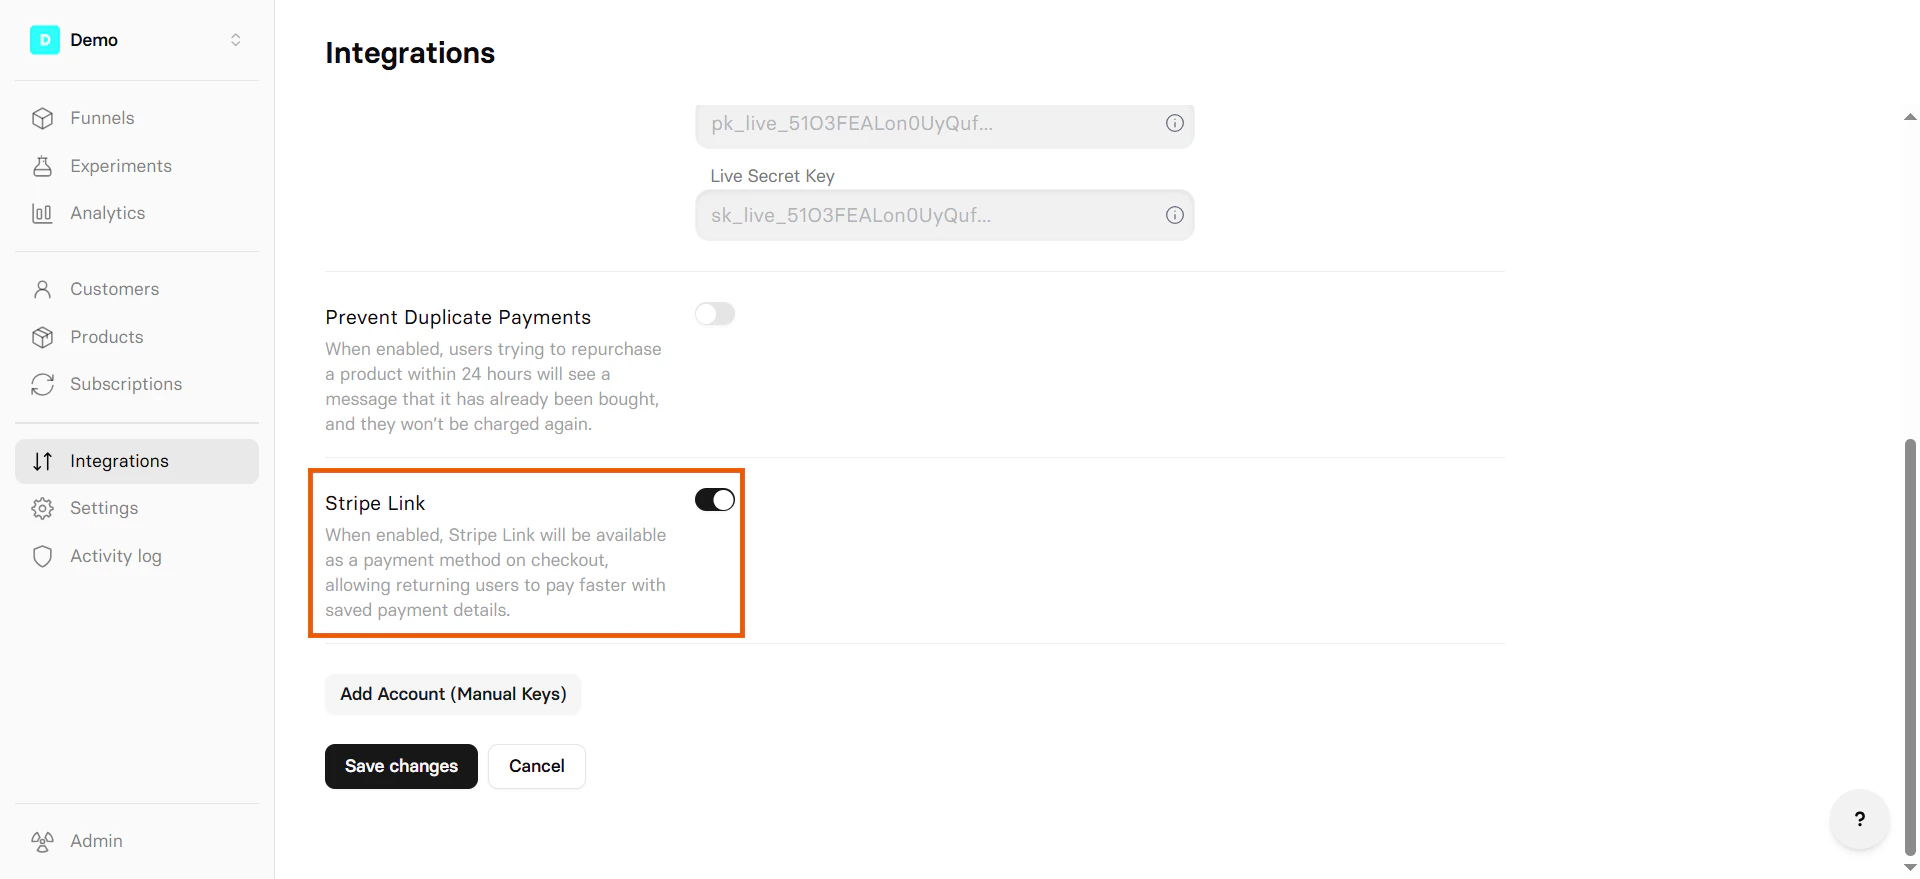
Stripe Link lets returning Stripe customers pay faster using their saved payment details. They do not need to re-enter their card or billing information, which helps improve conversion rates. You don’t need to configure anything extra in the Checkout element. Enabling Stripe Link in your integration settings makes it available as a checkout payment method on all funnels automatically. Customers who have previously saved their payment details with Stripe Link, even if they are new to your funnel, can complete their payment in just a few clicks.
Before enabling Stripe Link in FunnelFox, make sure the
Stripe Link payment method is activated
in your Stripe account. Note that Stripe Link is not available in India,
Brazil, and Thailand.
- Go to Integrations > Stripe in FunnelFox.
- Toggle on Stripe Link.
- Click Save changes.
- Republish your funnels.
Multiple Stripe accounts
Connect multiple Stripe accounts to support:- Different business entities
- Geographic separation
- Currency optimization
1
Add another Stripe account
- Go to Integrations > Stripe.
- Click Add Stripe account.
- Follow the setup steps for the new account.
2
Select account in your funnel
After adding accounts, you can switch between them in your funnel (separately for Sandbox and Production environments):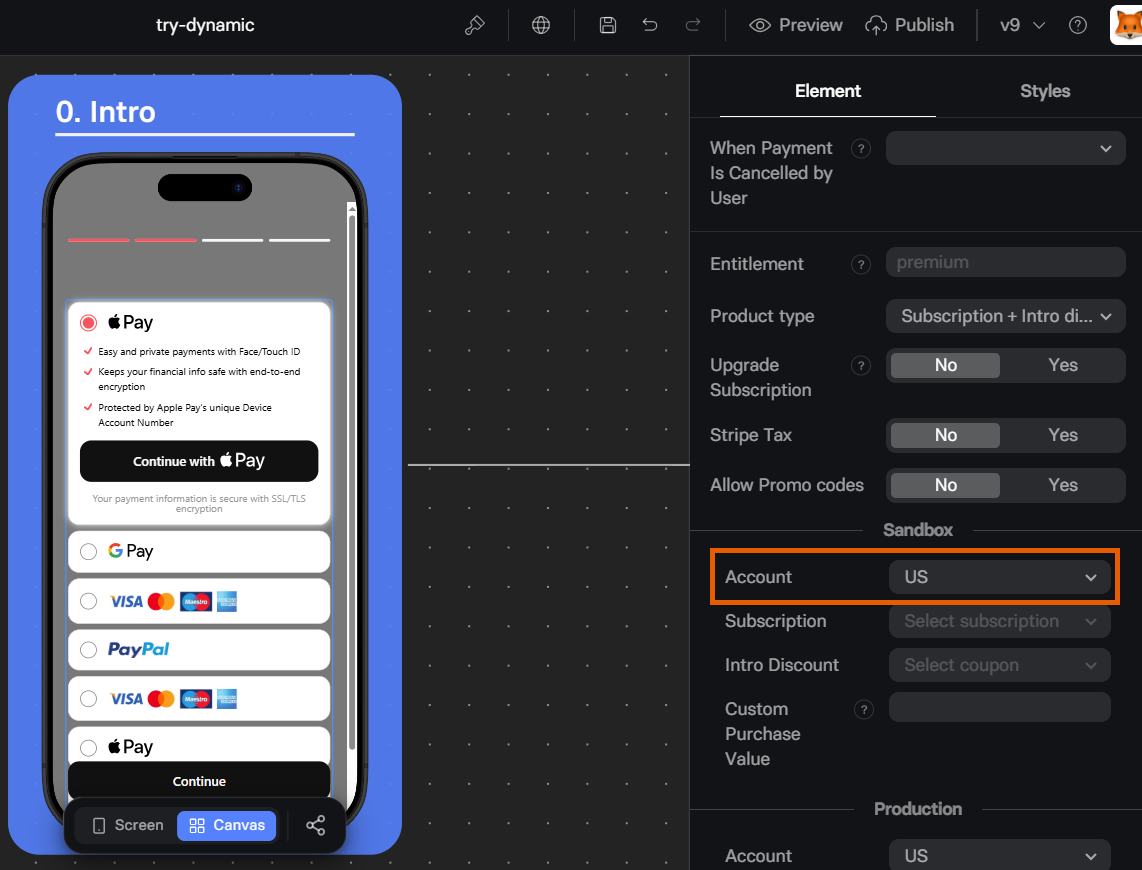
- In the Element tab of your Checkout
- In the Element tab of your Wallet Button
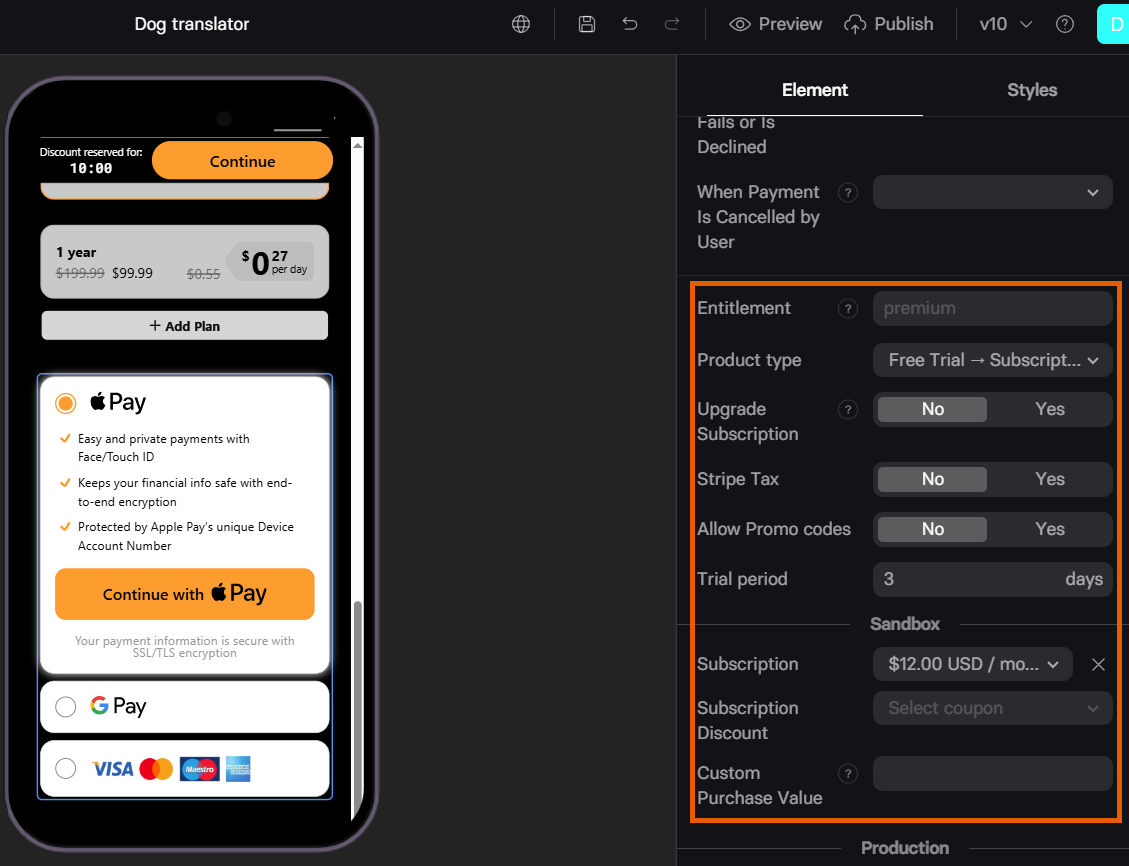
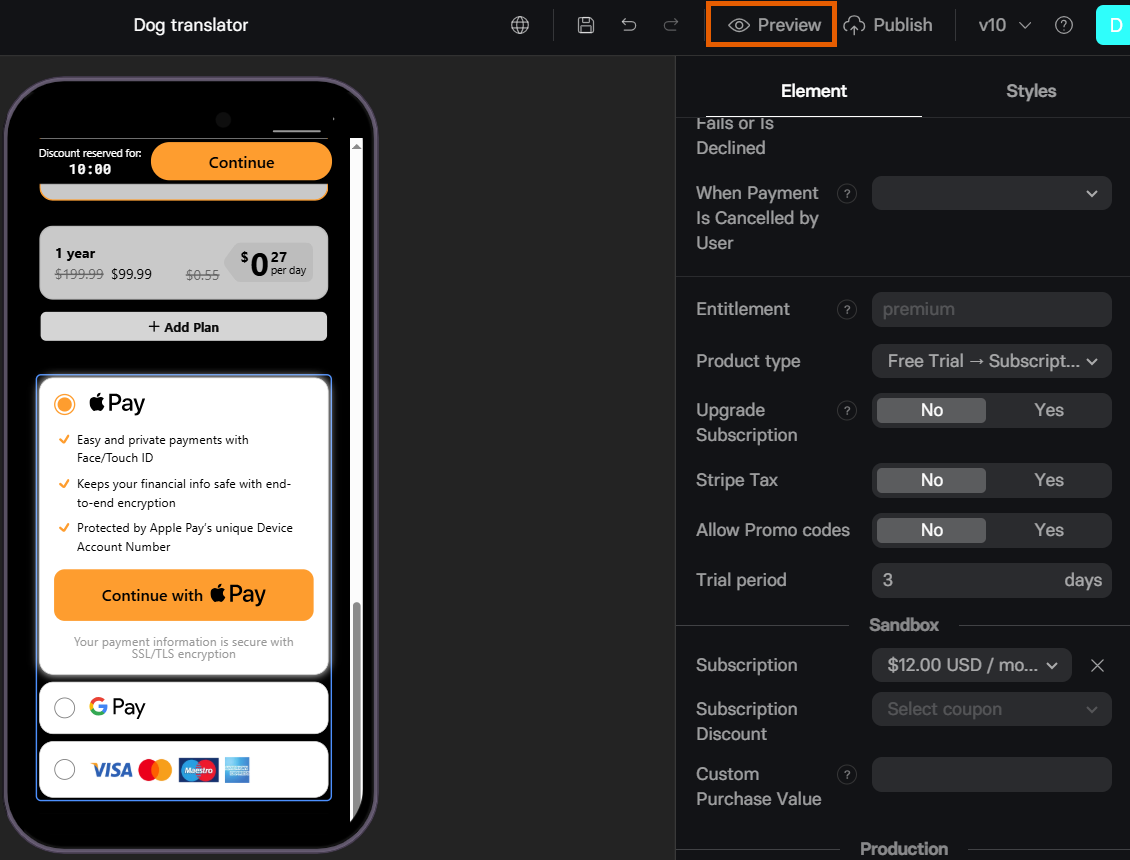
Stripe Tax
Stripe Tax automatically calculates taxes for you. Learn more about Stripe Tax and its pricing in the Stripe documentation. To enable Stripe Tax:1
Activate in Stripe Dashboard
- Go to Stripe Dashboard.
- Set up Stripe Tax. Learn about setting up Stripe Tax in Stripe Dashboard.
2
Enable in FunnelFox
- Go to the Checkout element in your funnels.
- Set Stripe Tax to Yes in the Actions section of the Element tab.
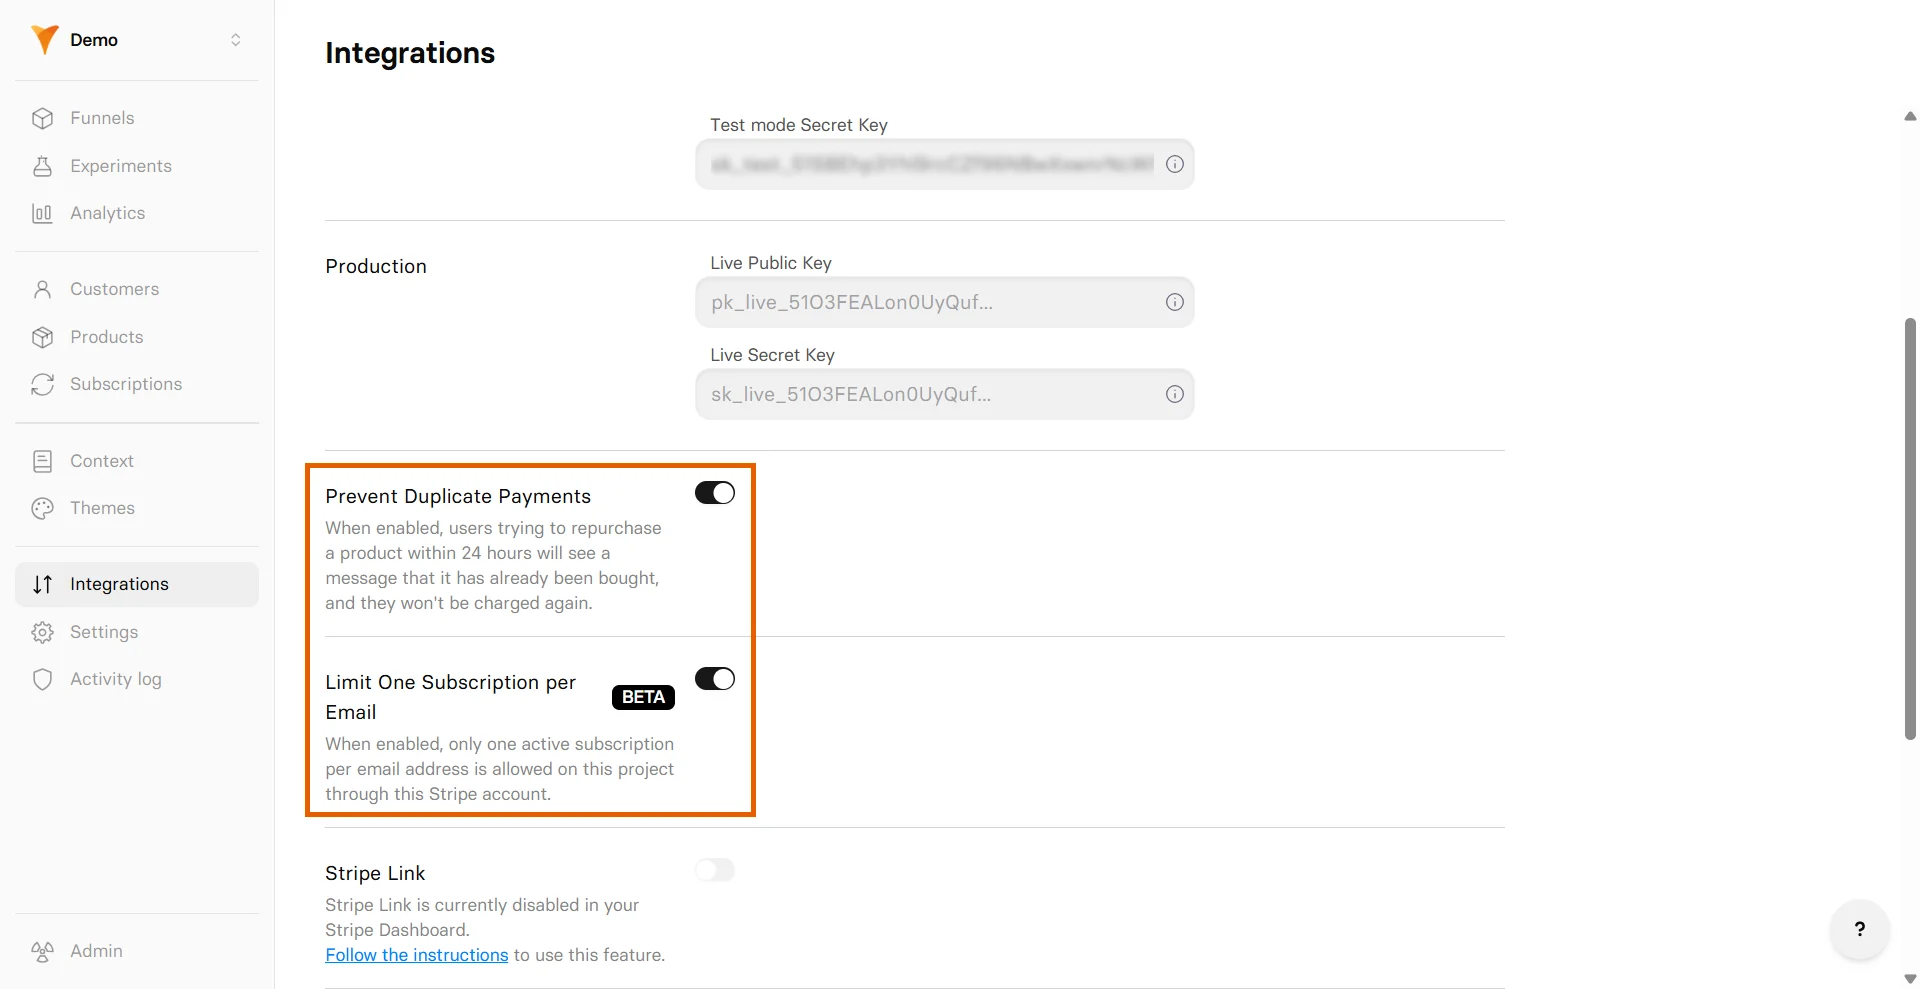
Prevent duplicate payments
Customers sometimes pay twice by double-clicking the purchase button or by starting a fresh checkout when they already subscribed. FunnelFox offers two ways for the Stripe integration to block both cases:- Prevent Duplicate Payments: Blocks a duplicate purchase that matches all of these: same customer, same product price, and same purchase date. Covers accidental double-clicks before Stripe confirms the first payment.
- Limit One Subscription Per Email: Blocks a new purchase if the customer’s email already has an active, trialing, or paused subscription in your project. Plan upgrades, one-time payments, and customers whose previous subscription is canceled or expired are not affected.
Limit One Subscription Per Email only works if the customer’s email is captured in the funnel before checkout.
- Go to Integrations > Stripe.
- Toggle on Prevent Duplicate Payments or Limit One Subscription Per Email.
Customers see these alerts when a duplicate is prevented:
- Duplicate payment: “You have already purchased this item. You won’t be charged again.”
- Duplicate subscription: “You already have an active subscription.”
Testing
Test your Stripe integration with simulated payments before going live.- Configure the test in your Checkout element’s Sandbox section.
- Open your funnel in Preview mode.
- Use these Stripe test cards with any future expiry date and any 3-digit CVV:
Learn more about Stripe test cards.
Metadata
FunnelFox sends the following customer metadata with purchases to Stripe: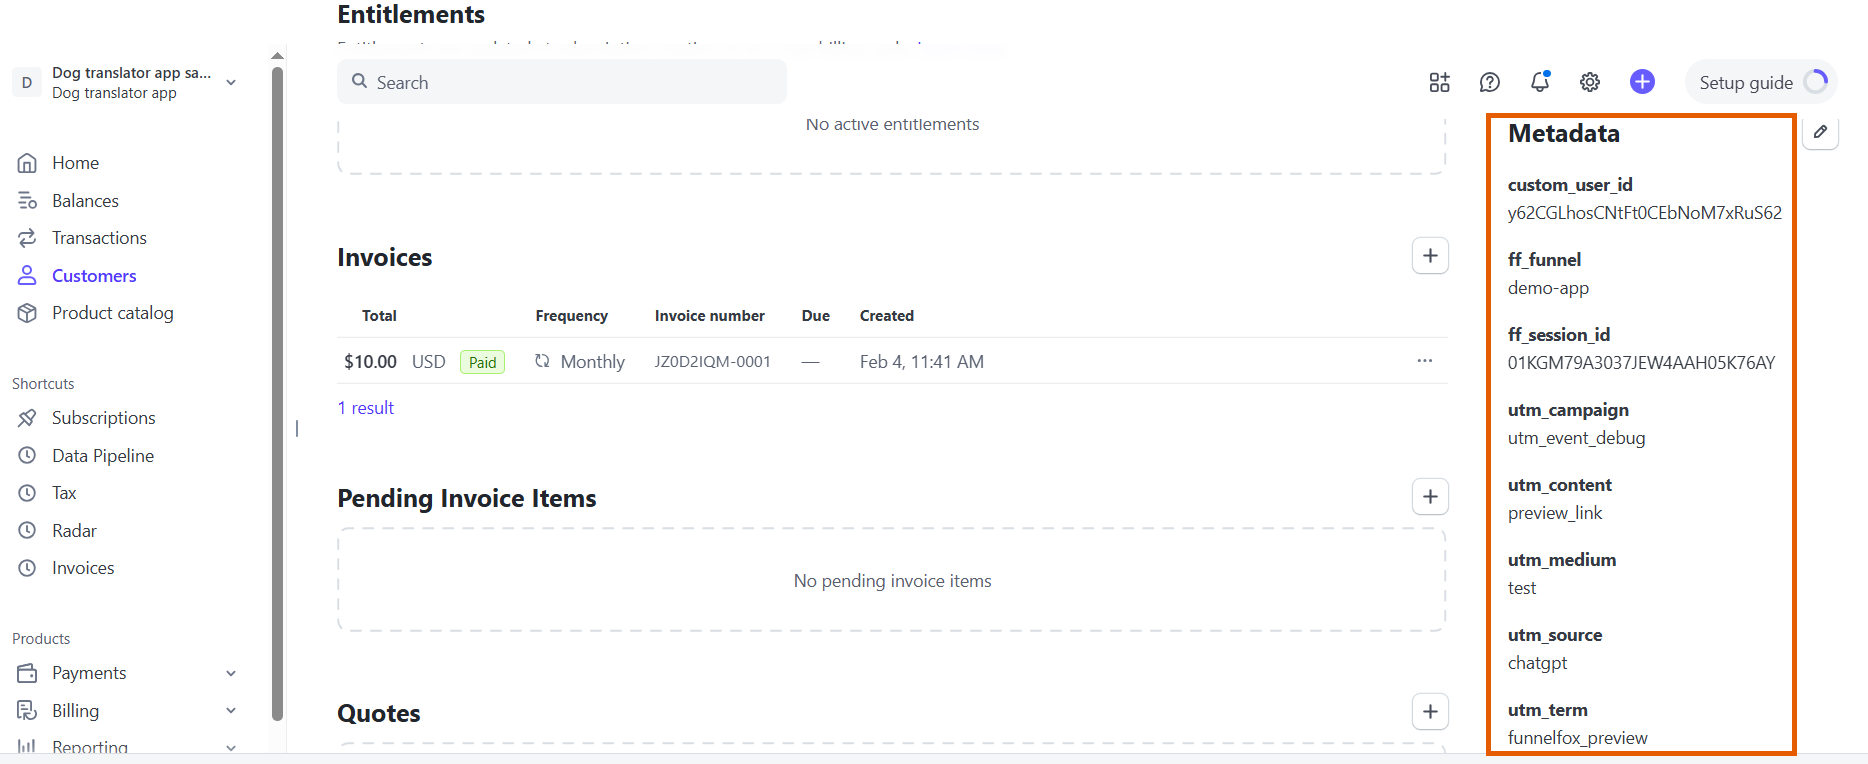
Troubleshooting
Can't find my production account with test mode when connecting Stripe
Can't find my production account with test mode when connecting Stripe
You will not see your production account in test mode when connecting a Stripe Sandbox account. Stripe recommends using sandbox accounts for testing purposes instead of production accounts in test mode.
Can I show customers multiple currencies with Stripe
Can I show customers multiple currencies with Stripe
Yes. To show relevant currencies for each user locale, follow our pricing localization guide.
I don't have products available for testing under the Sandbox section of my Checkout
I don't have products available for testing under the Sandbox section of my Checkout
Products used in funnel preview are fetched from your Stripe Sandbox account. Make sure the products are created there.
Checkout appears instead of one-click upsell with Stripe
Checkout appears instead of one-click upsell with Stripe
Stripe allows you to upsell both one-time products and subscription upgrades. By default, customers don’t need to provide their payment details again and will be charged with just one click.If the upsell payment is declined, for example due to insufficient funds after the initial purchase, the checkout pop-up is shown again so the customer can retry.
Next steps
- Configure checkout element in your funnel
- Set up Stripe Managed Payments