How localization works
Localizing a funnel is simple:- Create locales for your funnel: Add the countries and languages you want to support. For fast setup, you can translate content automatically with AI. Learn about managing locales and AI translation.
- Automatic detection at runtime: When a visitor lands on your funnel, FunnelFox reads their country (from IP) and language (from the browser) to pick the best locale. Learn about locale matching logic.
- Localize prices: Show the right currency and price for each locale. Create currency-specific prices in Stripe, then select the matching price in your Checkout element for that locale. See the pricing localization section.
Localized content is part of your funnel’s static build.
You must republish after making localization changes for them to go live.
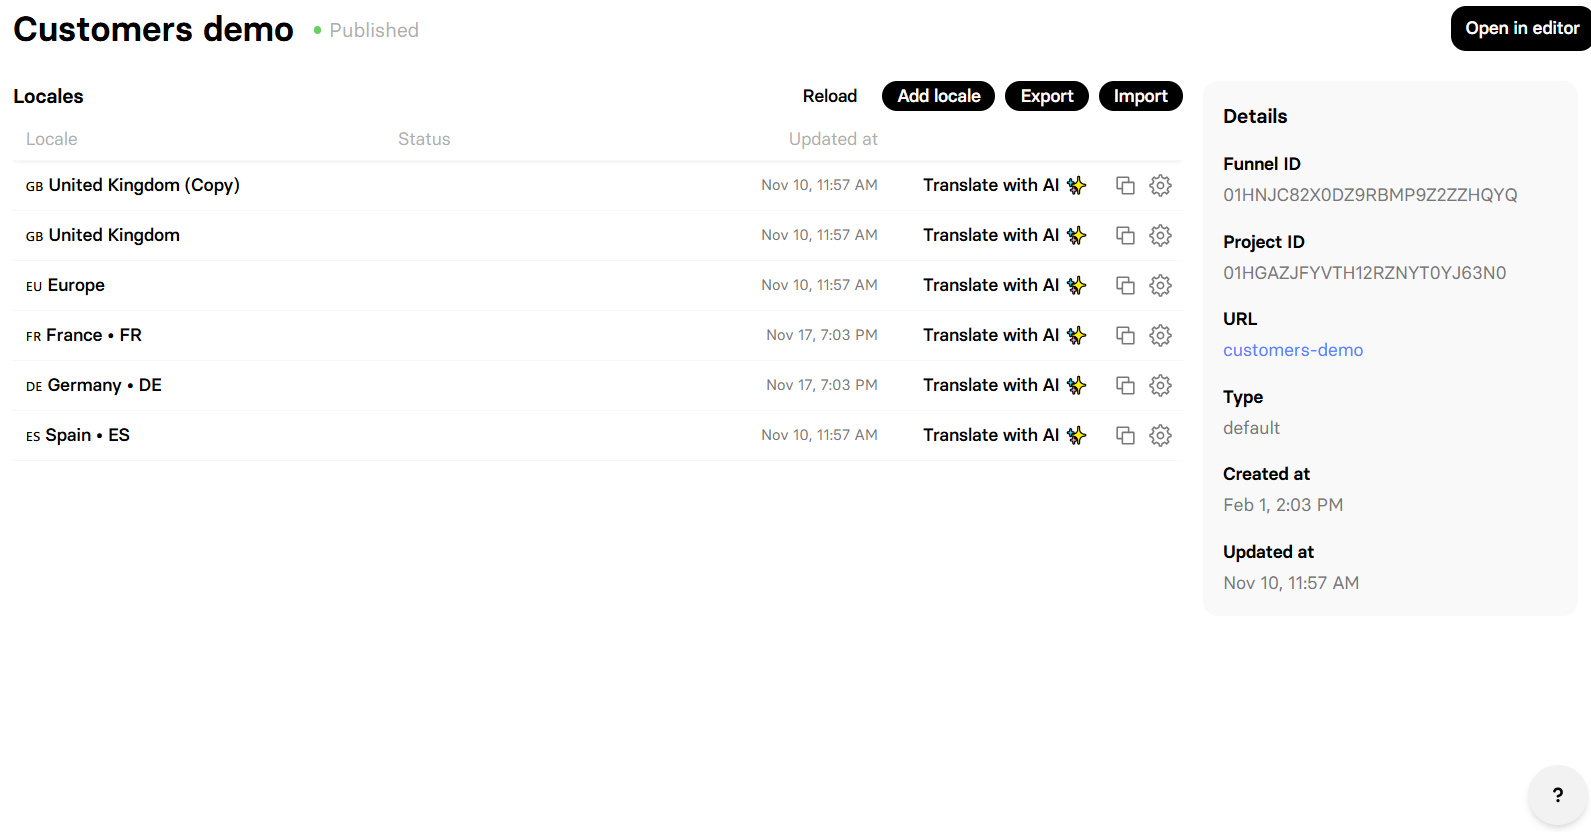
Manage locales
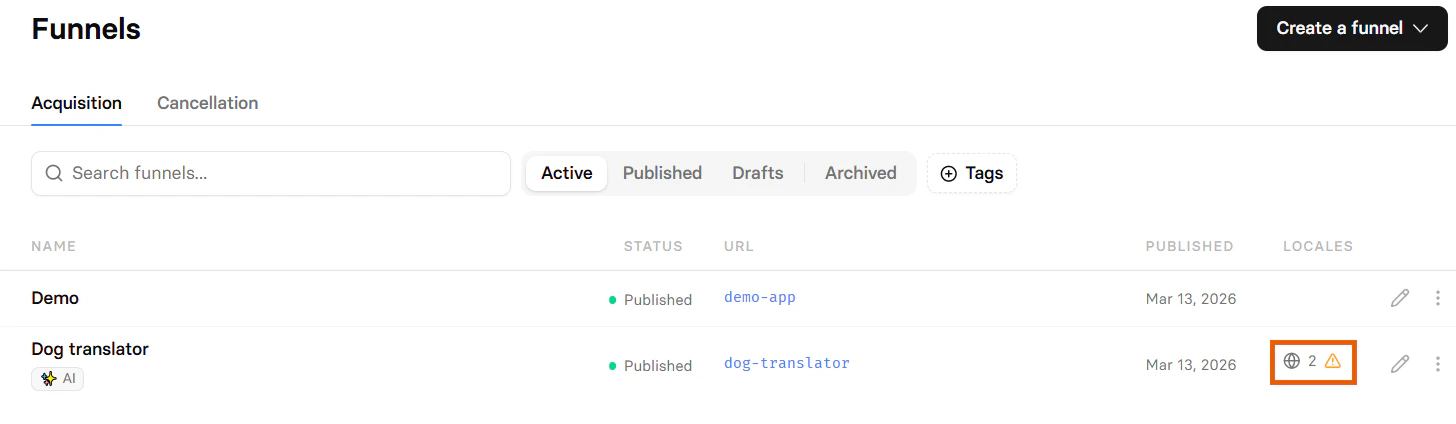
To manage locales, either:- Click the 🌐︎ locales icon in your Funnels list (if you have any locales).
- Hover over the 🌐︎ globe icon at the top of the Visual editor and click Manage locales.
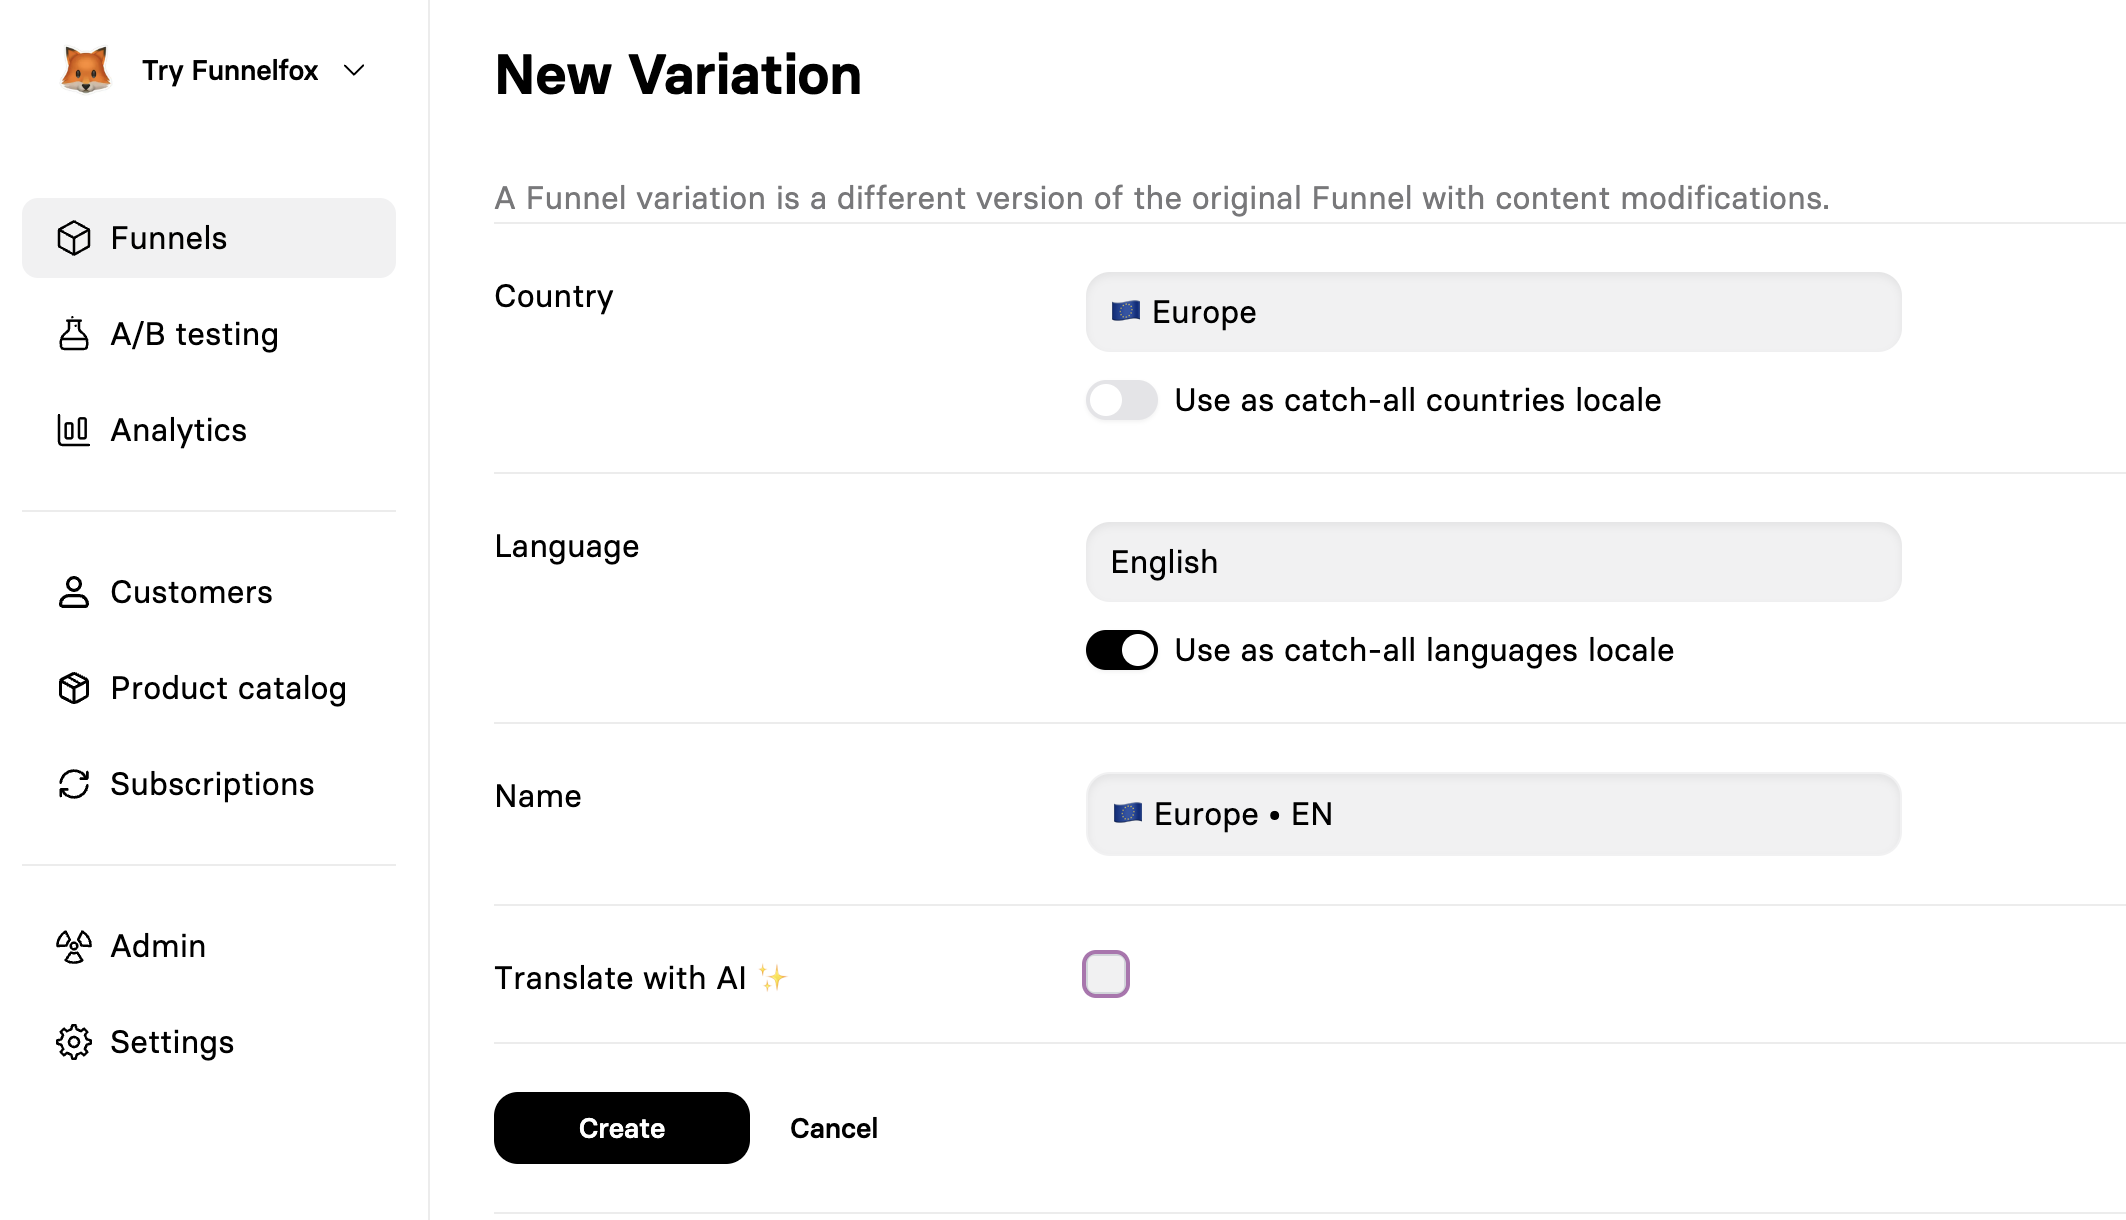
Add new locale
- Click Add locale.
- Select Country.
- Select Language.
- Optionally enable catch-all for broader matching.
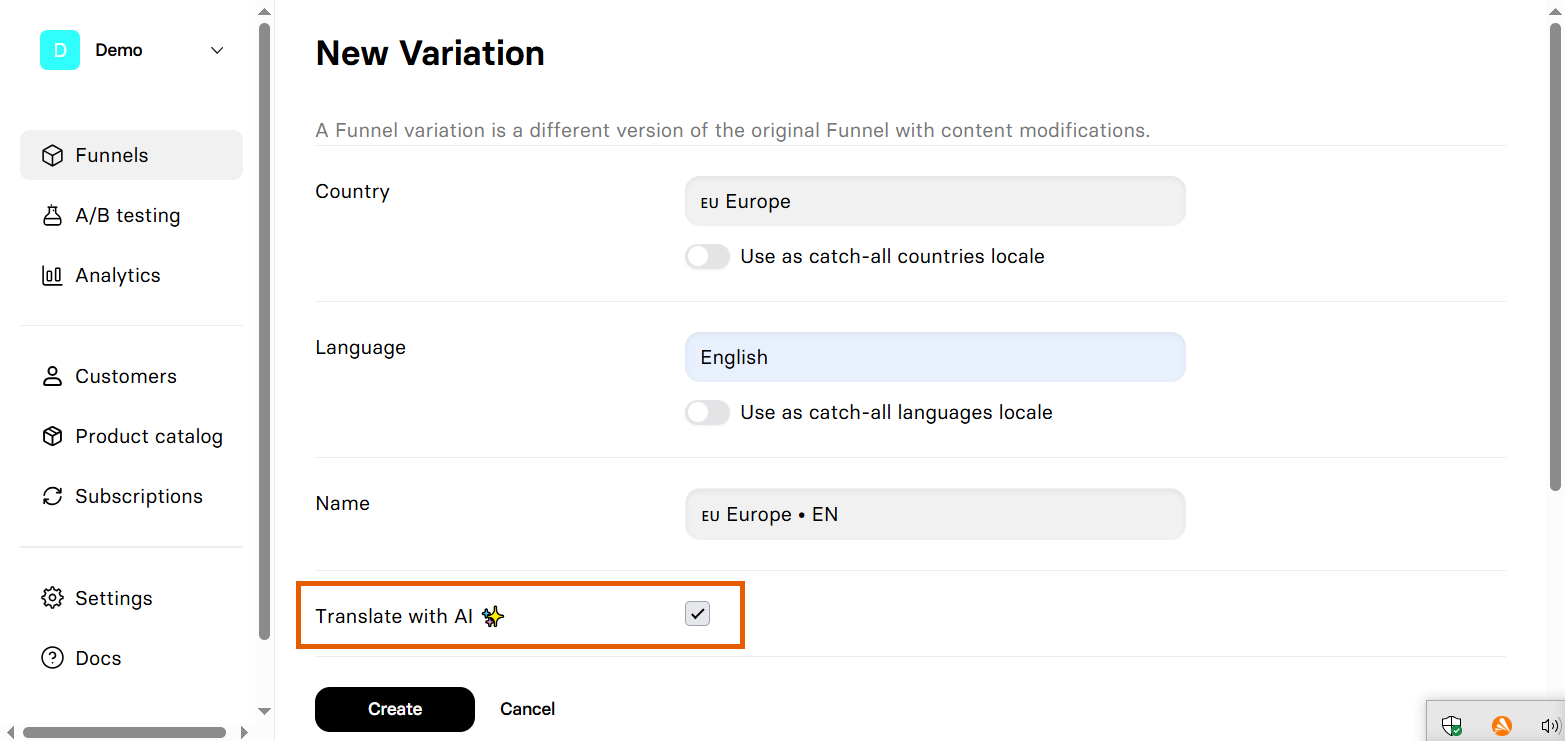
- Choose whether to Translate with AI for instant translation.
Edit localization
To edit content in a specific locale, switch between locales using the 🌐︎ globe icon in the editor toolbar:- All text content (headlines, paragraphs, buttons)
- Images and media files
- Input placeholders and labels
- Option lists in dropdowns/radio buttons
- Error messages
- Meta tags and SEO content
- Screen structure or flow
- Number of elements
- Element types or positions
- Actions and triggers
- Form field requirements
Locale matching
FunnelFox picks a locale from the visitor’s country (IP) and language (browser). It checks rules top to bottom and uses the first match. Enabling catch-all on a dimension makes it accept Any value.
When testing locale matching, use a private/incognito mode or clear your cookies and browser data to ensure accurate results.
Right-to-left languages (Arabic, Hebrew, Farsi, Urdu, and others) automatically render with reversed text and progress bar direction based on the locale’s language.
You can override automatic selection for testing or sharing by adding a URL parameter, e.g.
?ff-locale=de-DE. Learn more about overriding locales via URL.AI translation
FunnelFox includes built-in AI translation for fast localization:- During locale creation: Enable Translate with AI when creating a new locale to instantly translate all content.
- From the funnel page: Open the funnel in your Funnels list and click Translate with AI on any existing locale to retranslate all content or only missing keys.
AI translation doesn’t translate content inside Raw HTML elements. You’ll need to translate that content manually by editing the locale.
Pricing localization
To localize prices in FunnelFox, first create prices for each currency you need in Stripe. Learn more about prices in Stripe.
- Open the locale in the Editor.
- In the Element tab of the Plan picker, update the currency and prices.
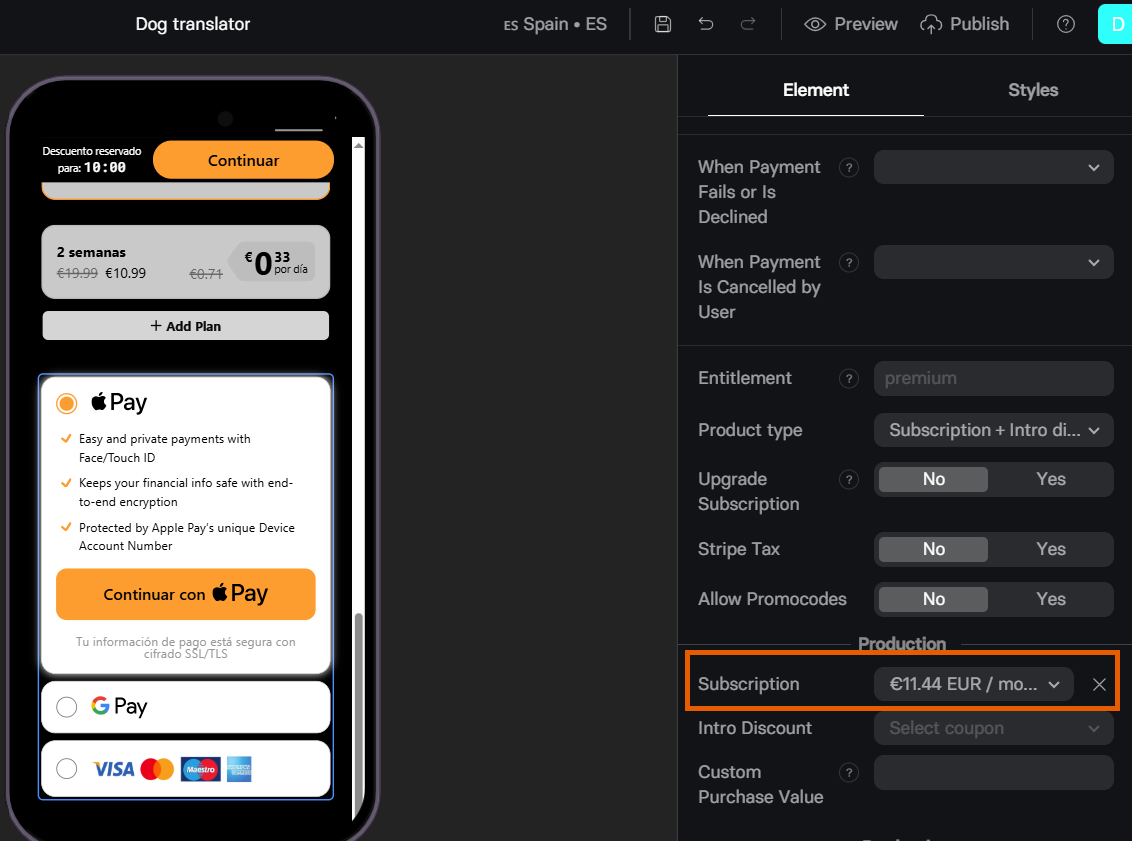
- Go to the Actions section in the Element tab of Checkout.
- From the Subscription dropdown, select the Stripe price in the relevant currency.
- Optionally, set Visibility to Conditional for both Plan picker and Checkout, and choose specific countries if you want localized pricing to appear only for certain visitors of that locale.

- Save and republish to go live.
Override locale via URL
For published funnels, you can override automatic locale detection by passing theff-locale parameter in the URL query string. This is useful for:
- Testing different language versions without VPN
- Sharing direct links to specific language versions
- Quality assurance and review workflows
- Customer support scenarios
?ff-locale= followed by the locale code to the public URL:
ff-locale parameter accepts standard ISO language codes in the format:
language-COUNTRY(e.g.,en-US,de-DE,fr-FR)languageonly (e.g.,en,de,fr)
The
ff-locale parameter must match one of your configured locales. If an
invalid or non-existent locale is provided, FunnelFox falls back to
automatic detection.How override works
When a locale is set via URL parameter:- It overrides geographic and browser language detection
- The preference persists throughout the funnel session
- Subsequent page navigations maintain the selected locale
- The parameter doesn’t need to be included on every page
Examples
Direct link to German version:Import/export translations
For professional translations or bulk editing, use the import/export feature.Content inside Raw HTML elements can’t be imported or exported. Translate that content manually by editing the locale instead.
Export
- Open the funnel in your Funnels list.
- Click Export.
- Receive a TSV (Tab-Separated Values) file.
- Key: Unique identifier (don’t modify it)
- Default column: Original text
- Locale columns: Translated text for each locale
Import
- Ensure TSV maintains the exact structure.
- Open the funnel in your Funnels list.
- Click Import and select your file.
- Review changes in the editor
- Republish to make changes live
Test locales
Use a private/incognito window or clear your cookies and browser data, then follow one of the testing methods below.Test different locales
- URL Parameter: Add
?ff-locale=xx-XXto force a specific locale for your published funnel - Use VPN: Connect from different countries to trigger geo-detection
- Change browser language: Modify browser’s language preferences
- Use different devices: Test with colleagues in other locations
- Browser extensions: Use header modification tools to change Accept-Language
Preview mode test
Preview mode uses the same locale detection logic as production, but it does not support the locale URL parameter.Locale identifiers
Your webhooks and API responses include:locale: Full locale name (e.g., “Germany • DE”)locale_code: ISO format (e.g., “de-DE”)
Troubleshooting
Translations not showing after publish
Translations not showing after publish
Ensure you republished the funnel after making localization changes.
Check that your test location/language matches your locale rules.
Wrong locale displayed to visitors
Wrong locale displayed to visitors
Review your locale priority rules. More specific rules (exact country +
language) take precedence over catch-all rules.
Publishing fails because of an unsaved locale
Publishing fails because of an unsaved locale
A locale with unsaved changes blocks publishing. Open the funnel, save
every locale, then publish again. If a publish fails, check your
locales first.