Use cases
Perfect for:- Limited offers - “50% off ends in…”
- Expiring bonuses - “Free add-ons available for…”
- Product launches - “Early bird pricing ends…”
Create timers
Set up your timer by adding the element and configuring its content and behavior.1. Add timer
1
Add element
Prompt the AI Chat in Editor to add a Timer element.Or open the Layers tab, click + Add element and go to All > Timer.
2
Select Timer type
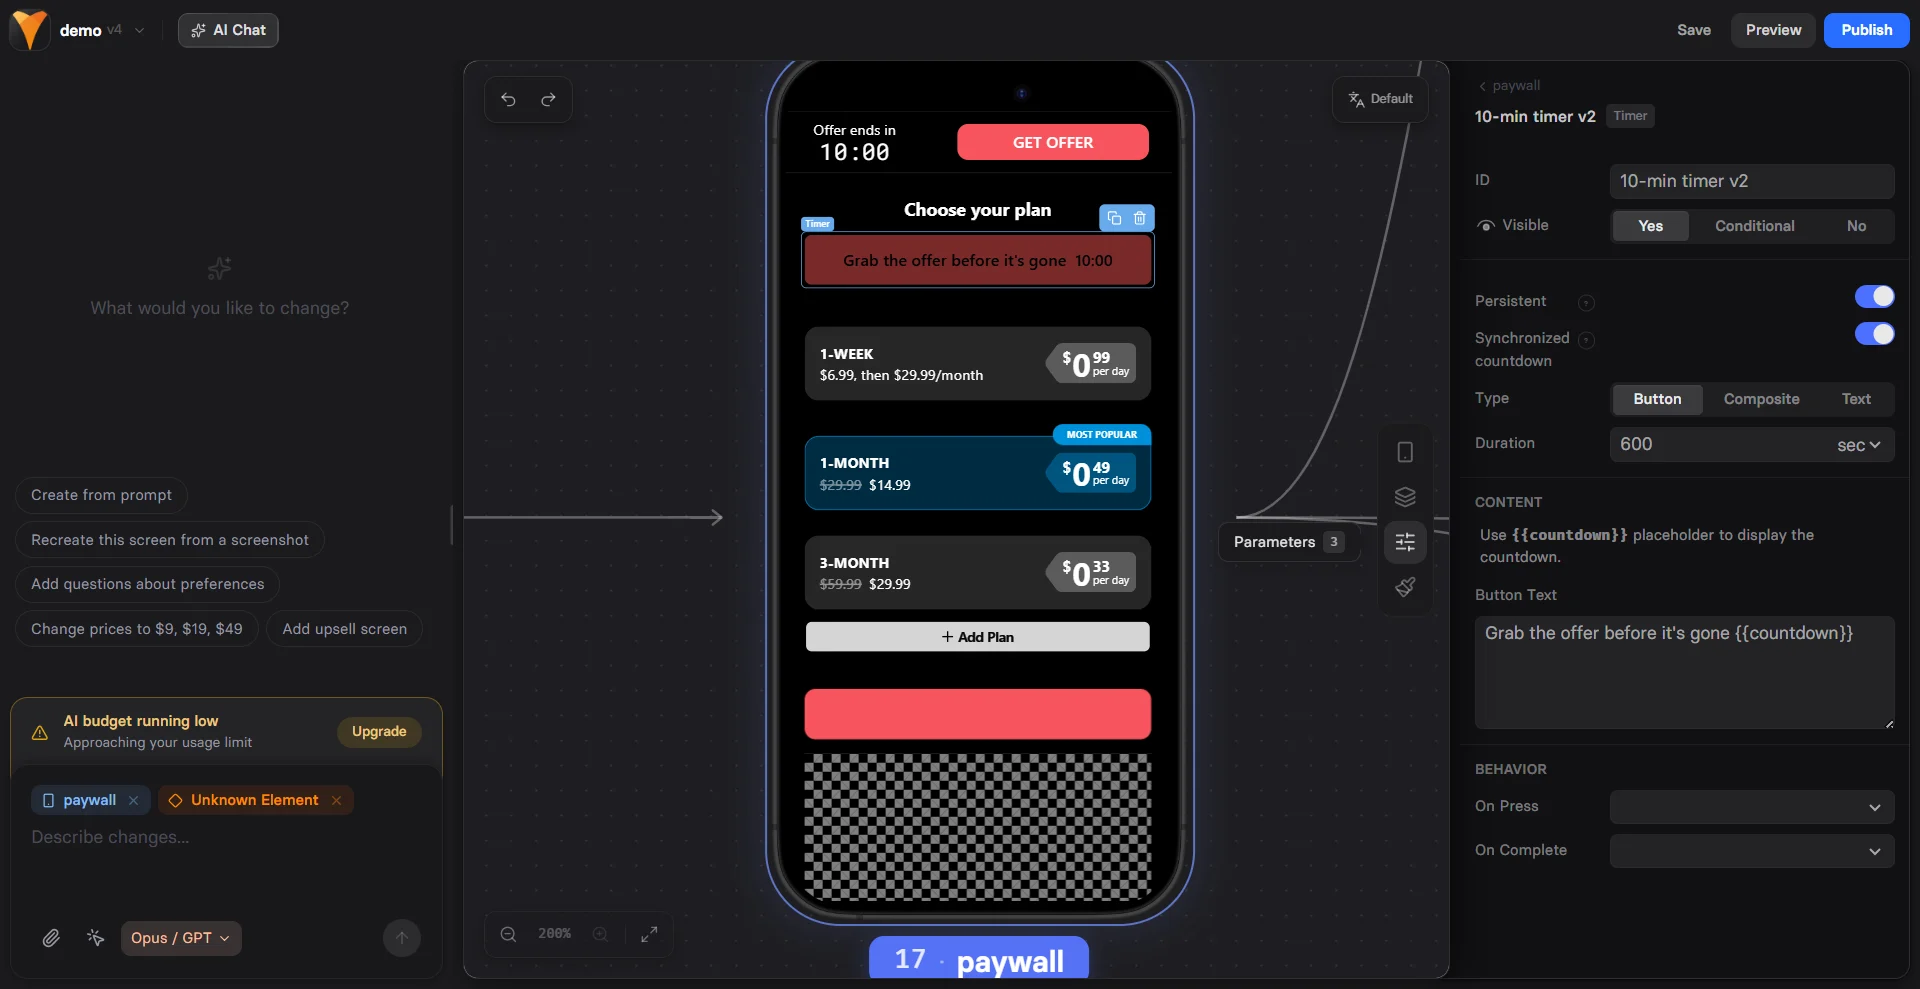
Select the timer type in the Parameters tab on the right:
- Button: Countdown displayed on a button.
- Composite: Button + text for maximum visibility.
- Text: Inline countdown in text.
2. Configure timer
Go to the Parameters tab on the right and configure:- Persistent: When enabled, the timer preserves its time after a page refresh or when the visitor returns.
- Duration: Timer length in seconds or minutes.
- Text: Inline label that displays the countdown. Use the
{{countdown}}placeholder. - Button Text: Button label that displays the countdown. Use the
{{countdown}}placeholder. - On Press: Configure actions that run when the button is pressed, such as navigating the user, revealing hidden elements, and more.
- On Complete: Configure actions that run when the timer reaches zero.
- Synchronized countdown: Syncs the timer start time across all pages in this funnel. When disabled, each timer starts when the user first views it.
3. Timer layout
Go to the Styles tab to customize the visual appearance of the element, button, text, and countdown.Troubleshooting
Timer resets when page is refreshed
Timer resets when page is refreshed
Check the Persistent setting. When enabled, the timer preserves its time after a page refresh or when the visitor returns.
Timers show different times across pages
Timers show different times across pages
Check the Synchronized countdown setting. When enabled, all timers in the funnel start at the same time. When disabled, each timer starts when the user first views it.