Sandbox
Follow these steps to set up FunnelFox Billing in your Sandbox environment.1. Get Primer invitation
Your Solution Manager will send you an email invitation to Primer.io. This is a dedicated Primer Sandbox account we create for your FunnelFox Billing setup.2. Connect your Stripe to Primer
You can optionally connect a different payment provider instead of Stripe using similar setup steps.
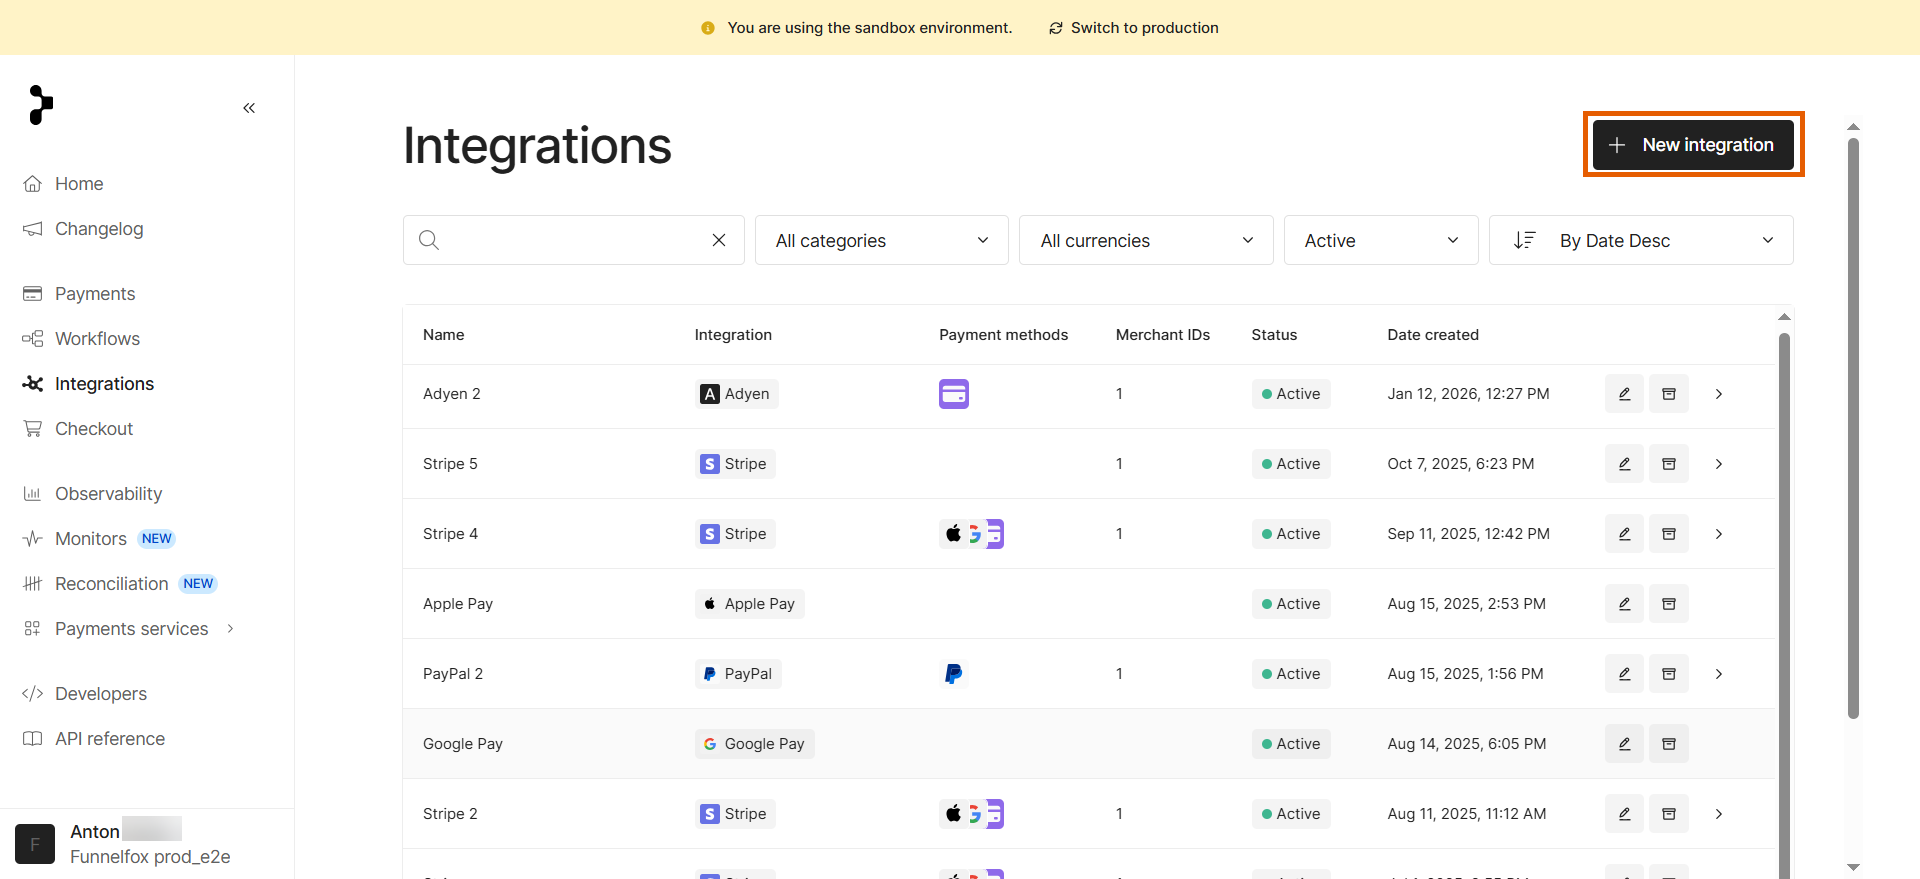
- Go to the Integrations page in the Primer account we created for you.
- Click + New integration at the top right.
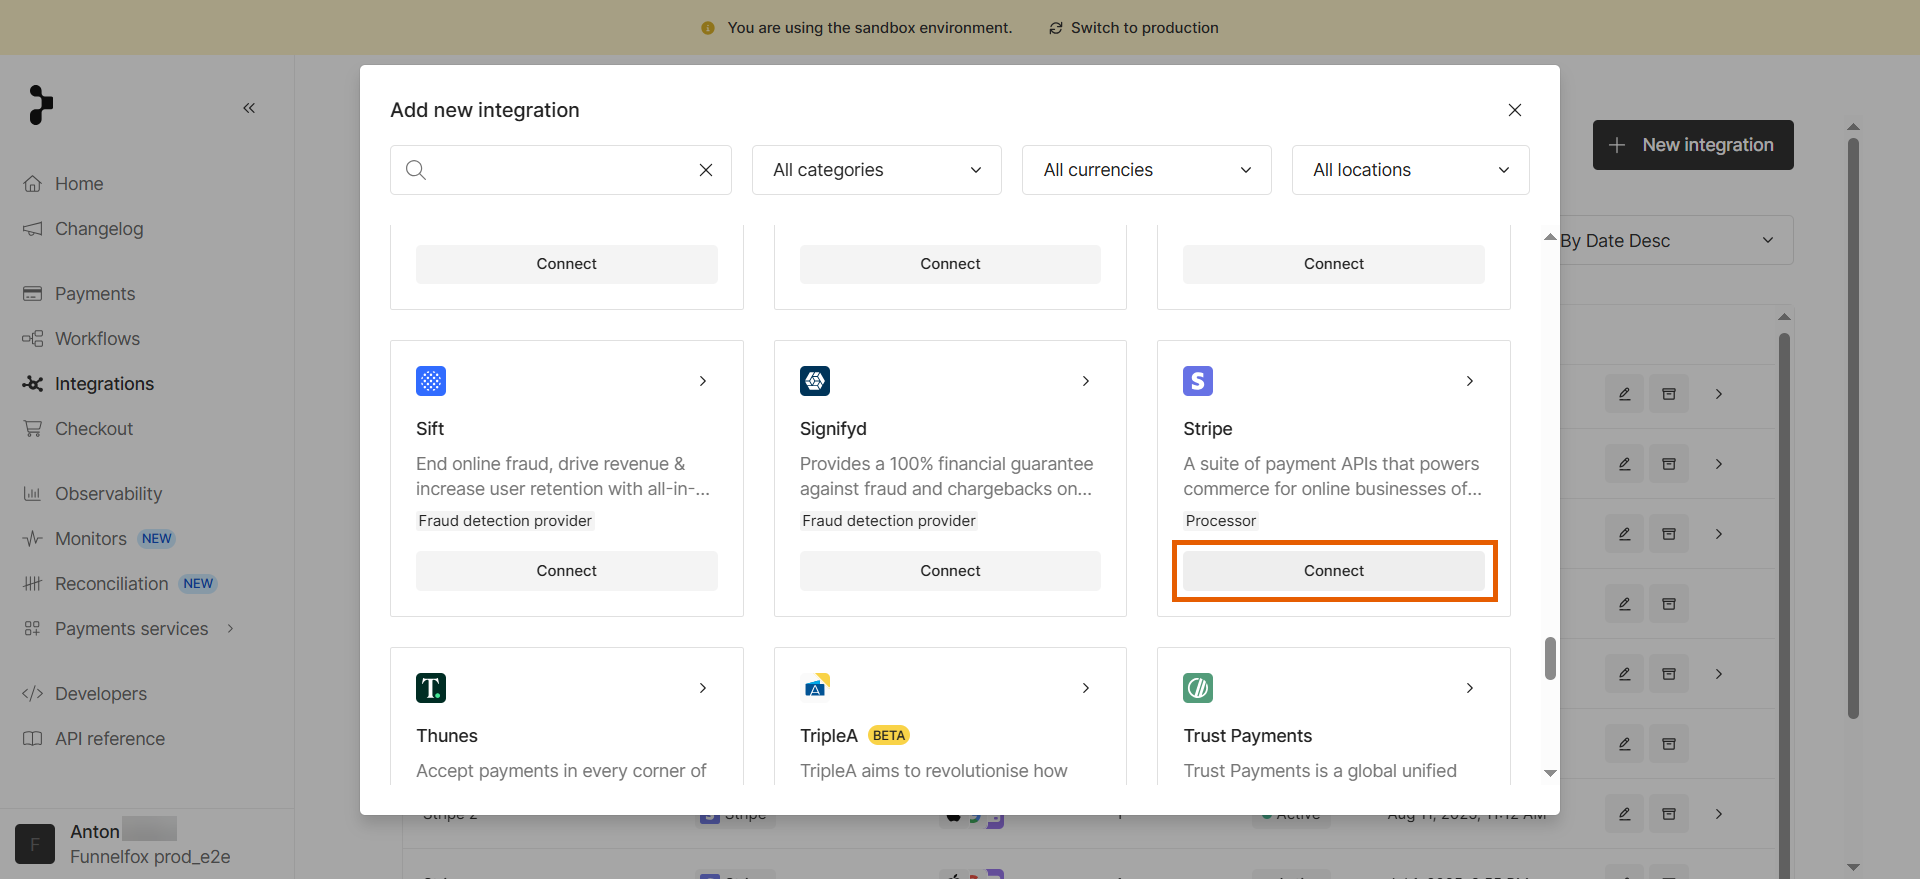
- Click Connect under Stripe.
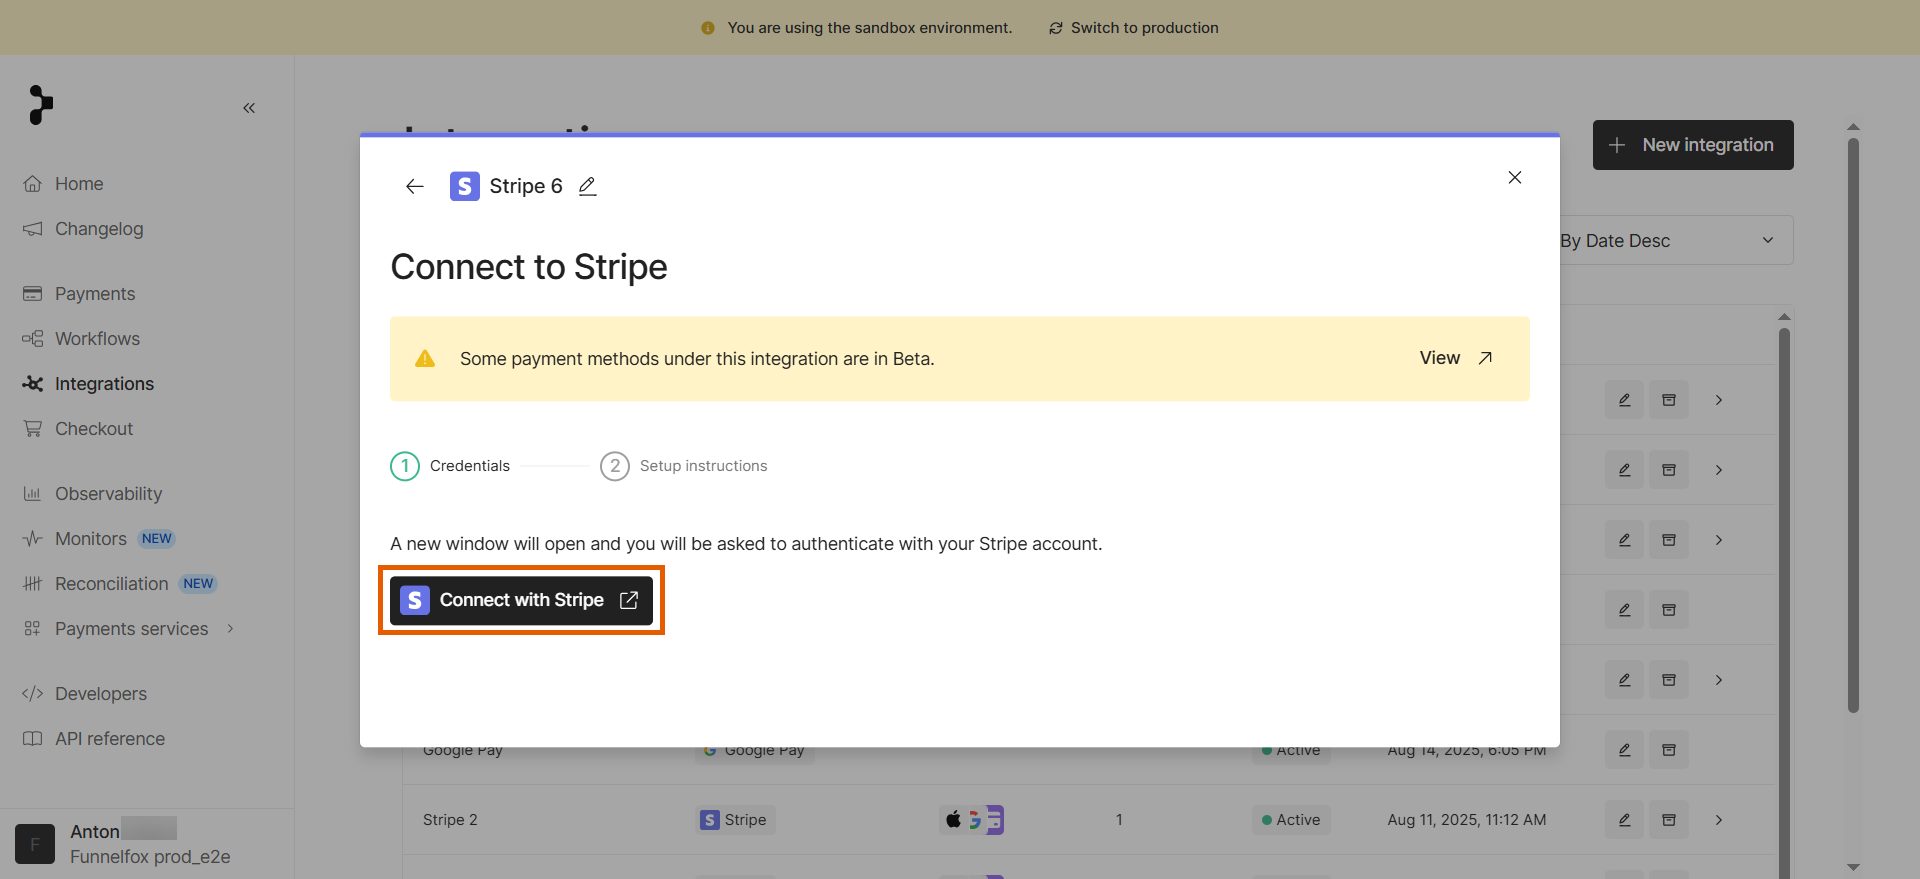
- Click Connect with Stripe.
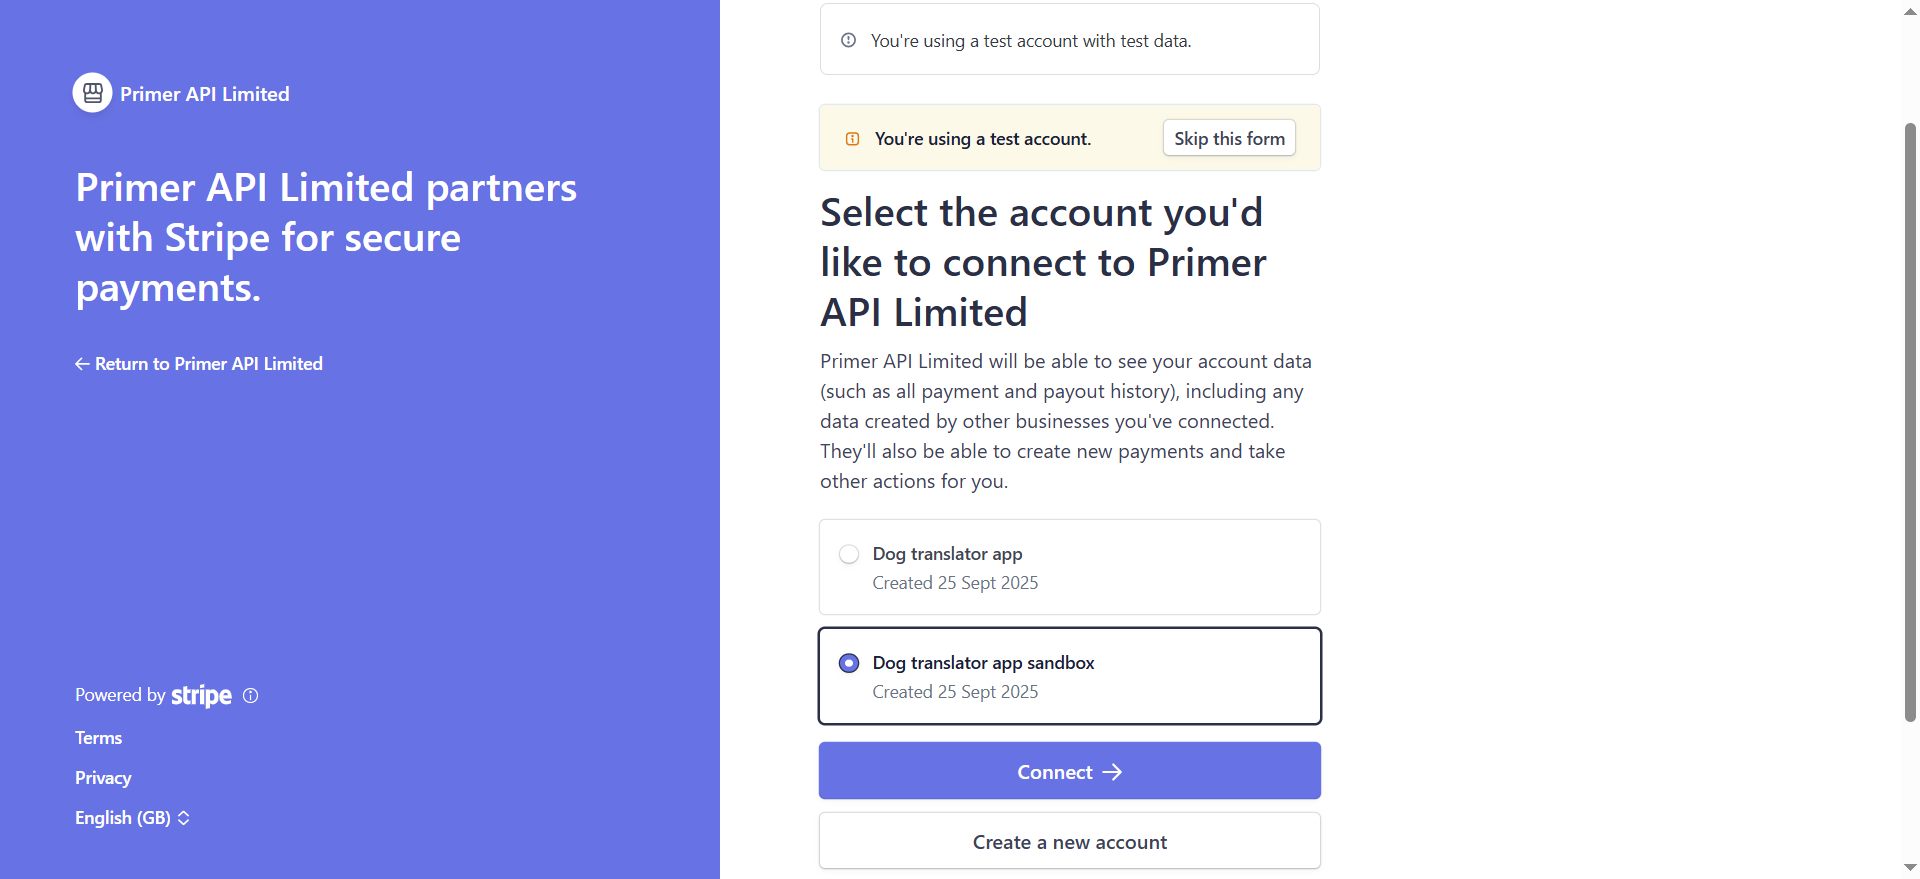
- Select your sandbox account and click Connect.
3. Set up Primer webhook
- Click + Add destination on the Developers > Webhooks page in Stripe.
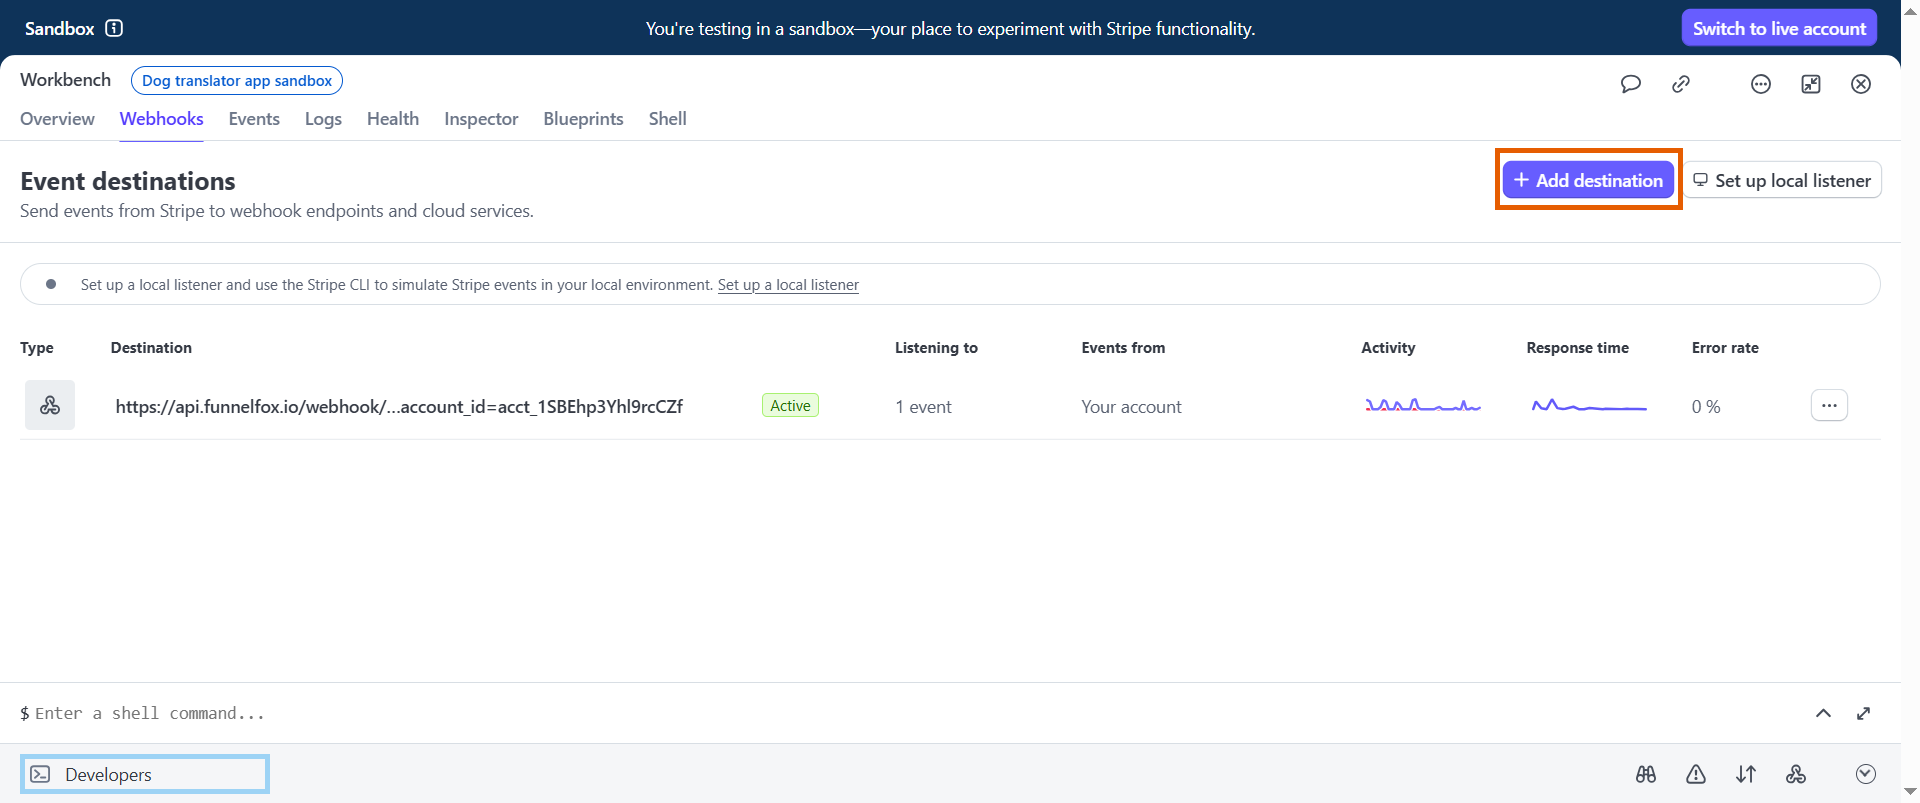
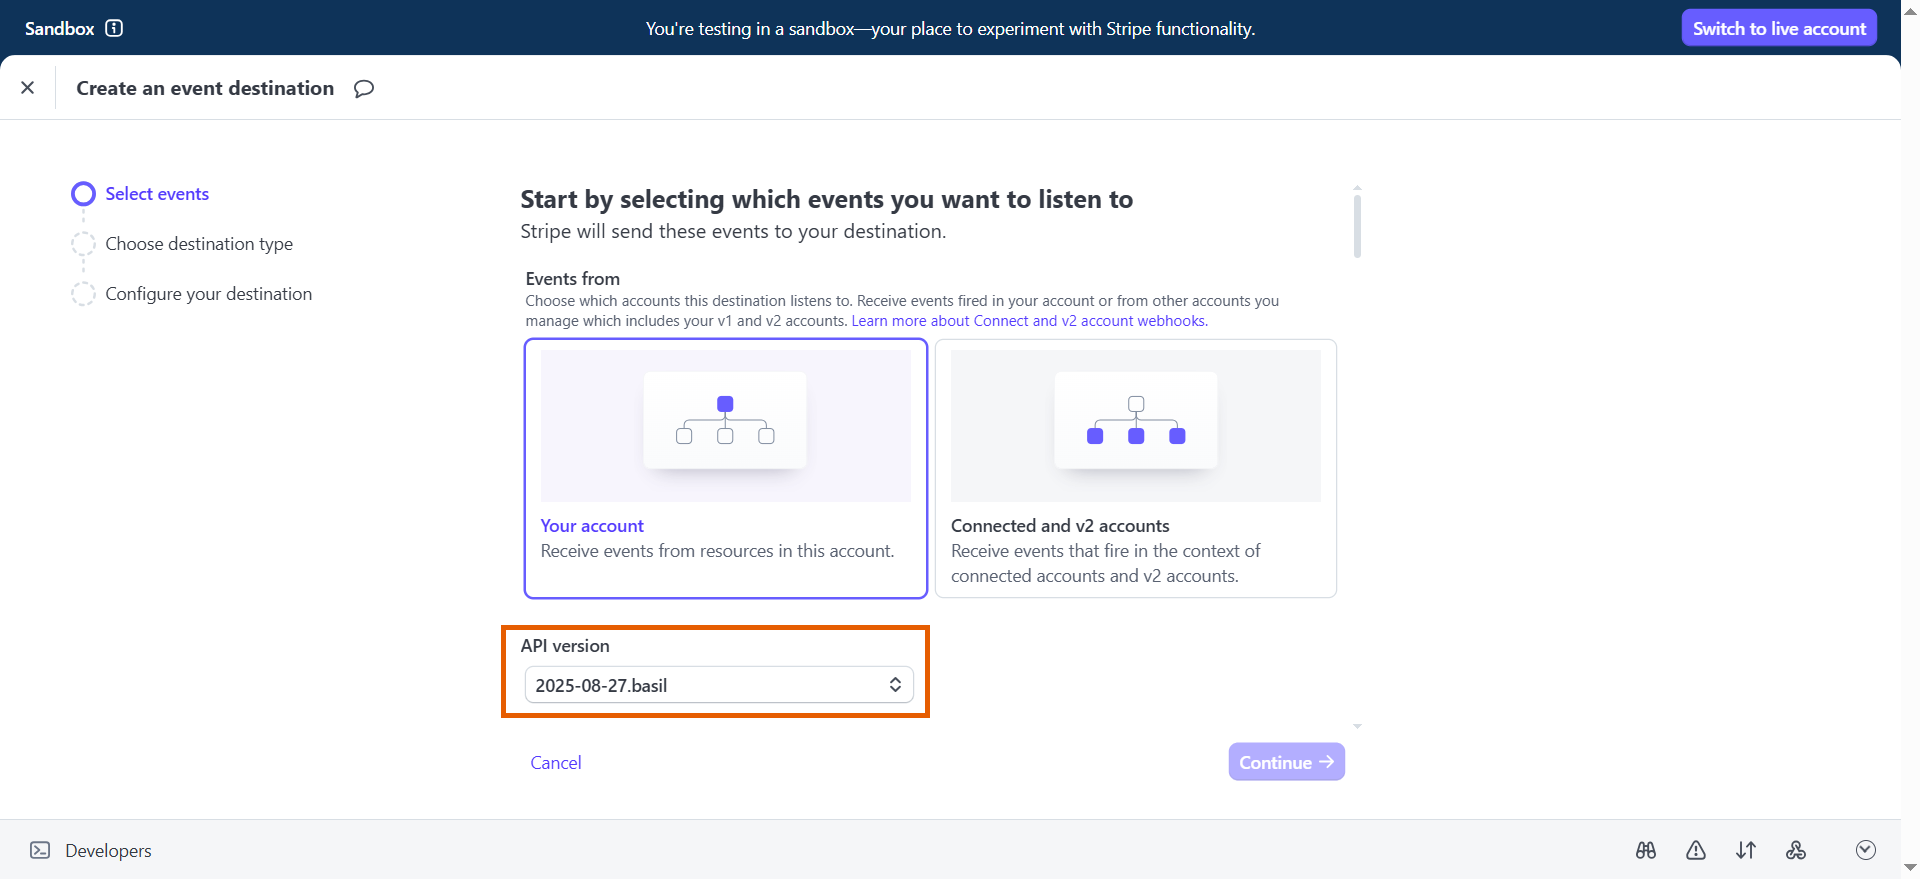
- Select Your account under Events from.
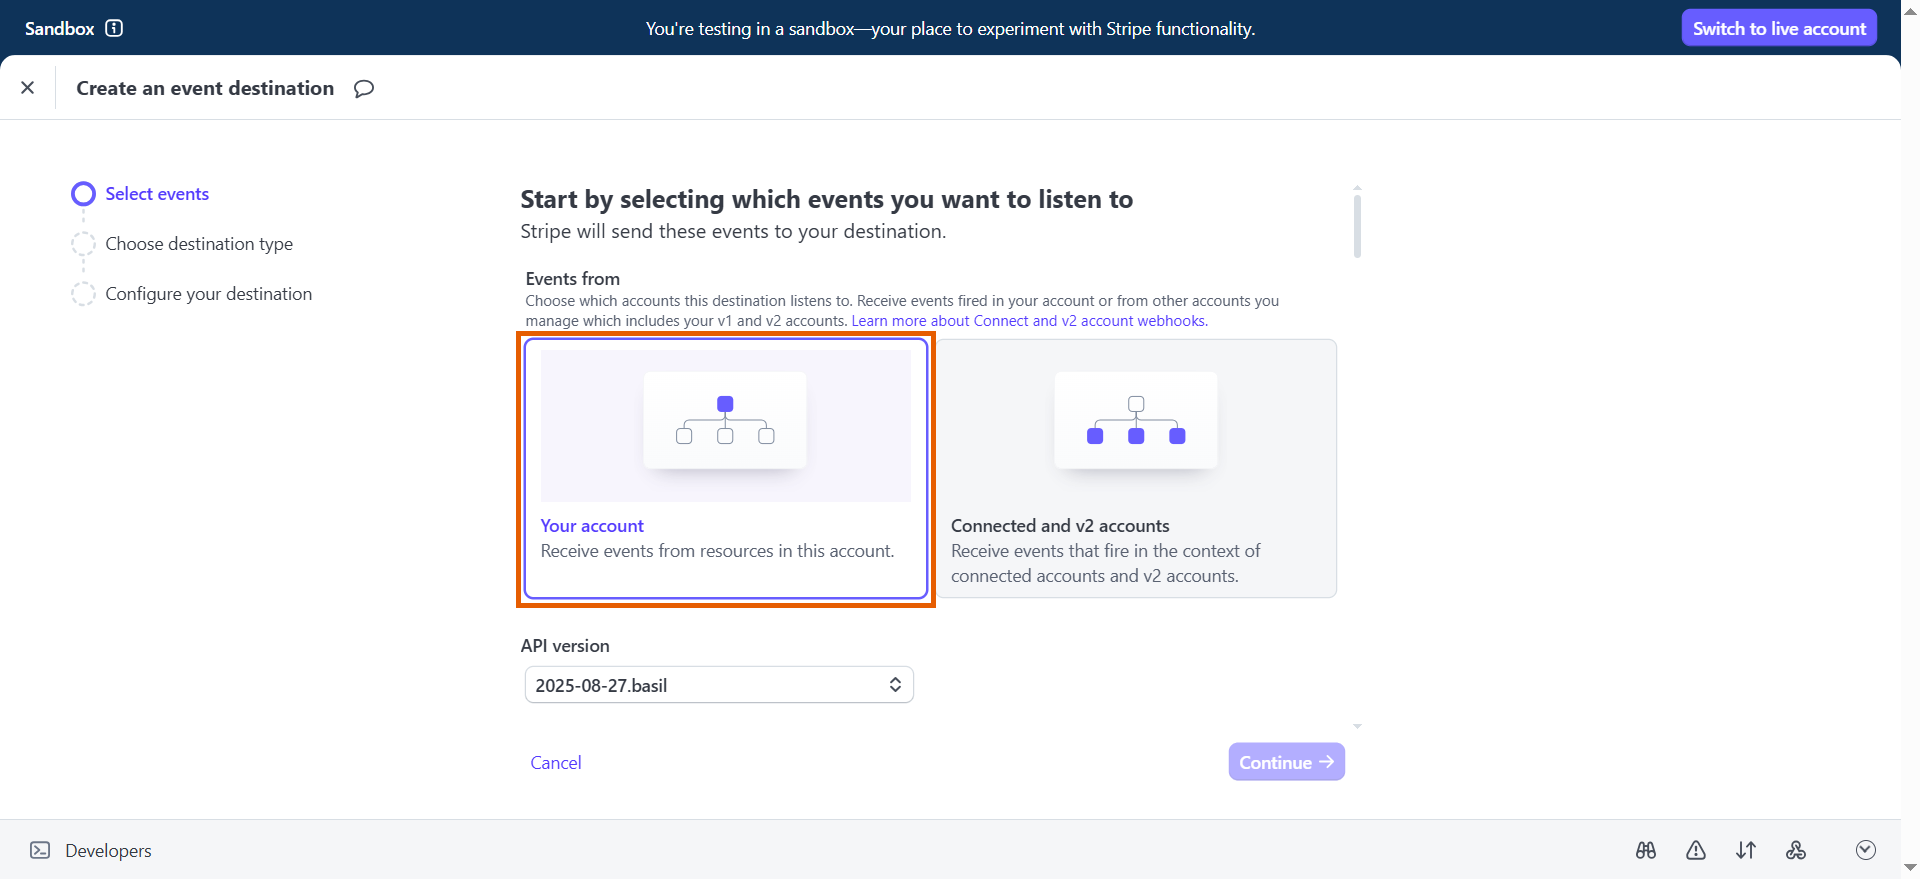
- Ensure the API version is 2020-03-02 or later.
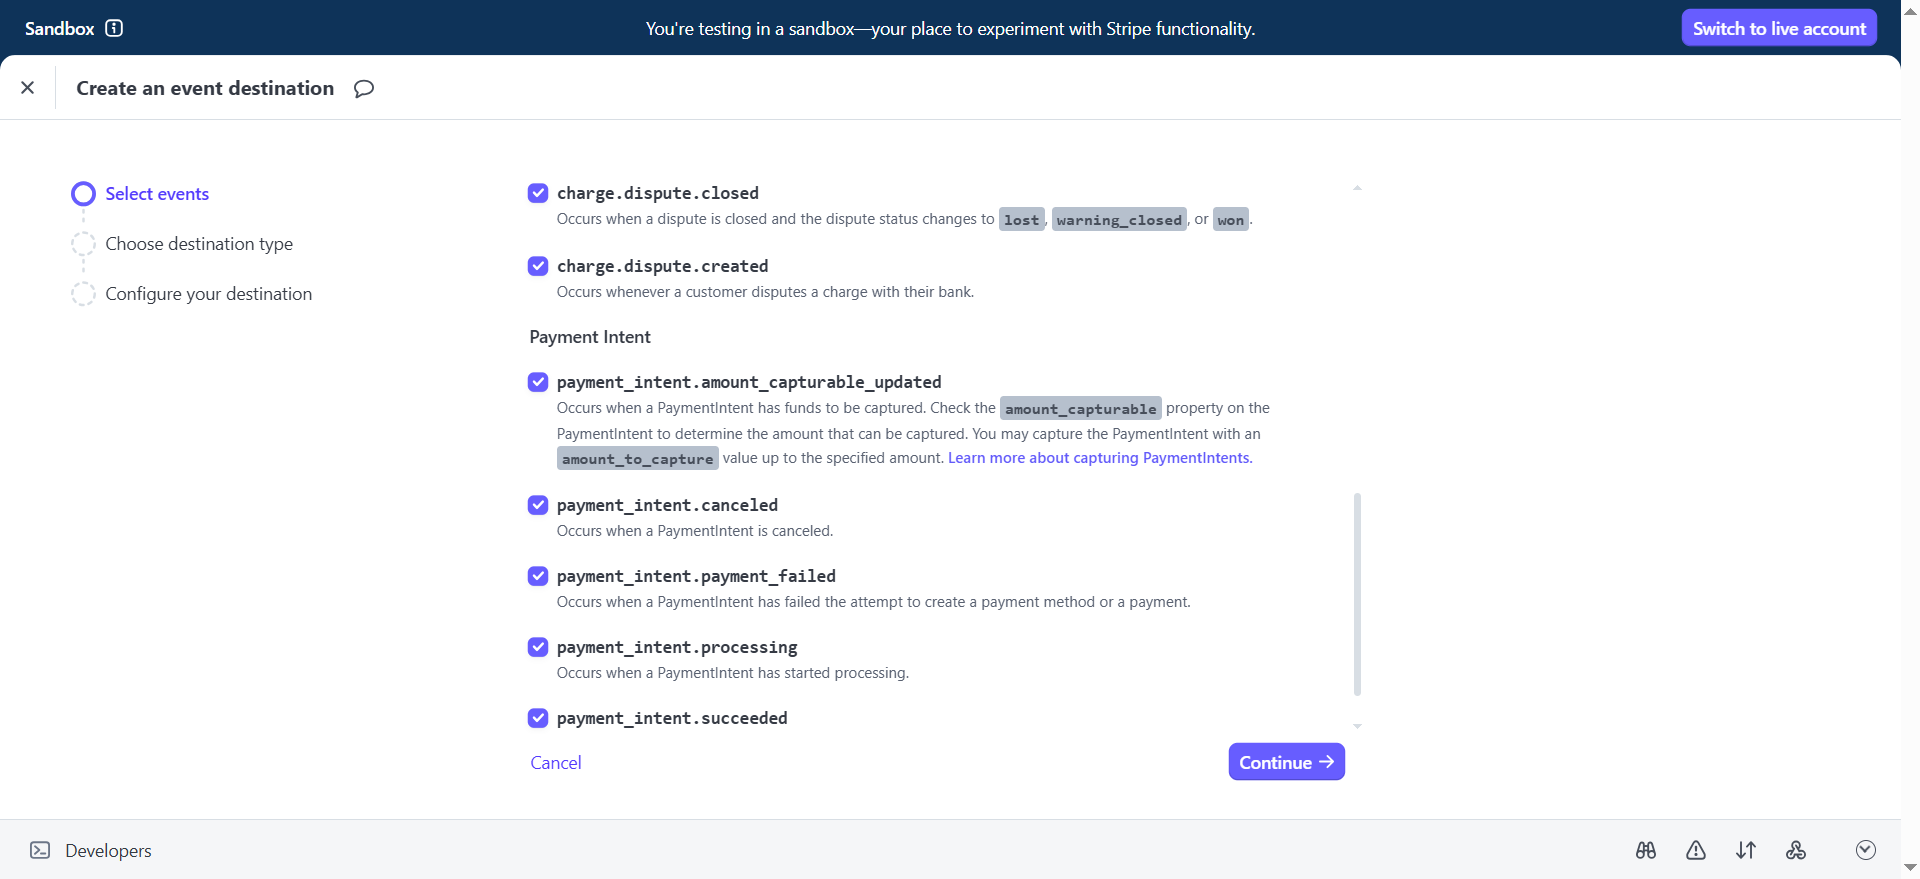
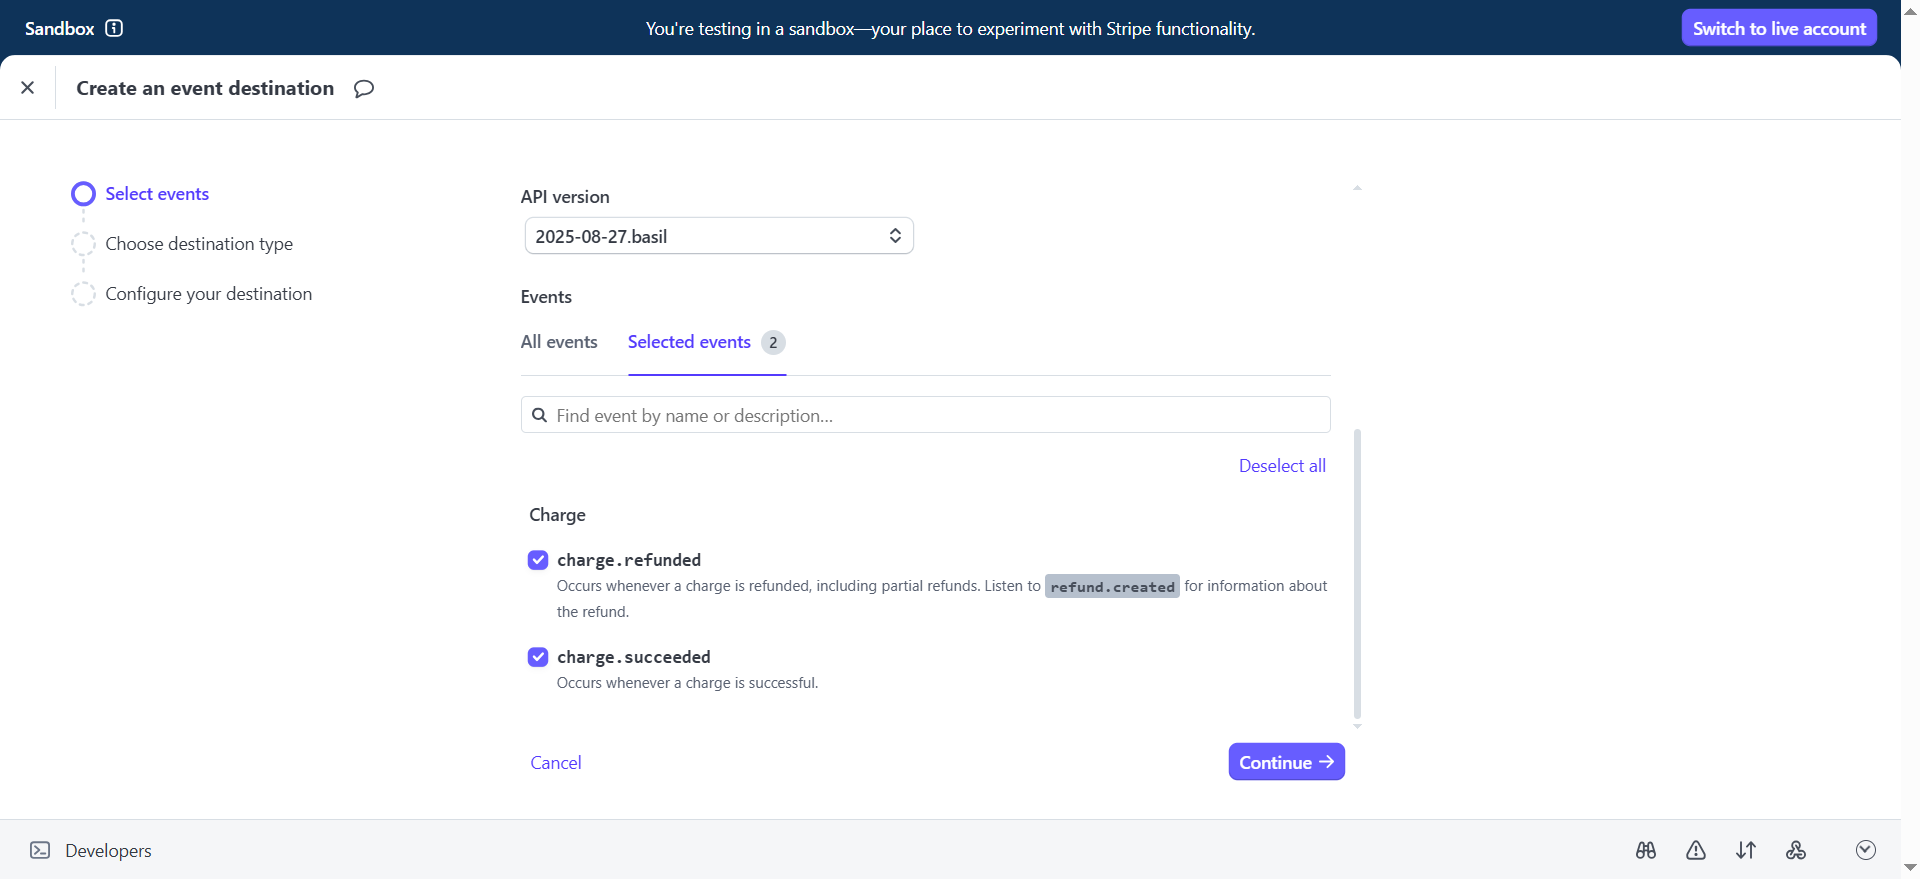
- Select the following events and click Continue:
- payment_intent.succeeded
- payment_intent.payment_failed
- payment_intent.processing
- payment_intent.canceled
- payment_intent.amount_capturable_updated
- payment_intent.partially_funded
- charge.dispute.created
- charge.dispute.closed
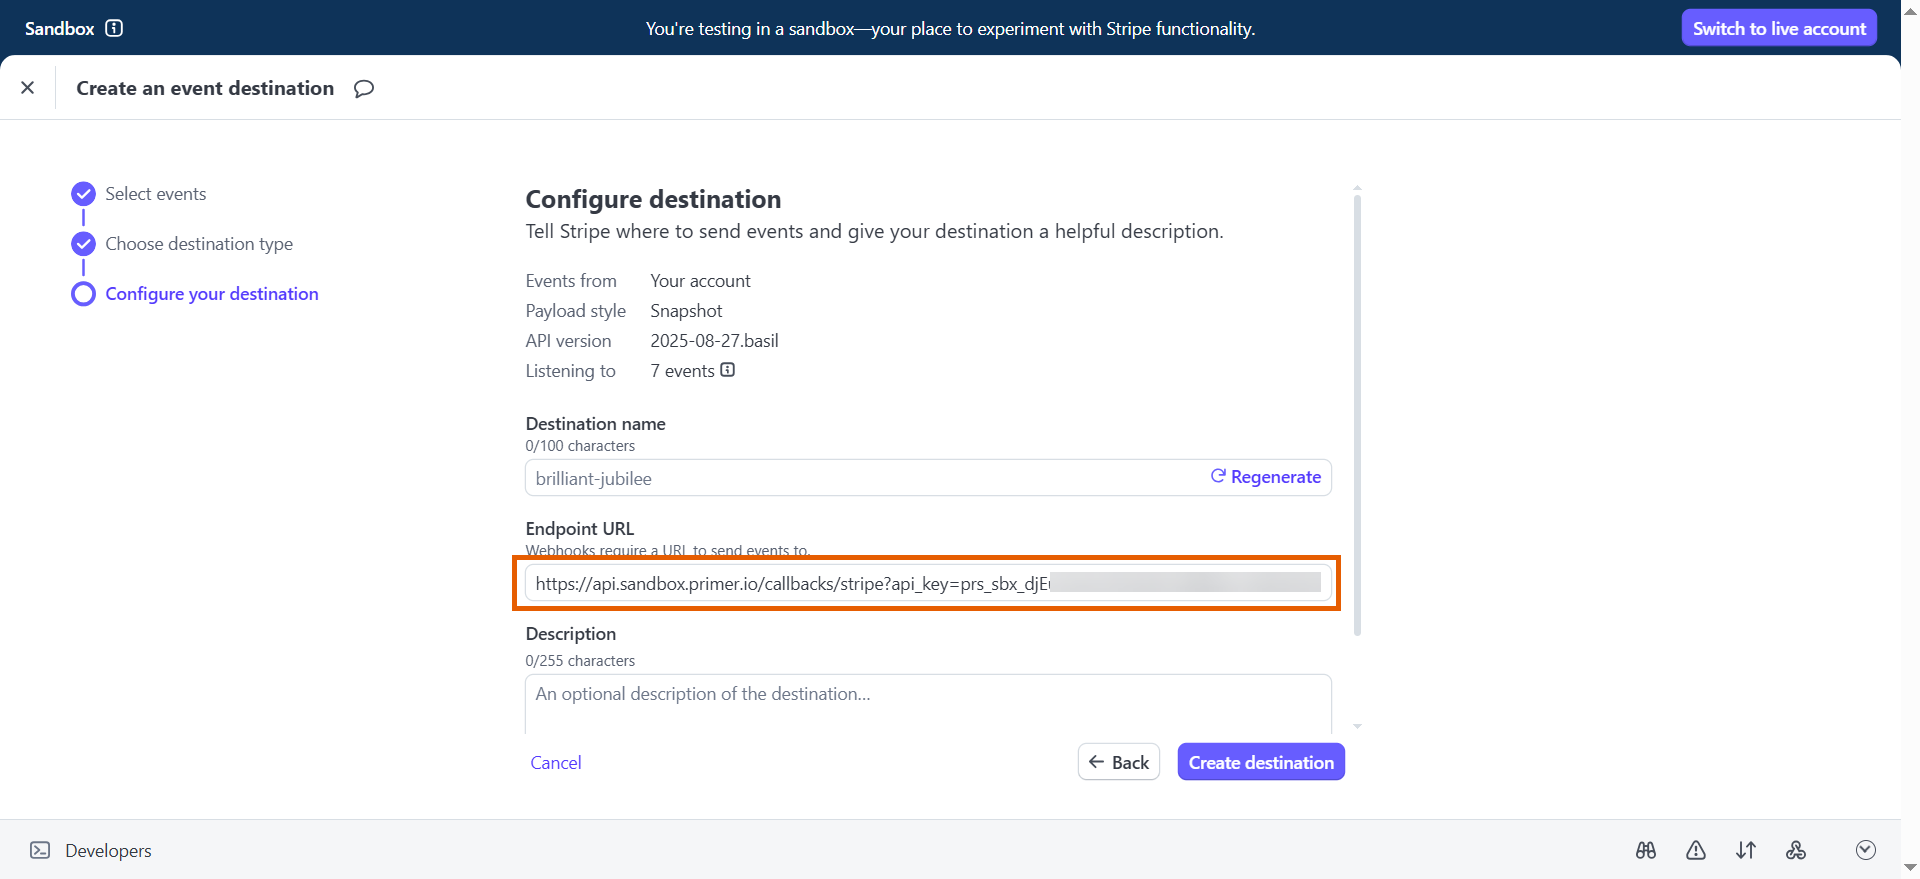
- Select Webhook endpoint under Destination type and click Continue.

- Go back to the Stripe integration in Primer and copy the endpoint URL under Set up webhook.
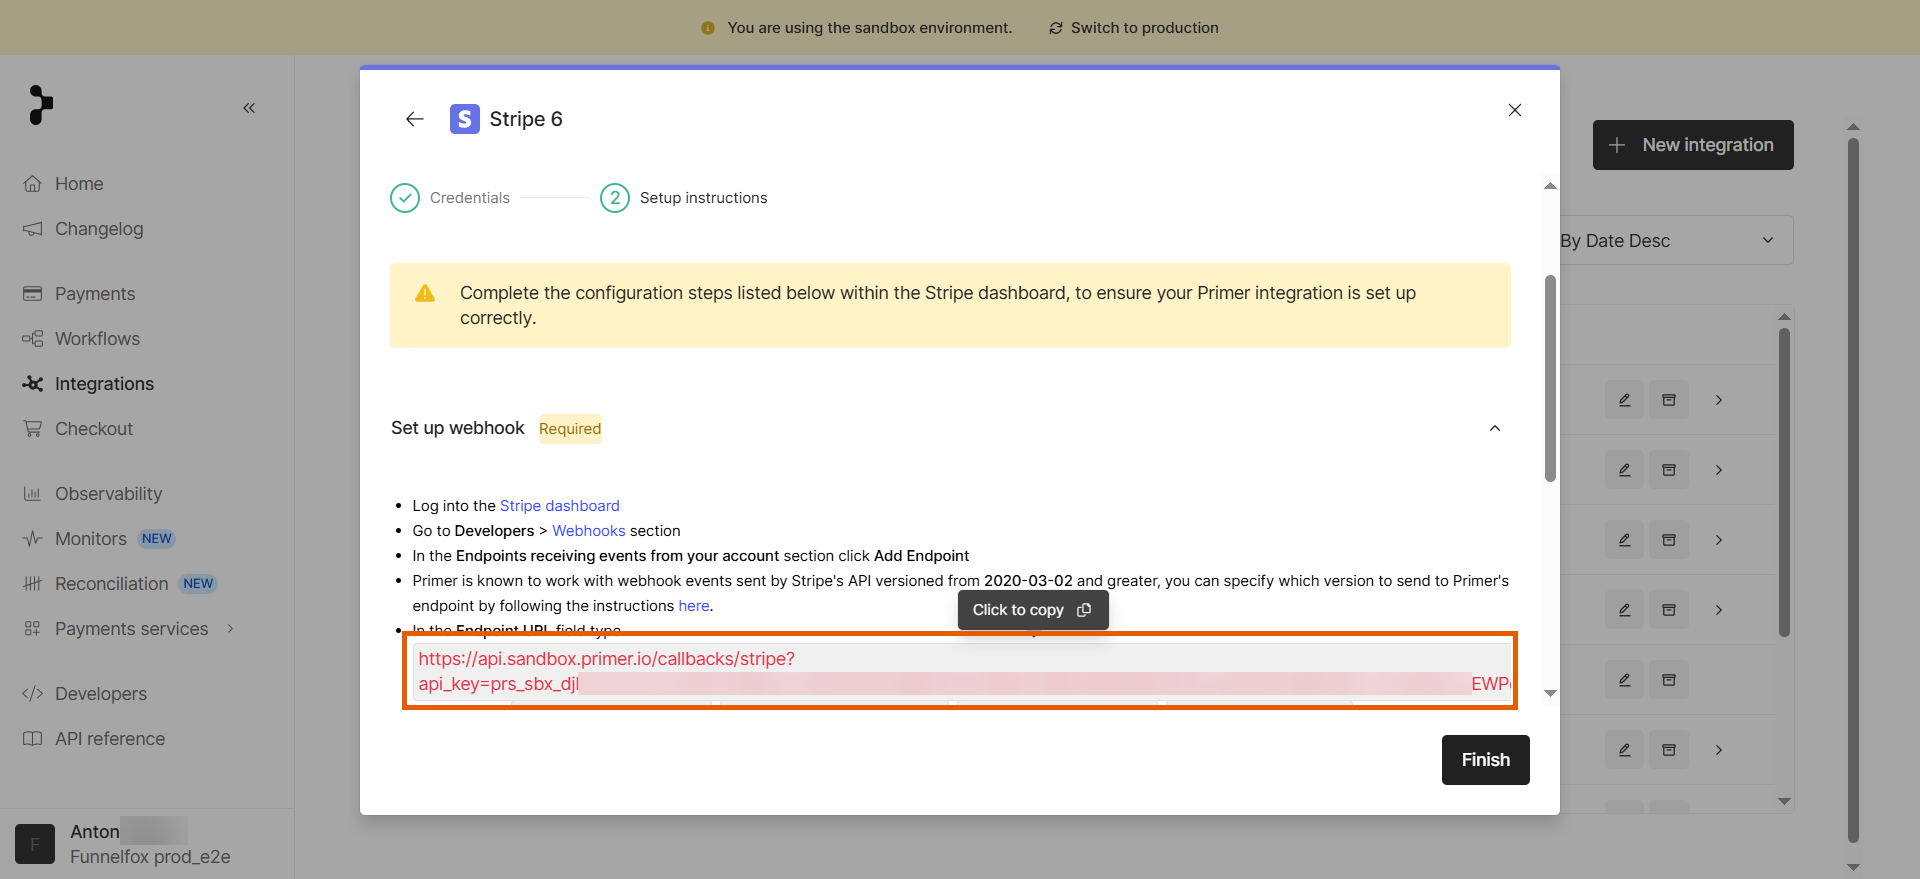
- Go back to webhook configuration in Stripe and paste the endpoint URL into the Endpoint URL field.
- Click Create destination.
Click Finish in the Stripe integration in Primer. You can skip the remaining steps about enabling raw card data handling—that section of the Primer guide is outdated.
4. Set up FunnelFox Billing webhook
Repeat the steps above to set up another webhook using a different endpoint URL and events.- Click + Add destination on the Developers > Webhooks page in Stripe.
- Select Your account under Events from.
- Select the following events and click Continue:
- charge.refunded
- charge.succeeded
- Select Webhook endpoint under Destination type and click Continue.
- Request your Sandbox Organization ID (org id) from your Solution manager.
-
Replace
{ORG_ID}inhttps://billing.funnelfox.com/{ORG_ID}/v1/stripe/webhook?region=defaultwith your Sandbox Organization ID.
- Go back to the Stripe webhook configuration and paste the endpoint URL into Endpoint URL.
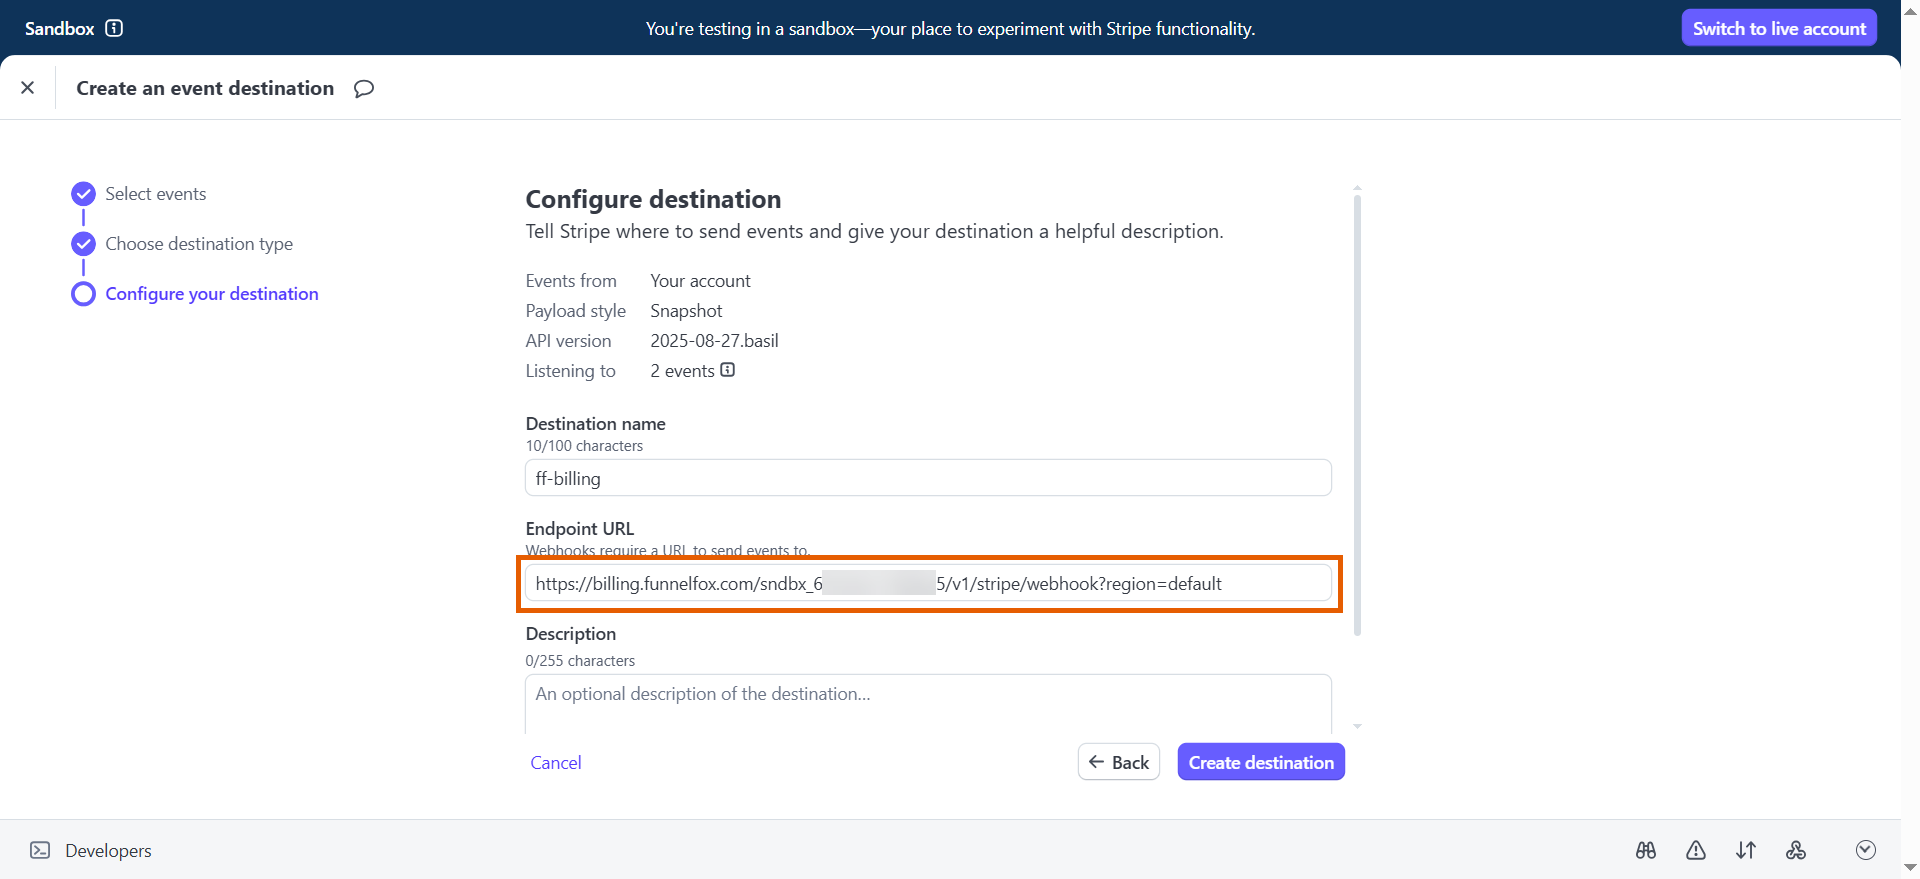
- Click Create destination.
5. Configure field mapping
Map required fields in Primer to ensure FunnelFox Billing receives the necessary customer data from Stripe.- Go to Integrations in Primer and open the Stripe integration you just set up.
- Click Manage at the top right and select Advanced mapping.
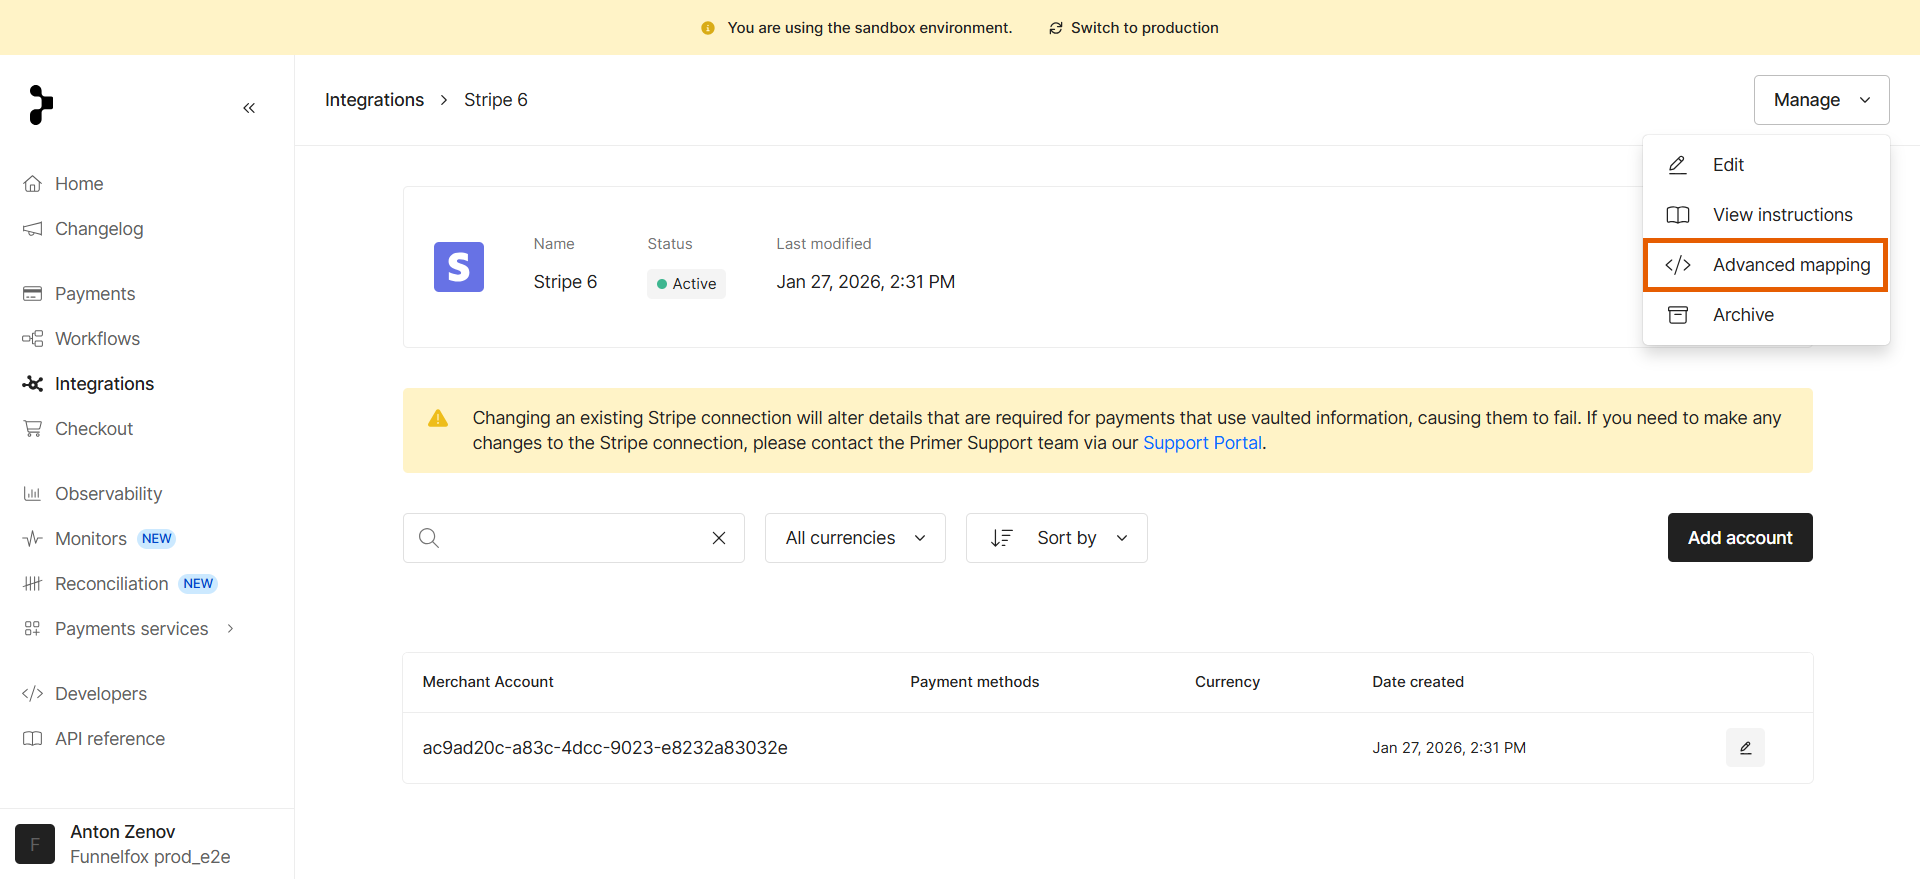
- Click Add field and map the following fields under the Authorization tab:
ff_org_id:metadata[ff_org_id]ff_country_code:payment_method_data[billing_details][address][country]postal_code:payment_method_data[billing_details][address][postal_code]email:payment_method_data[billing_details][email]
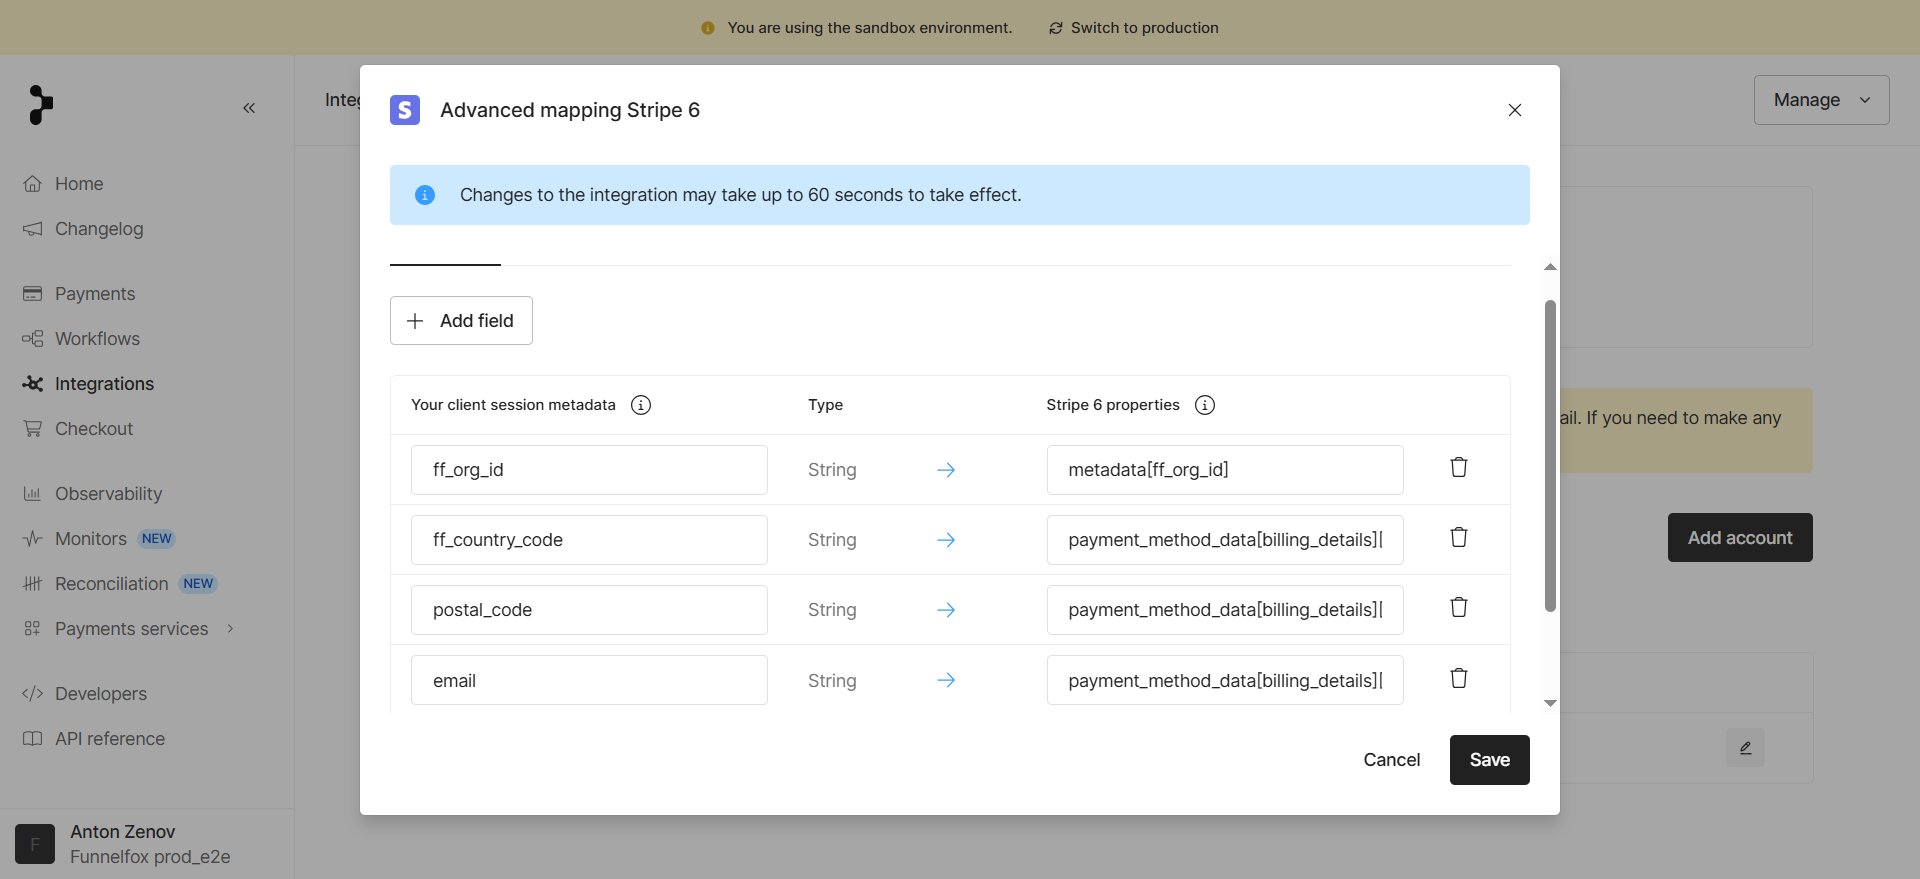
- Click Save.
6. Get Support Tool access
Your Solution manager will reach out to provide access to the dedicated FunnelFox Billing dashboard with the Support Tool. Use the Support Tool to manage subscriptions, process refunds, and view payments, webhooks, and more.Your FunnelFox Billing Sandbox setup is complete. Make test payments to verify that everything is configured correctly.
Production
After testing in Sandbox, set up FunnelFox Billing for your live environment to start accepting real payments. Repeat the setup process from the Sandbox section above using the Primer Production account we create for you. After completing the setup, proceed with configuring Apple Pay, Google Pay, and PayPal. These payment methods are configured in your Production environment only.Before you begin, ensure you have:
- Your Merchant ID from the Google Pay & Wallet Console with a verified business profile.
- An active PayPal business account.
1. Set up Apple Pay
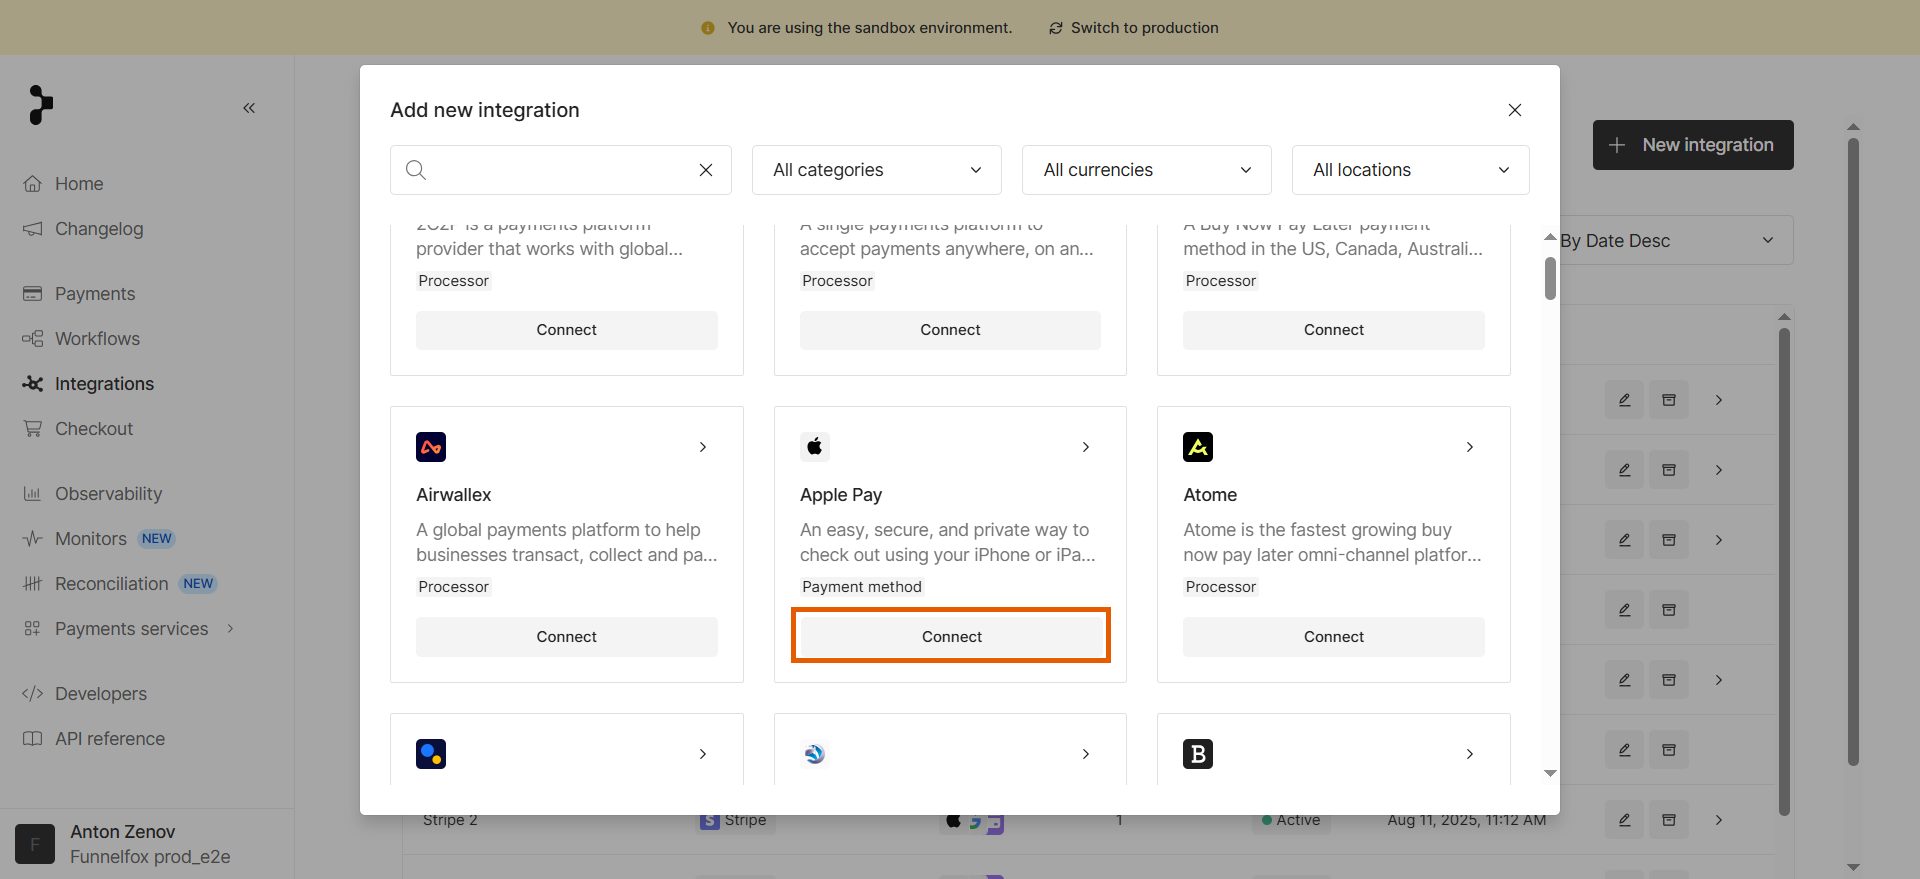
- Go to the Integrations page in the Primer account we created for you.
- Click + New integration at the top right.
- Click Connect under Apple Pay.
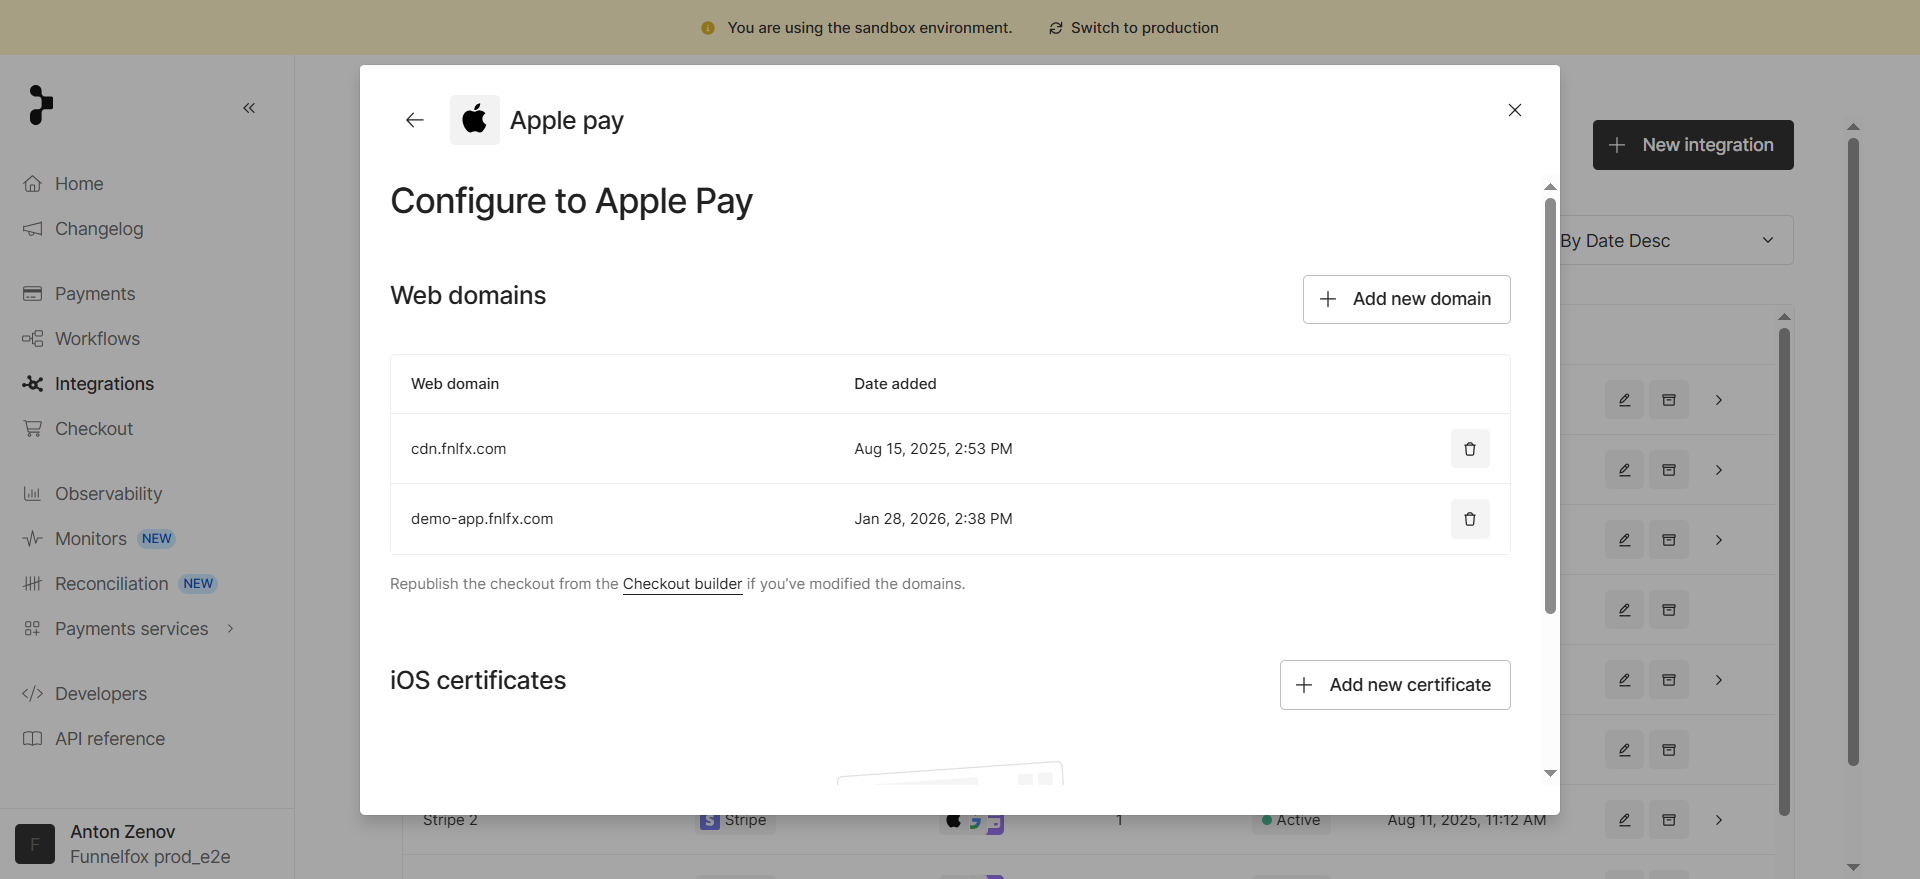
- Click + Add new domain and add three domains:
cdn.fnlfx.com.- Your project domain from Settings > Domains in FunnelFox (for example,
demo-app.fnlfx.com). - Your custom domain (if any).
- Go to Settings > Domains in FunnelFox.
- Select FunnelFox Billing under Apple Pay domain verification.

- Save changes.
2. Set up Google Pay
- Click + New integration on the Integrations page in Primer.
- Click Connect under Google Pay.
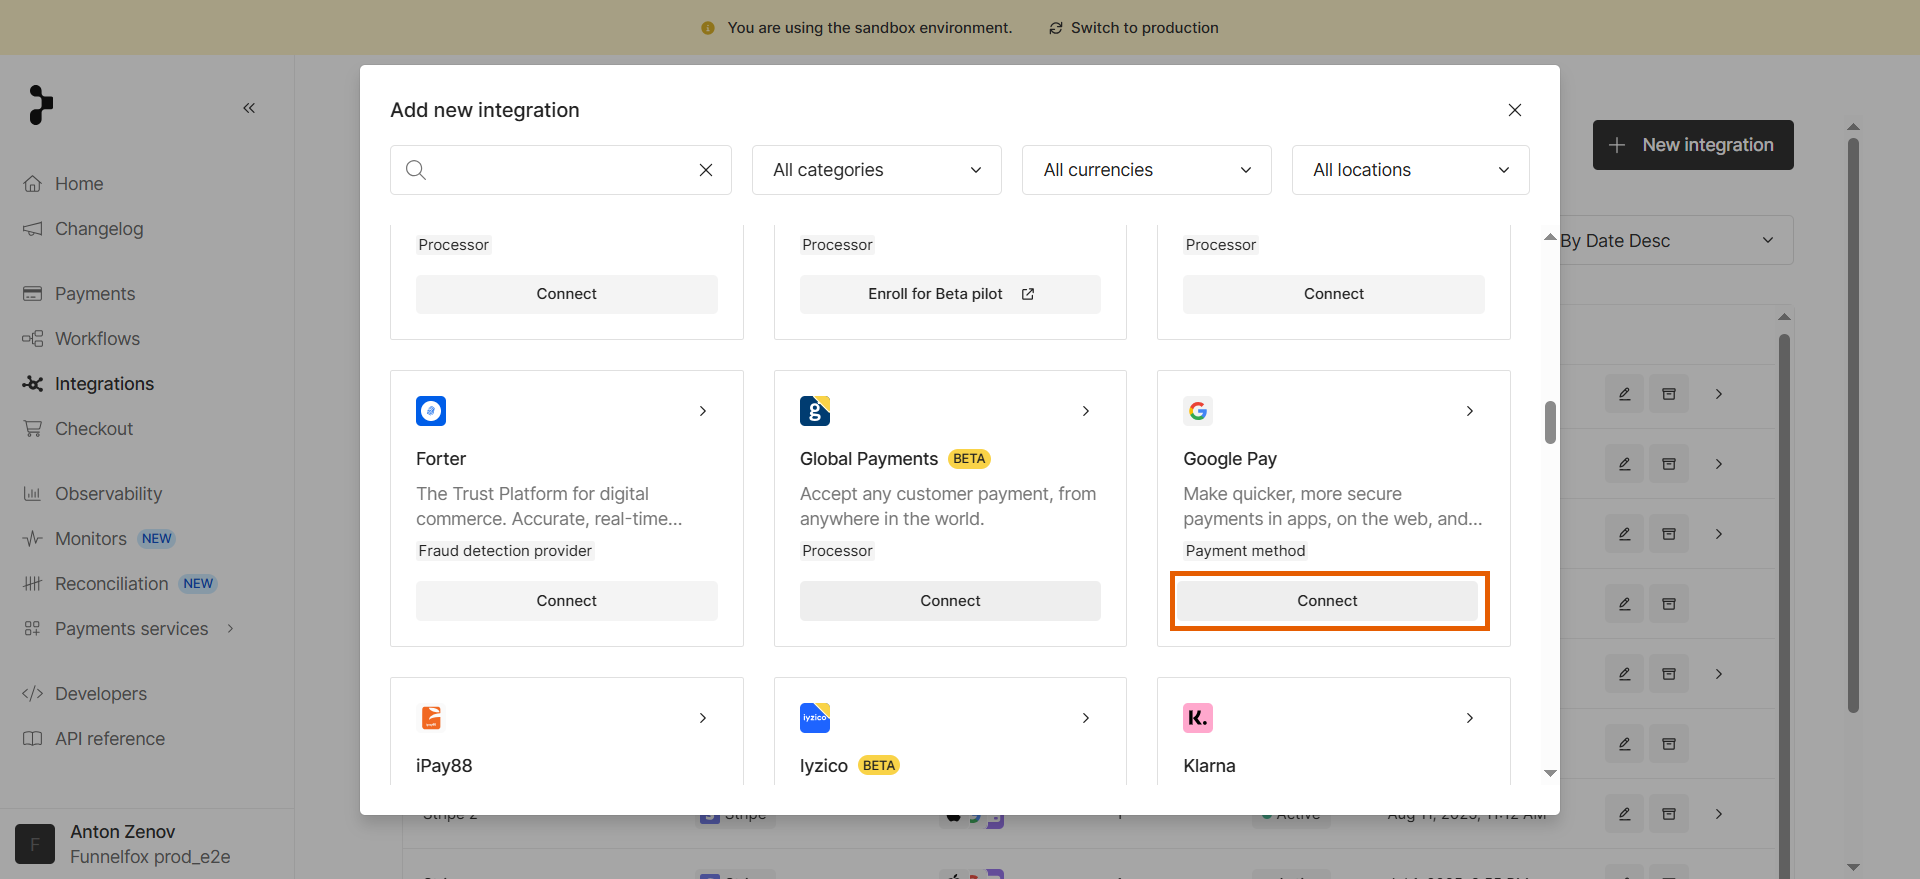
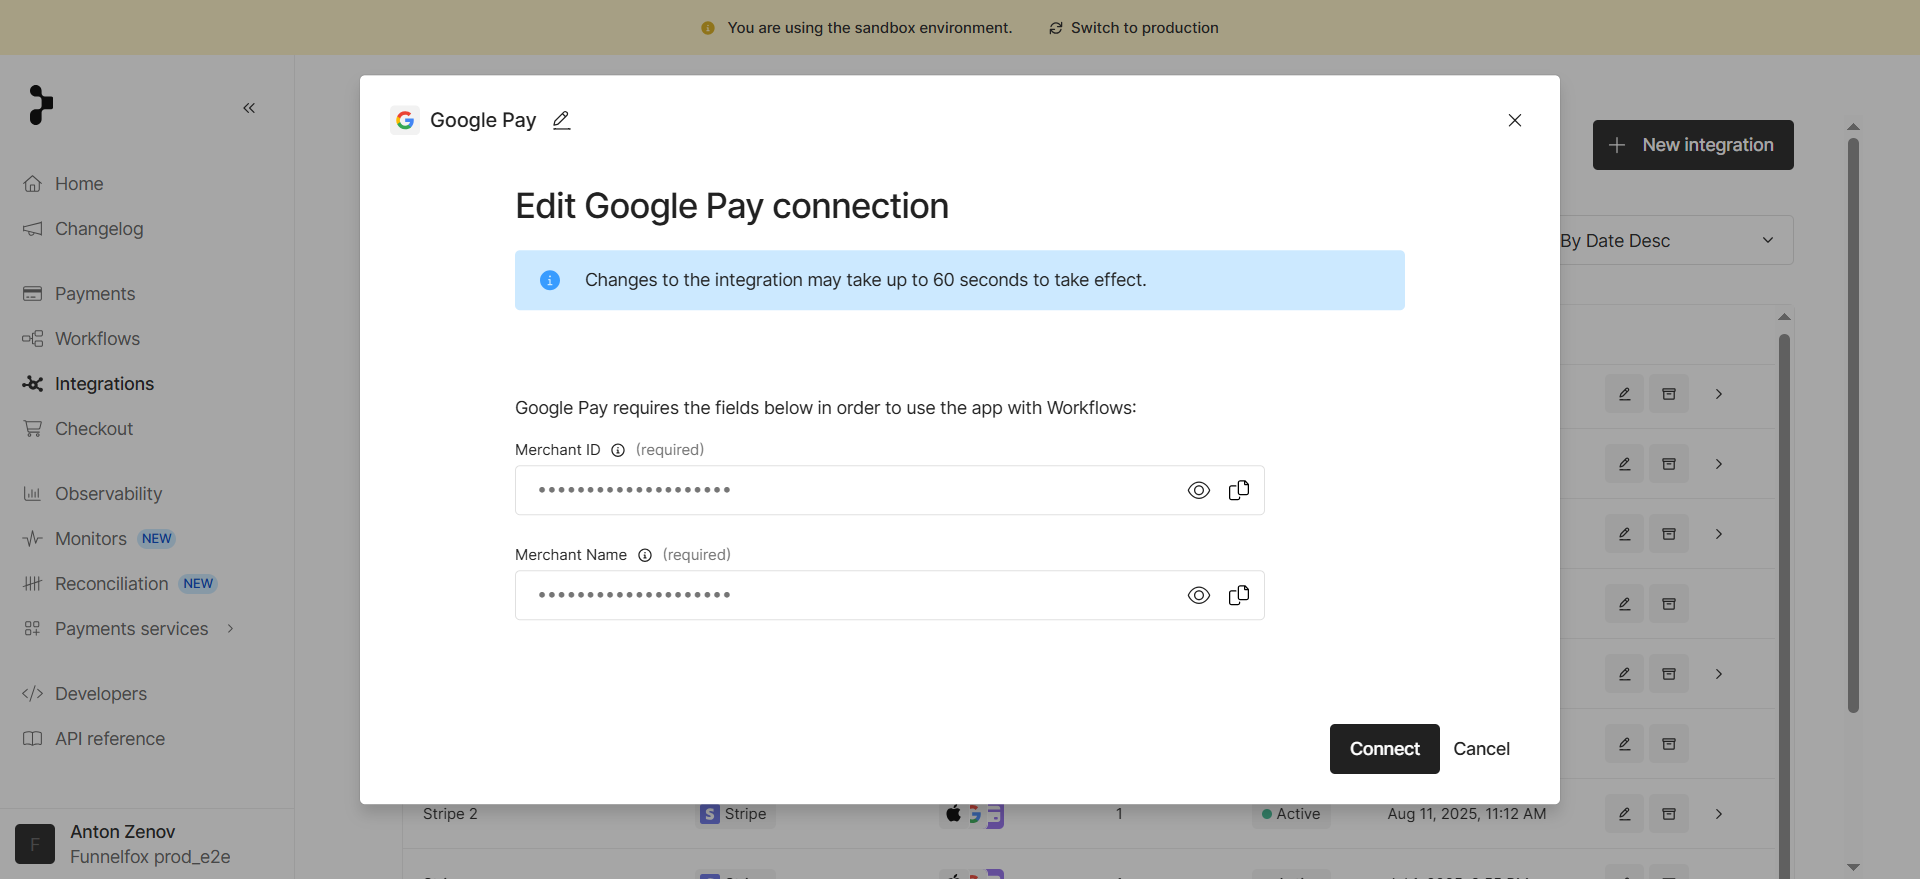
- Enter your Google Pay merchant details and click Connect:
- Merchant ID
- Merchant Name
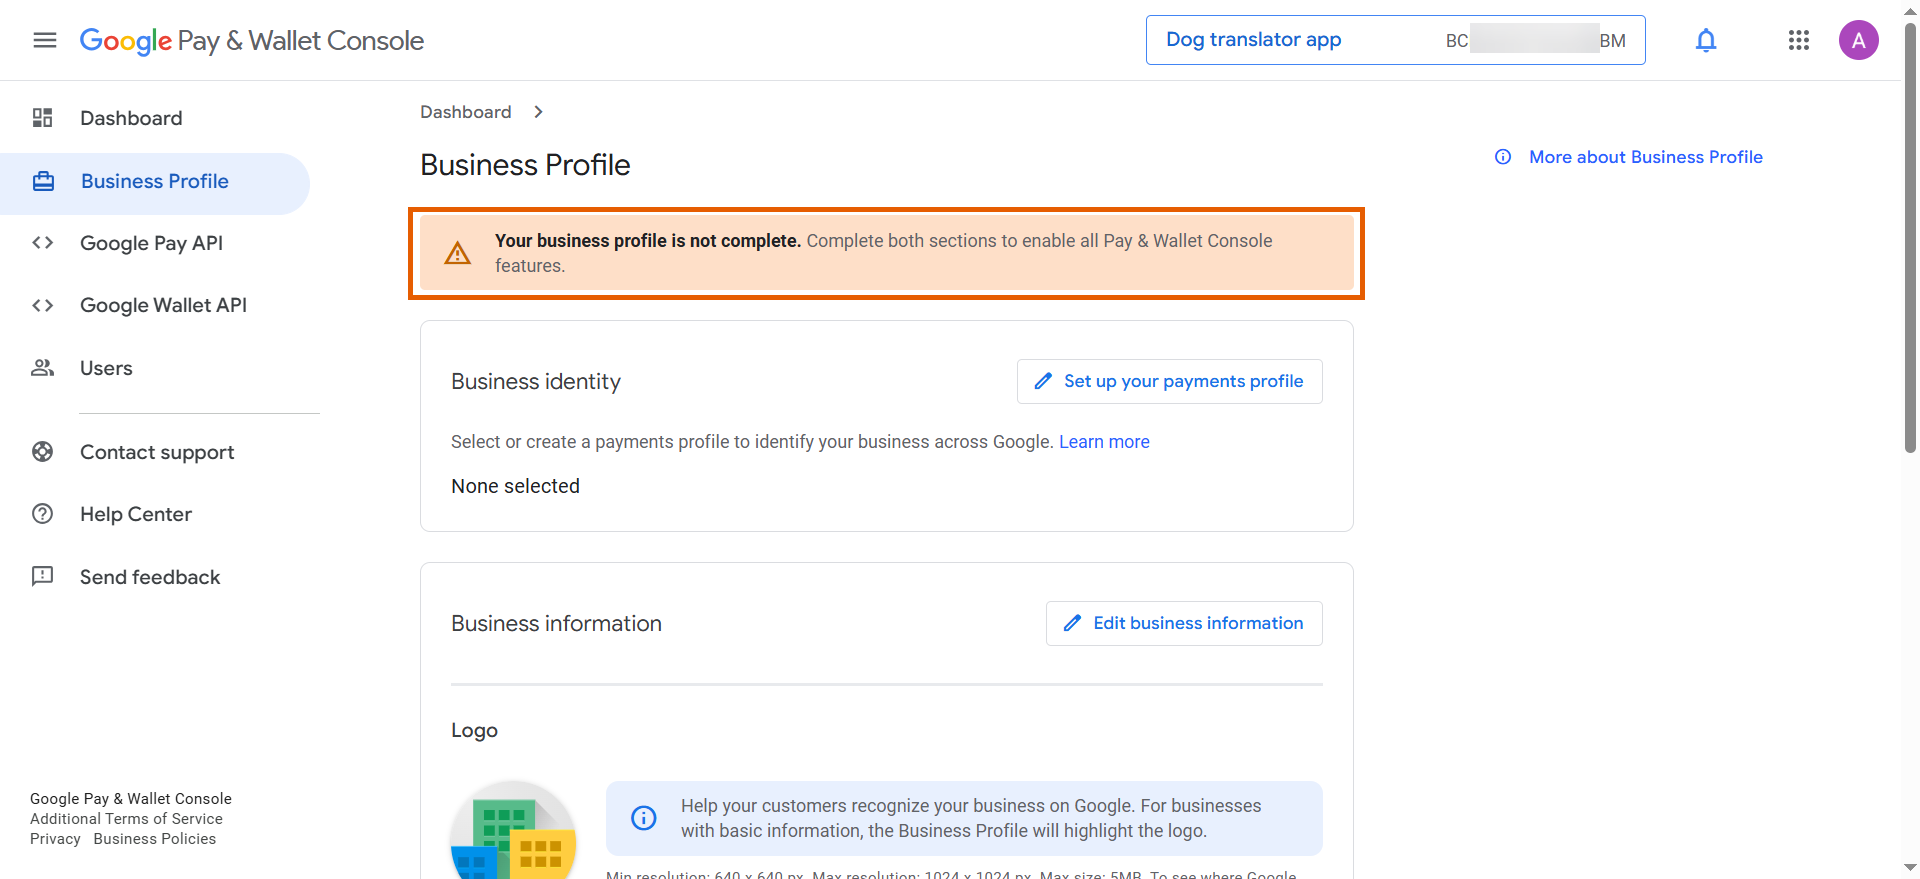
- Go to the Business profile page in your Google Pay & Wallet Console and verify your business profile is complete.
- Go to Google Pay API > Web integration.
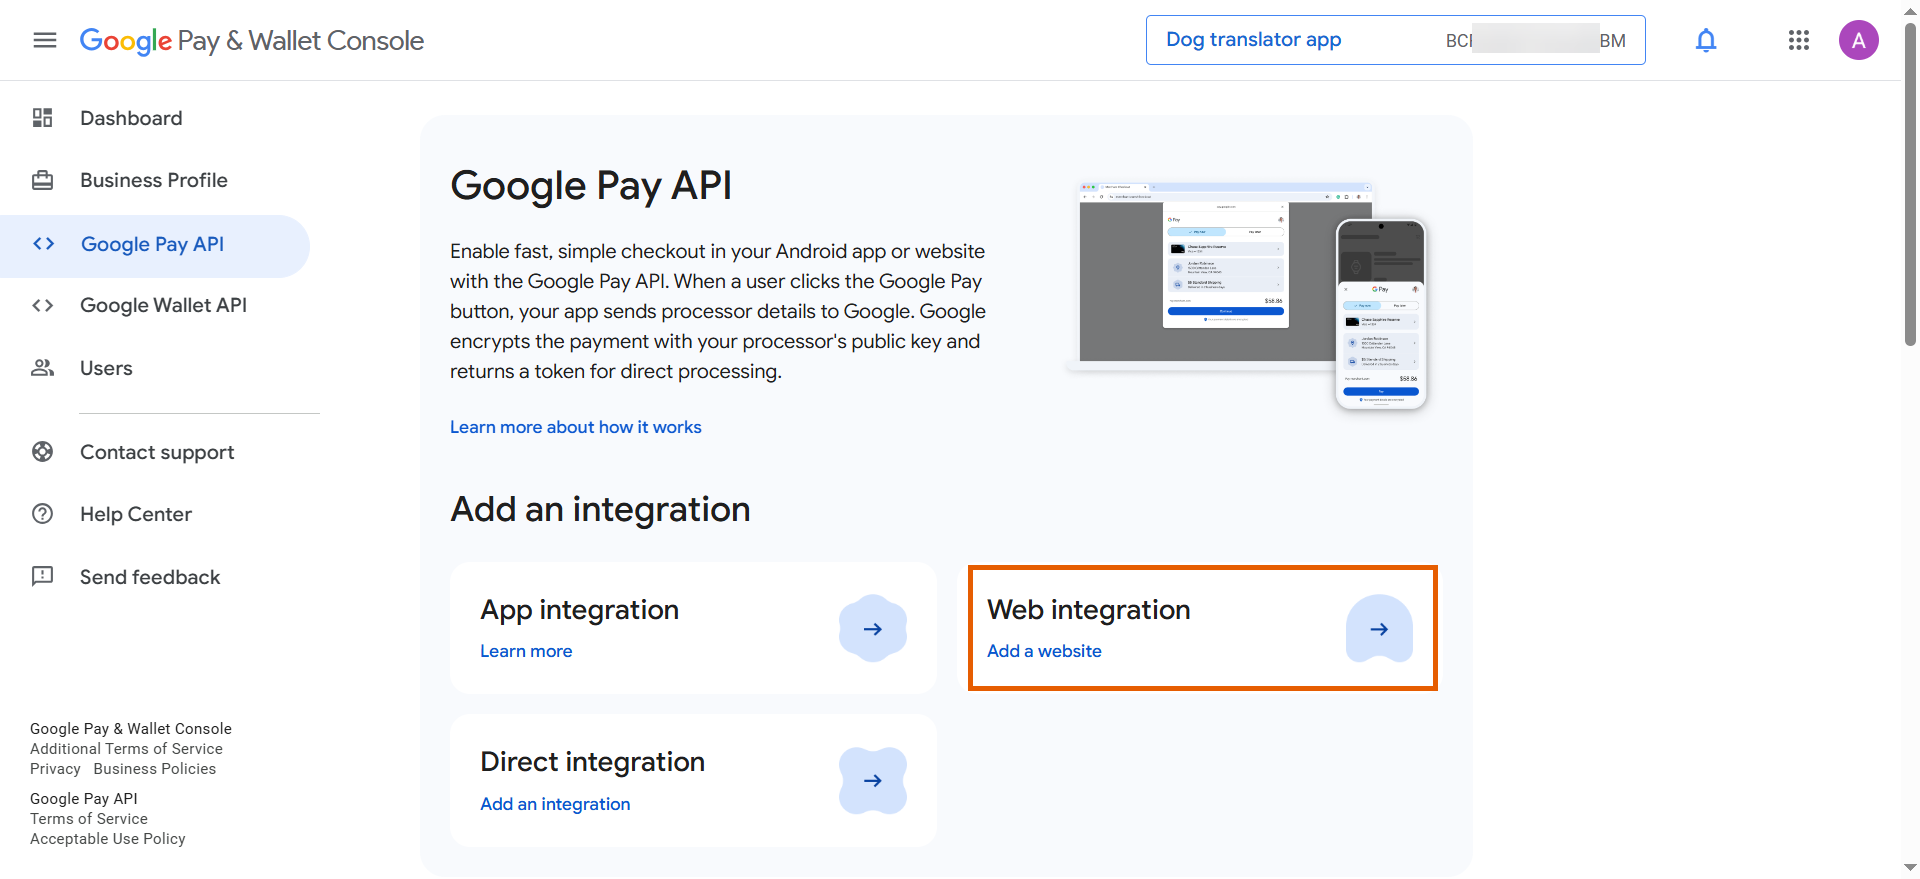
- Complete the form and click Submit for approval:
- Website URL: Enter the domain you’d like to integrate with. If you have multiple domains, enter the main one.
- Integration type: Gateway.
-
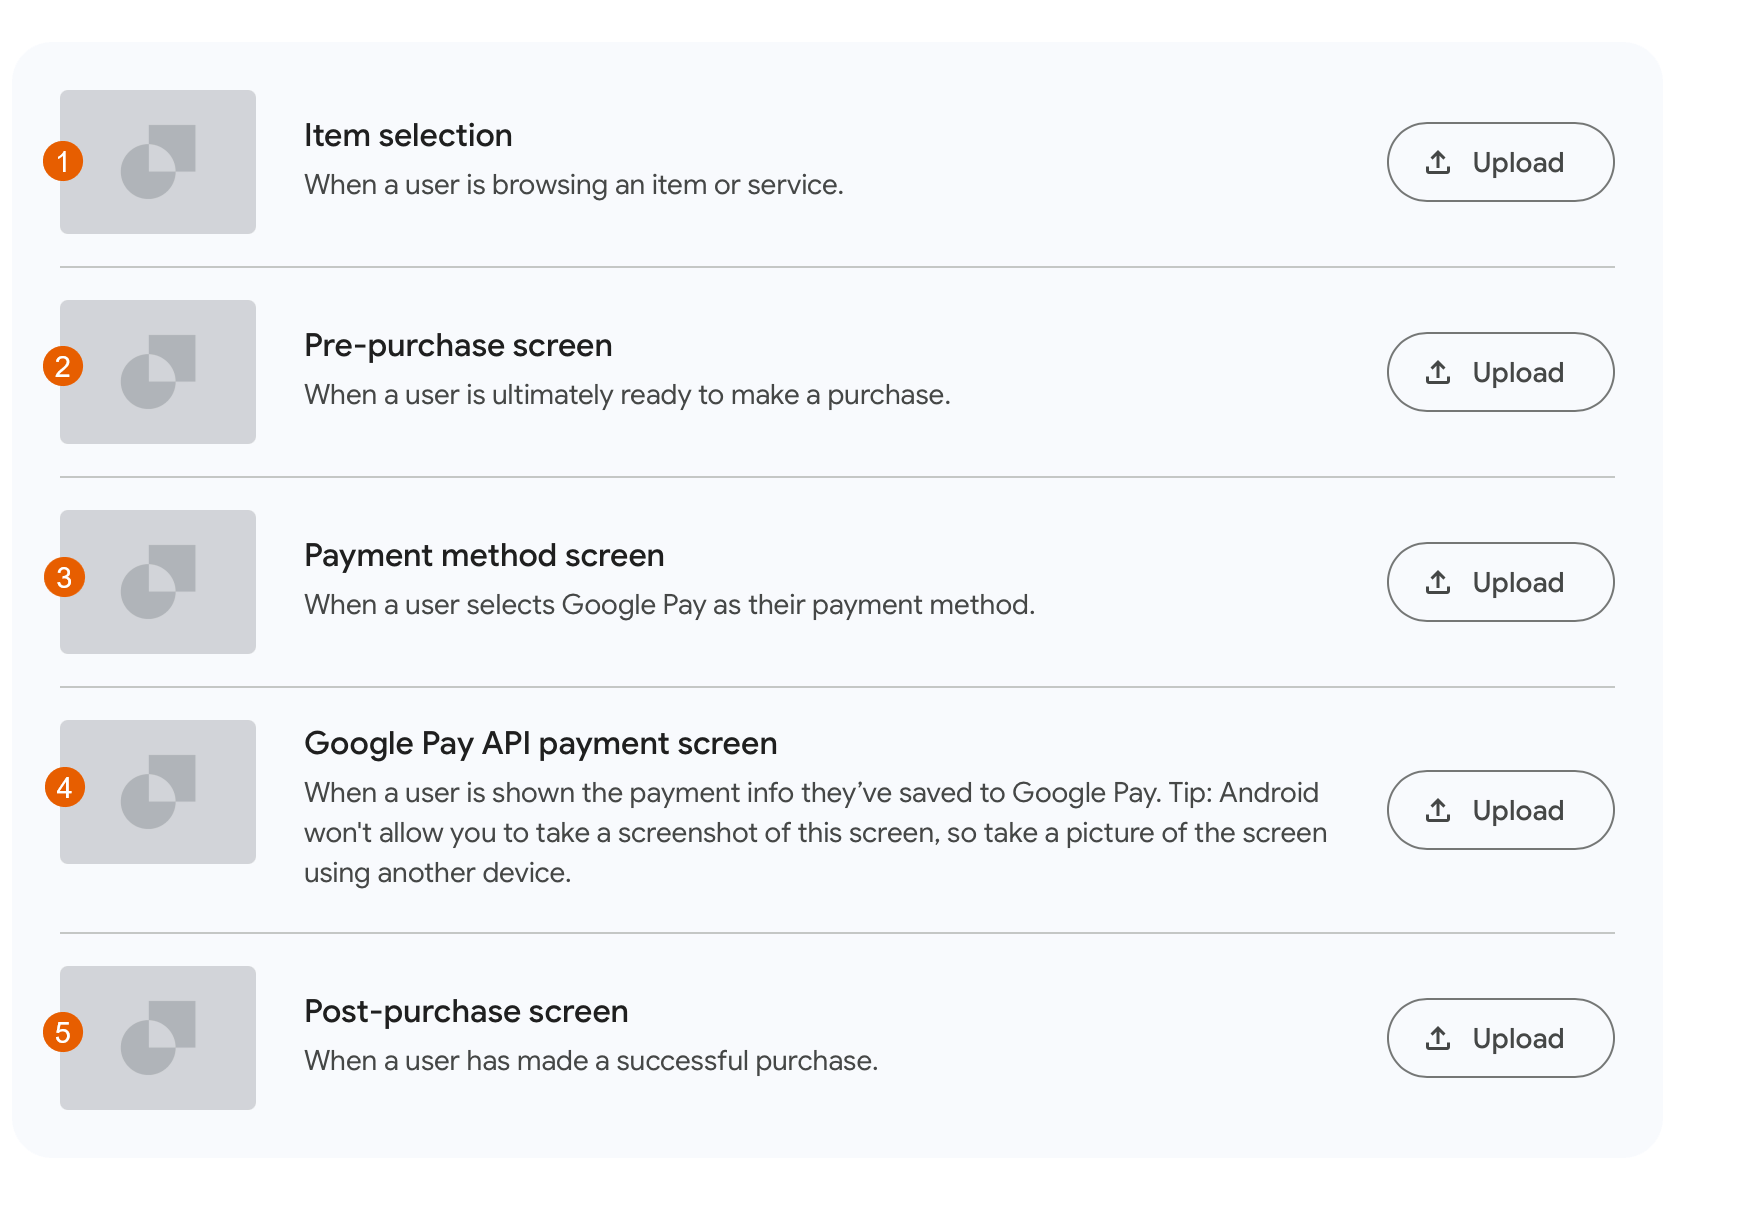
Screenshots of your buyflow: Upload five screenshots of your buyflow (1MB max each):
- Item selection
- Pre-purchase screen
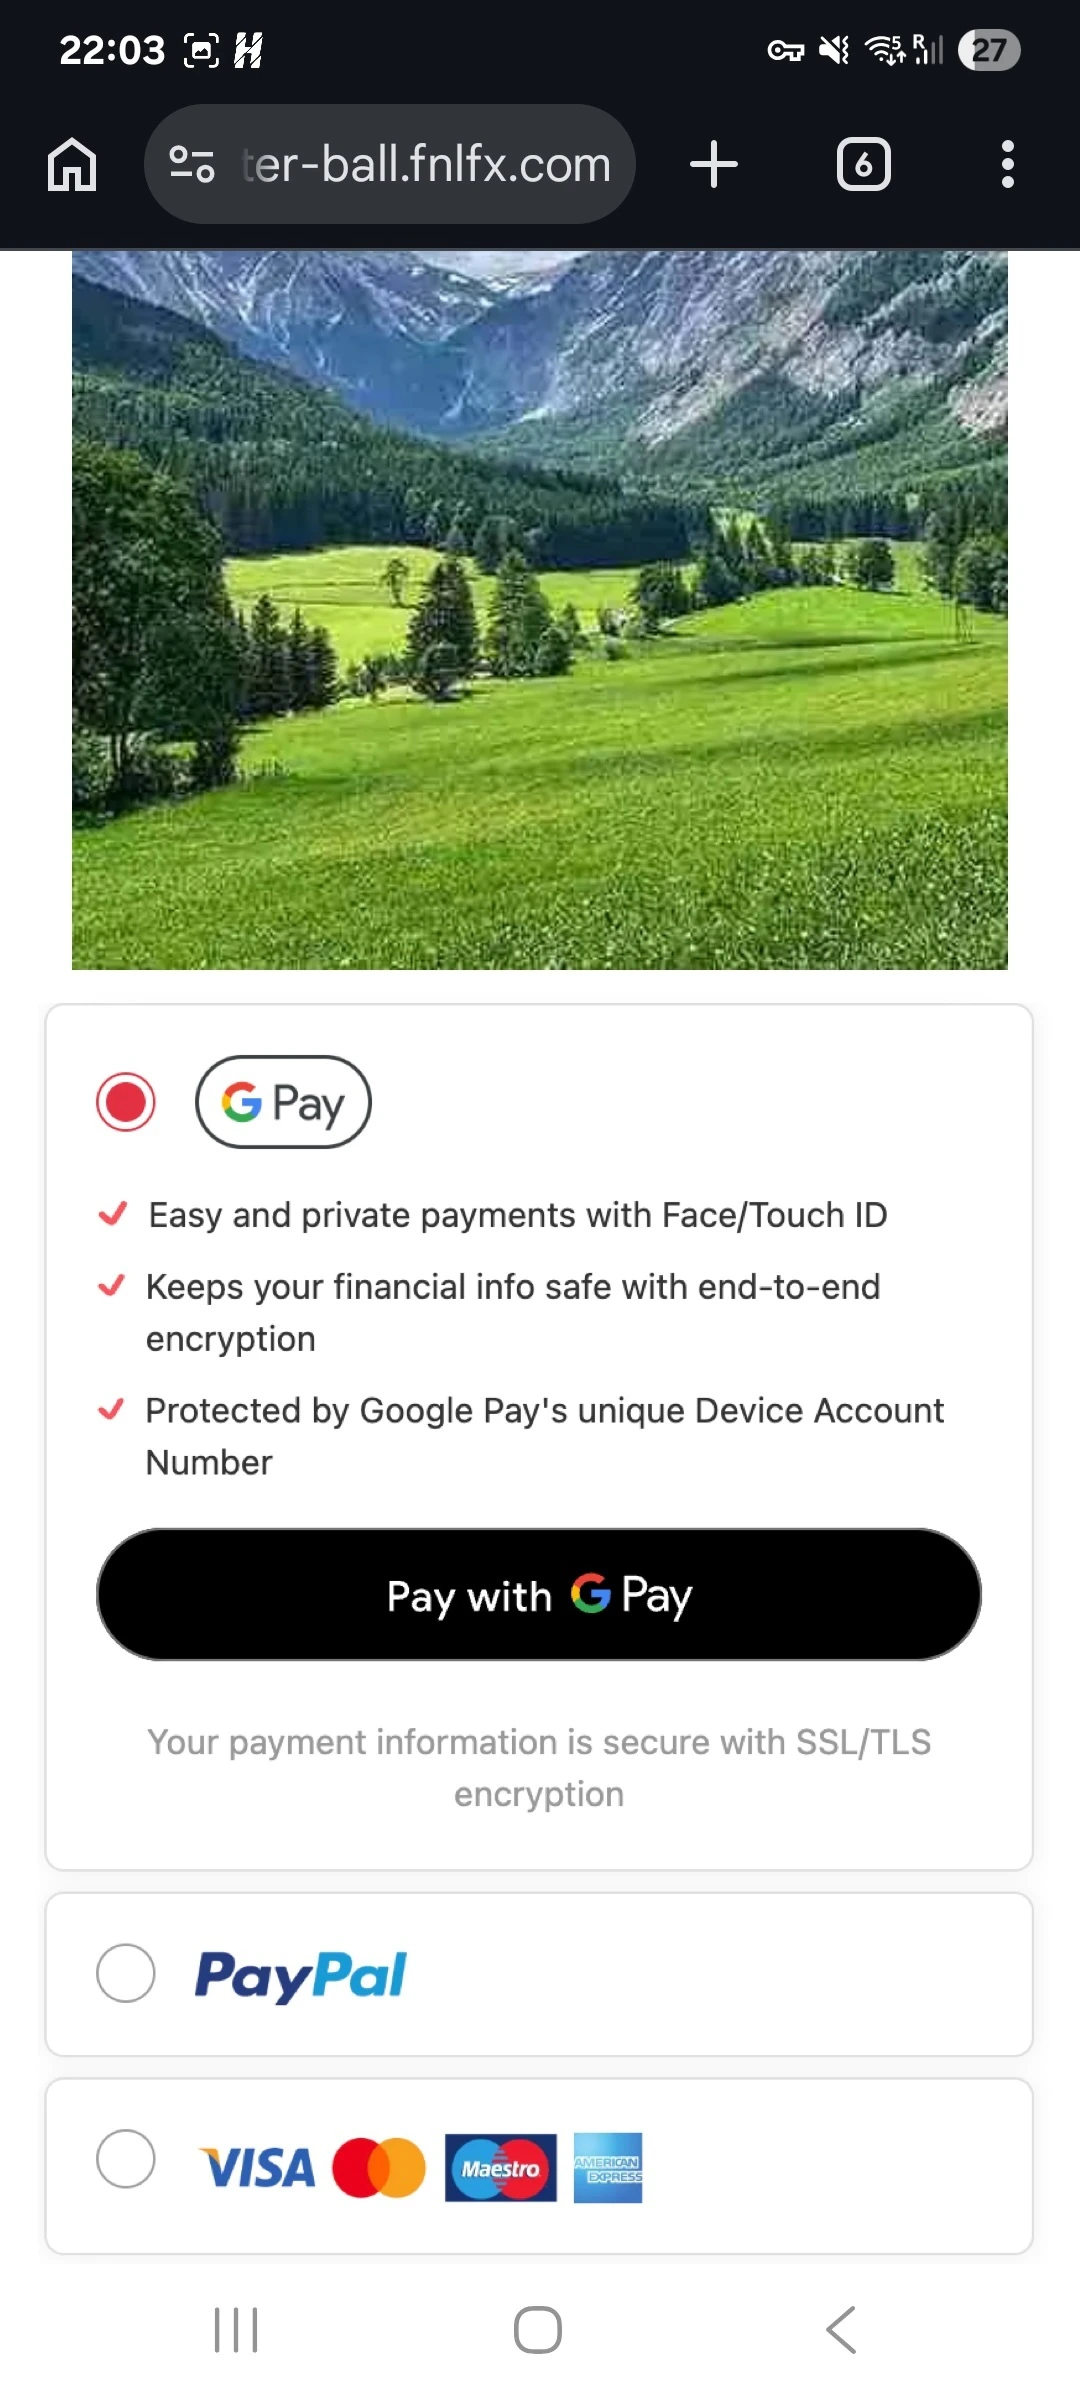
- Payment method screen
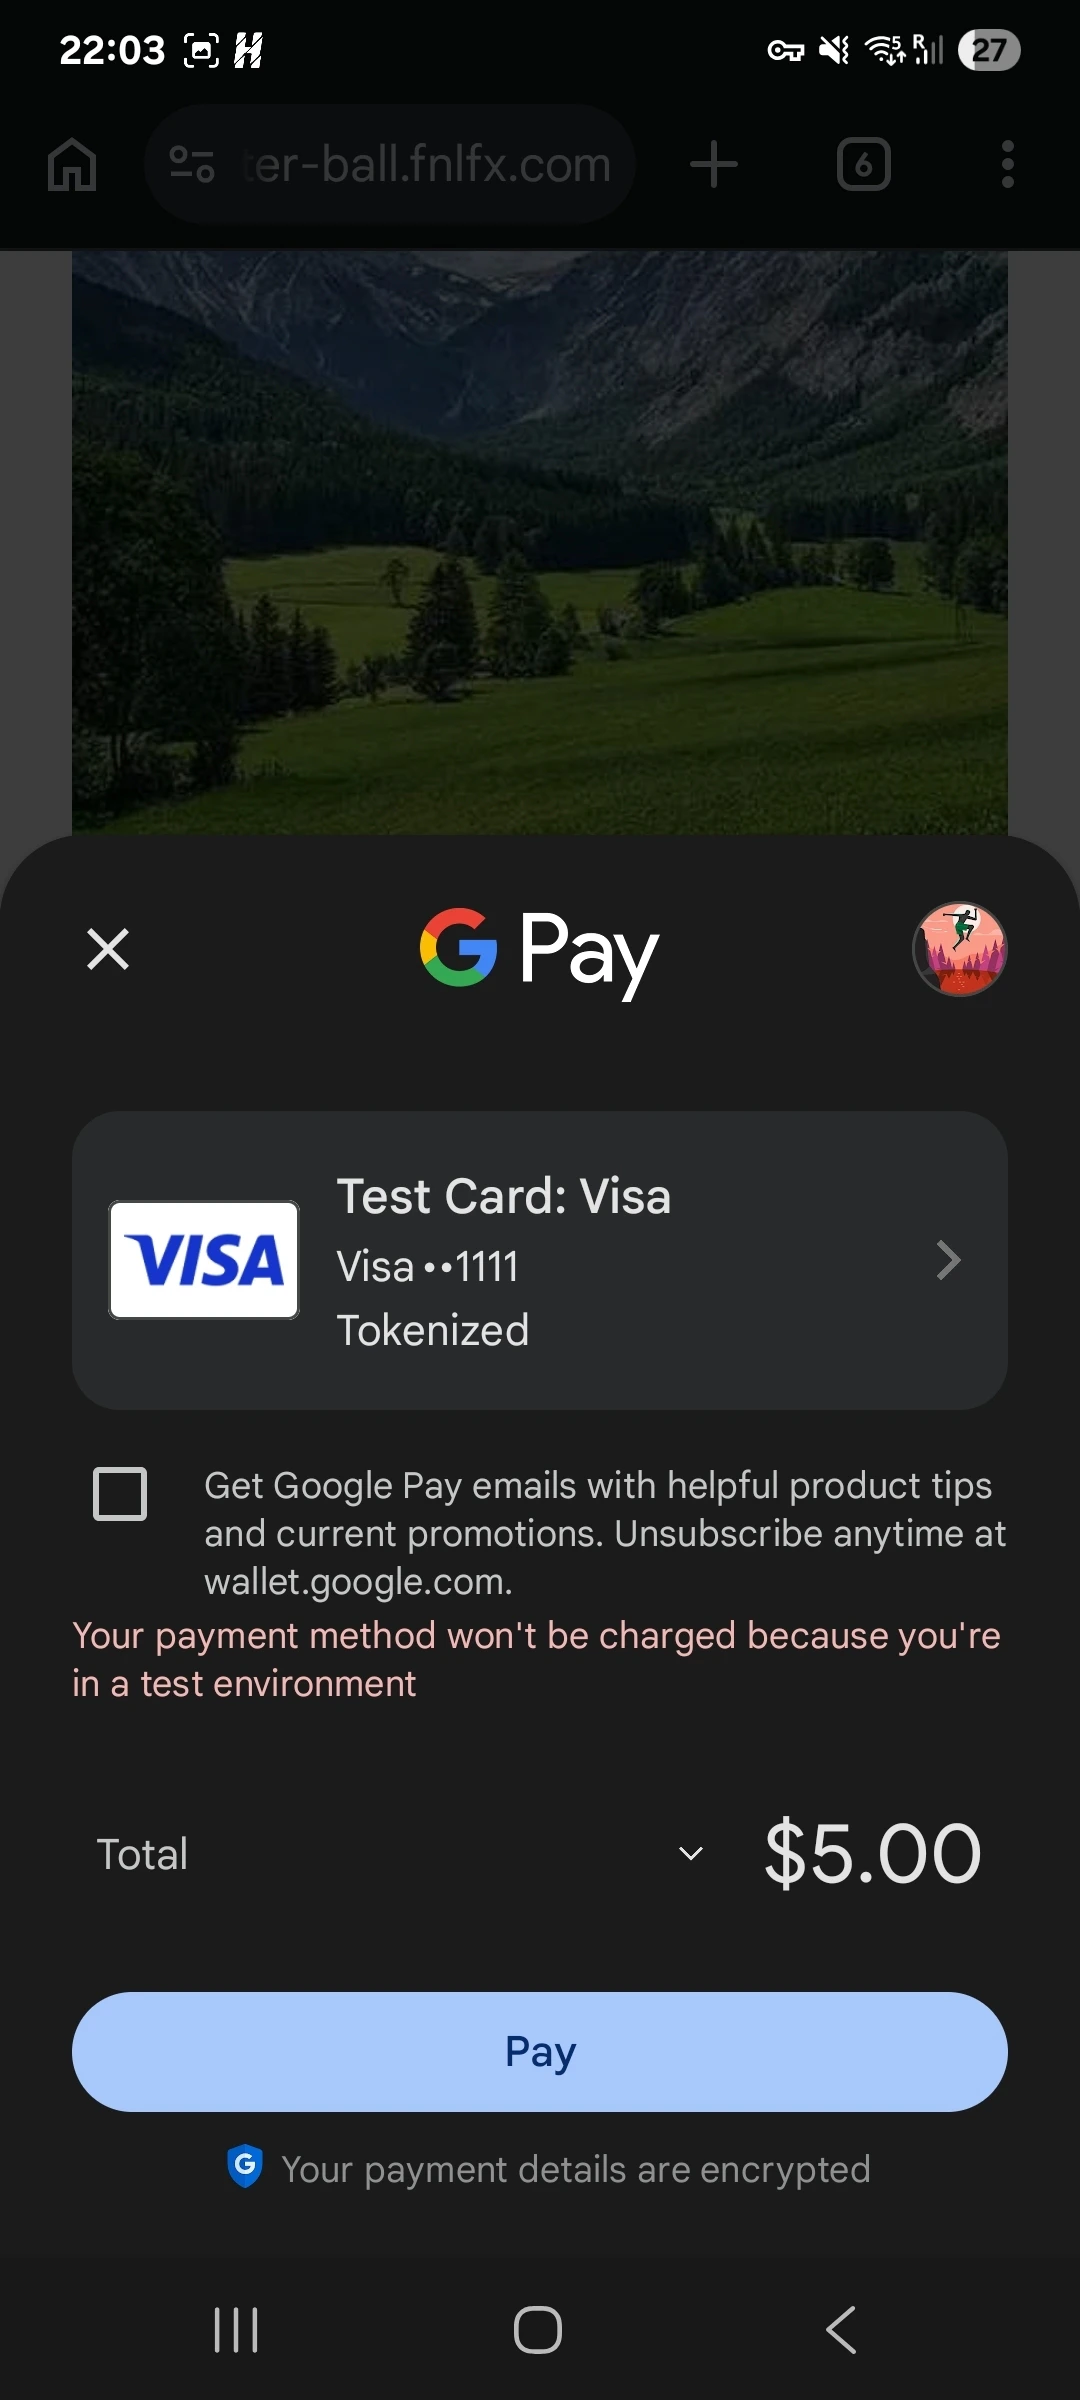
- Google Pay API payment screen
- Post-purchase screen
Use these screenshots for the Payment method screen (3) and Google Pay API payment screen (4):
Use these screenshots for the Payment method screen (3) and Google Pay API payment screen (4):
3. Set up PayPal
- Click + New integration on the Integrations page in Primer.
- Click Connect under PayPal.
- Go to Apps & Credentials in your PayPal Developer dashboard and open your app under REST API apps.
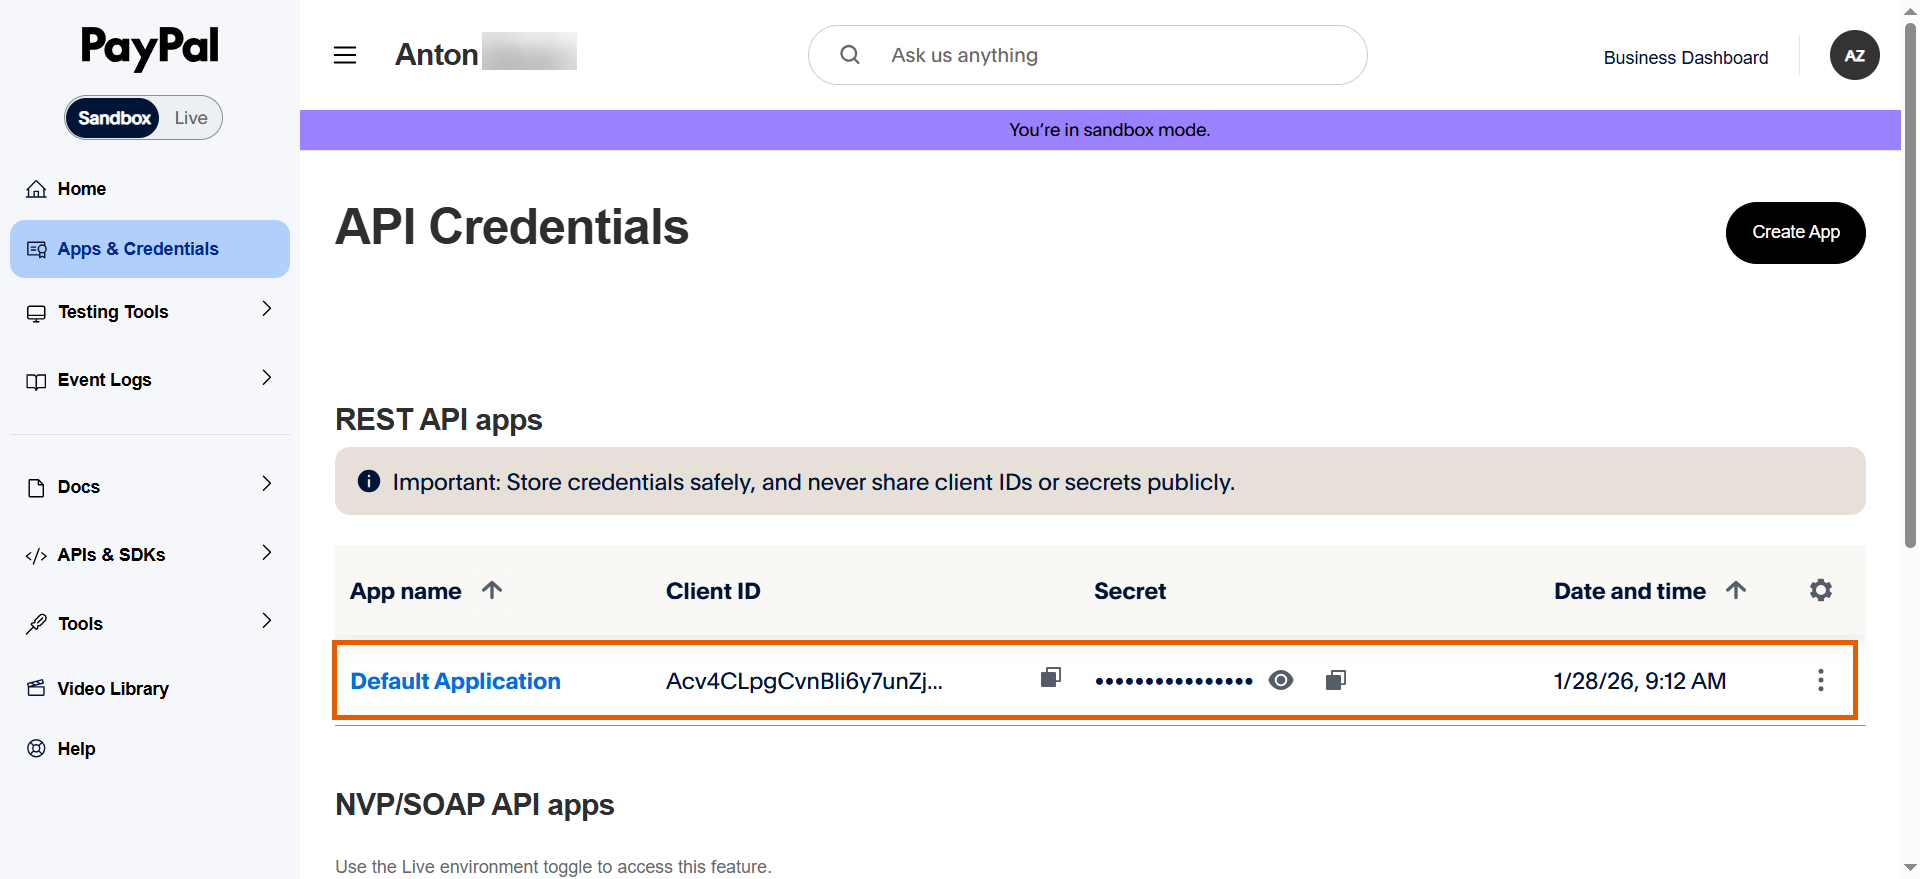
- Copy your PayPal API credentials and paste them in Primer:
- Account: Email address associated with the PayPal app under the Account info.
- Client ID: Public API identifier for the PayPal app under the API credentials.
- Secret: API secret key for the PayPal app under the API credentials.
- Landing Page: Billing page.
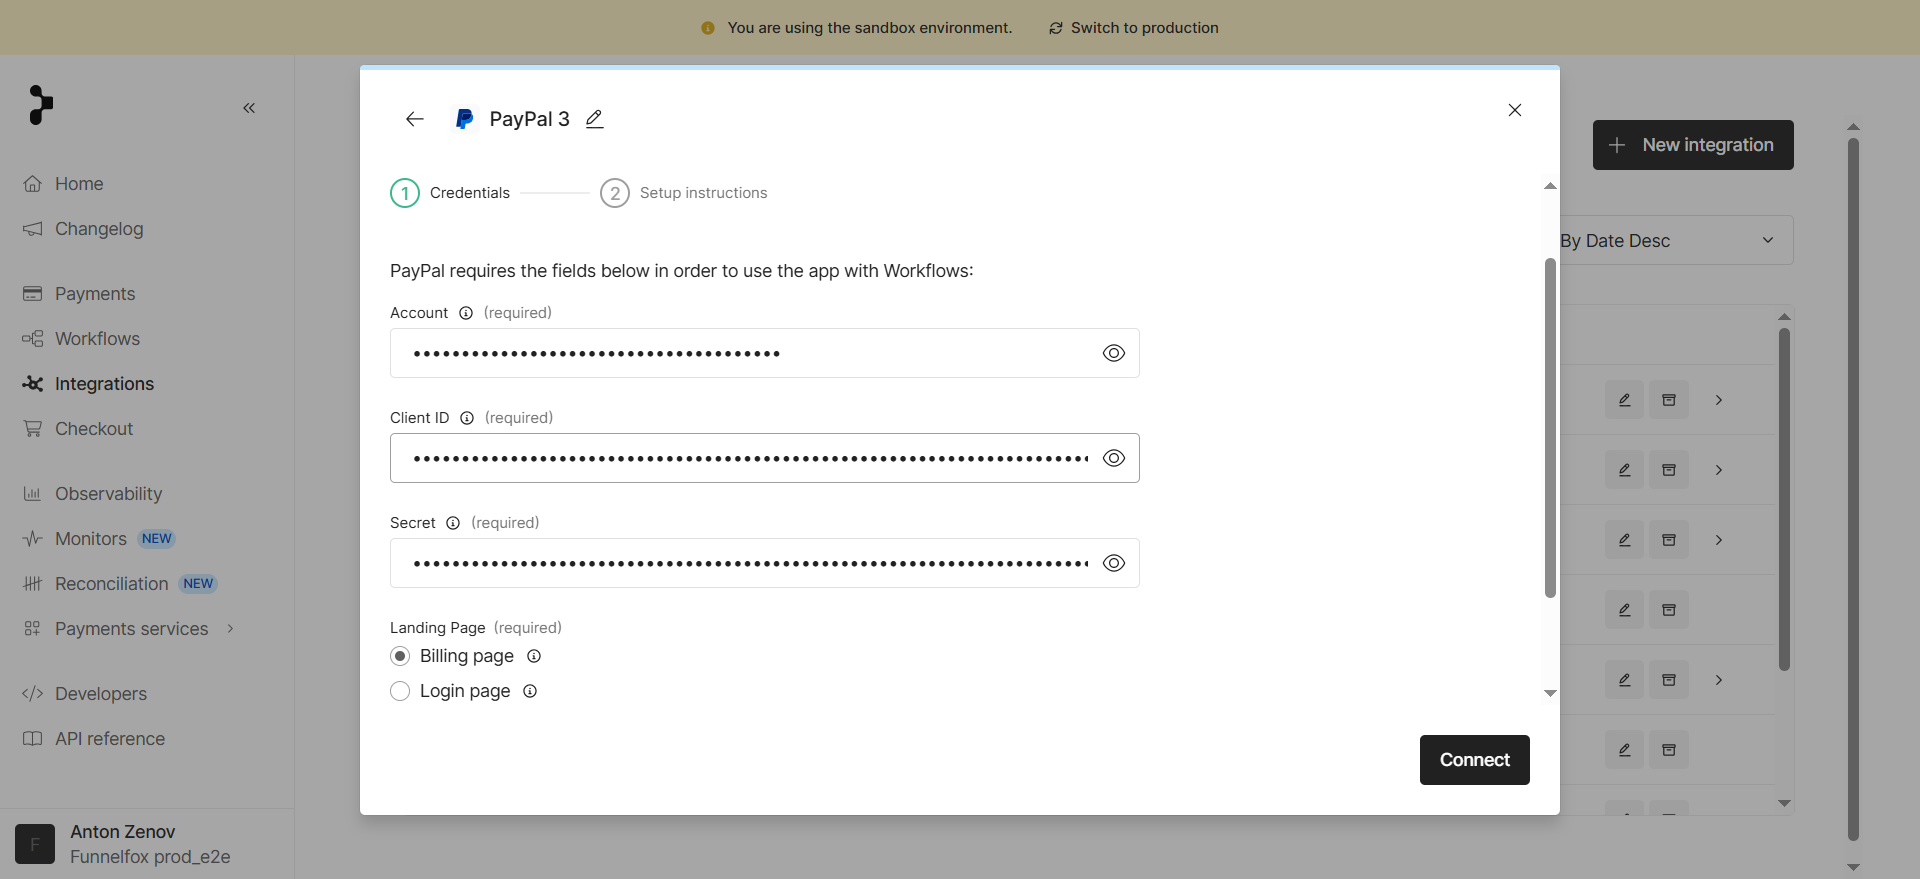
- Click Connect.
- Go back to your app page under Apps & Credentials in the PayPal Developer dashboard and ensure Save payment methods is enabled.
- Contact PayPal Support and request to enable Reference transactions.
Your FunnelFox Billing Production setup is complete. Make test payments to verify that everything is configured correctly.