Purchase and CompleteRegistration
to Facebook Events Manager, enabling better ad optimization on Instagram and
Facebook.
Conversions API additionally sends events directly from FunnelFox server to Meta, bypassing browser limitations. This guide walks you through the complete setup process.
We strongly recommend using Conversions API. If you’re unsure whether you
need it, read our guide on
why use Conversions API.
Set up Meta Pixel
Follow these steps to create a Meta dataset, get your Pixel ID, and connect it to FunnelFox.Use only one ad account per Pixel, and make sure your Pixel and
Conversions API send events to the same data source. Sharing a Pixel
across multiple ad accounts, or splitting browser and server events
between different data sources, gives data discrepancies and conversions mismatches.
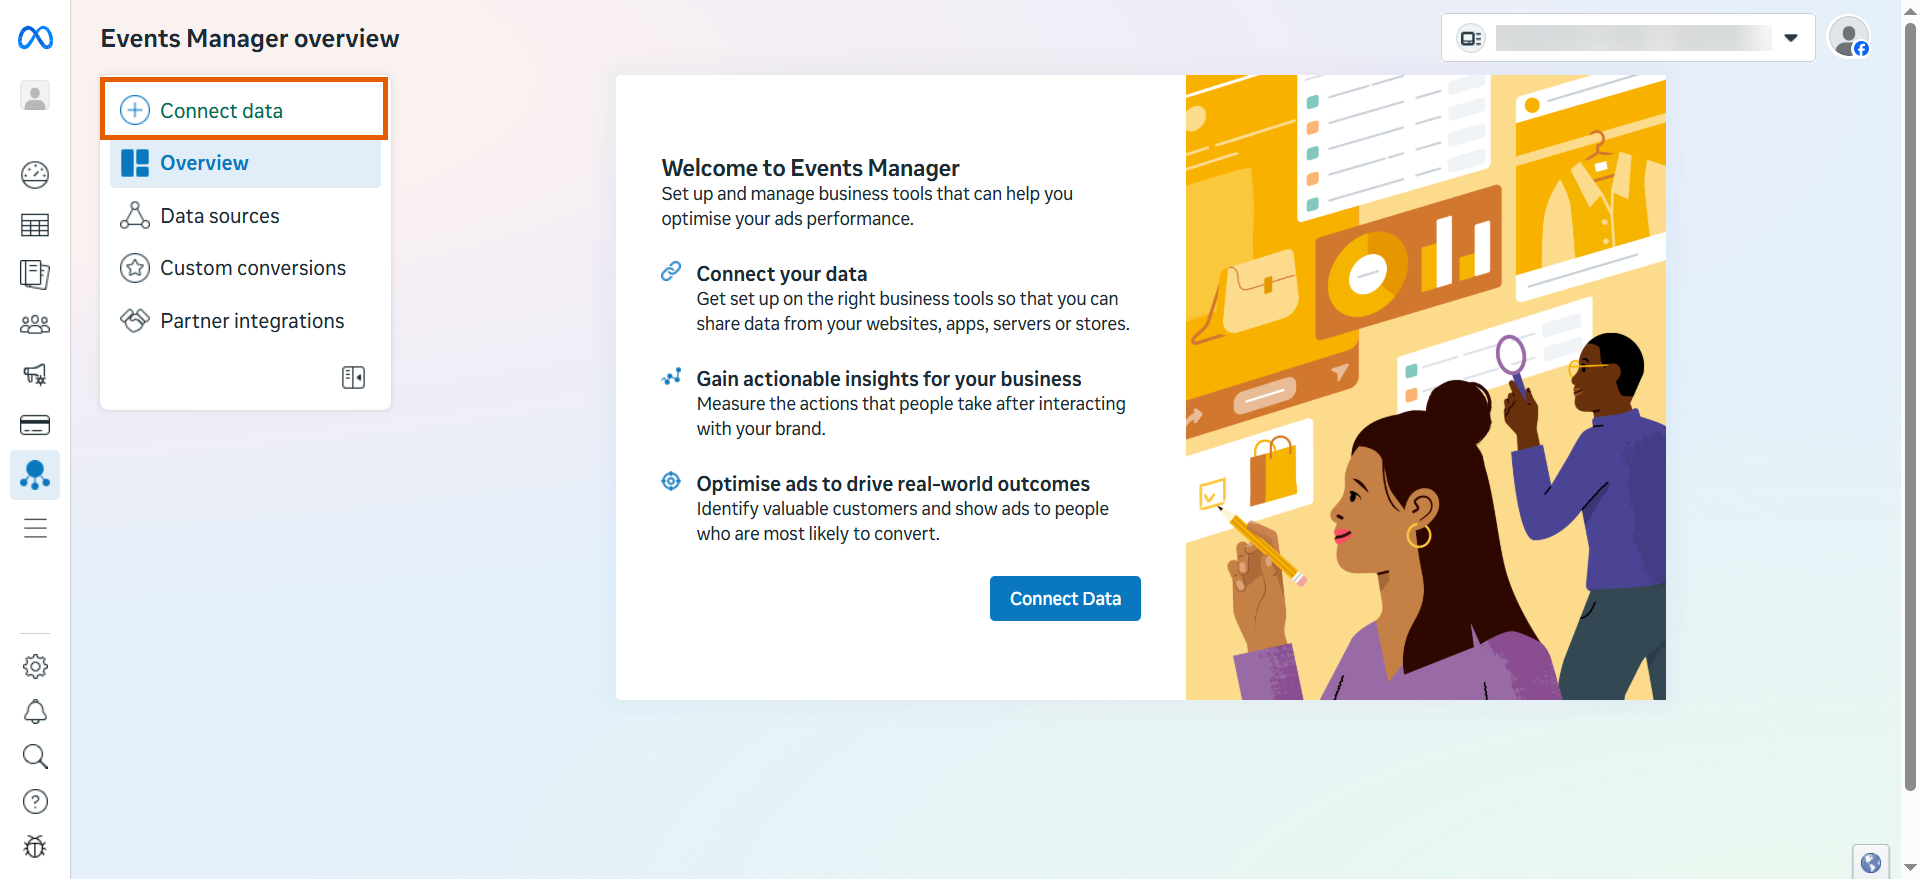
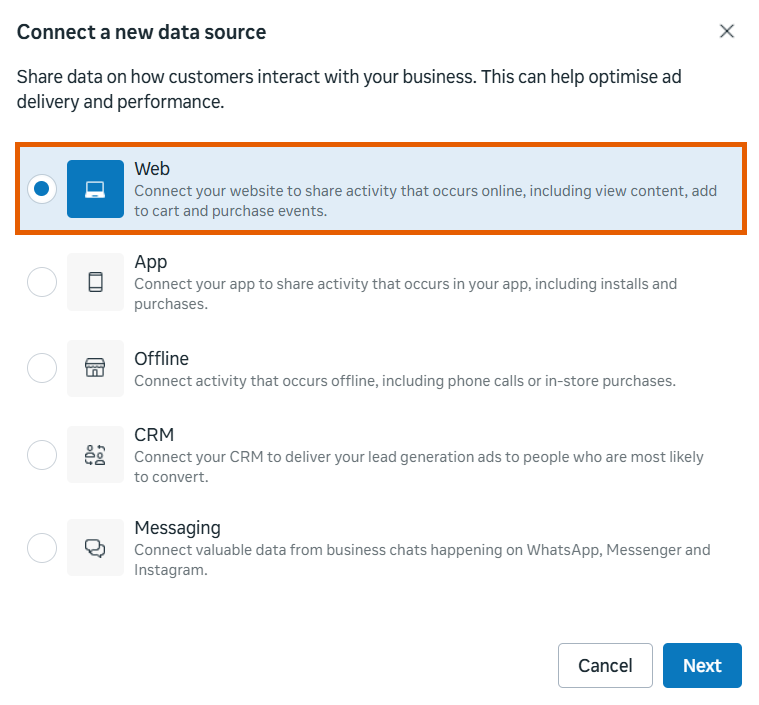
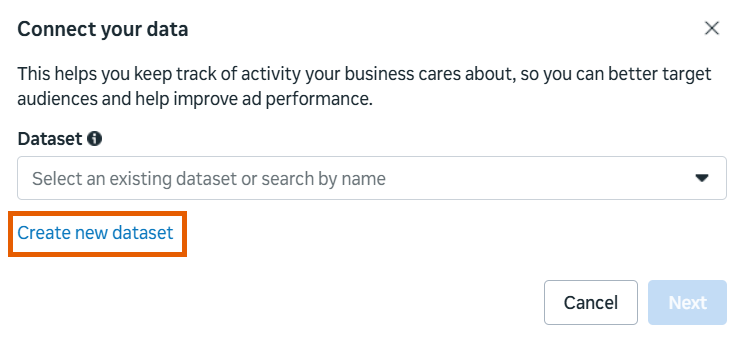
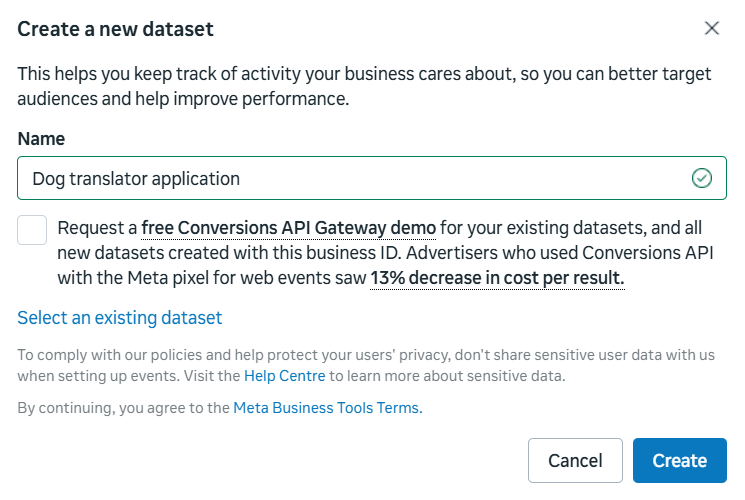
1. Create data source
- Go to Meta Events Manager.
- Click Connect data.
- Select Web.
- Click Create new dataset.
- Name your dataset and uncheck the demo request.
- Click Create.
Your dataset is created. Follow the steps below to set up your integration.
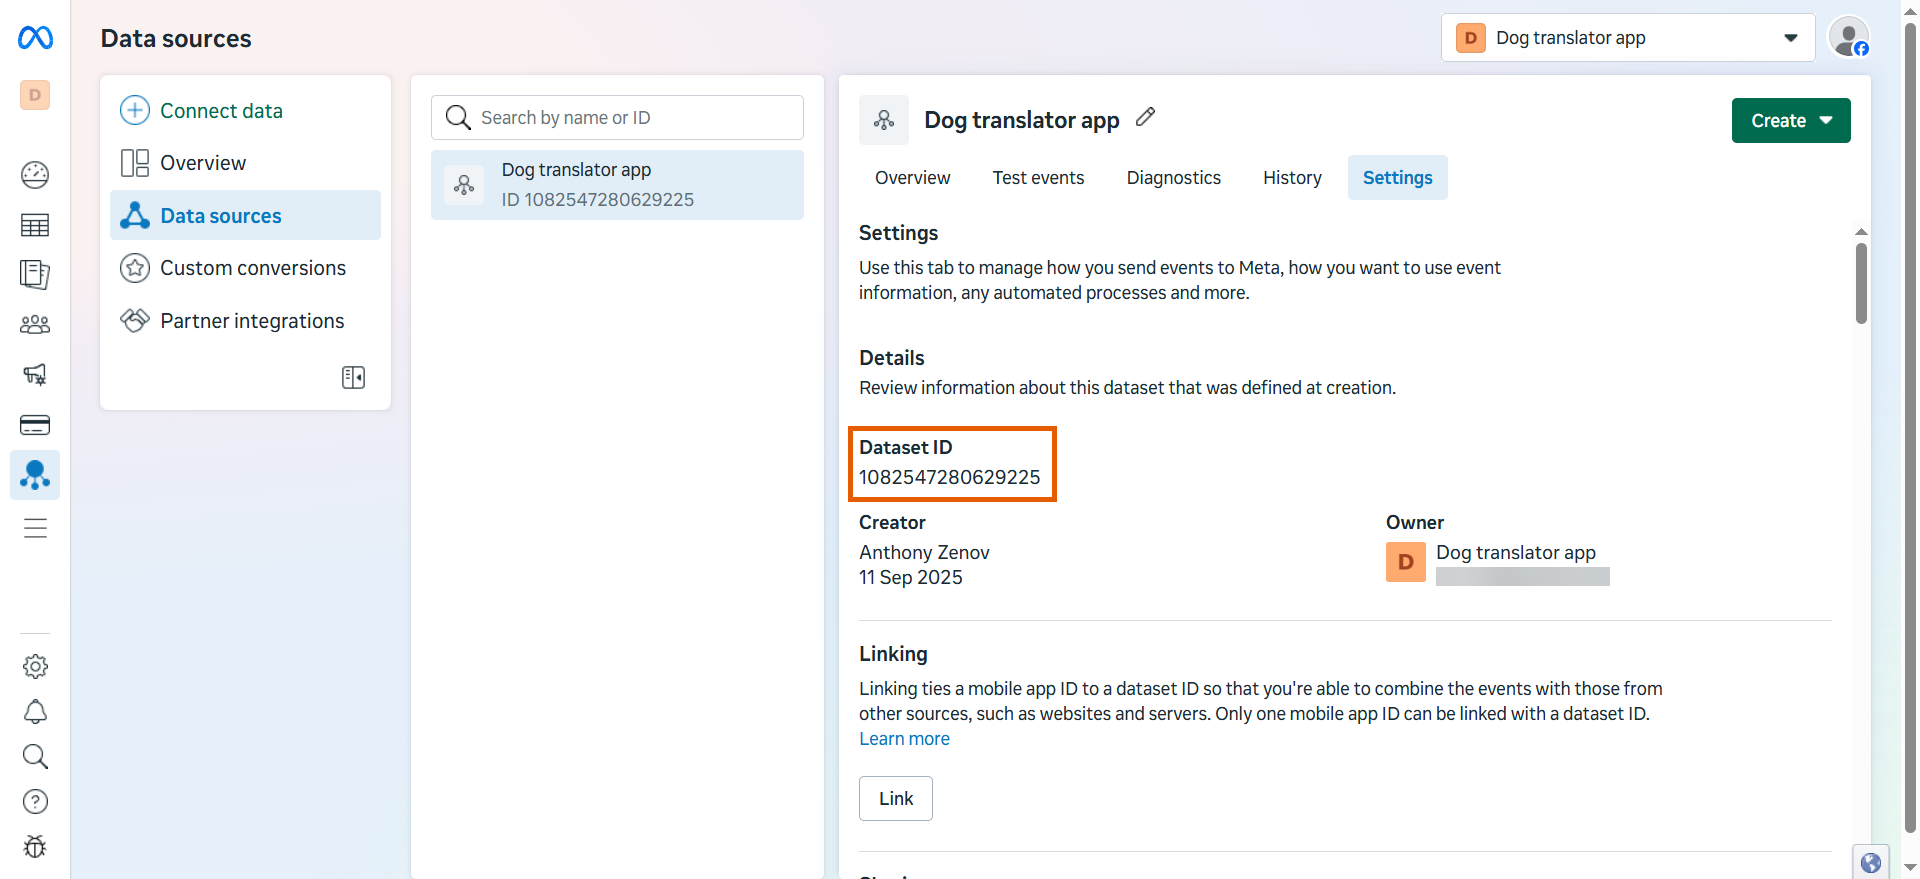
2. Access your Pixel ID
- Go to Meta Events Manager > Data sources.
- Select the Pixel (data source) you’ve created.
- Copy the Dataset ID on the right or by going to the Settings tab for the data source.
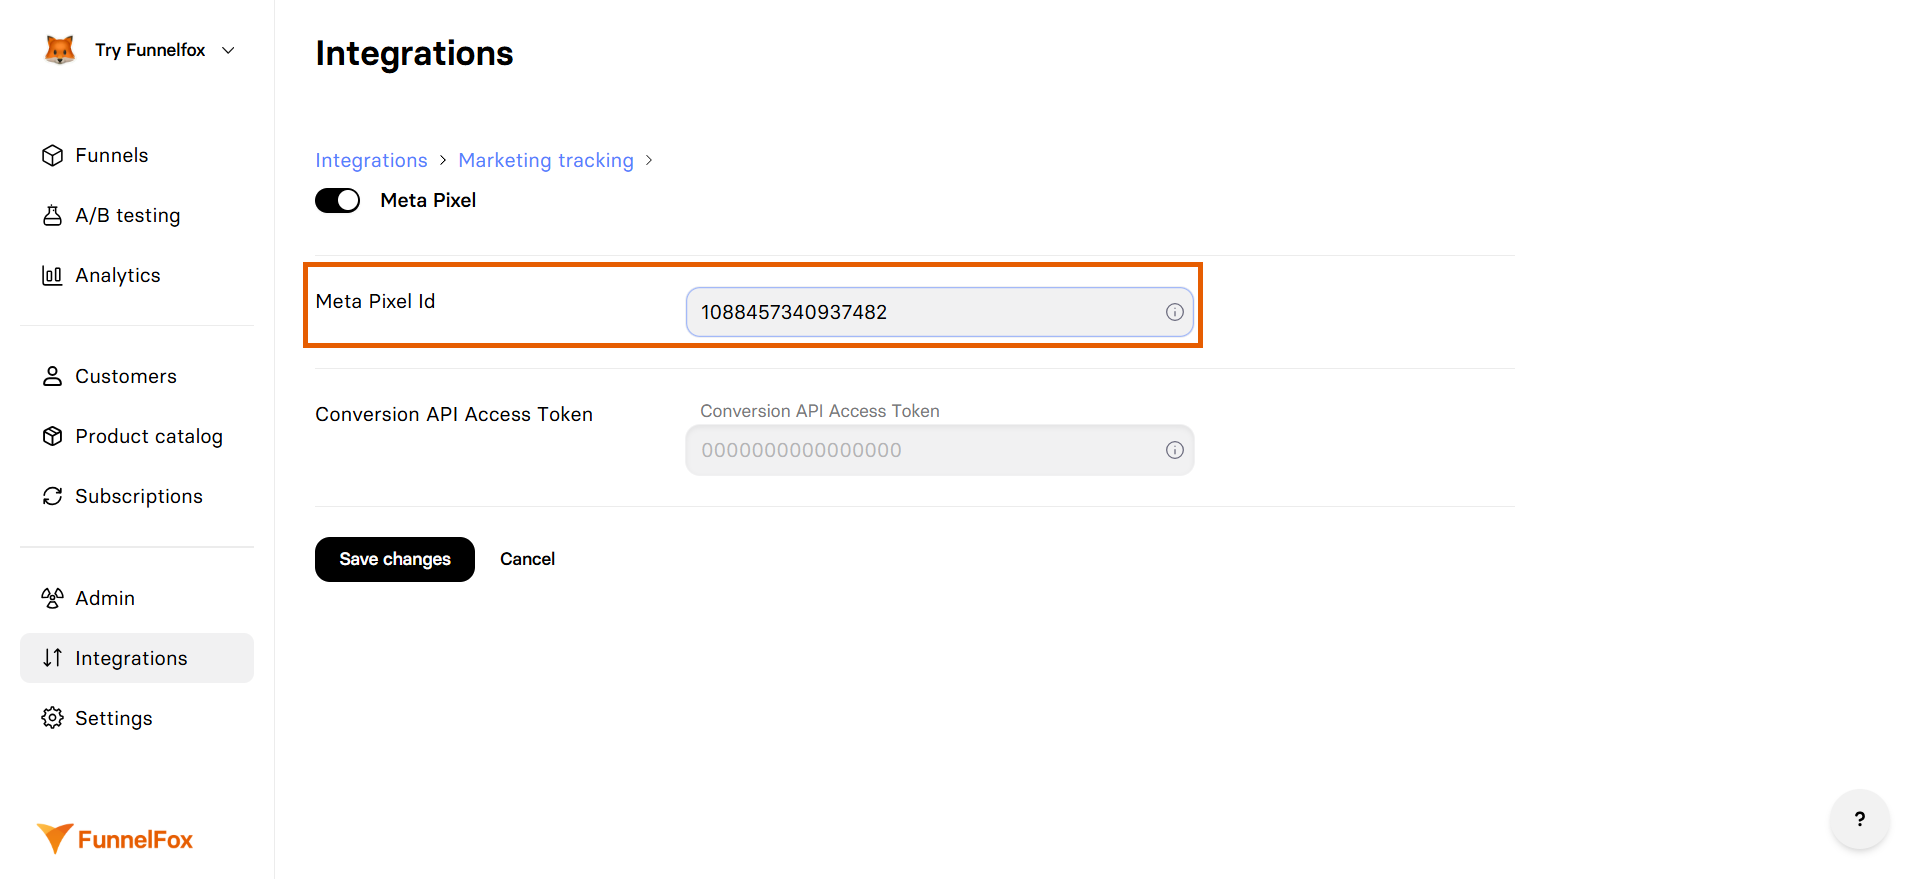
3. Apply Pixel ID in FunnelFox
- Go to Integrations > Meta Pixel in FunnelFox.
- Paste your Dataset ID (Pixel ID) into the Meta Pixel ID field.
- Click Save changes.
Meta Pixel event tracking is now active! Republish your funnels, or enhance tracking with the Conversions API by following the next section.
Set up Conversions API
To set up the Conversions API, you must be an admin or developer for the Meta business portfolio.
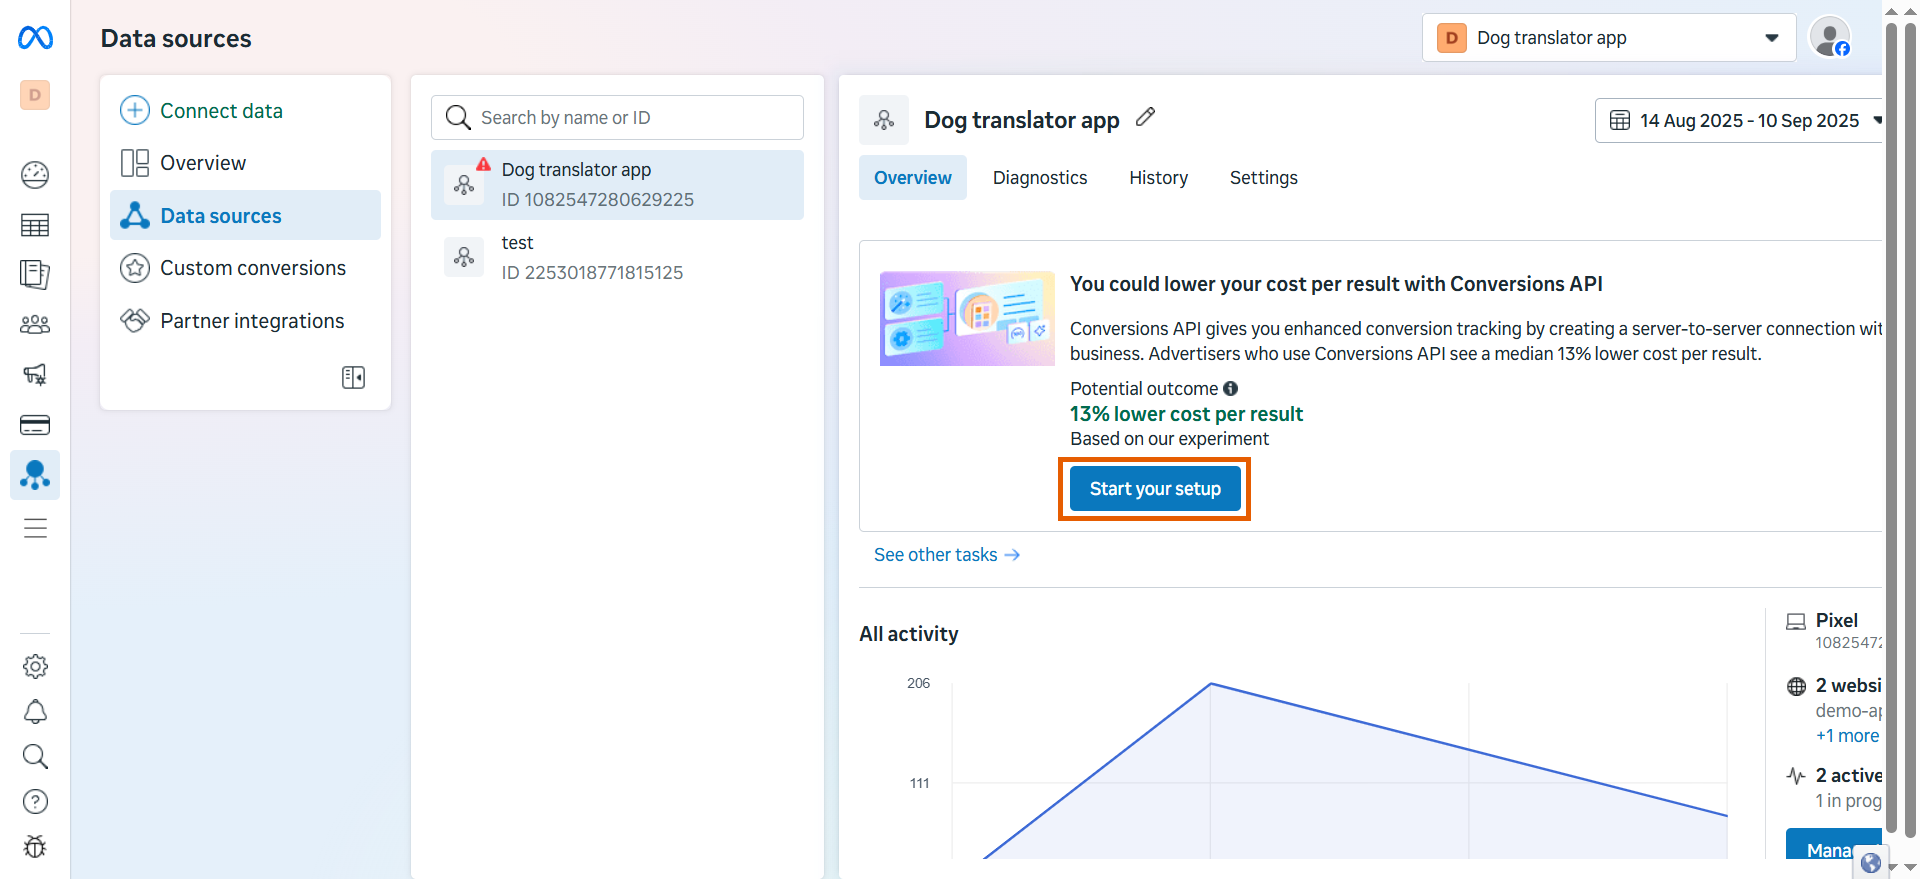
1. Start your setup
- Go to Meta Events Manager > Data sources.
- Select your Pixel (data source).
- Click Start your setup on the Conversions API notification.
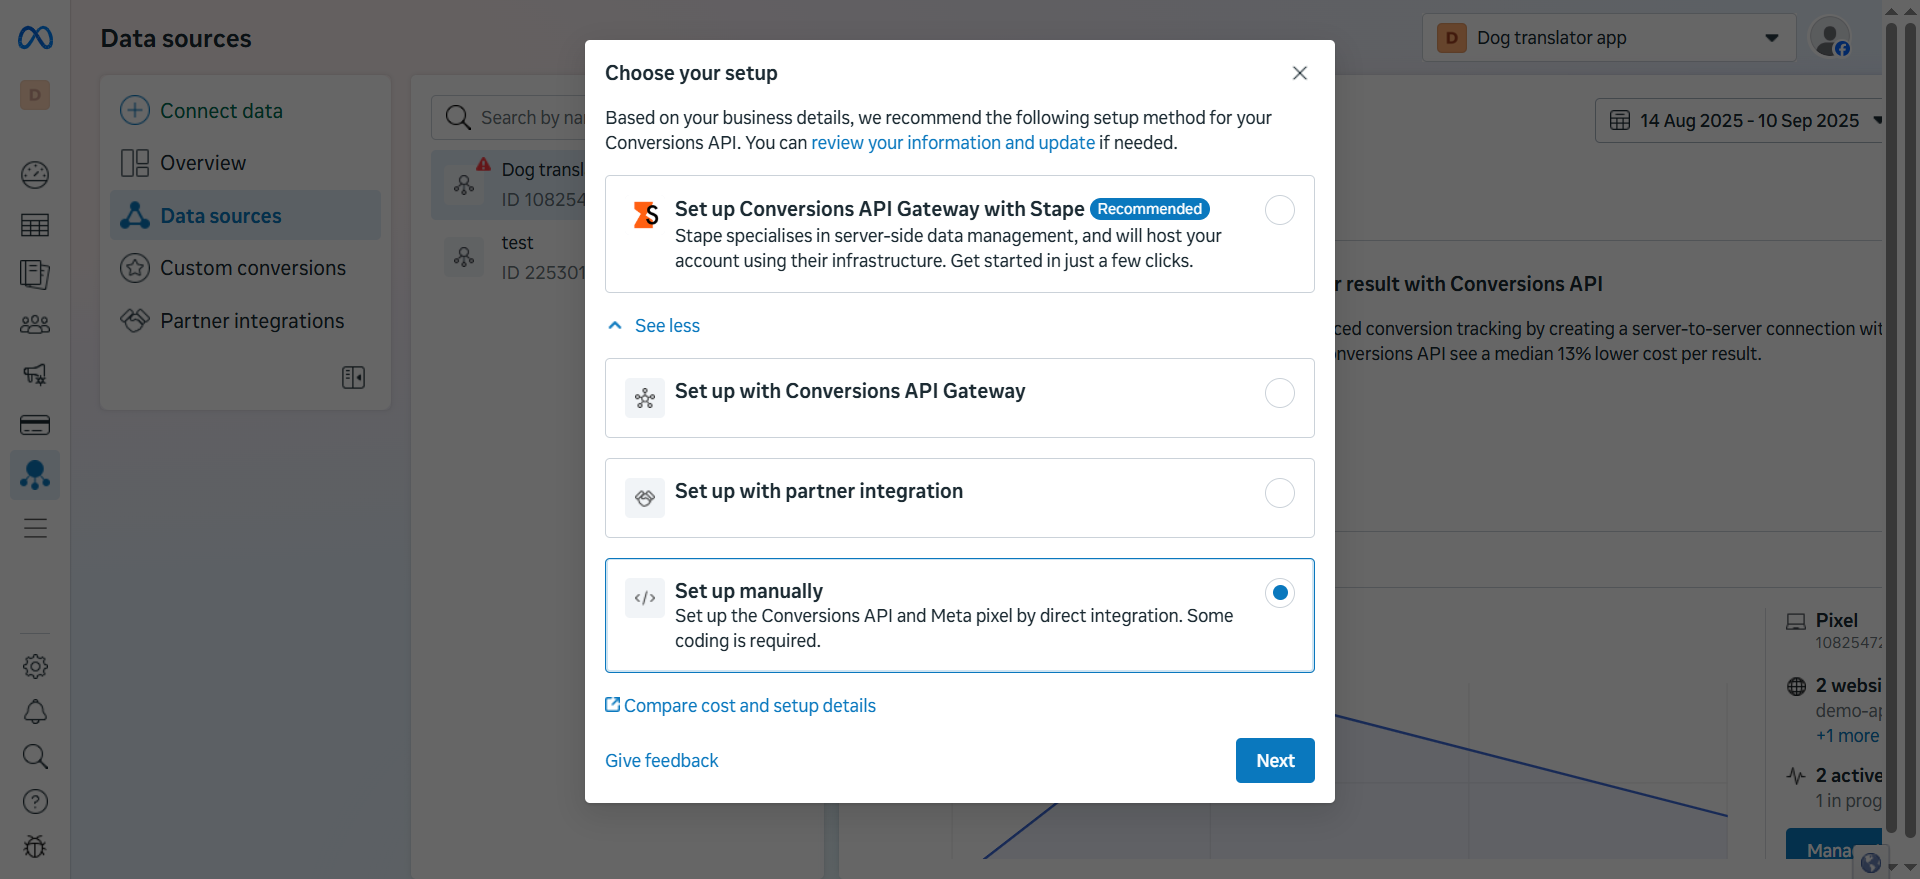
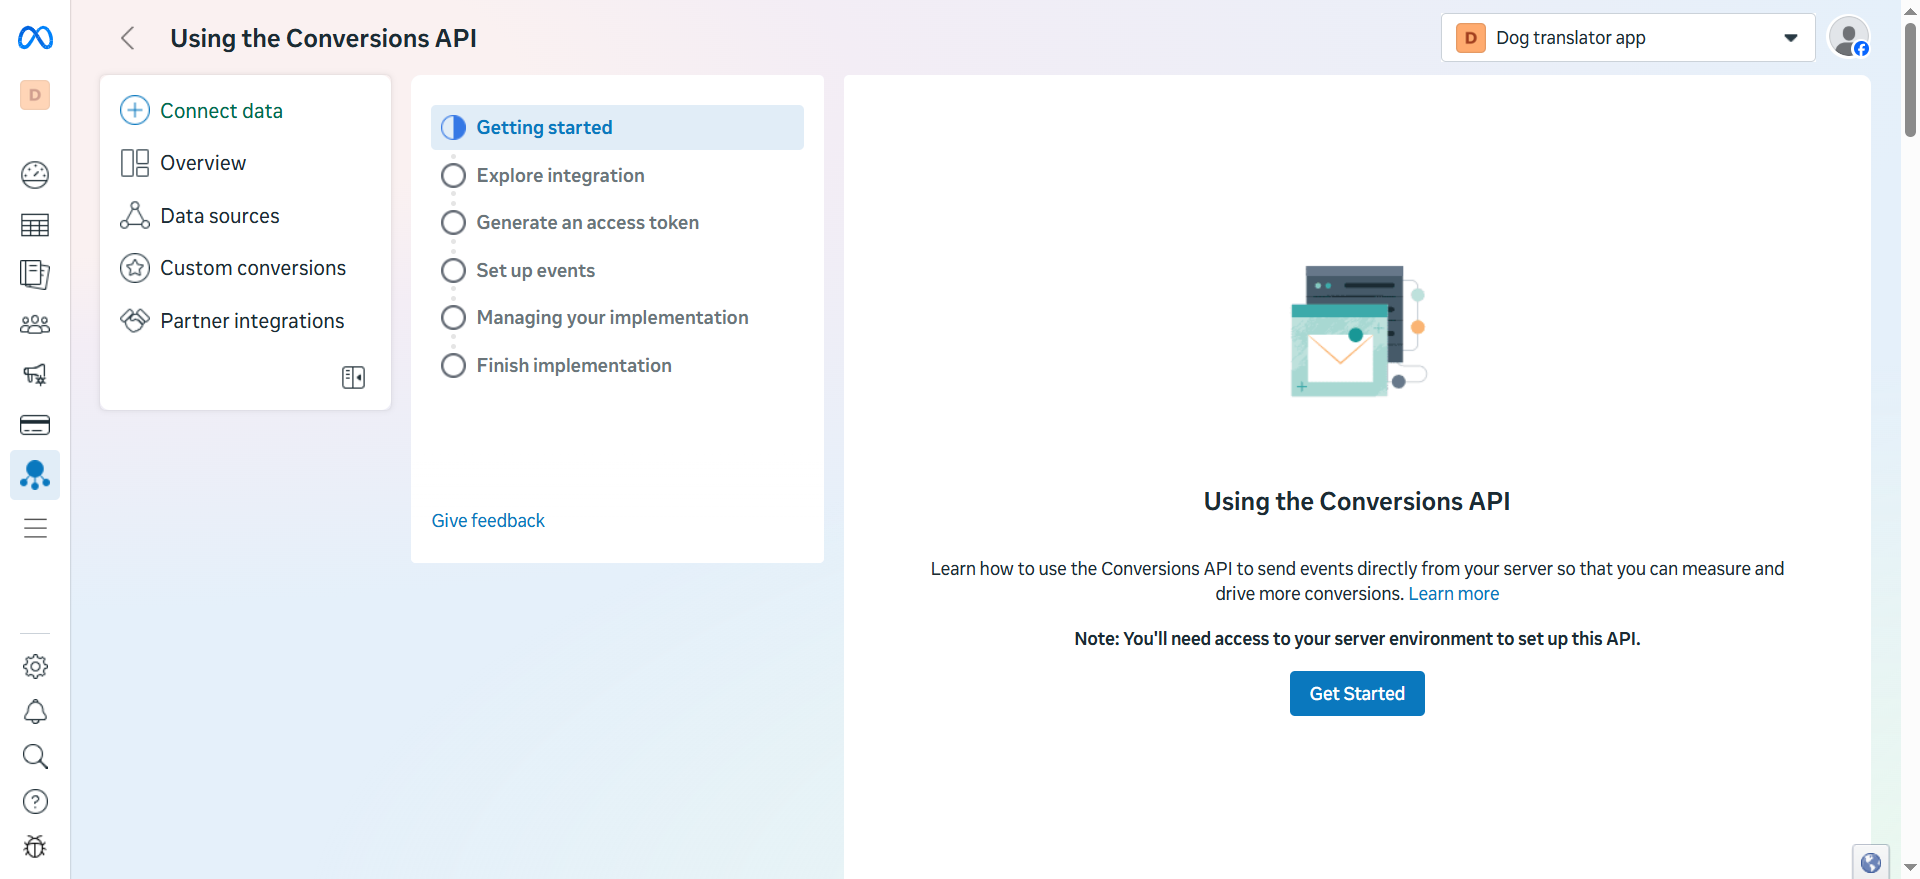
2. Choose setup method
- Click See other ways to setup.
- Select Set up manually.
- Click Next.
3. Configure setup options
- Select Conversions API and Meta pixel.
- Click Next.
- Click Start CAPI setup.
- Click Finish.
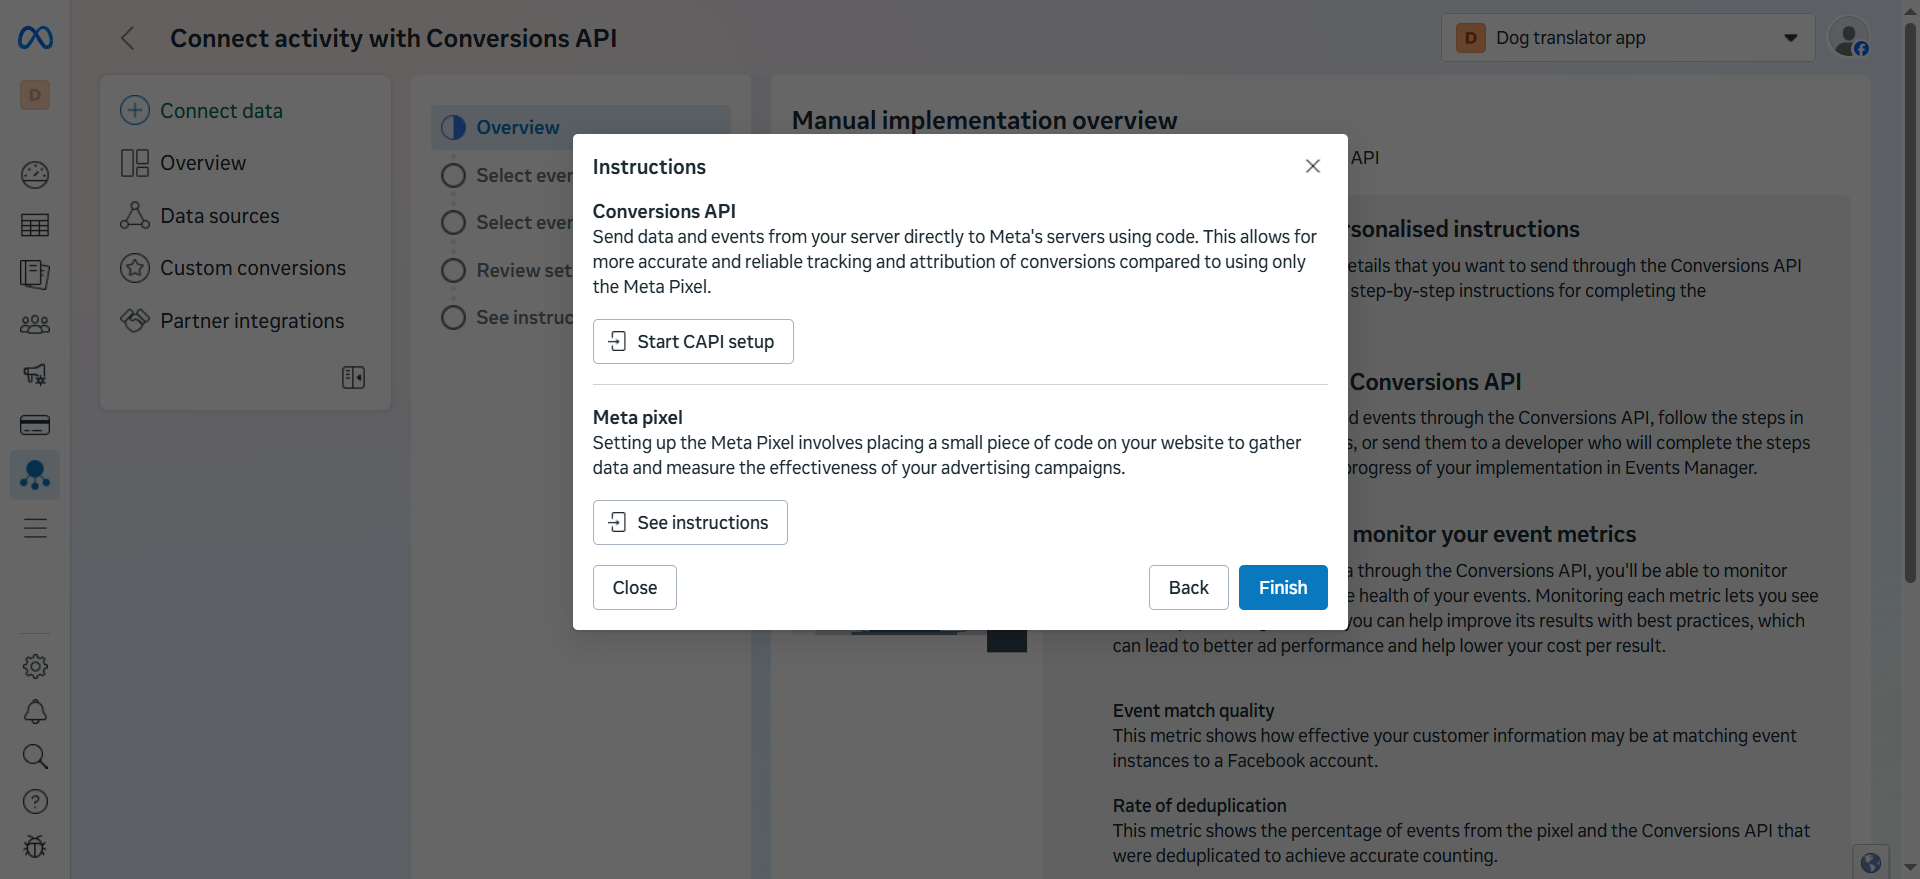
4. Manual implementation
- Click Continue under Manual implementation overview.
- Checkmark Events sent using pixel code.
- Select all events to track with Conversions API under Additional events.
- Click Continue.

- Click Continue under Select parameters.
- Click Continue under Review setup.
- Click Continue under See instructions.
5. Generate access token
- Go to the Generate an access token section and select Set up without Dataset Quality API.
This guide covers the setup flow without Dataset Quality API, but you can select any option under Generate an access token.
- Click Generate Access Token.
- Copy the access token.
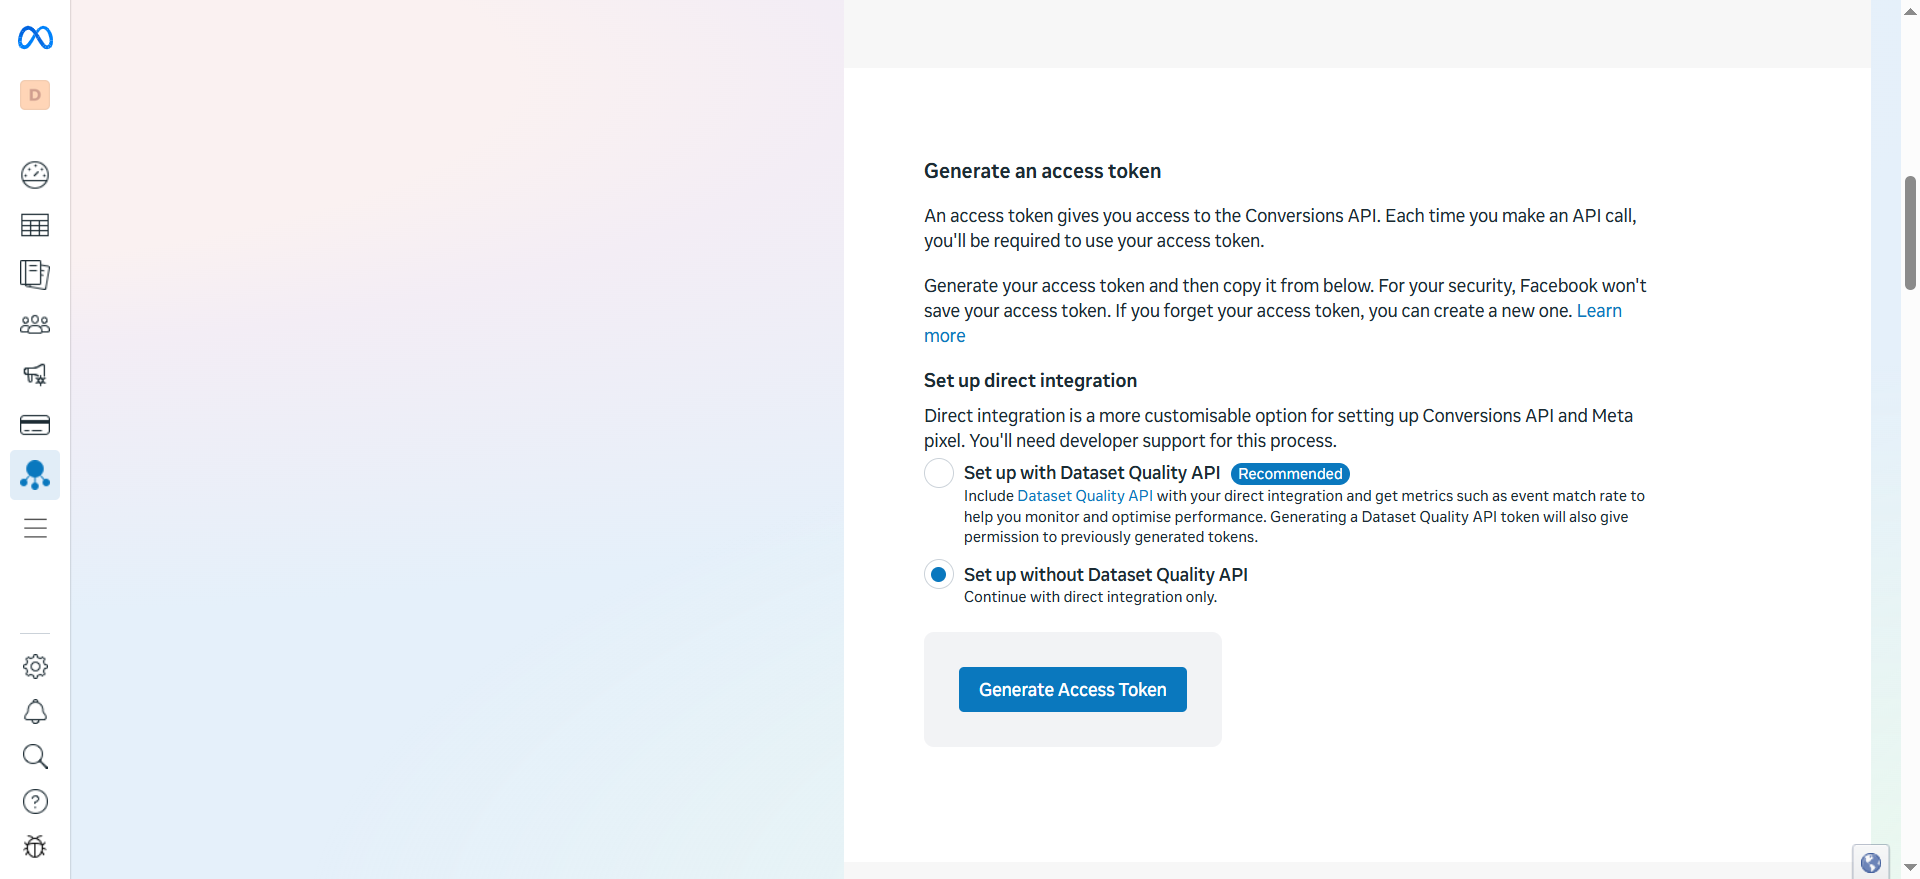
- Click Finish.
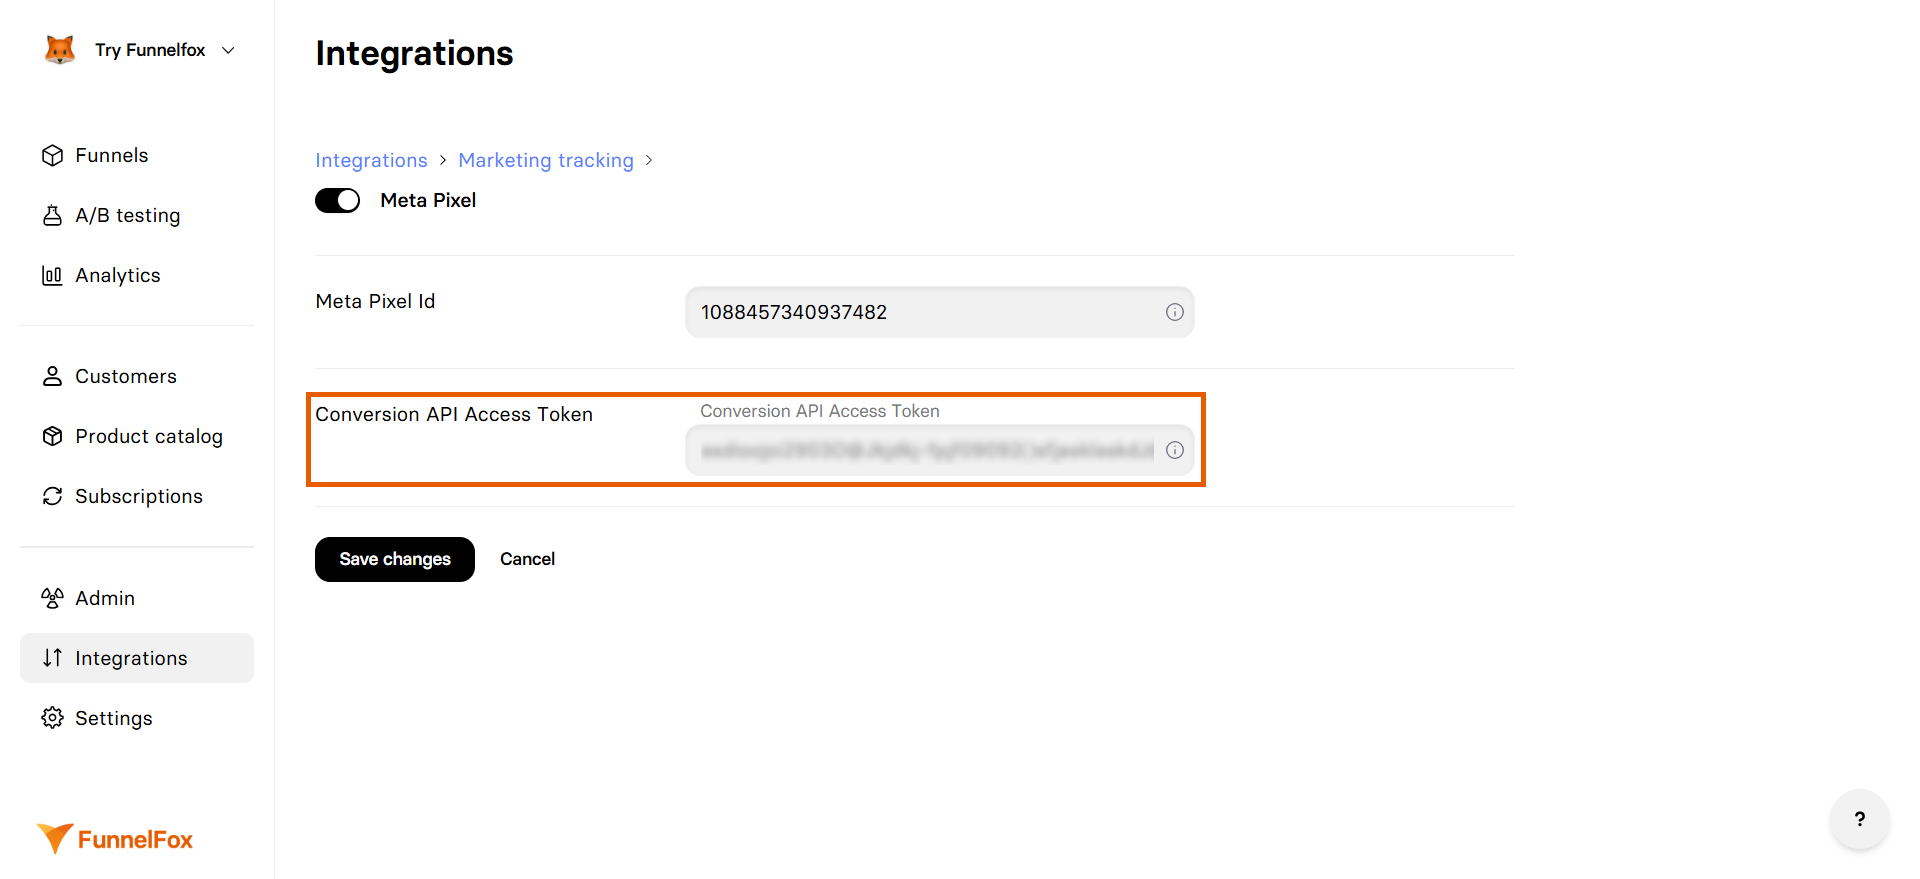
6. Apply token in FunnelFox
- Go to Integrations > Meta Pixel in FunnelFox.
- Paste your access token into the Conversion API Access Token field.
- Click Save changes.
Conversions API is now active! Republish your funnels and test event tracking.
Test your integration
Verify that event tracking works correctly by sending test events from your funnel:- Go to Meta Events Manager > Data sources.
- Select your Pixel (data source).
- Go to Test events for the data source.
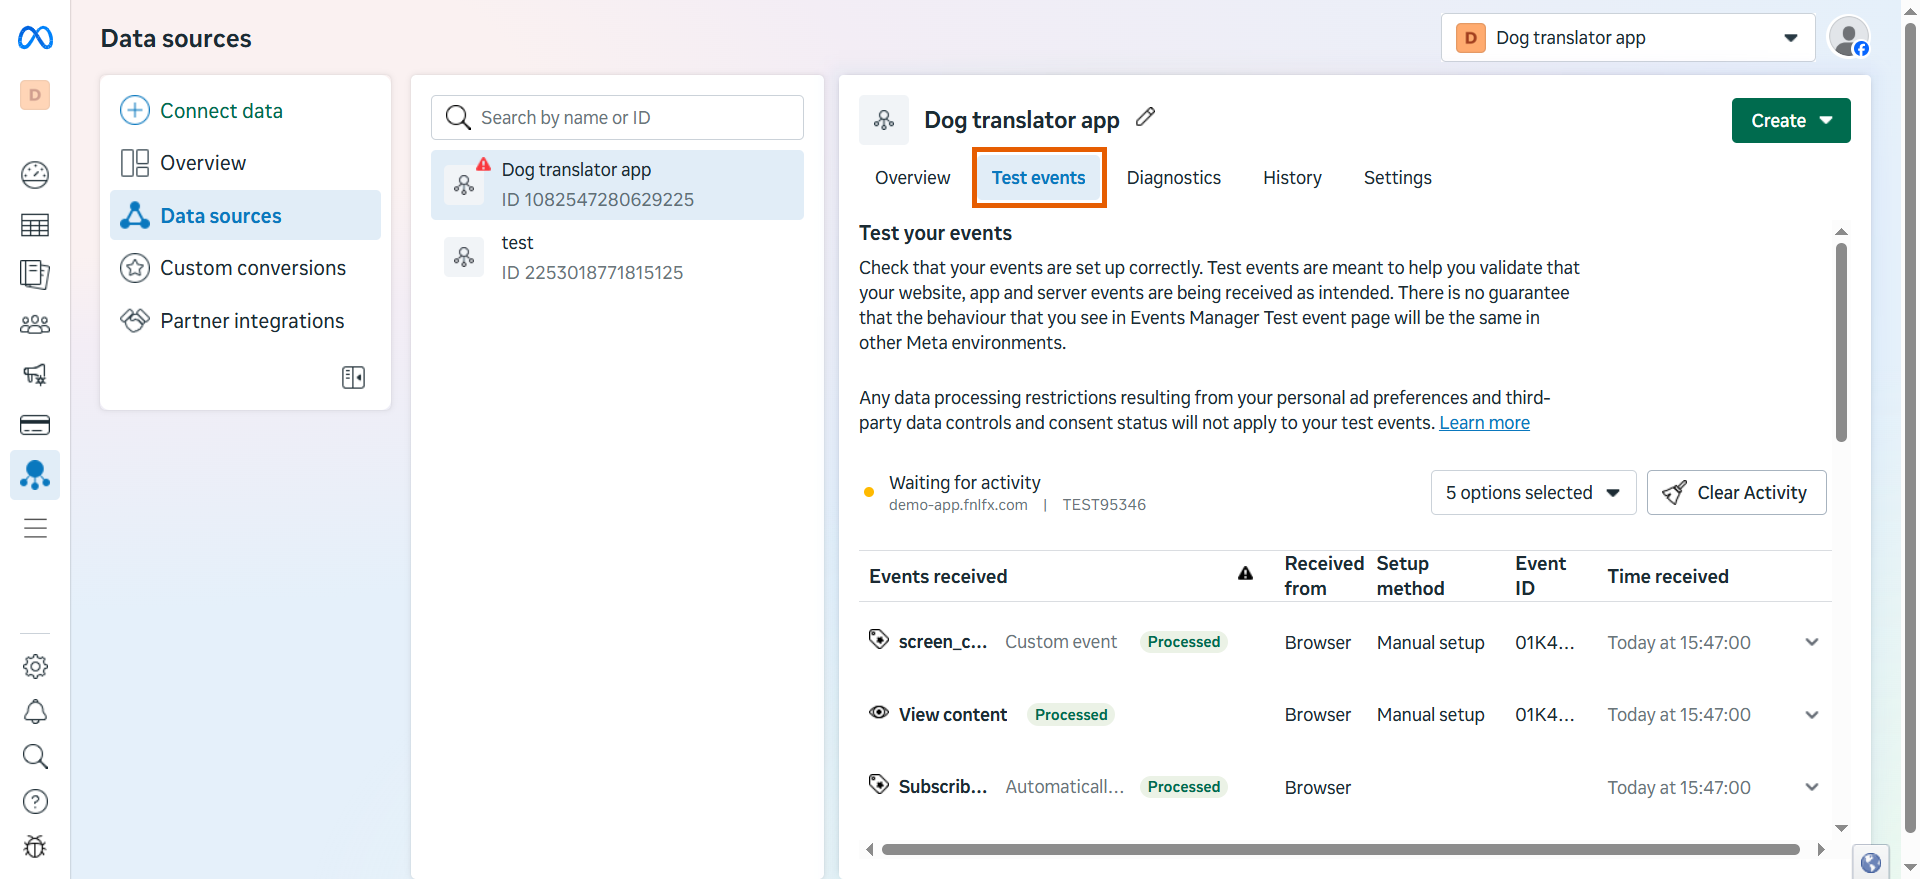
- Open your published funnel and interact with it. Events will appear in the Test events tab.

Test Conversions API
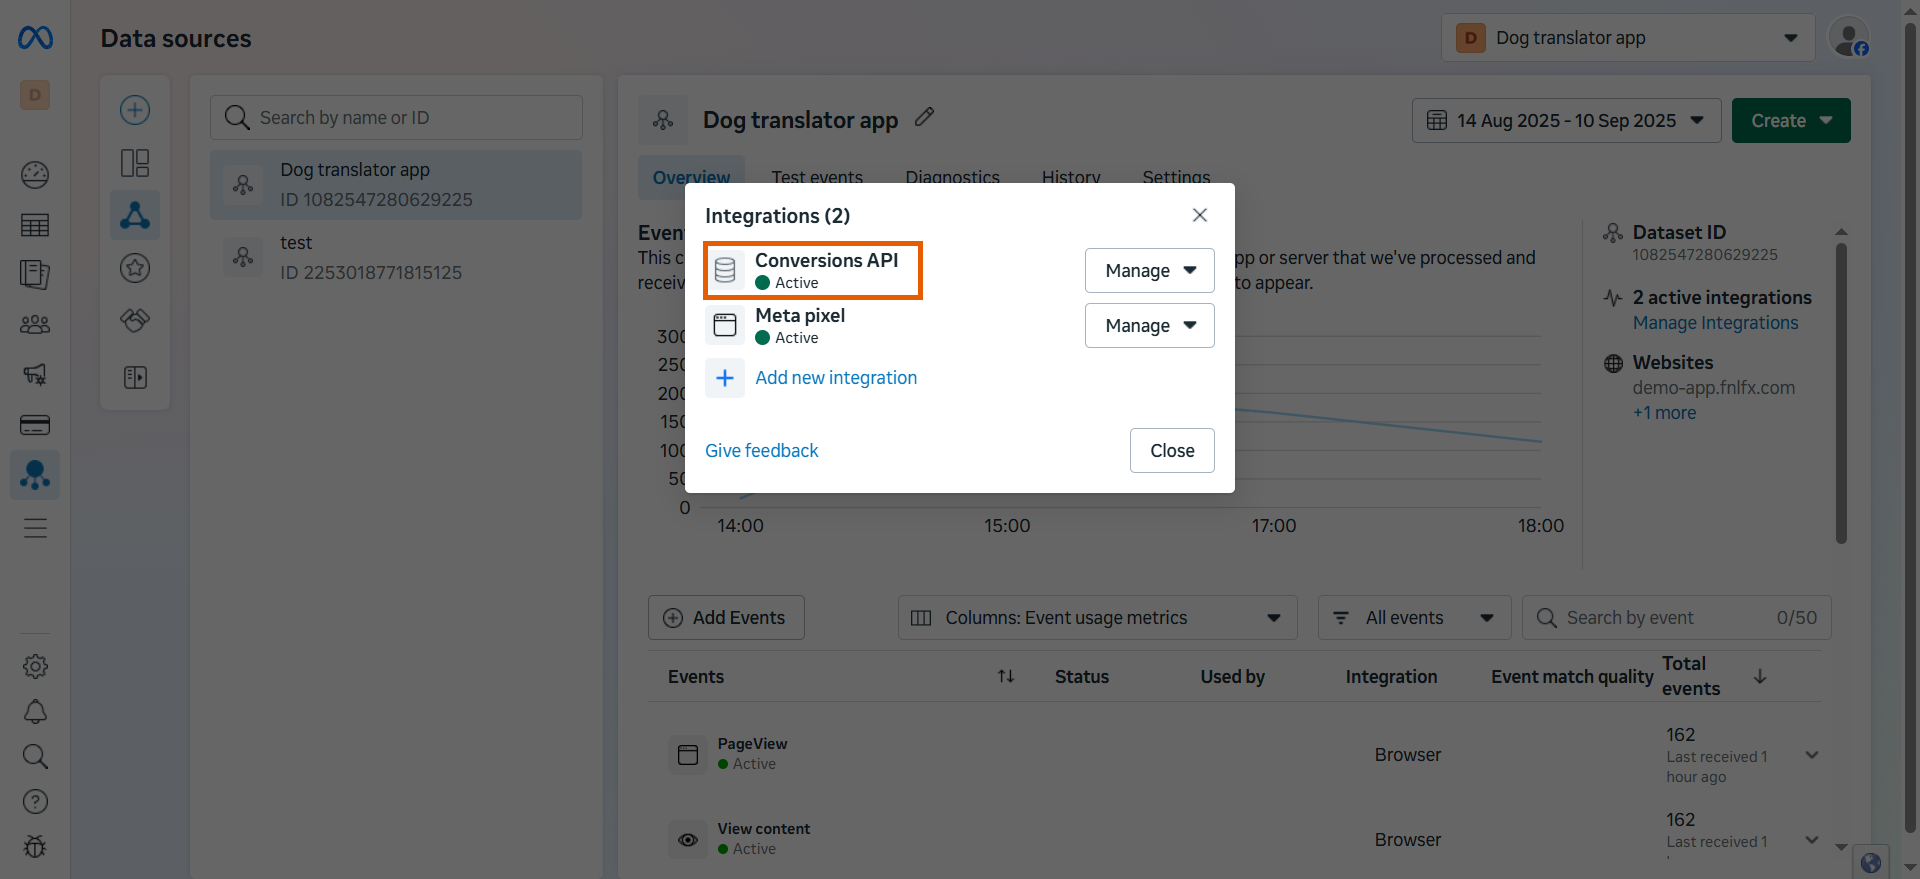
Ensure that Conversions API is set up and sending events properly. To check the integration status:- Click Manage integrations from the Overview tab of your data source.
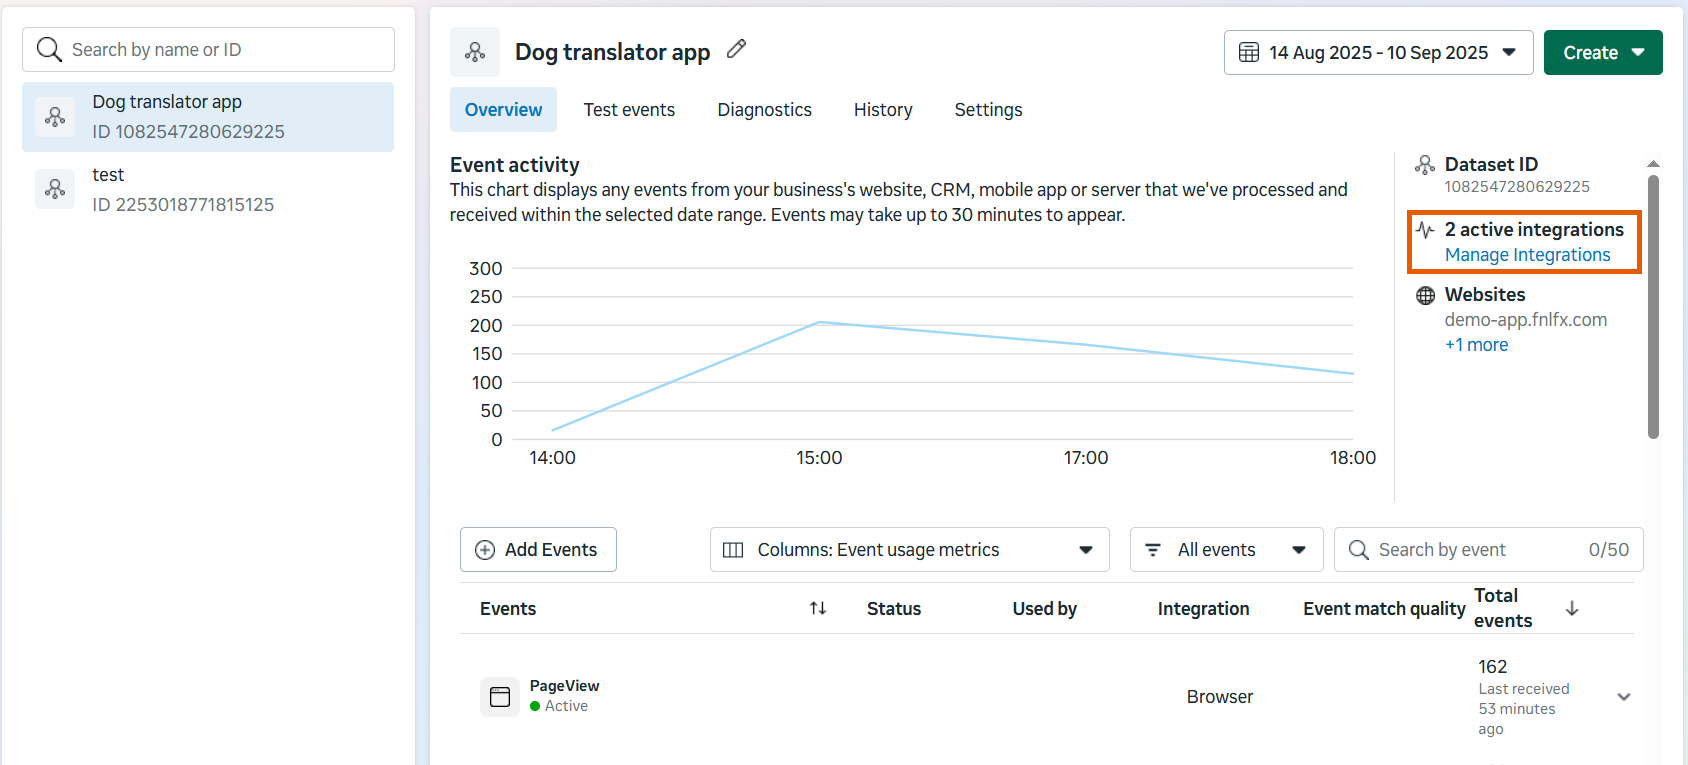
- Check the status under Conversions API. Active or Waiting for first event statuses indicate successful setup.
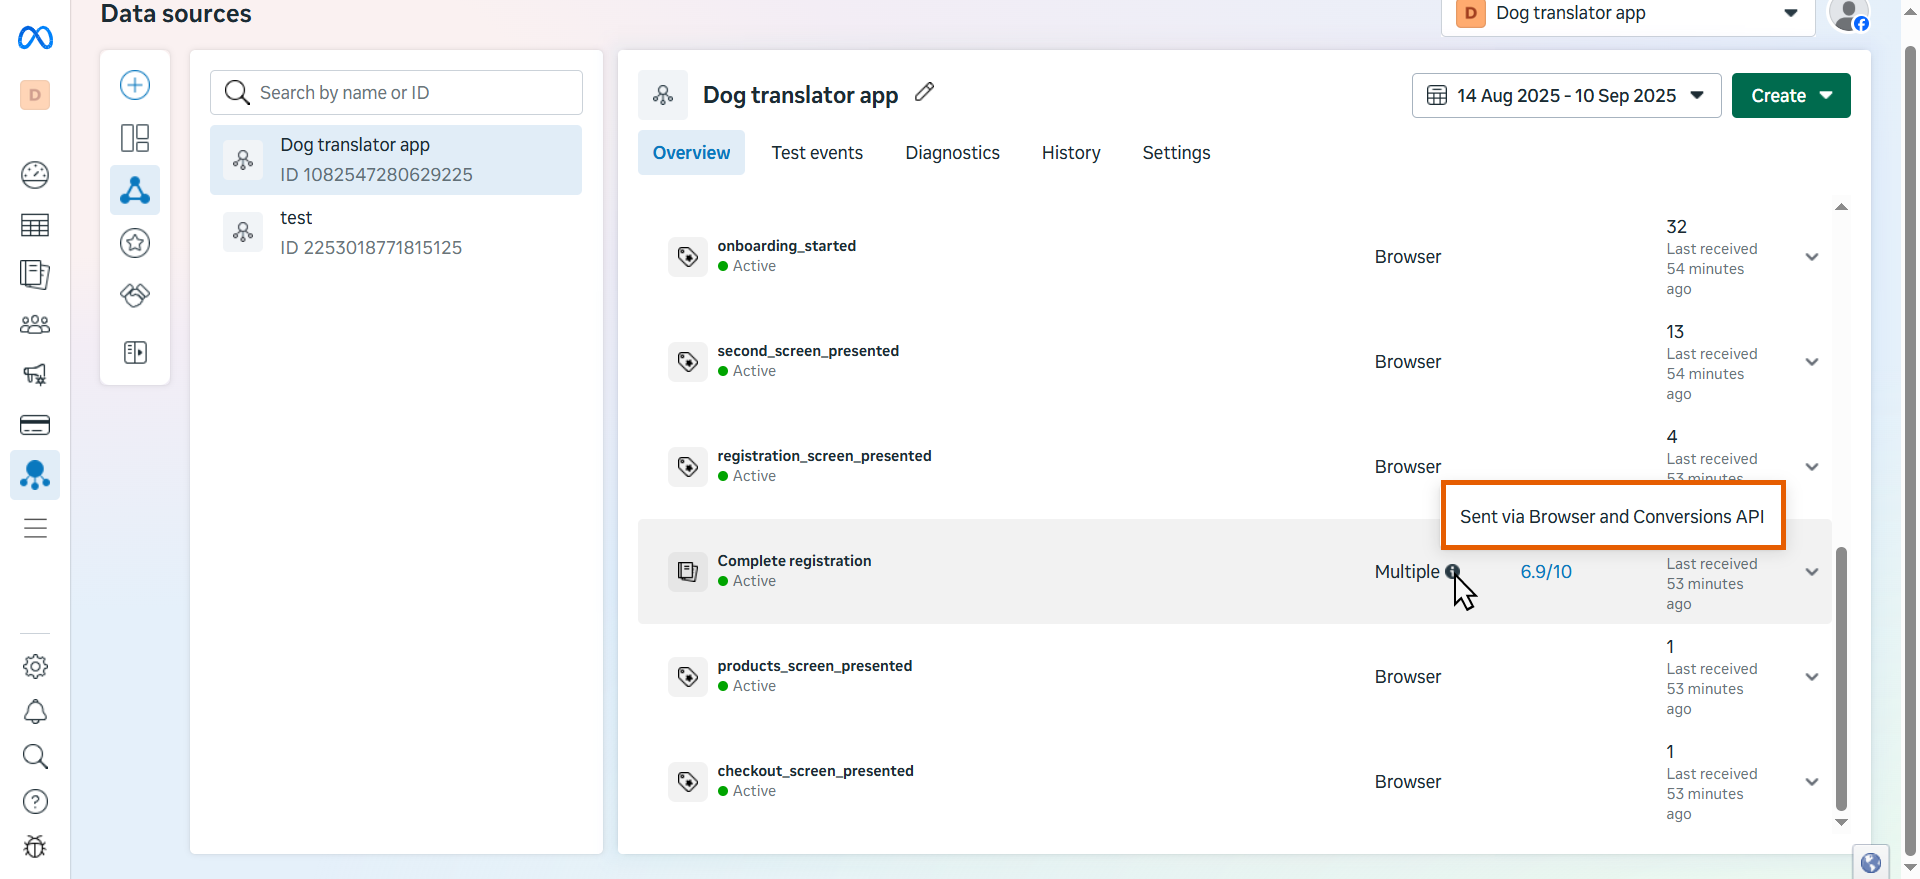
- Complete the registration step on your published funnel.
- Go to the Overview tab for the data source.
- You will see the Complete registration event marked Multiple in the Integrations column.
Troubleshooting
Events are not tracked or missing in Meta Events Manager
Events are not tracked or missing in Meta Events Manager
Even if your setup matches the steps above, events may still not appear. This can happen if Meta blocks traffic from your domain.To fix this, add both your FunnelFox project custom domain and
https://app.funnelfox.com/ to the domain allow list for Pixel traffic in Meta Events Manager.Learn more about managing Meta Pixel traffic permissions.Conversion numbers don't match between browser and server events
Conversion numbers don't match between browser and server events
Data discrepancies usually appear when a single Pixel is shared
across multiple ad accounts, or when your Pixel and Conversions API
report to different data sources.Keep one ad account per Pixel, and confirm that both browser events
and Conversions API events send to the same data source. This lets
Meta deduplicate events correctly and count each conversion once.