How it works
The Mailchimp integration keeps your audience updated as users move through your funnels. When a user interacts with a funnel:- Contact creation: FunnelFox creates a contact in your selected Mailchimp audience when a user provides their email using the Email Input element.
- Marketing subscription: FunnelFox updates the contact’s marketing status in Mailchimp.
- Subscribed: If the user checks the consent checkbox in your funnel. These users are opted in to receive your marketing content.
- Non-subscribed: If the user leaves the consent checkbox empty. Non-subscribed contacts won’t receive marketing emails, but they can still receive transactional emails.
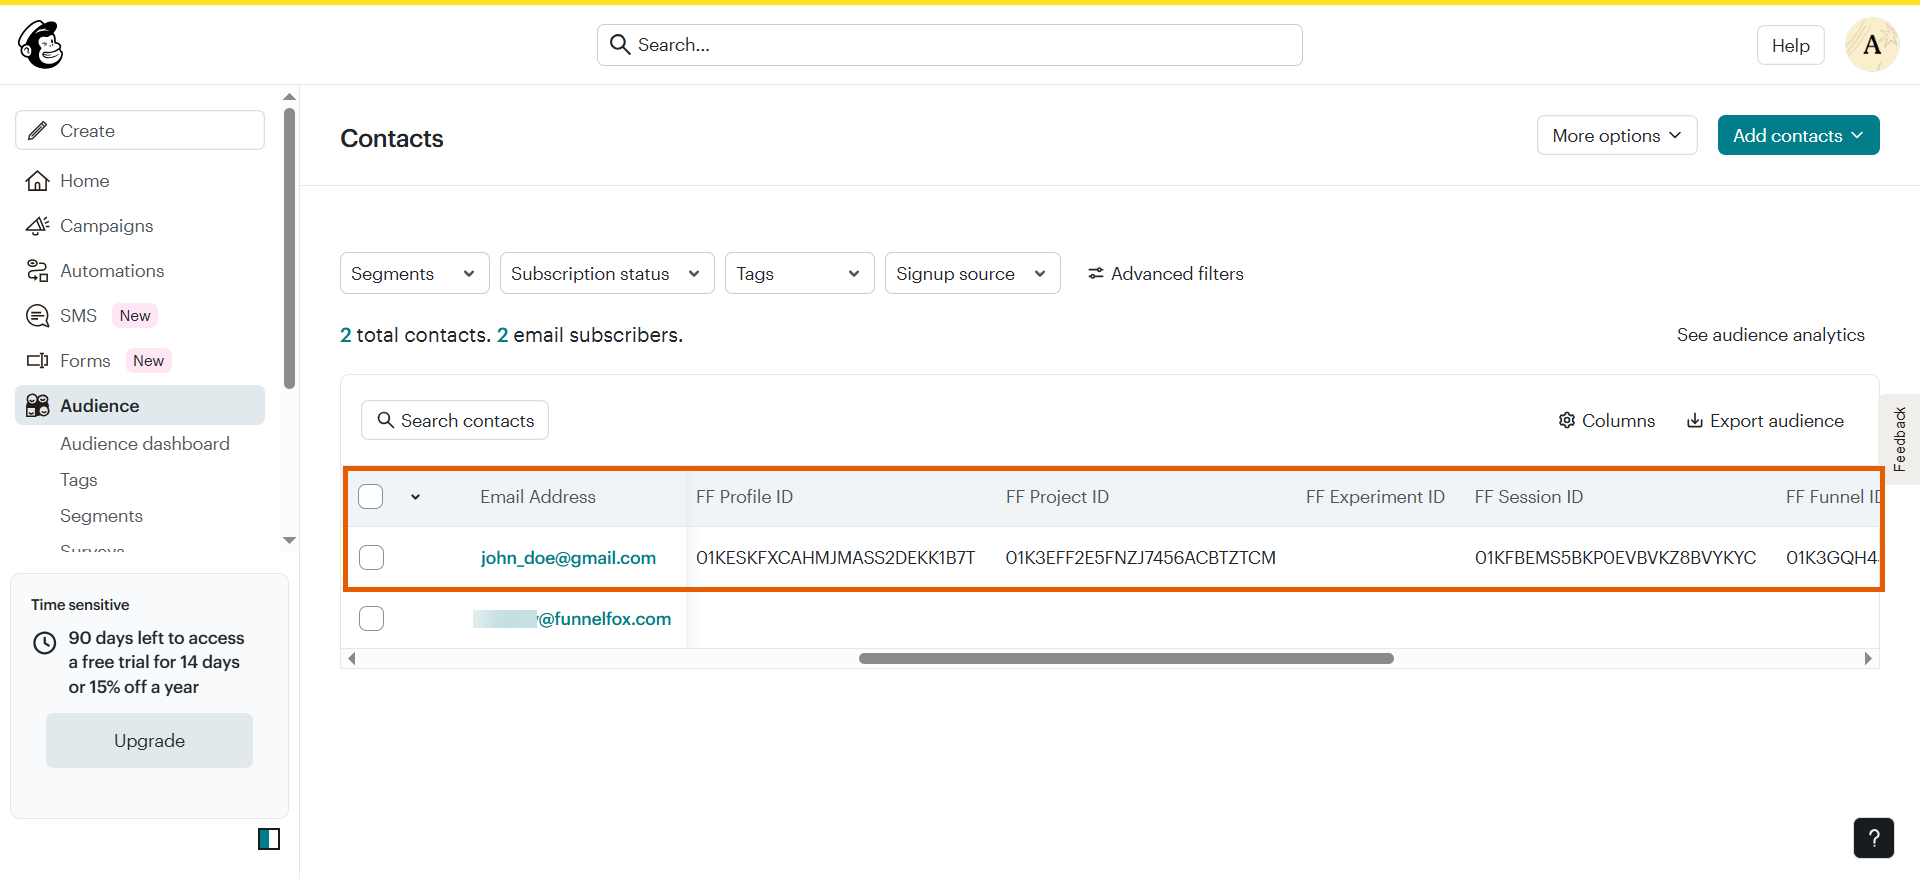
- Contact details: FunnelFox sends funnel context and manages tags in Mailchimp so you can segment users and trigger automations based on where they are in your flow. Here’s what FunnelFox sends to Mailchimp:
- Phone (if provided in the funnel)
- Funnel ID
- Profile ID
- Session ID
- Experiment ID (if applicable)
- Project ID
Setup
You need an active Mailchimp account to complete this setup. Connect FunnelFox to your account, configure the audience fields, and set up email consent in your funnel.1. Connect Mailchimp
- Go to the Audience page in Mailchimp.
- Click More options > Audience settings at the top right.
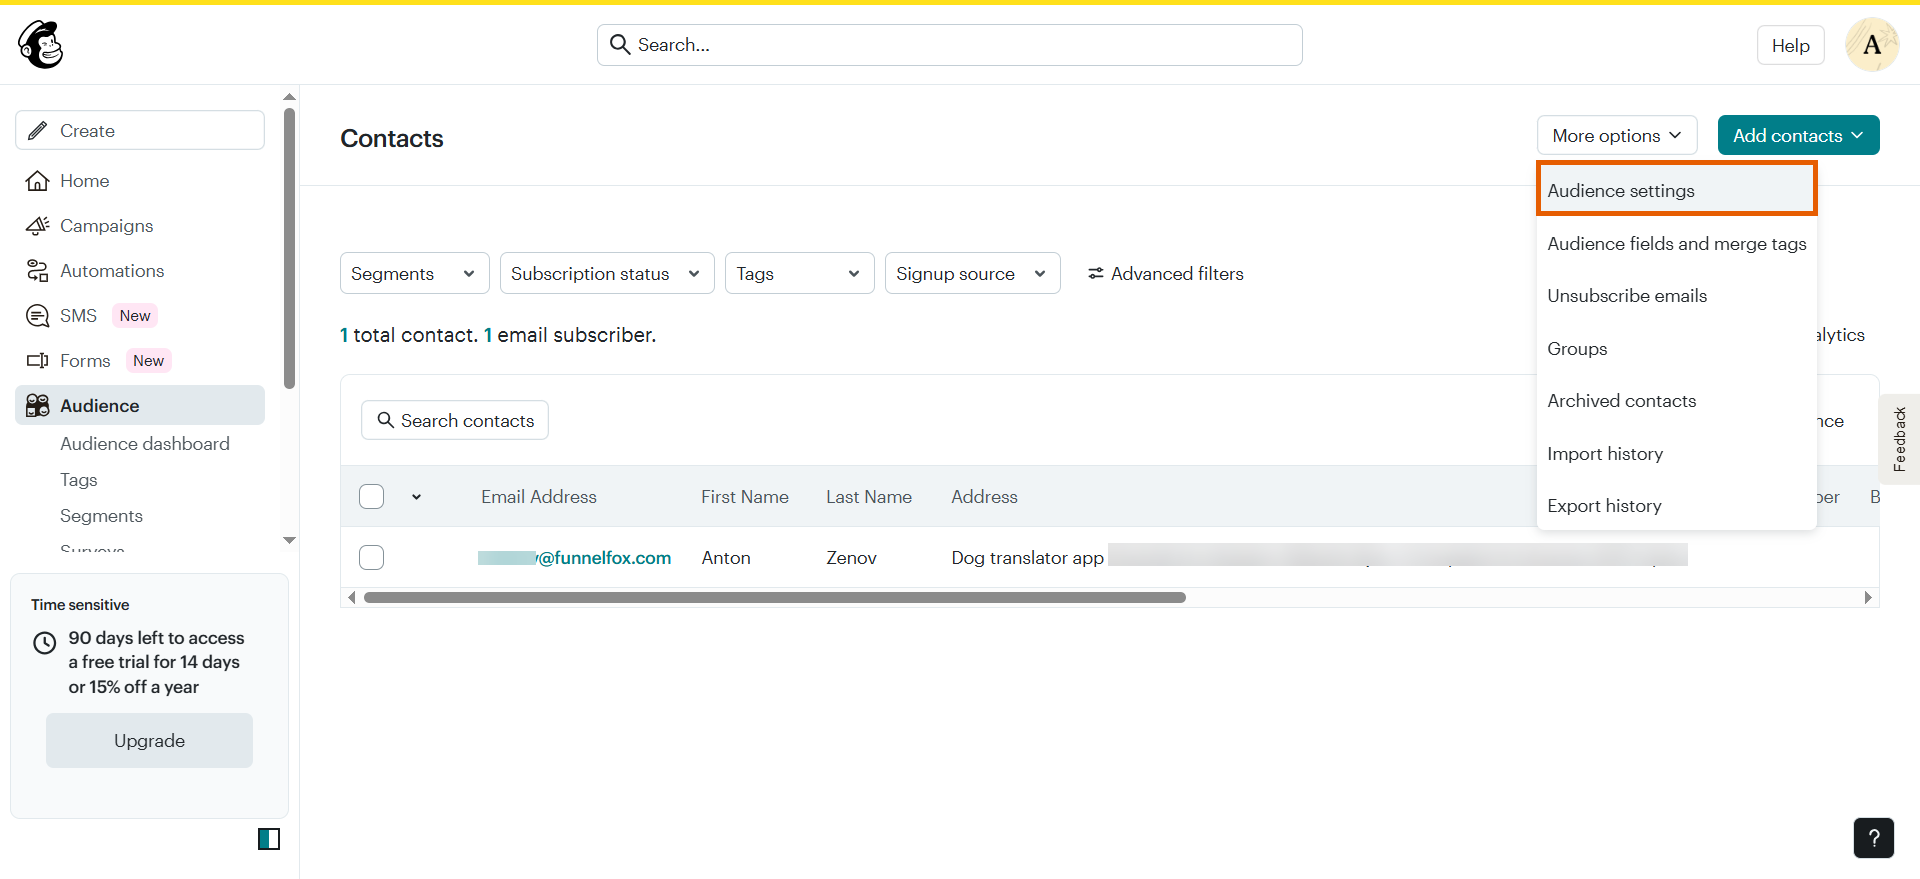
- Copy the Audience ID.

- Go to Integrations > Mailchimp in FunnelFox.
- Paste your Audience ID into the List ID field and click Connect Mailchimp.

- Log in to your Mailchimp account.
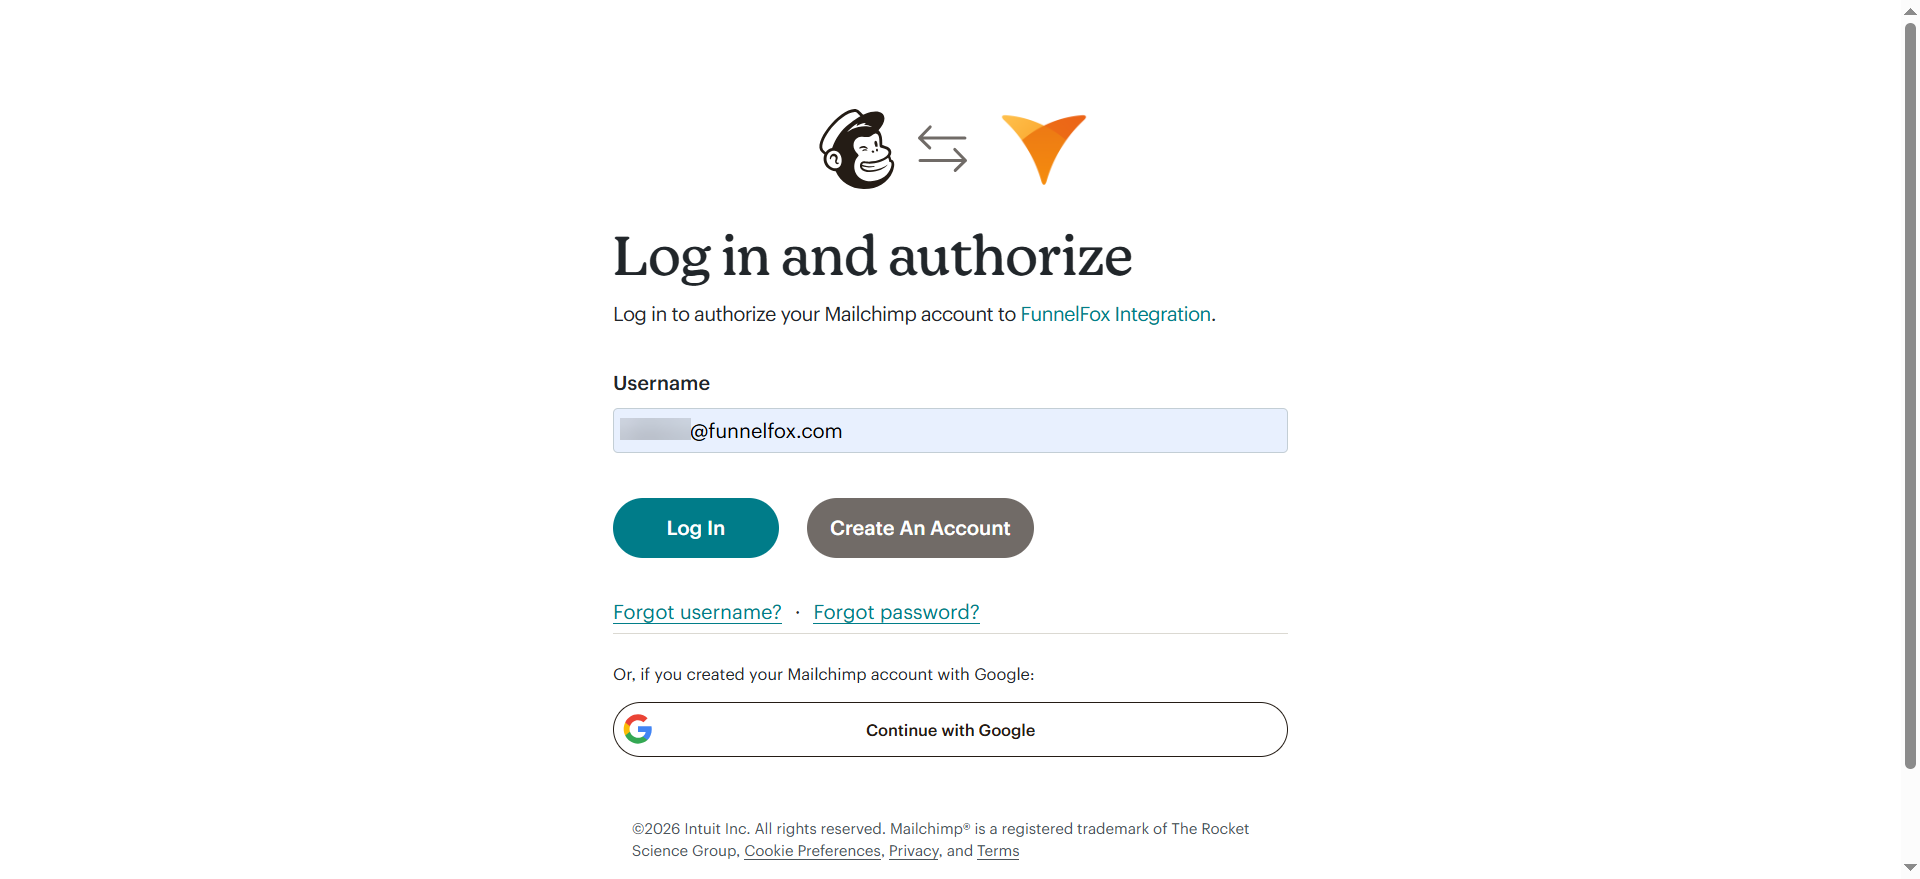
- Click Allow to authorize FunnelFox integration.
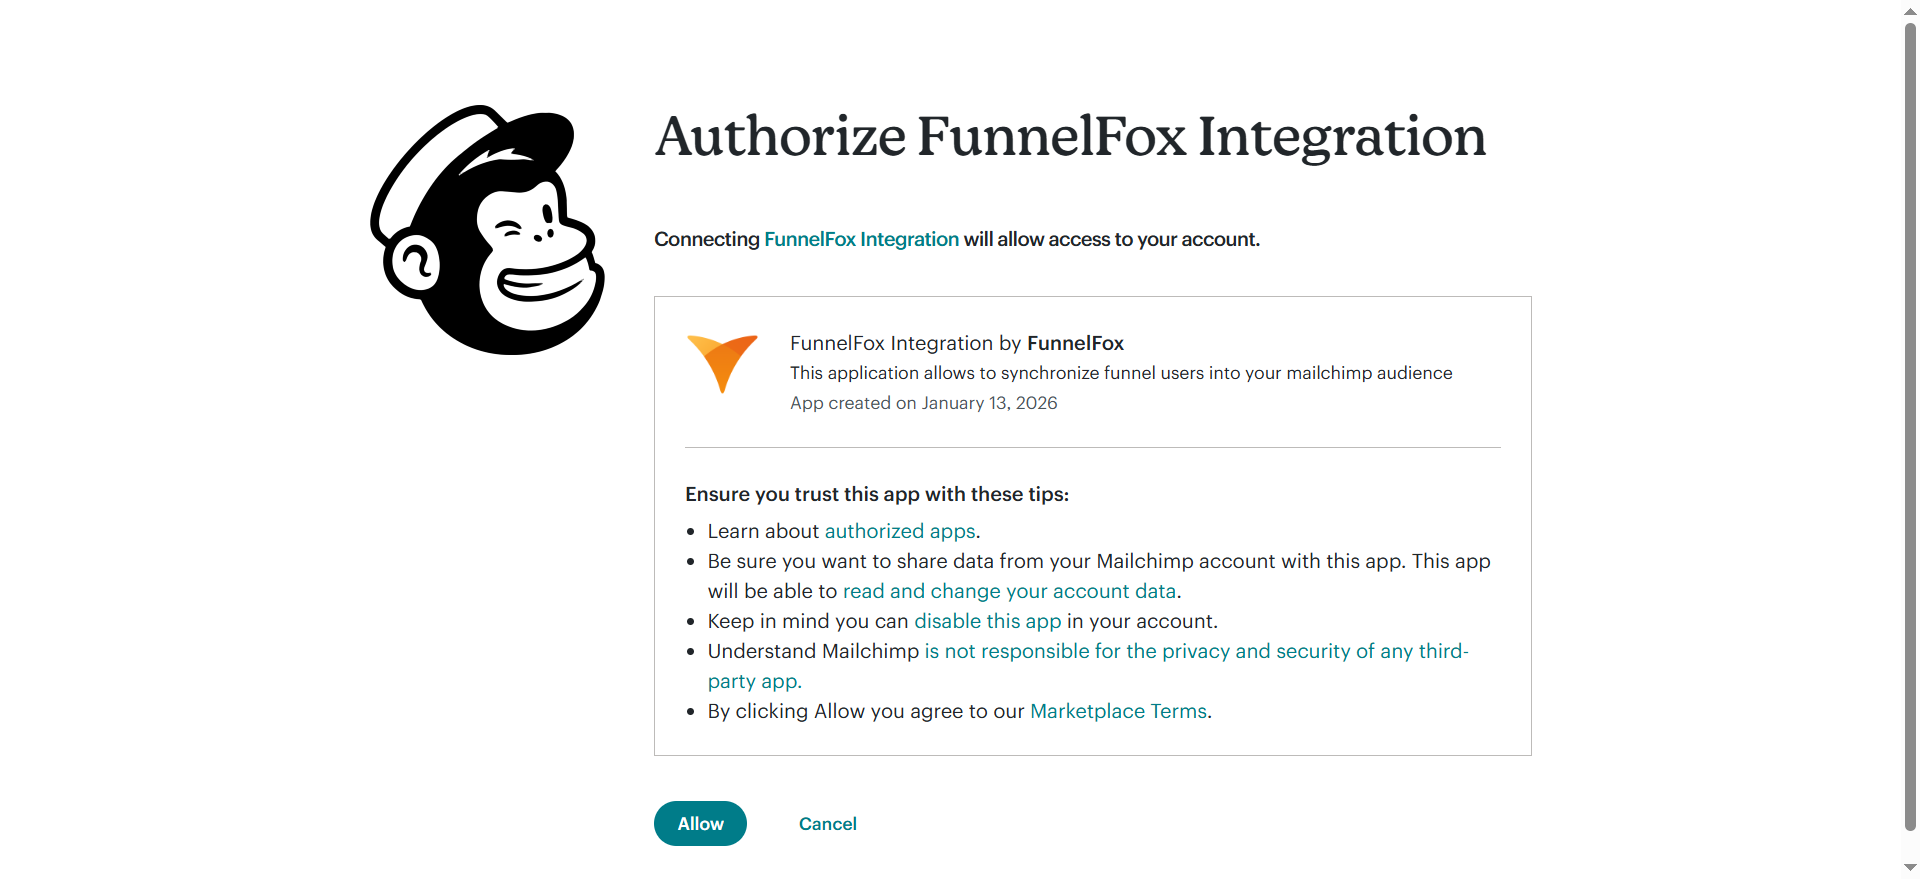
You successfully connected FunnelFox to Mailchimp. Proceed with the Mailchimp configuration below.
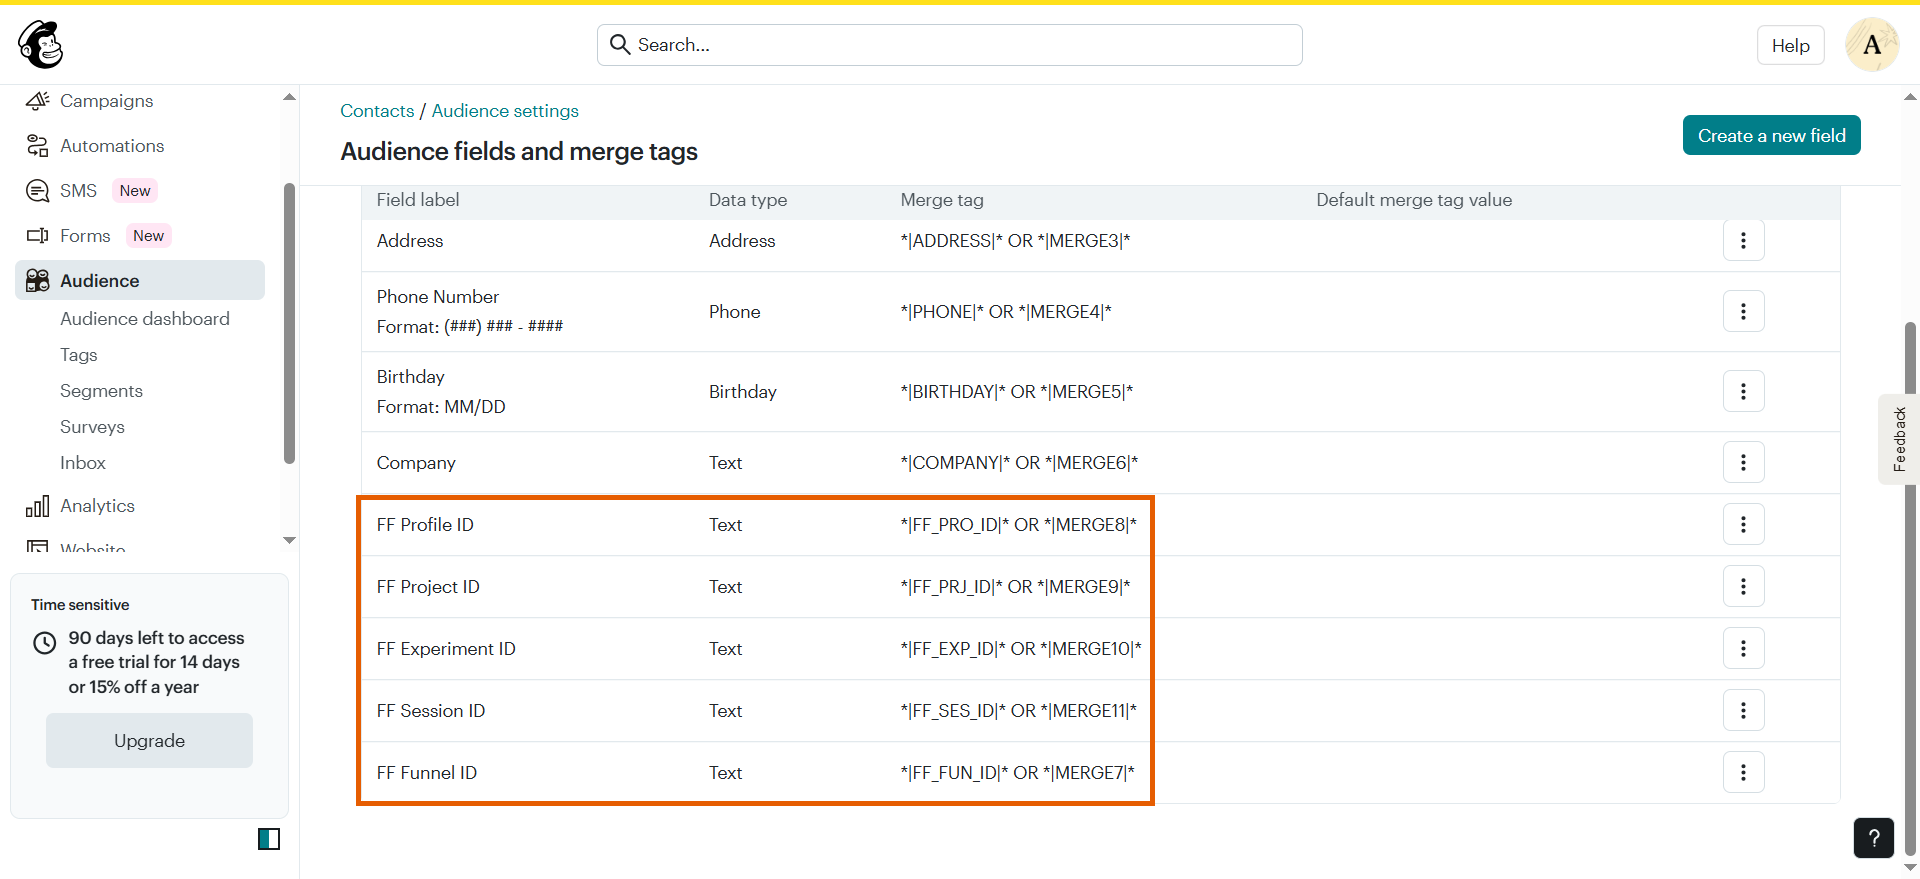
2. Create audience fields
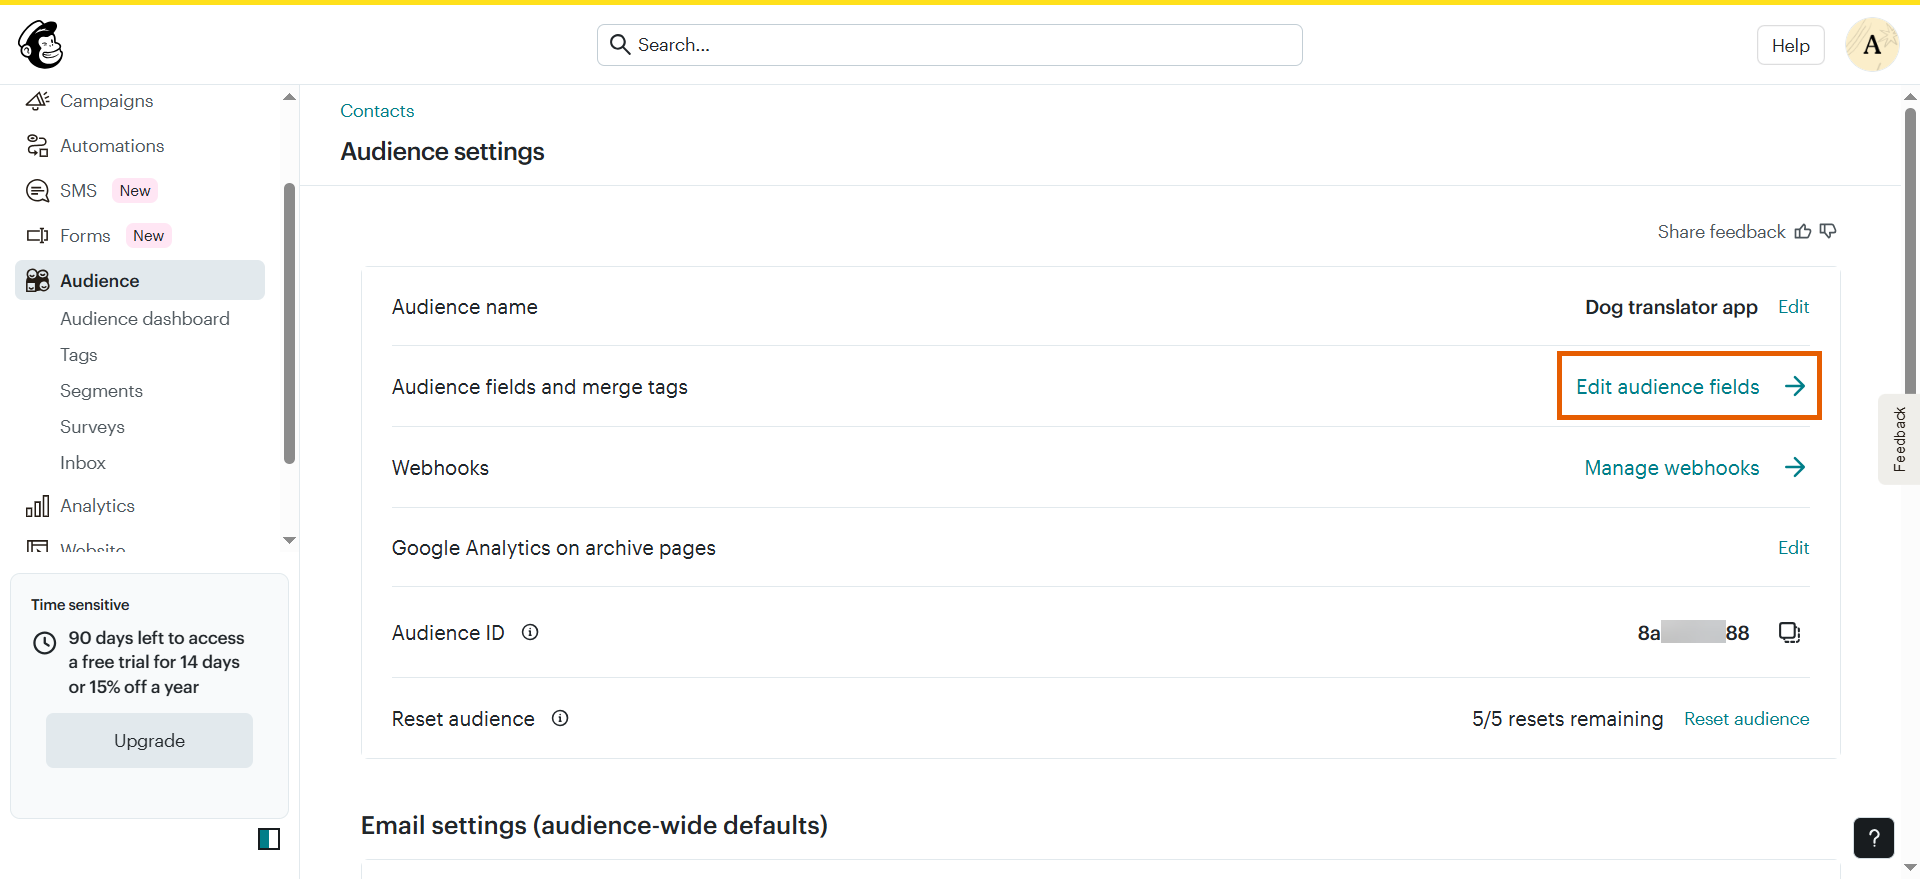
To sync custom contact information from FunnelFox to Mailchimp, create merge fields in Mailchimp:- Go back to Audience settings in Mailchimp.
- Click Edit audience fields.
- Click Create a new field at the top right.
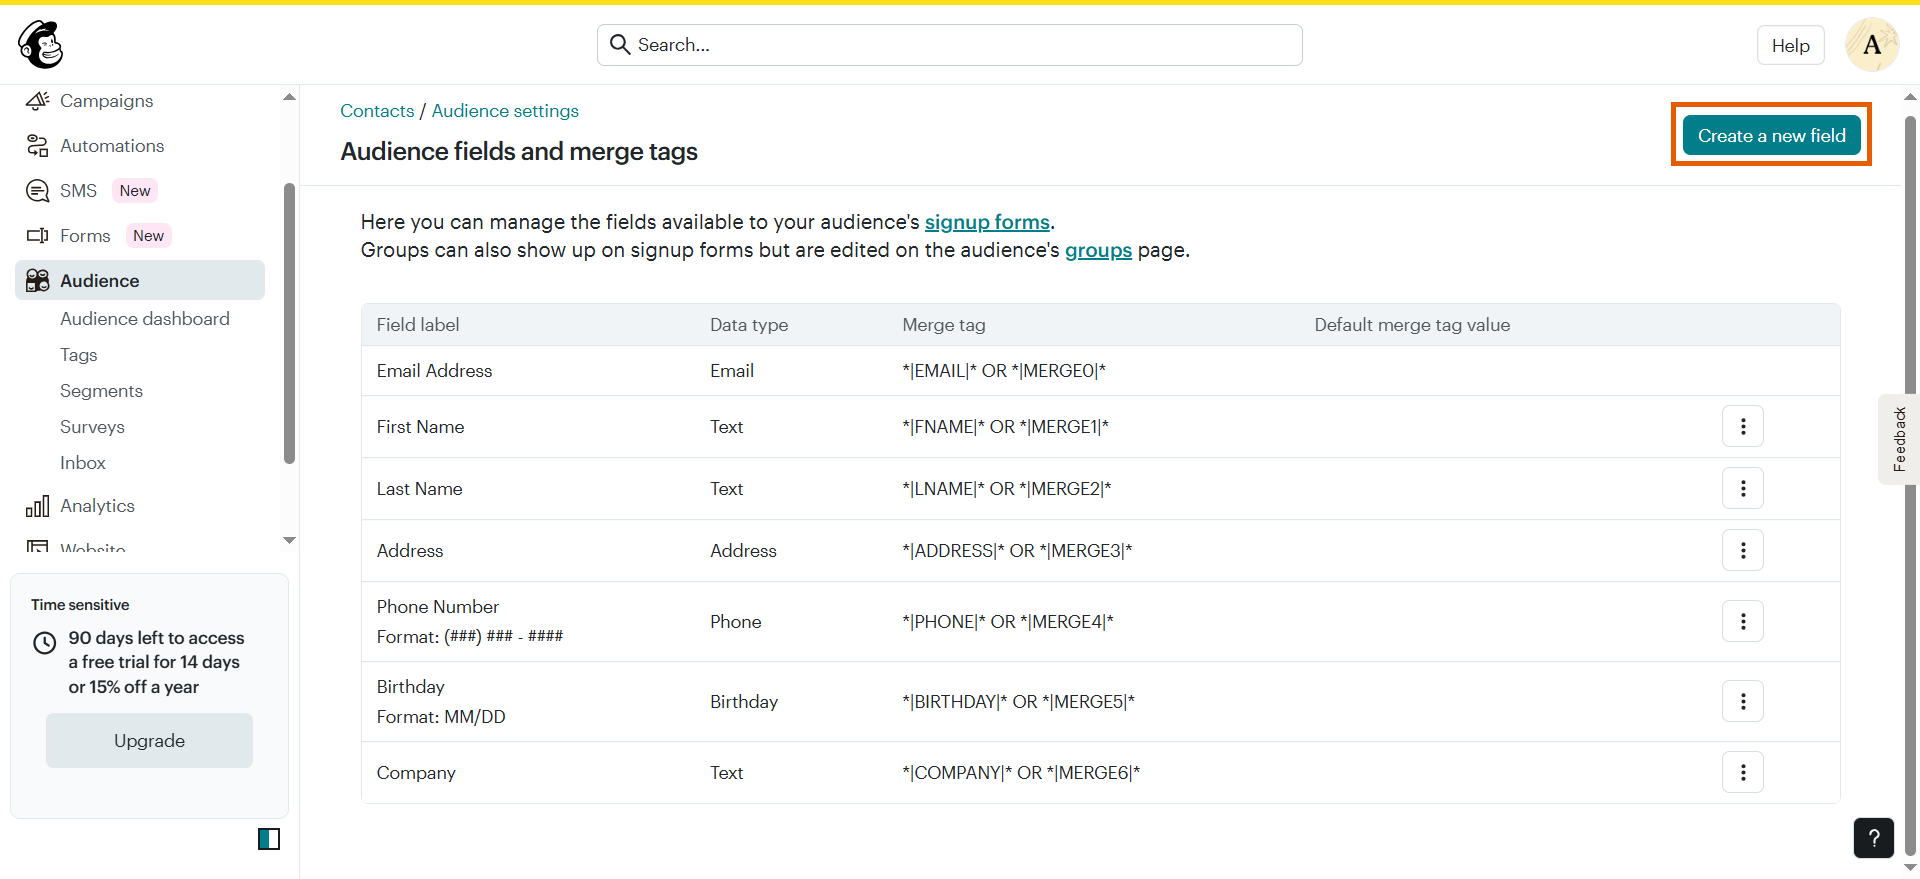
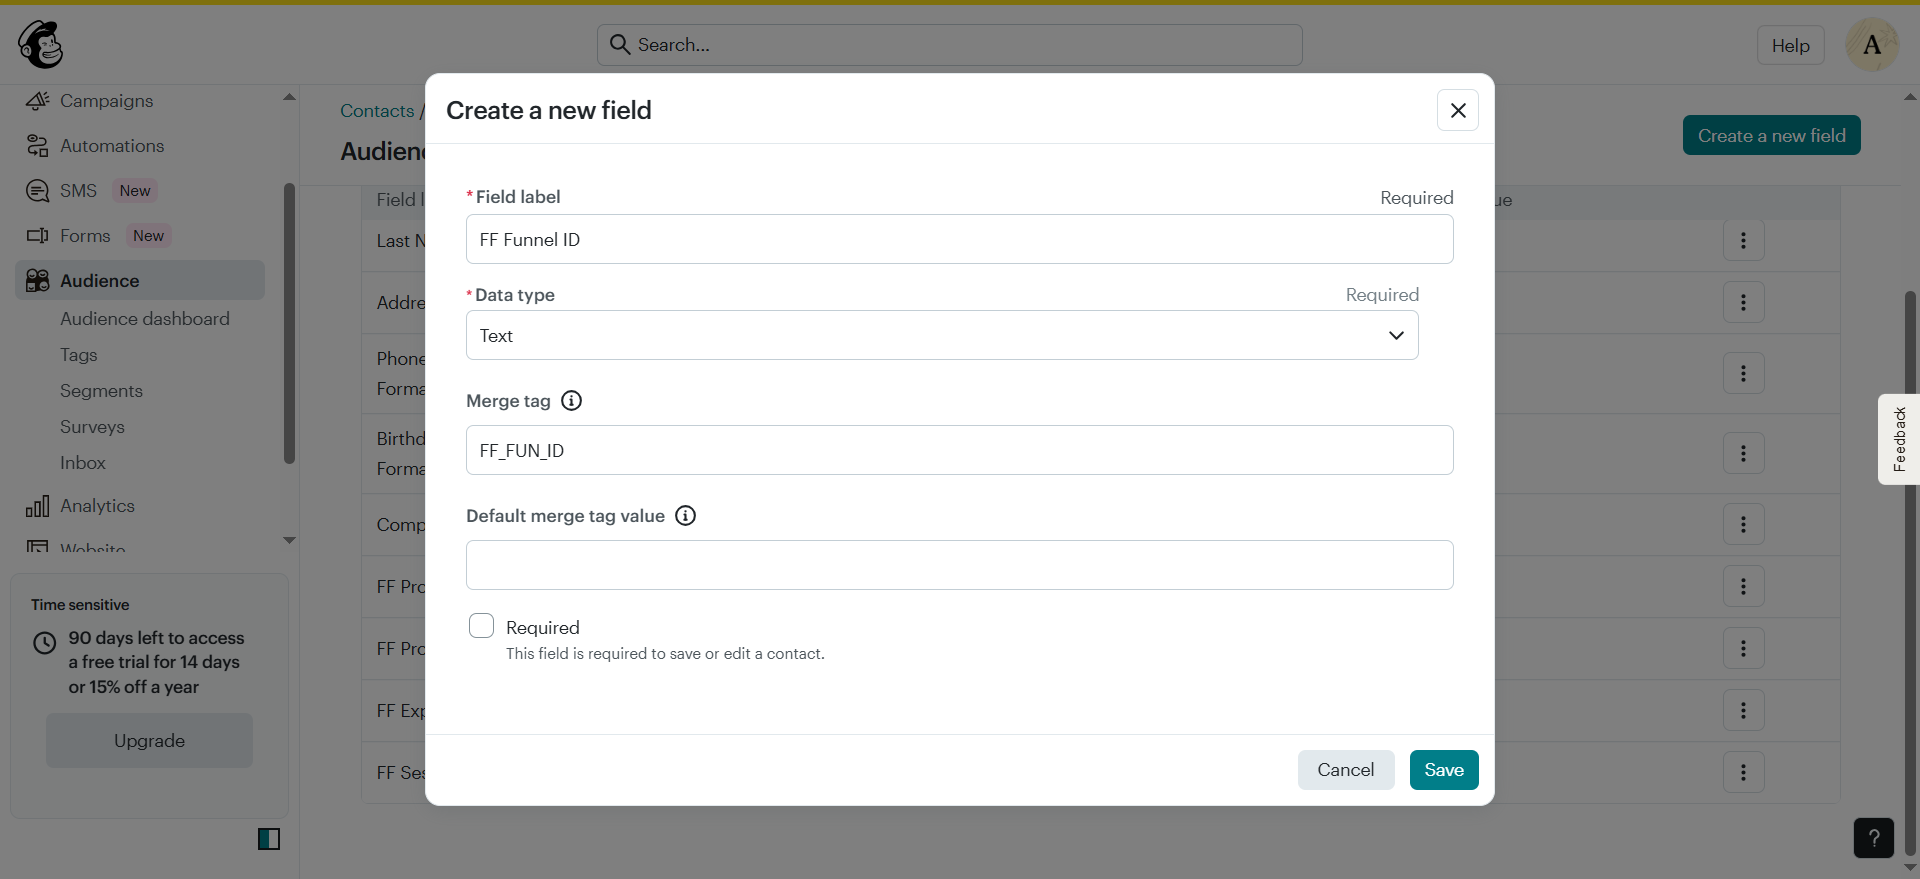
- Fill out the field creation page and click Save:
- Field label: Give the field a description you like, e.g.
FF Funnel ID. - Data type: Text.
- Merge tag:
FF_FUN_ID. - Default merge tag value: Leave empty.
- Repeat the field creation process to create five fields with the following merge tags:
FF_FUN_IDFF_PRO_IDFF_PRJ_IDFF_EXP_IDFF_SES_ID
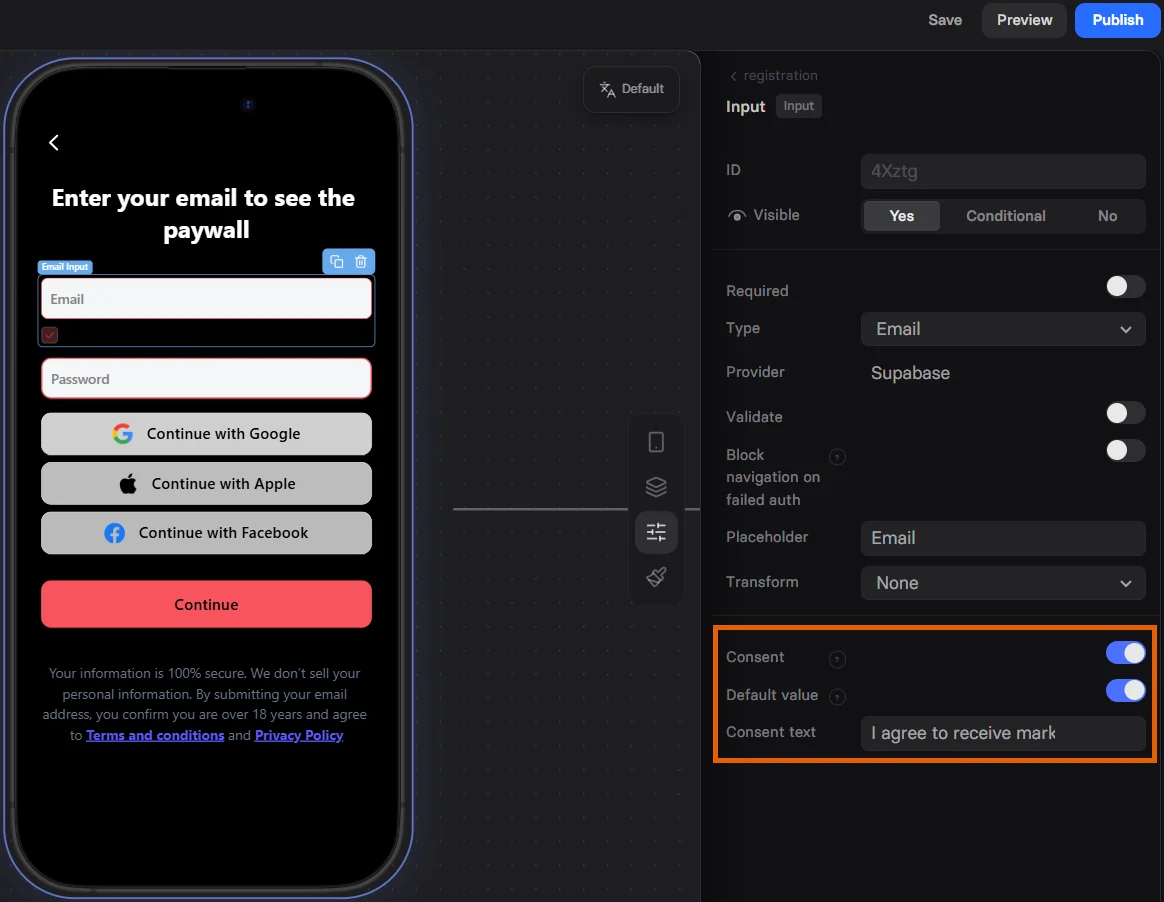
3. Configure email consent
FunnelFox will automatically update contact’s marketing status in Mailchimp.- Go to the Parameters tab of your Email Input in the funnel.
- Set the Consent to Yes.
- Optionally, set the default value of the consent and text.
Your setup is complete. Save and republish the funnel to make changes go live.
Troubleshooting
Contacts are not being created in Mailchimp
Contacts are not being created in Mailchimp
If contacts aren’t appearing in your Mailchimp audience, check that you’re using valid email domains for testing.Mailchimp rejects emails with fake or invalid domains like
test@example.com or user@test.com. For testing, use emails with real domains like @gmail.com or similar.