How it works
FunnelFox authenticates users directly within your funnels, giving each user a stable Firebase UID (FUID). It will either:- Create a new Firebase user (sign up): If no user exists for the customer’s credentials.
- Authenticate an existing Firebase user (sign in): If the user was created during a previous funnel experience and signs in using an OAuth button or by entering their email. New purchase is recorded in the existing Adapty or RevenueCat profile.
{{email}} funnel variable. You can use it in upstream screens, for example, in deep links.
Email & Password authentication
Email-based authentication occurs when the customer navigates from the authentication screen with Email/Password inputs filled out. The first Email input completed in the funnel automatically pre-fills all subsequent Email inputs in the same funnel. Sign up: When a customer submits their credentials in a funnel, FunnelFox automatically handles Firebase user creation:- FunnelFox creates a Firebase user via Email/Password authentication.
- By default, a secure random password is generated for the user.
- If the same screen includes a Password input element, that value replaces the generated password.
- If a Firebase user exists, FunnelFox recognizes the customer as returning, signs them in using their Firebase UID (FUID), and fires the profile.updated webhook.
- If no Firebase user exists, FunnelFox treats the customer as new and creates a Firebase user (sign up).
OAuth authentication
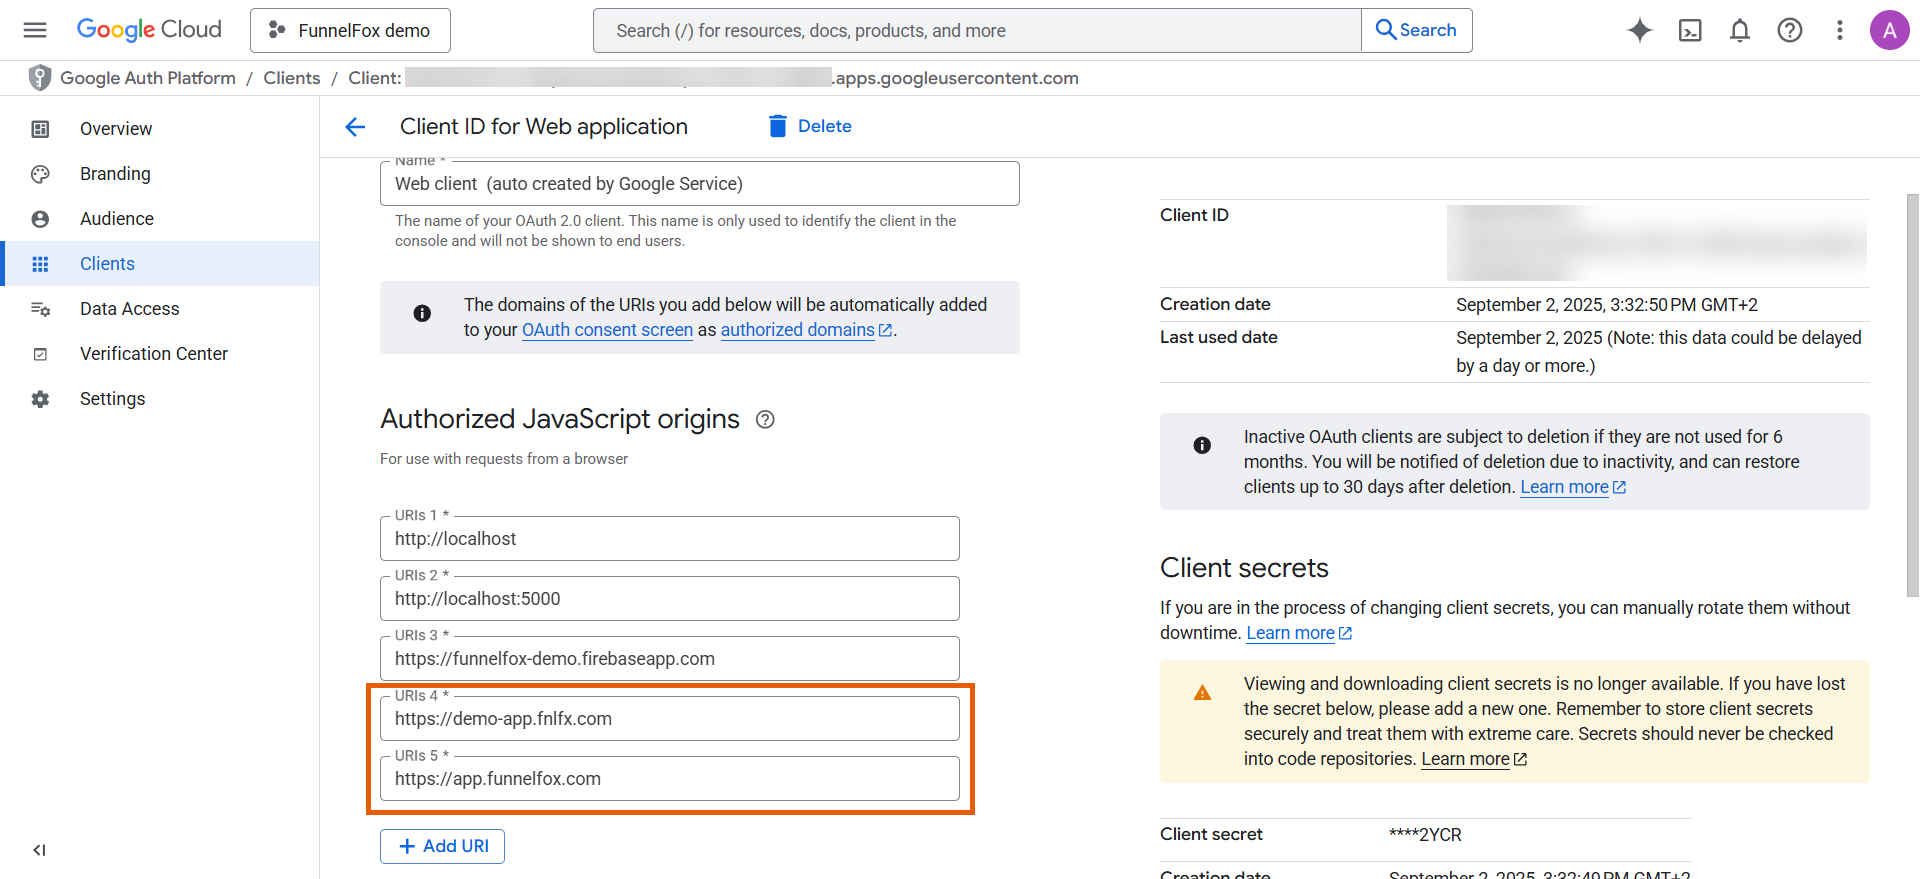
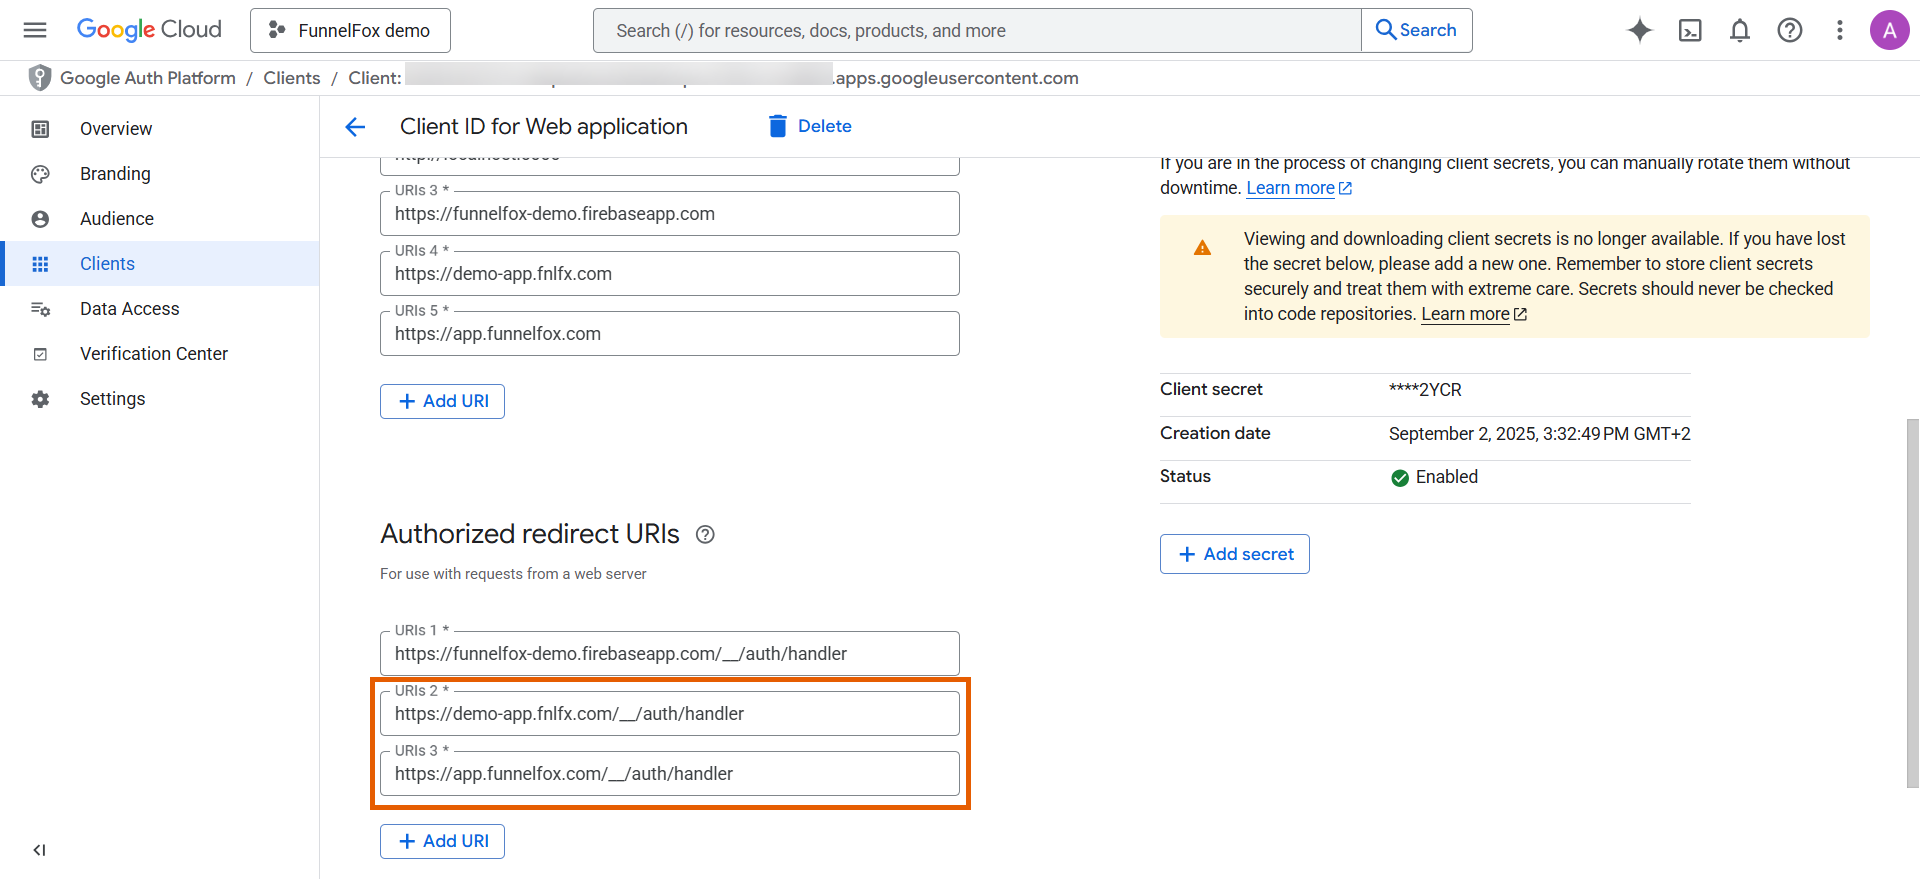
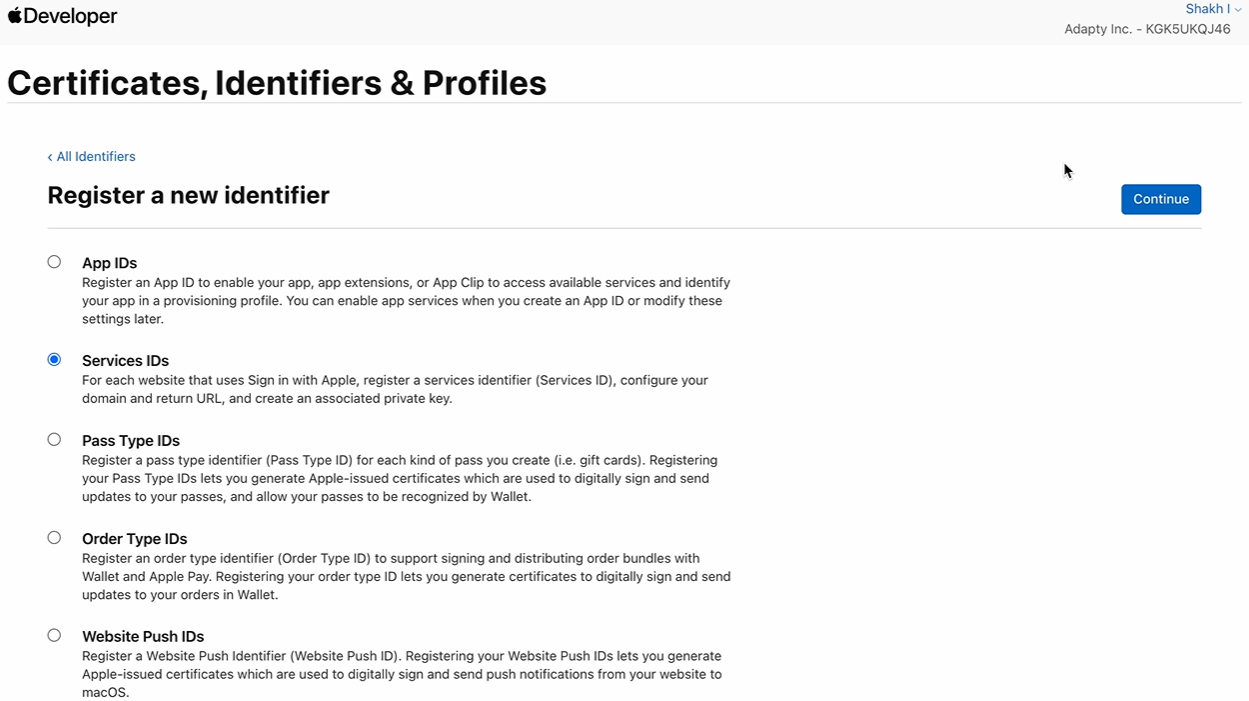
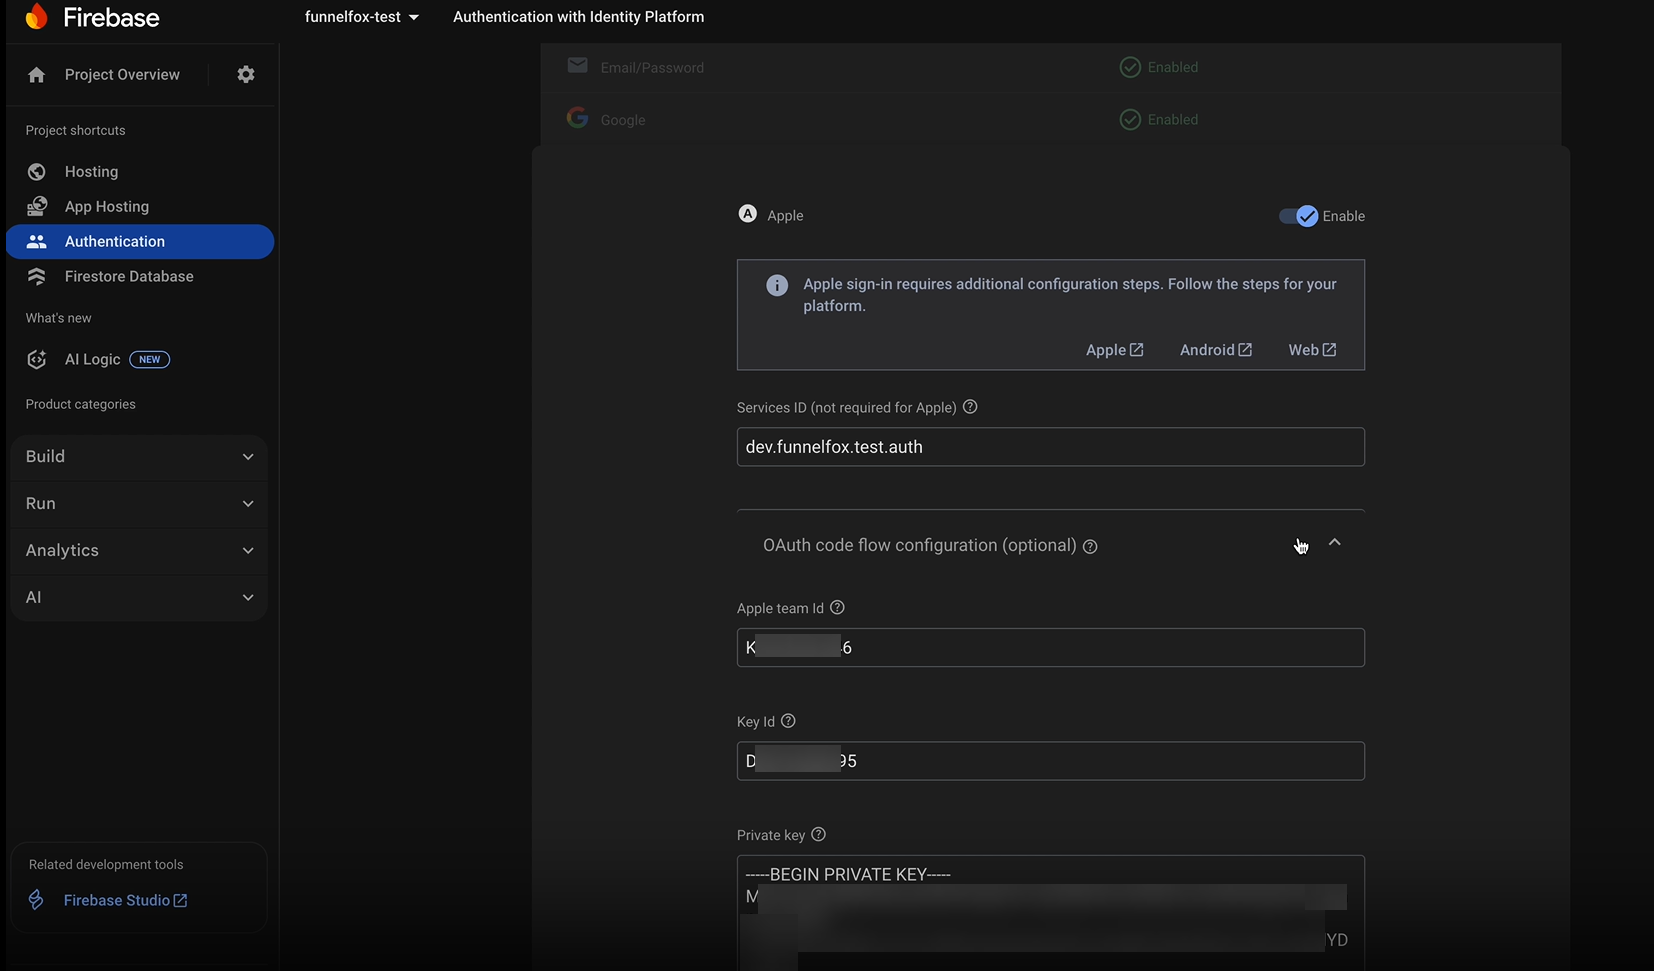
Unlike email/password authentication, OAuth works right when the customer uses the OAuth button. OAuth providers enable seamless social authentication within your funnels:- Enable OAuth providers (e.g., Google or Apple) in Firebase and add OAuth buttons in the Editor.
- Users receive a secure and seamless authentication experience:
- If it’s the user’s first time, Firebase creates the account.
- If the account already exists, Firebase signs them in using the same OAuth buttons and FunnelFox fires the profile.updated webhook.
auth_button_clicked event,
followed by auth_success or auth_fail depending on the result. Learn more in the
events reference.
Unified identity (FUID)
Firebase UID becomes the canonical identifier across all integrated services:- The user’s Firebase UID (FUID) serves as their primary identifier.
- When other integrations are enabled, FunnelFox forwards this ID automatically:
- Adapty receives it as CustomerUserID.
- RevenueCat receives it as appUserID.
Setup
Complete the Firebase integration by creating a Firebase project, configuring authentication methods, and connecting it to FunnelFox.1. Create Firebase Project
Start by setting up a new Firebase project in the Firebase console.- Go to the Firebase console and start creating a new Firebase project.
- Name your project.
- Configure Google Analytics.
- Click Create project.
2. Configure Firebase Authentication
Enable Firebase Authentication to configure your preferred sign-in methods.- In your Firebase project, go to Build > Authentication.
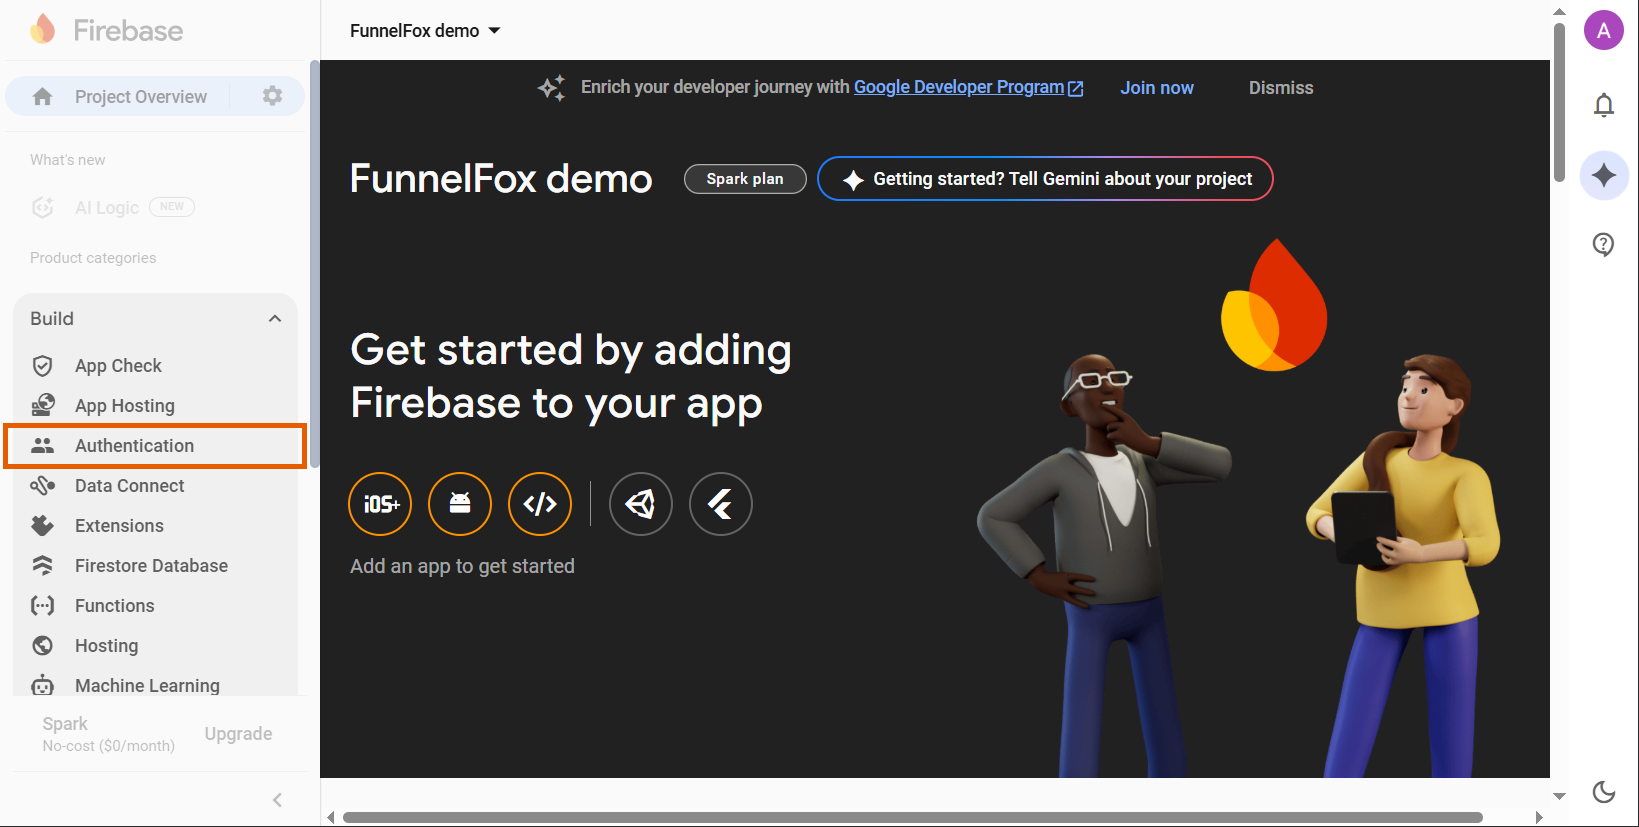
- Click Get started.
3. Configure sign-in methods
Select a provider to configure under the Sign-in method in Firebase. Once done, click Add new provider to set up another one.- Email/Password
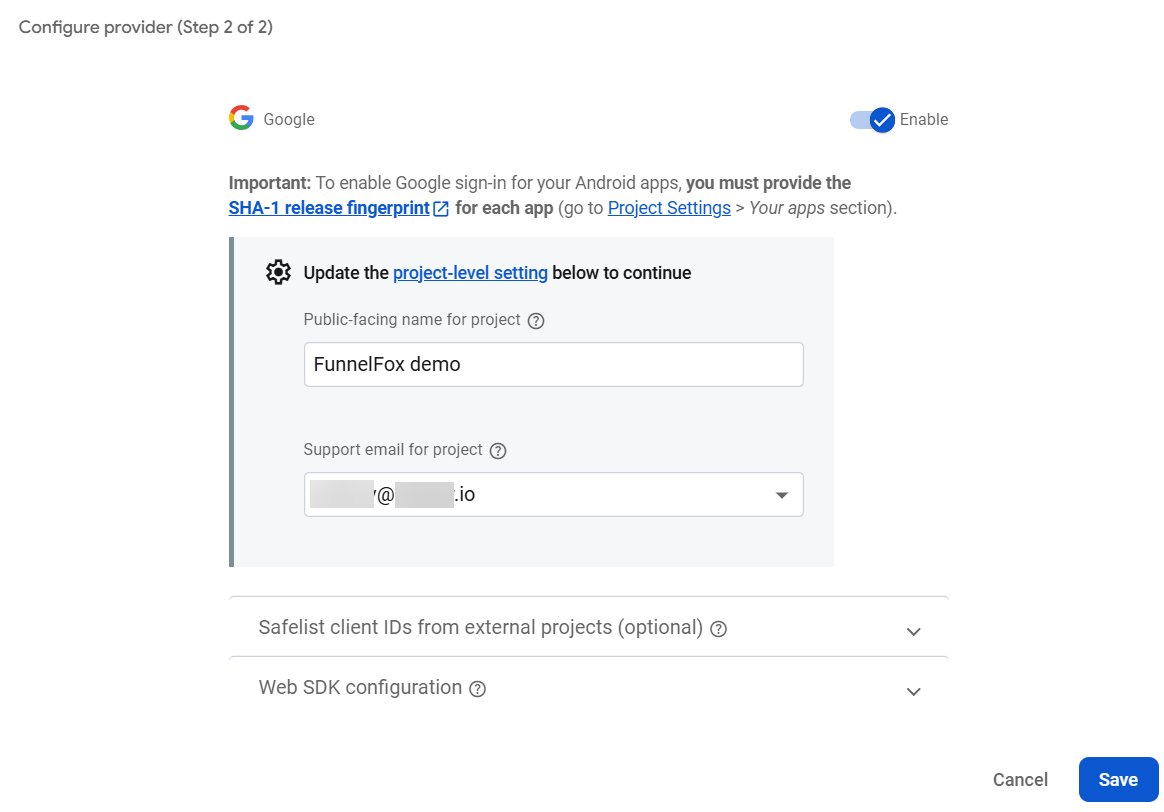
- Google OAuth
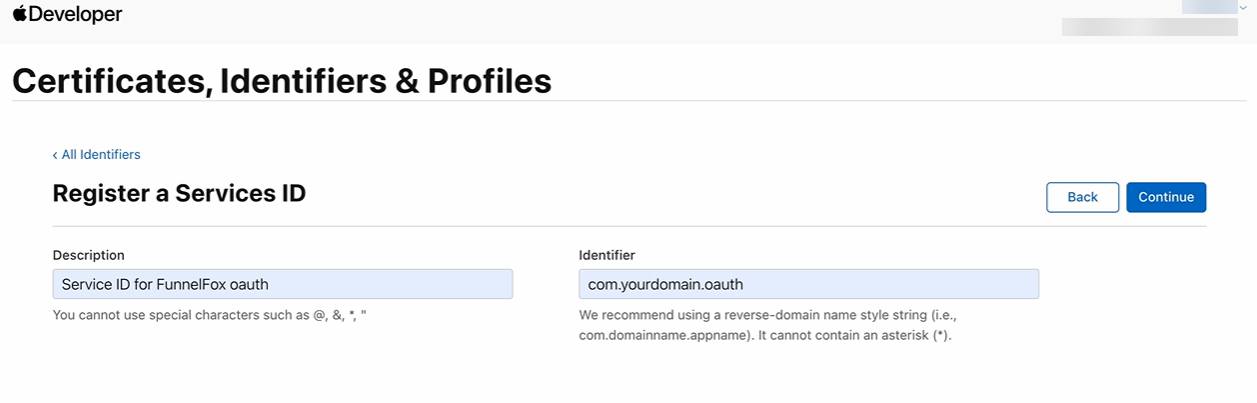
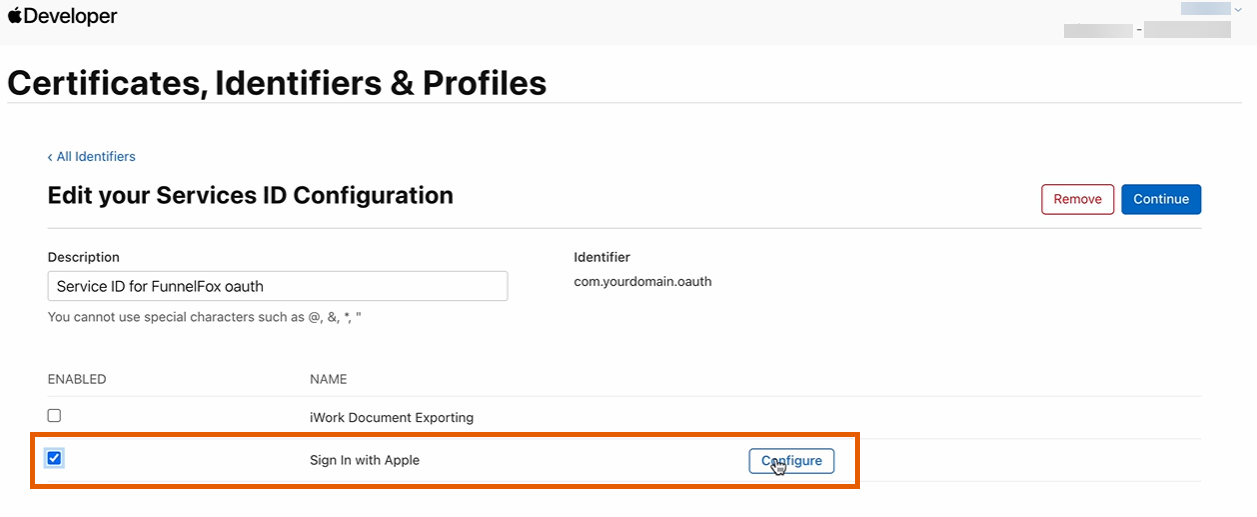
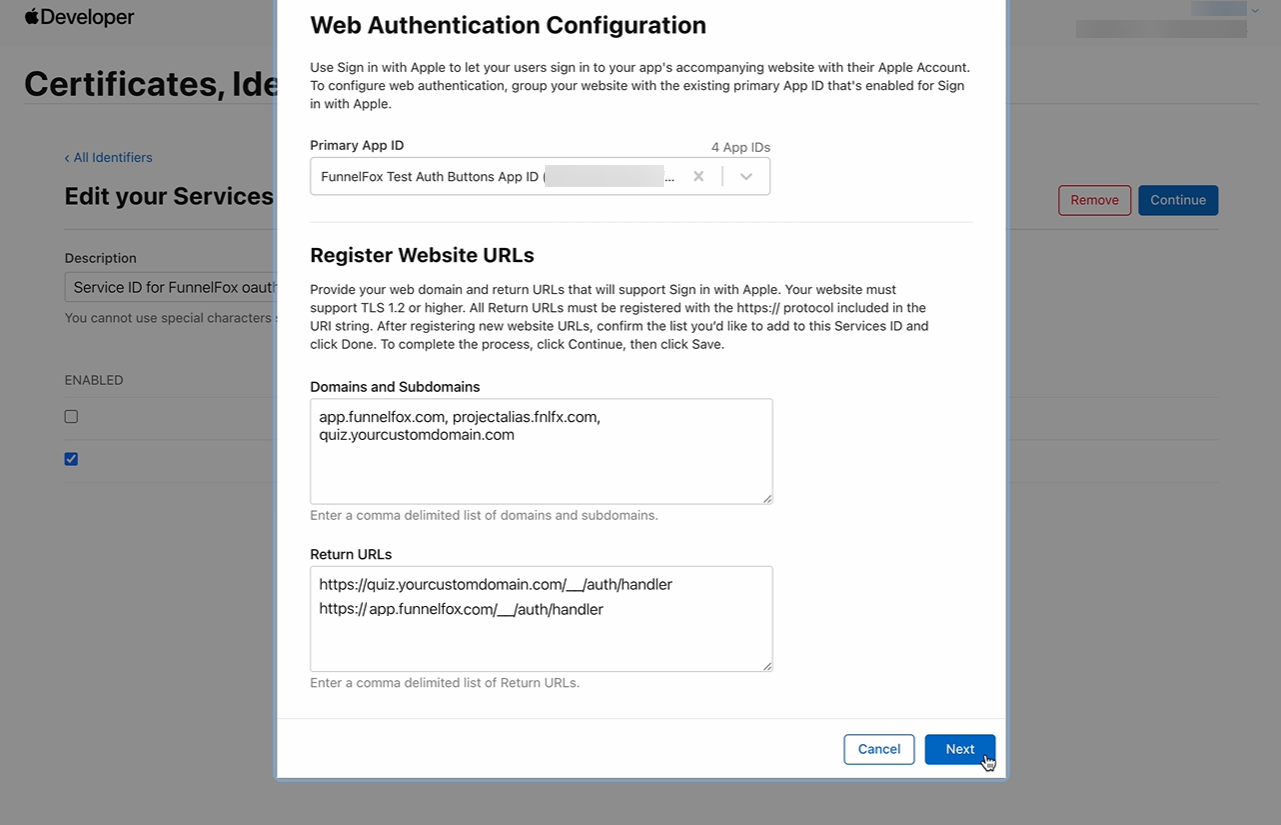
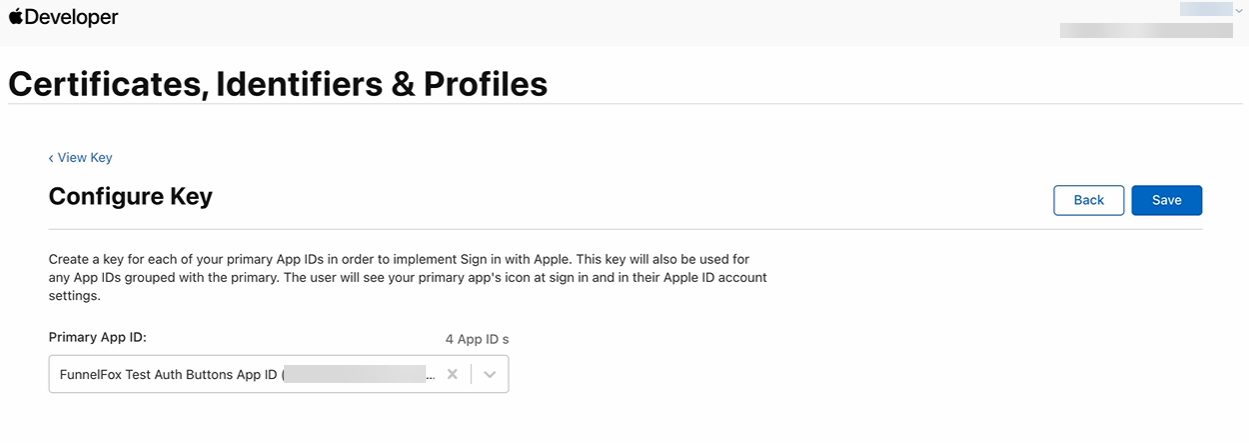
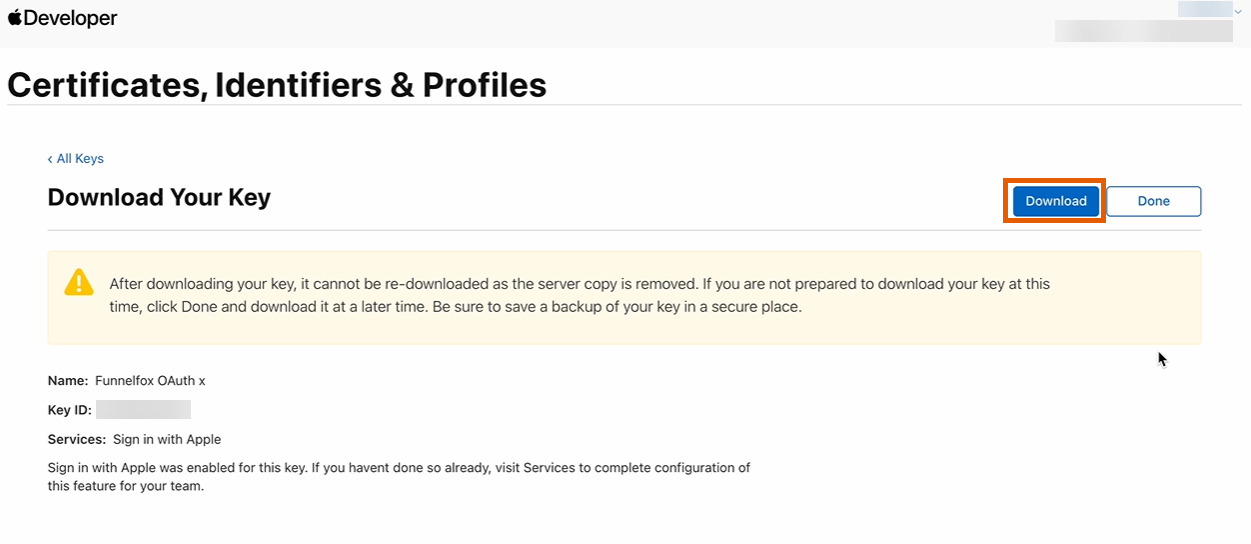
- Apple OAuth
- Magic link
The Email/Password method allows users to sign up using their email address and password.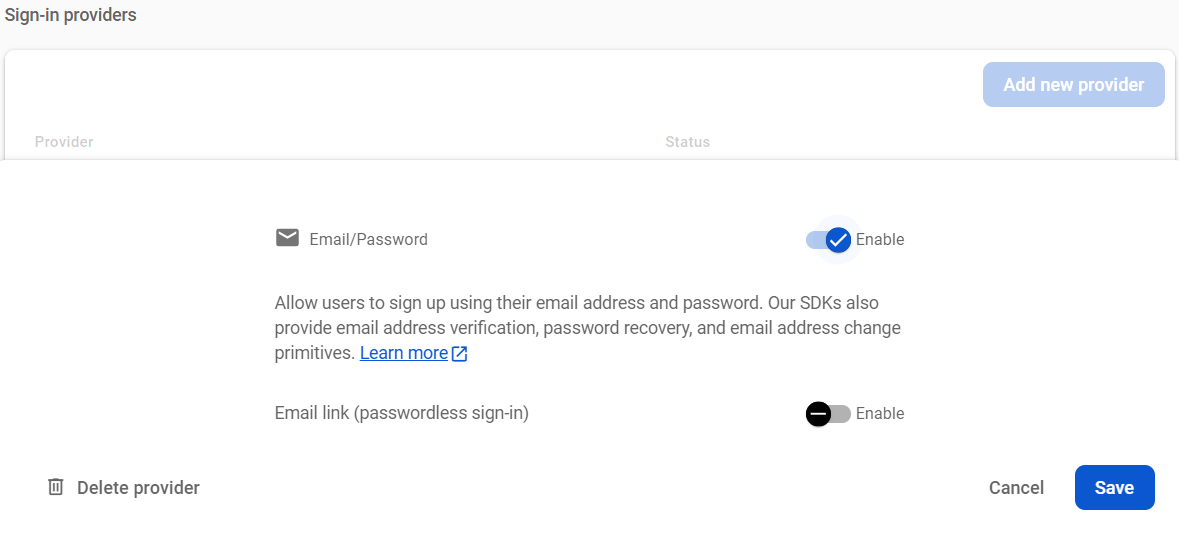
- Click Email/Password in the Native providers.
- Toggle on Email/Password.
- Click Save.

4. Register Your App in Firebase
Register your web app in Firebase to obtain the configuration values needed for FunnelFox integration.- Go back to your Firebase project.
- Click the settings gear icon at the top left and select Project settings.
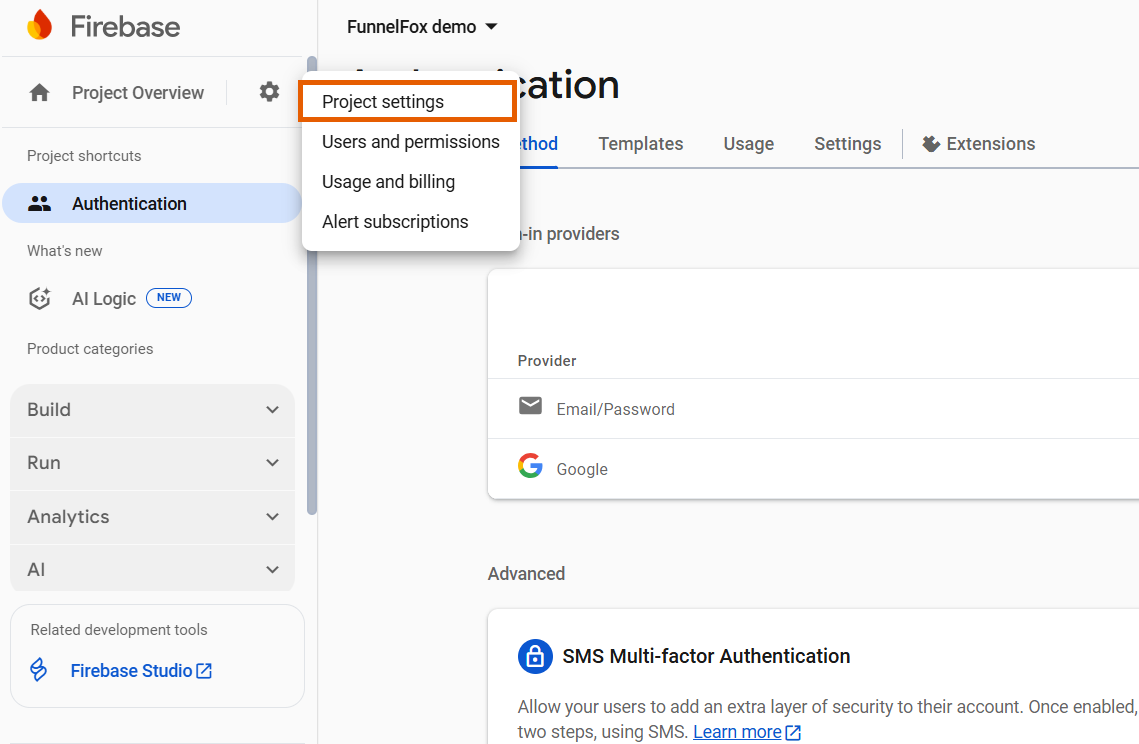
- Select the web icon under Your apps.
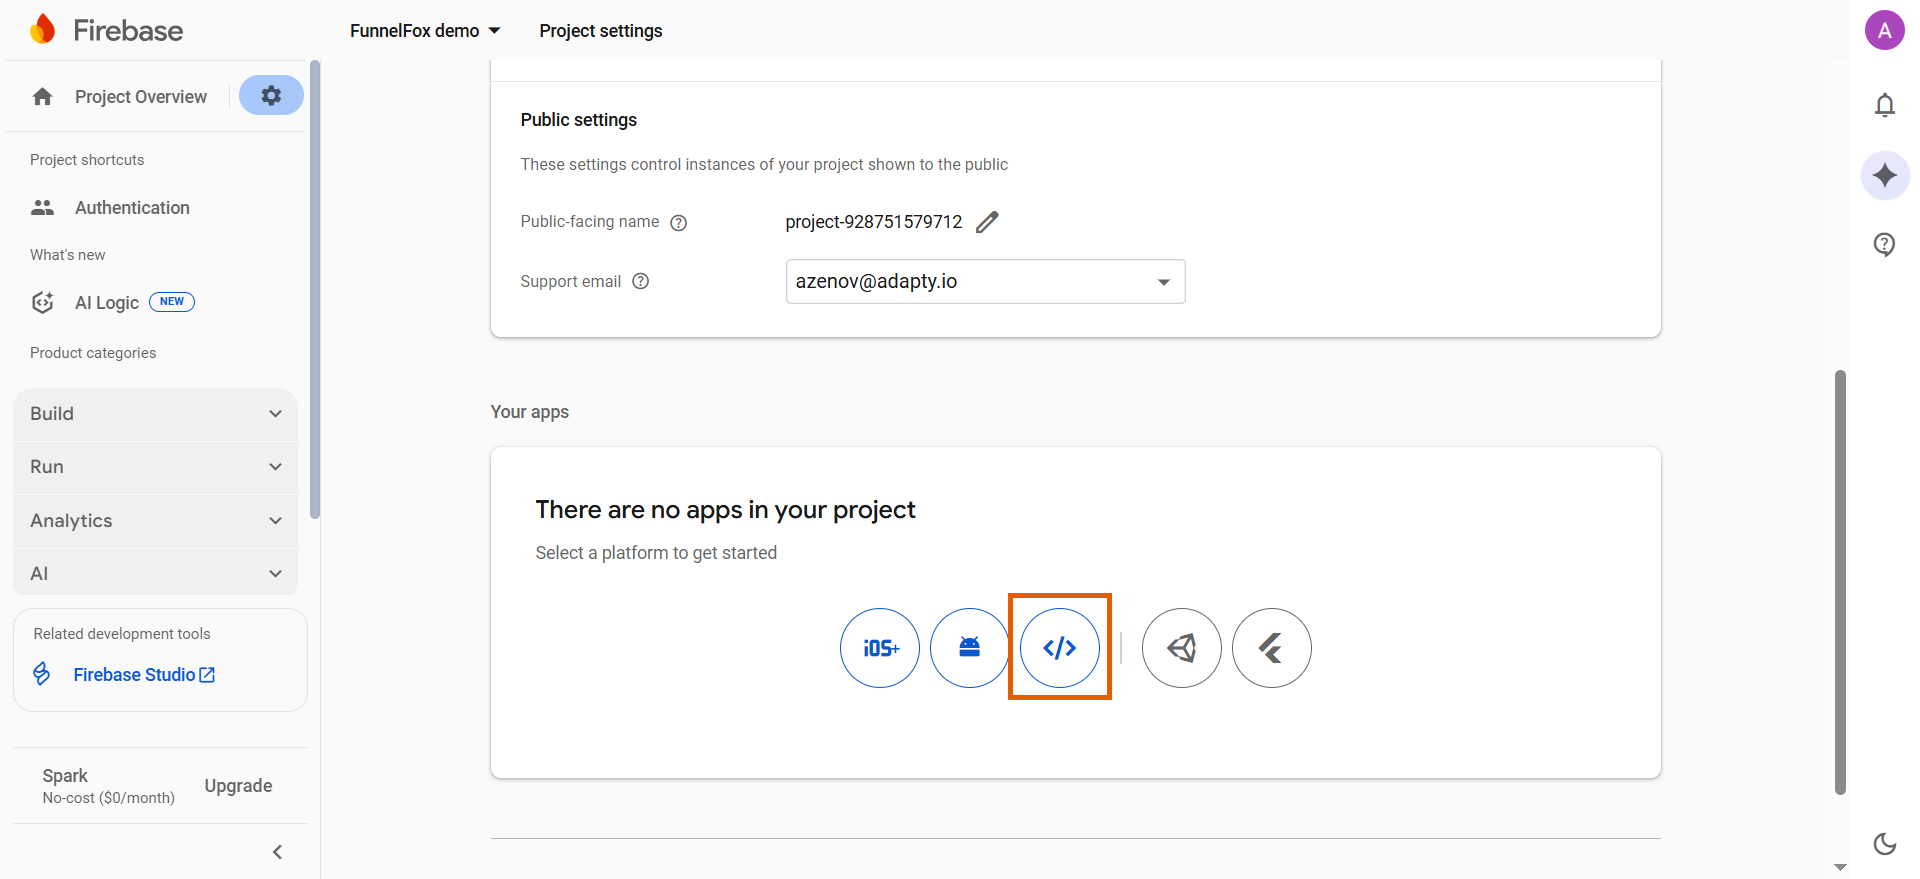
- Add your app nickname.
- Click Register app.
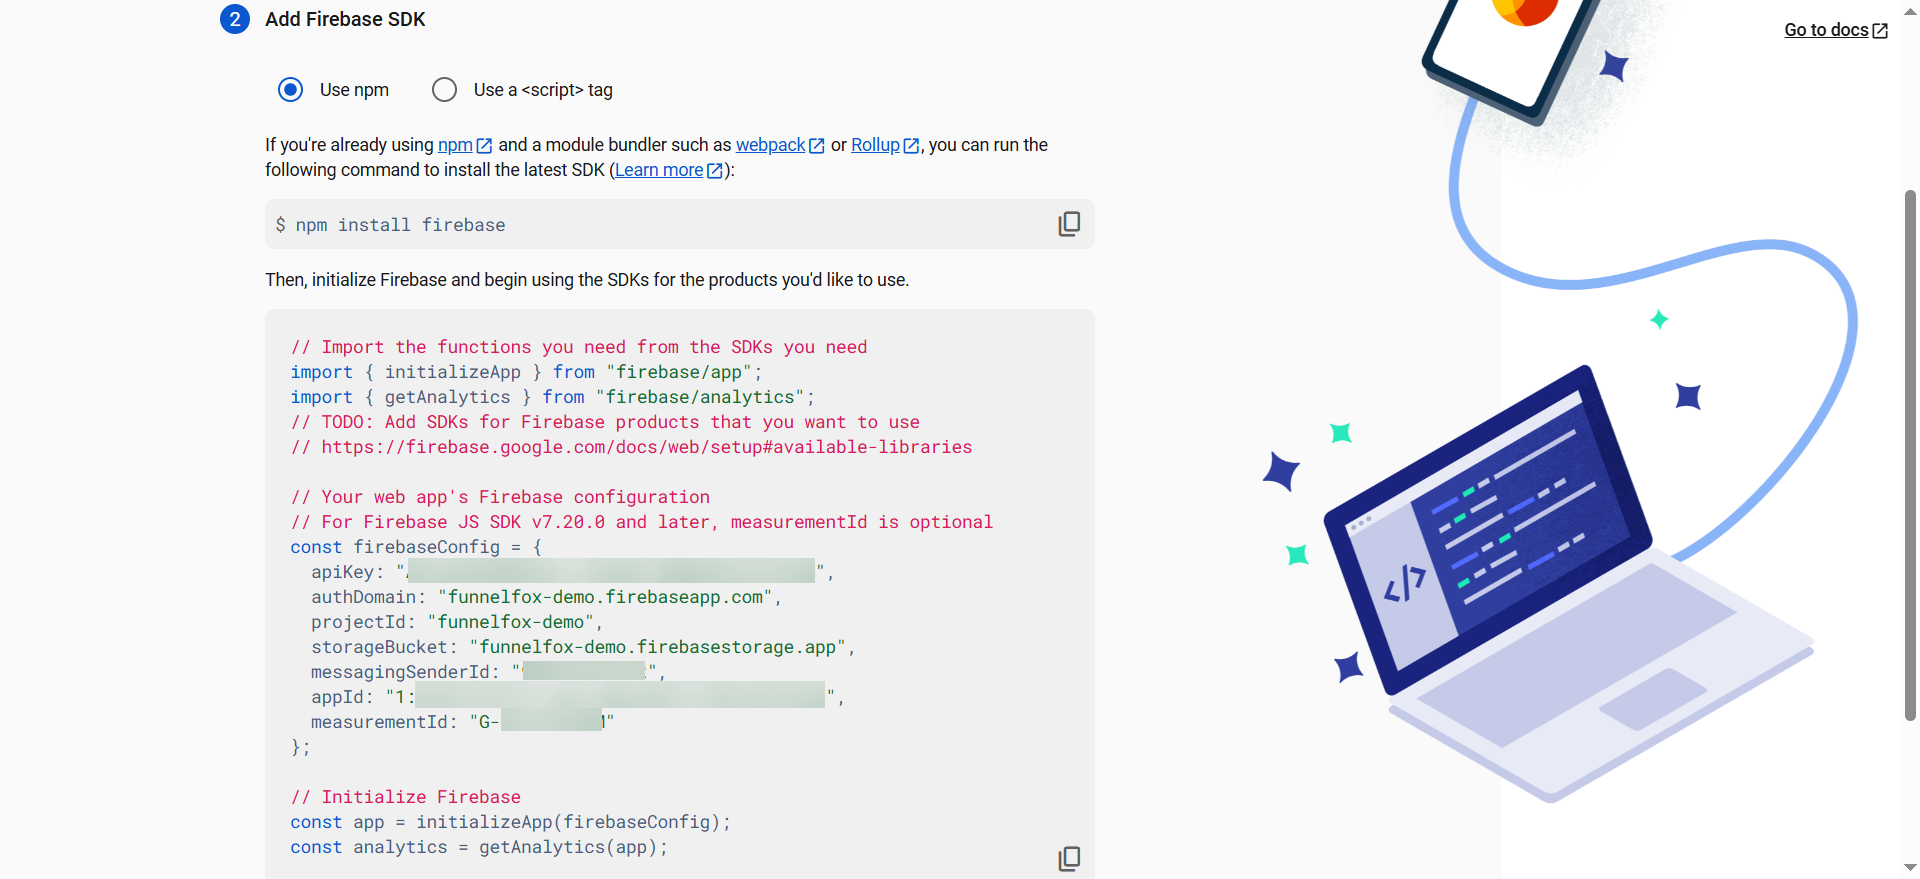
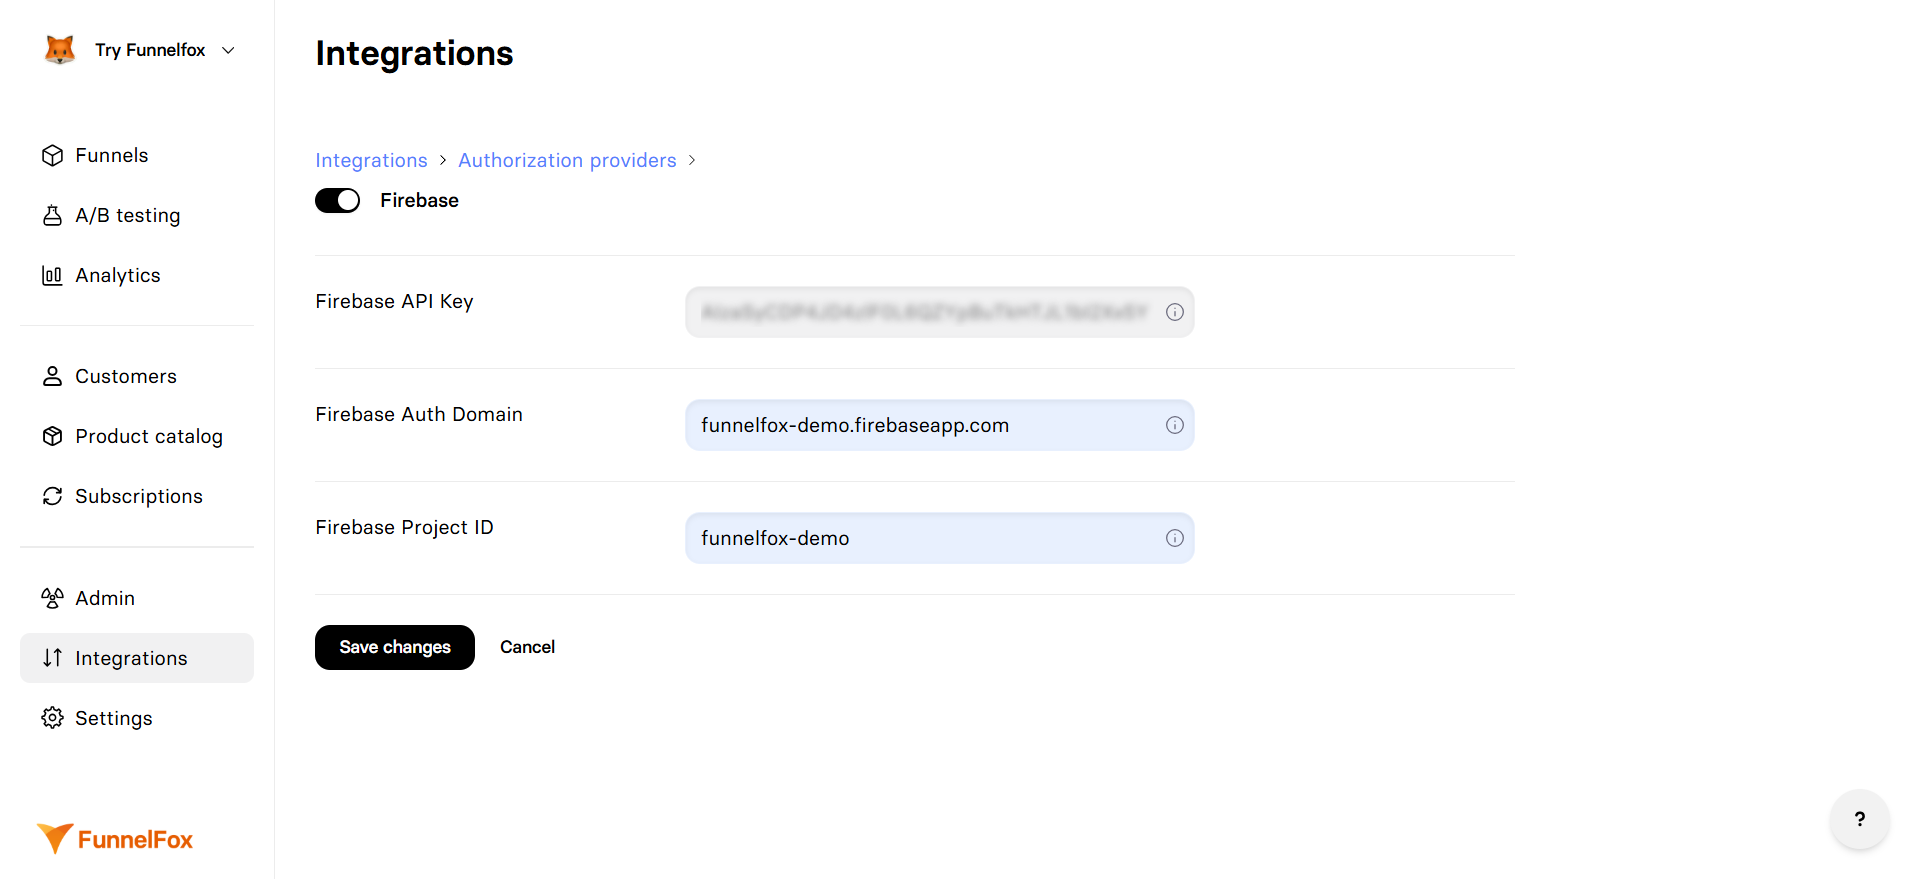
5. Connect Firebase to FunnelFox
Complete the integration by adding your Firebase configuration to FunnelFox.- Go to Integrations > Firebase in FunnelFox.
- Toggle on Firebase.
- Copy the config values from Firebase project and paste them in FunnelFox using the following mapping:
- Click Save changes.
You successfully integrated Firebase! Add the authentication methods you’ve set up to your funnels in the Editor.
Service account key
The service account key lets FunnelFox look customers up in Firebase. It’s required for email sign in to work reliably. With the key, FunnelFox can find a customer in Firebase even when:- The customer exists in FunnelFox with an email only, and no FUID is stored in their profile.
- The customer exists in Firebase but not yet in this FunnelFox project.
1
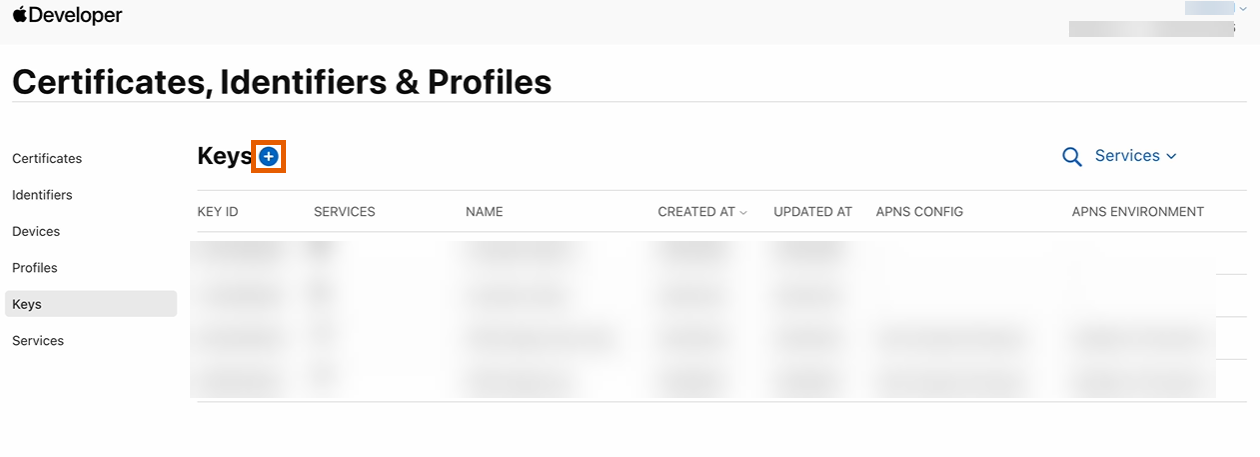
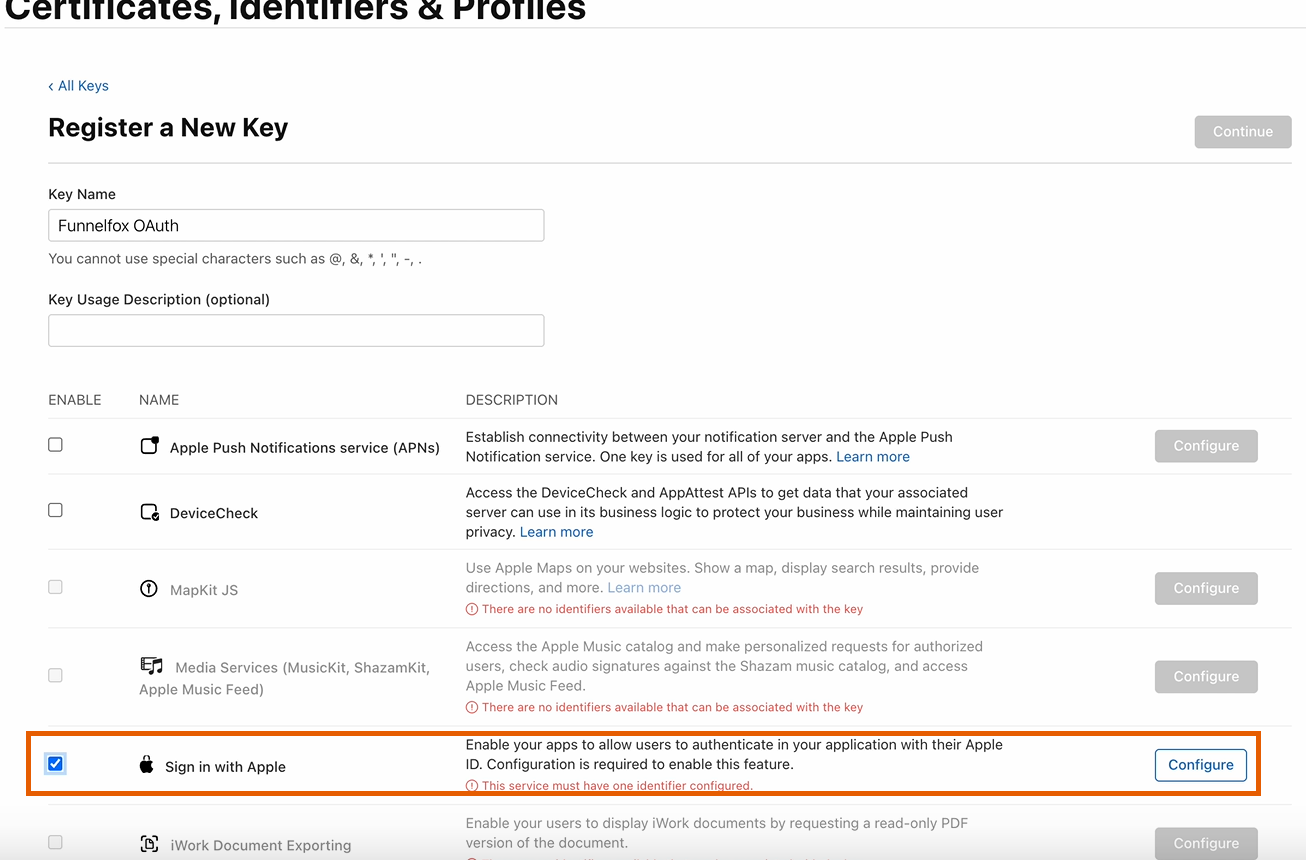
Generate a private key in Firebase
- Go to Settings > Service accounts in the Firebase console.
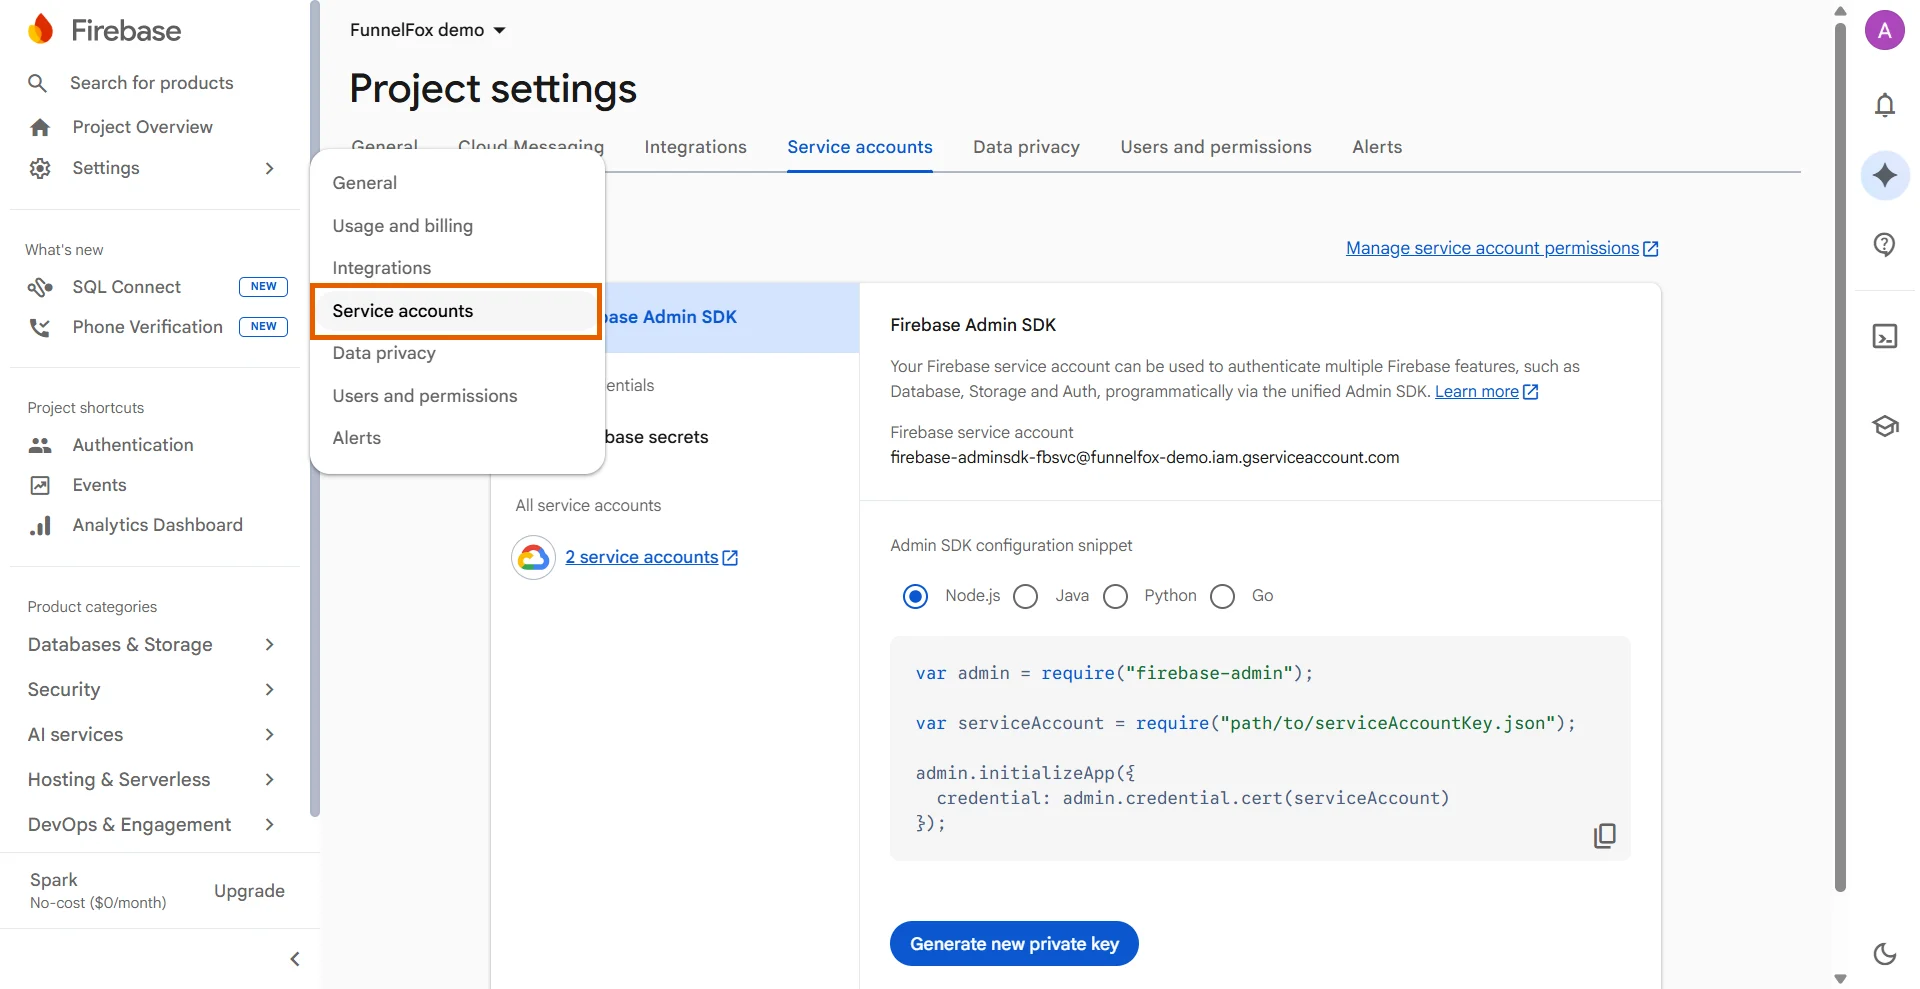
- Click Generate new private key.
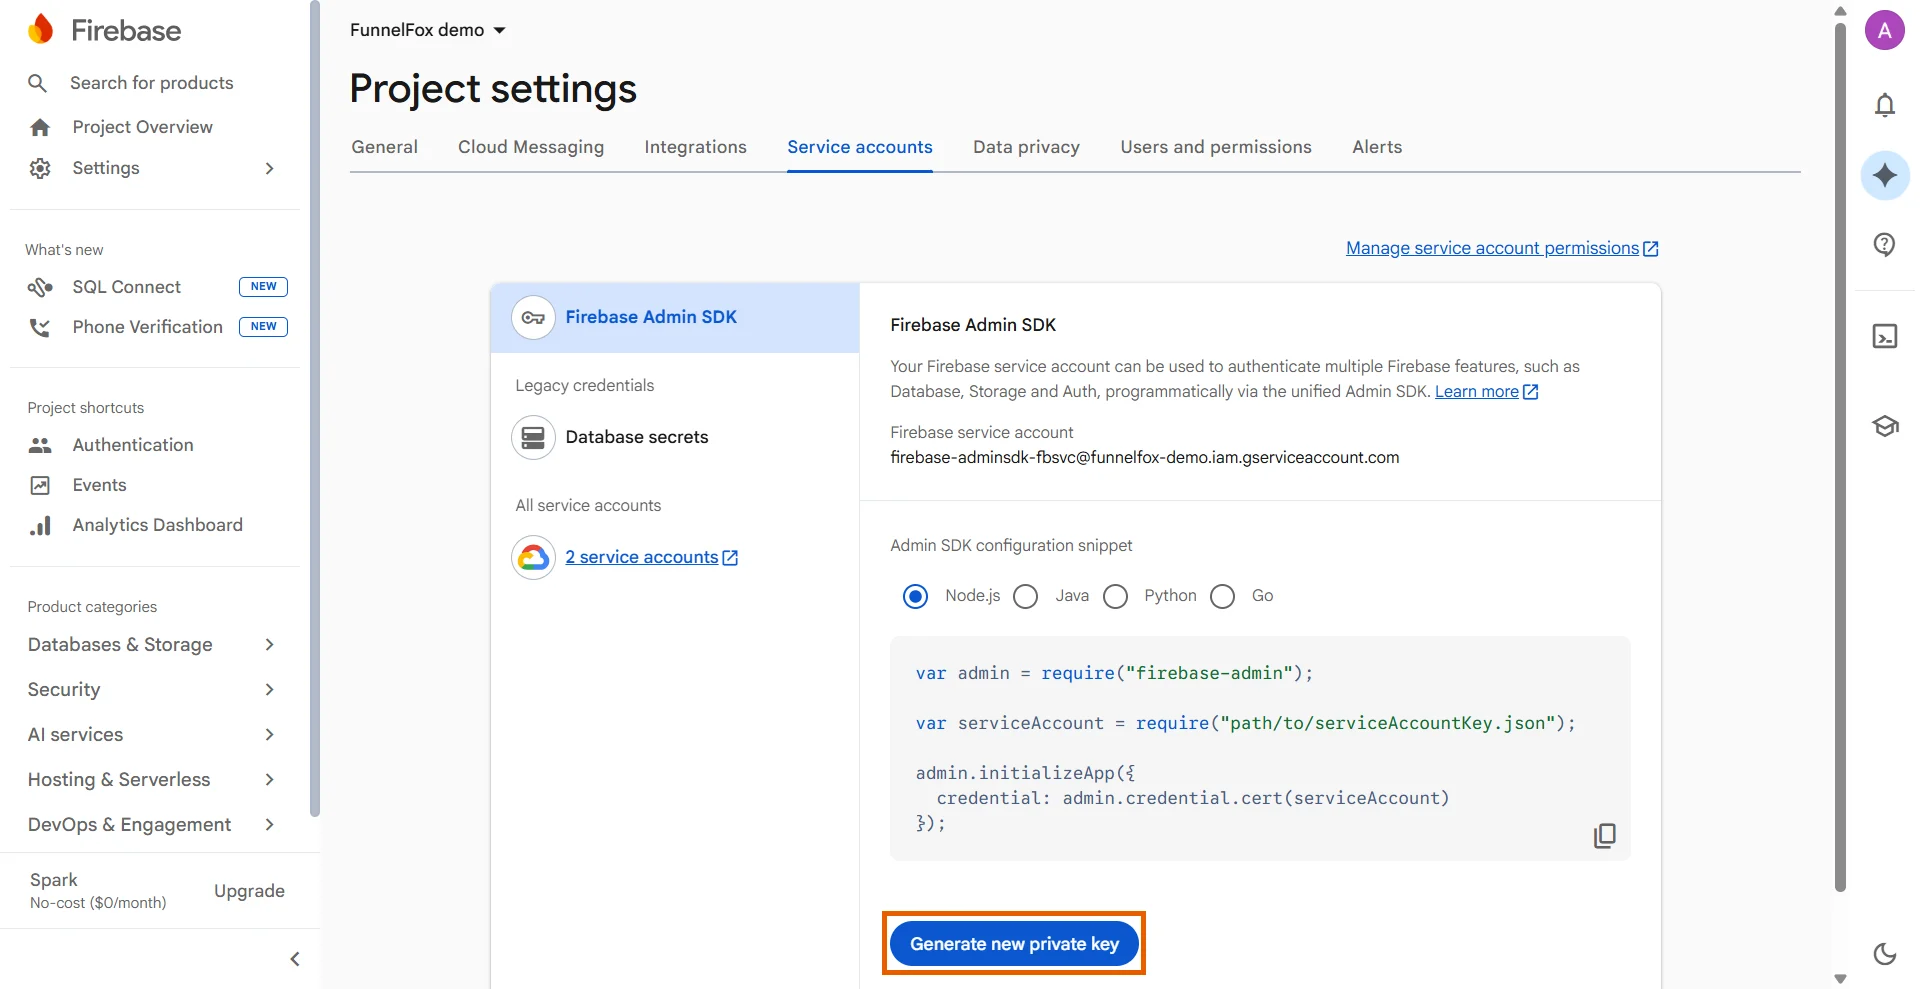
- Confirm the download. The JSON file with the key is created and downloaded within a few seconds.
2
Upload the key to FunnelFox
Go to Integrations > Firebase in FunnelFox. Upload the JSON file using the Service Account Key field, then save changes.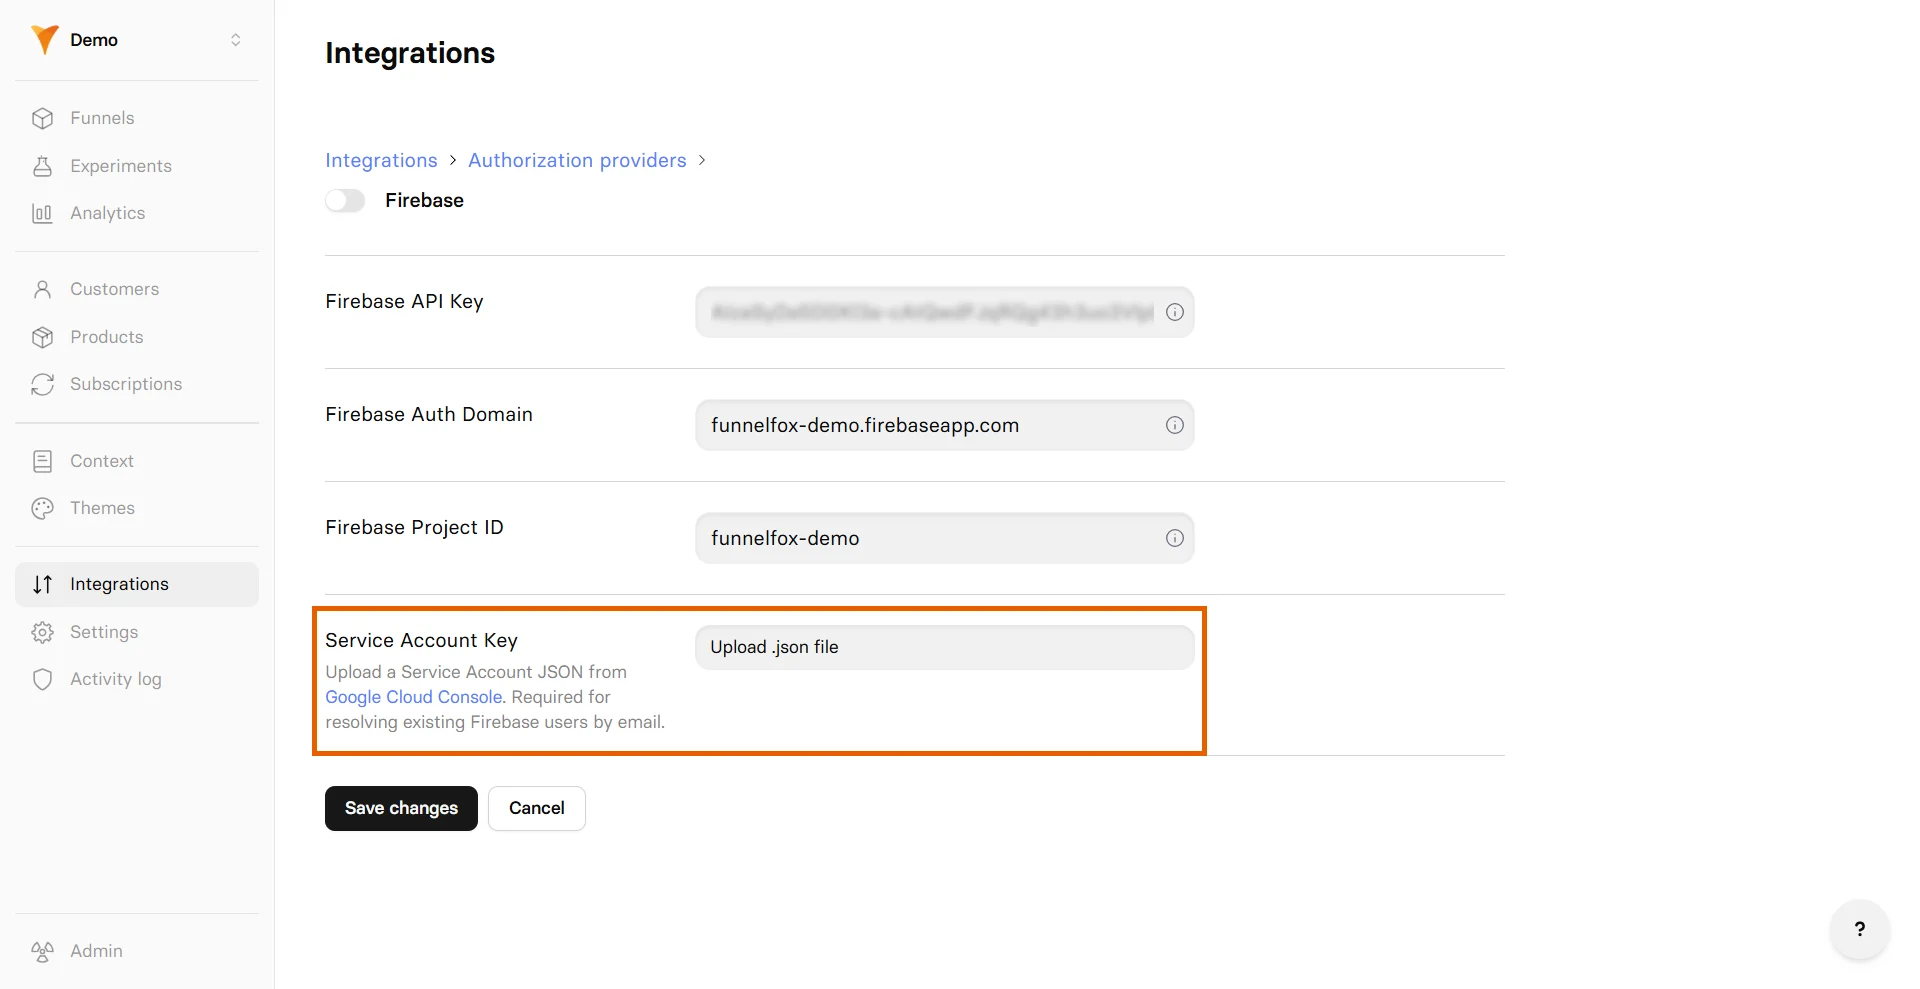
Multi-project setups
If you run multiple FunnelFox projects integrated with the same Firebase project, the service account key lets a customer use email sign in even when they were originally created in a different FunnelFox project. In this case, FunnelFox:- Looks the customer up in Firebase.
- Creates a new profile in the current project, since the customer didn’t exist here before.
- Signs in the same Firebase customer by FUID.
- Records the purchase in the same Adapty or RevenueCat profile.
Both FunnelFox projects must be integrated with the same Firebase project for this to work.
Add authentication to funnels
Once Firebase is configured, you can add authentication flows to your funnels in the Editor. The following authentication methods correspond to the ones you’ve set up in Firebase. The same OAuth buttons serve both authentication methods: sign up and sign in.Email/Password authentication
Enable users to authenticate with their email address and custom password. To add Email/Password authentication to your funnel:- In the Editor, prompt the AI Chat to add a screen for user registration with both Email and Password inputs. Or go to Add element > Inputs and add these inputs manually.
-
Set the Custom ID to
firebase-passwordfor the Password input.
By default, FunnelFox generates a random password when a user submits their email in the funnel. It’s important to add the Password input on the same screen to replace the previously generated password with the one provided.

OAuth authentication
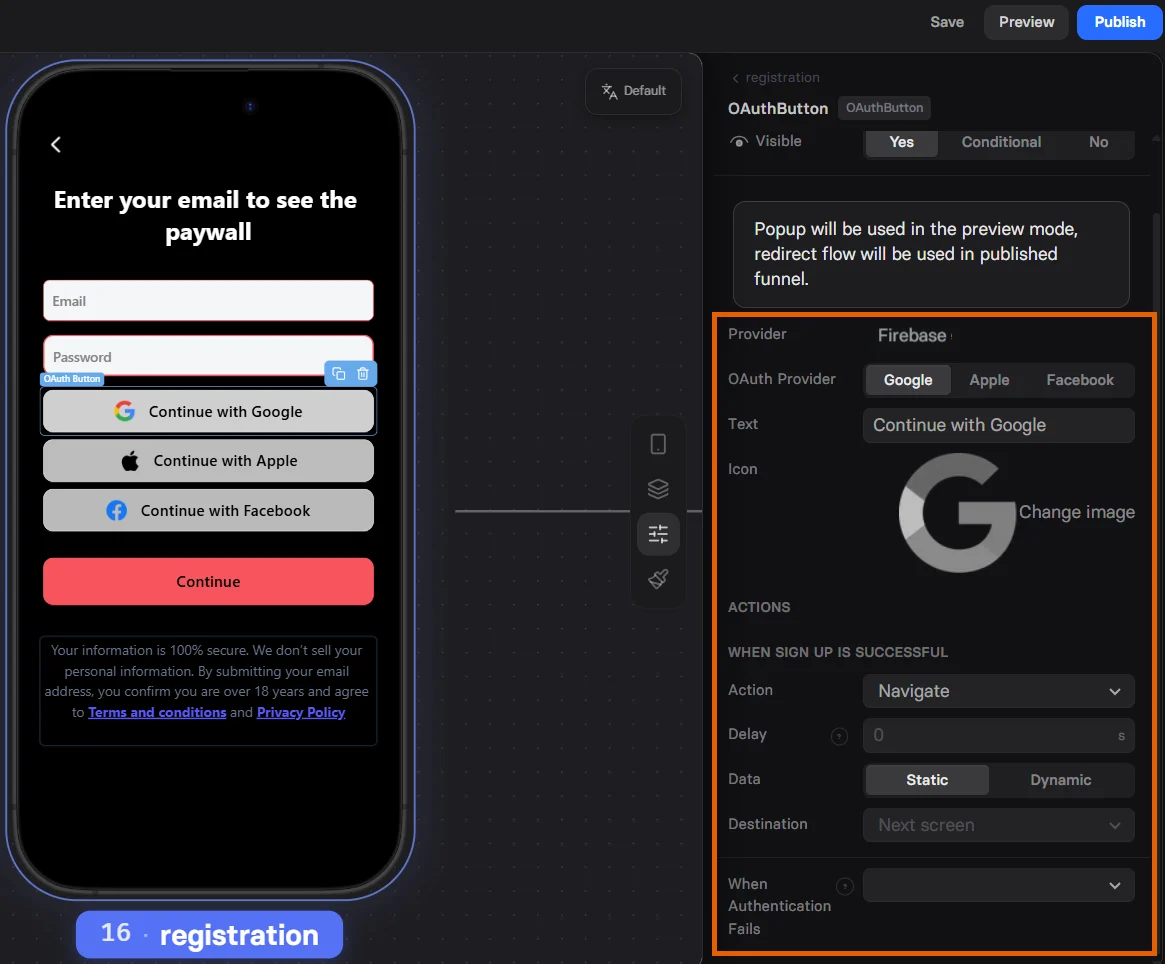
Enable seamless OAuth authentication using Google or Apple accounts for a frictionless user experience. To add OAuth authentication to your funnel:- In the Editor, prompt the AI Chat to add a screen for user registration with OAuth button or use the one you’ve already added for Email/Password. Or click Add element > Authentication and select OAuth button.
- Go to the Parameters tab of the OAuth button.
- Select OAuth provider.
- Under Actions, set up user navigation for cases when authentication succeeds or fails.