
Setup
You need admin access to both your Airwallex account and your Primer account. Keep both open in separate browser tabs, because the setup moves back and forth between them.1. Connect Airwallex to Primer
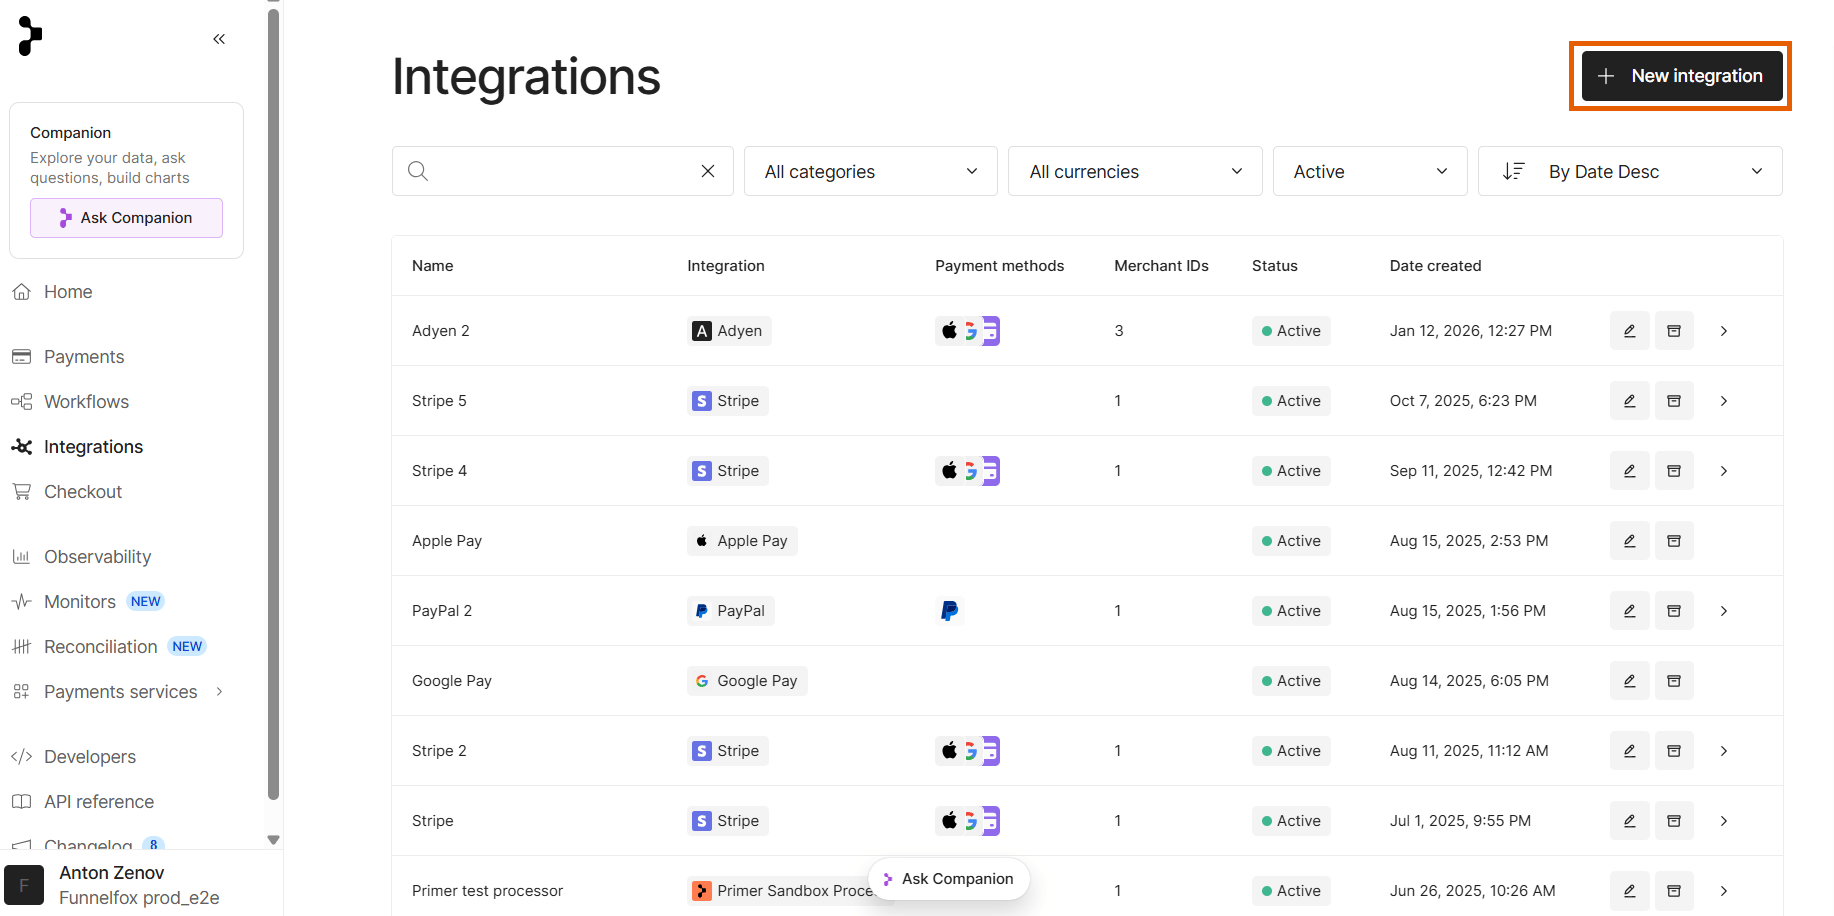
- Go to Integrations in your Primer dashboard.
- Click New integration at the top right.
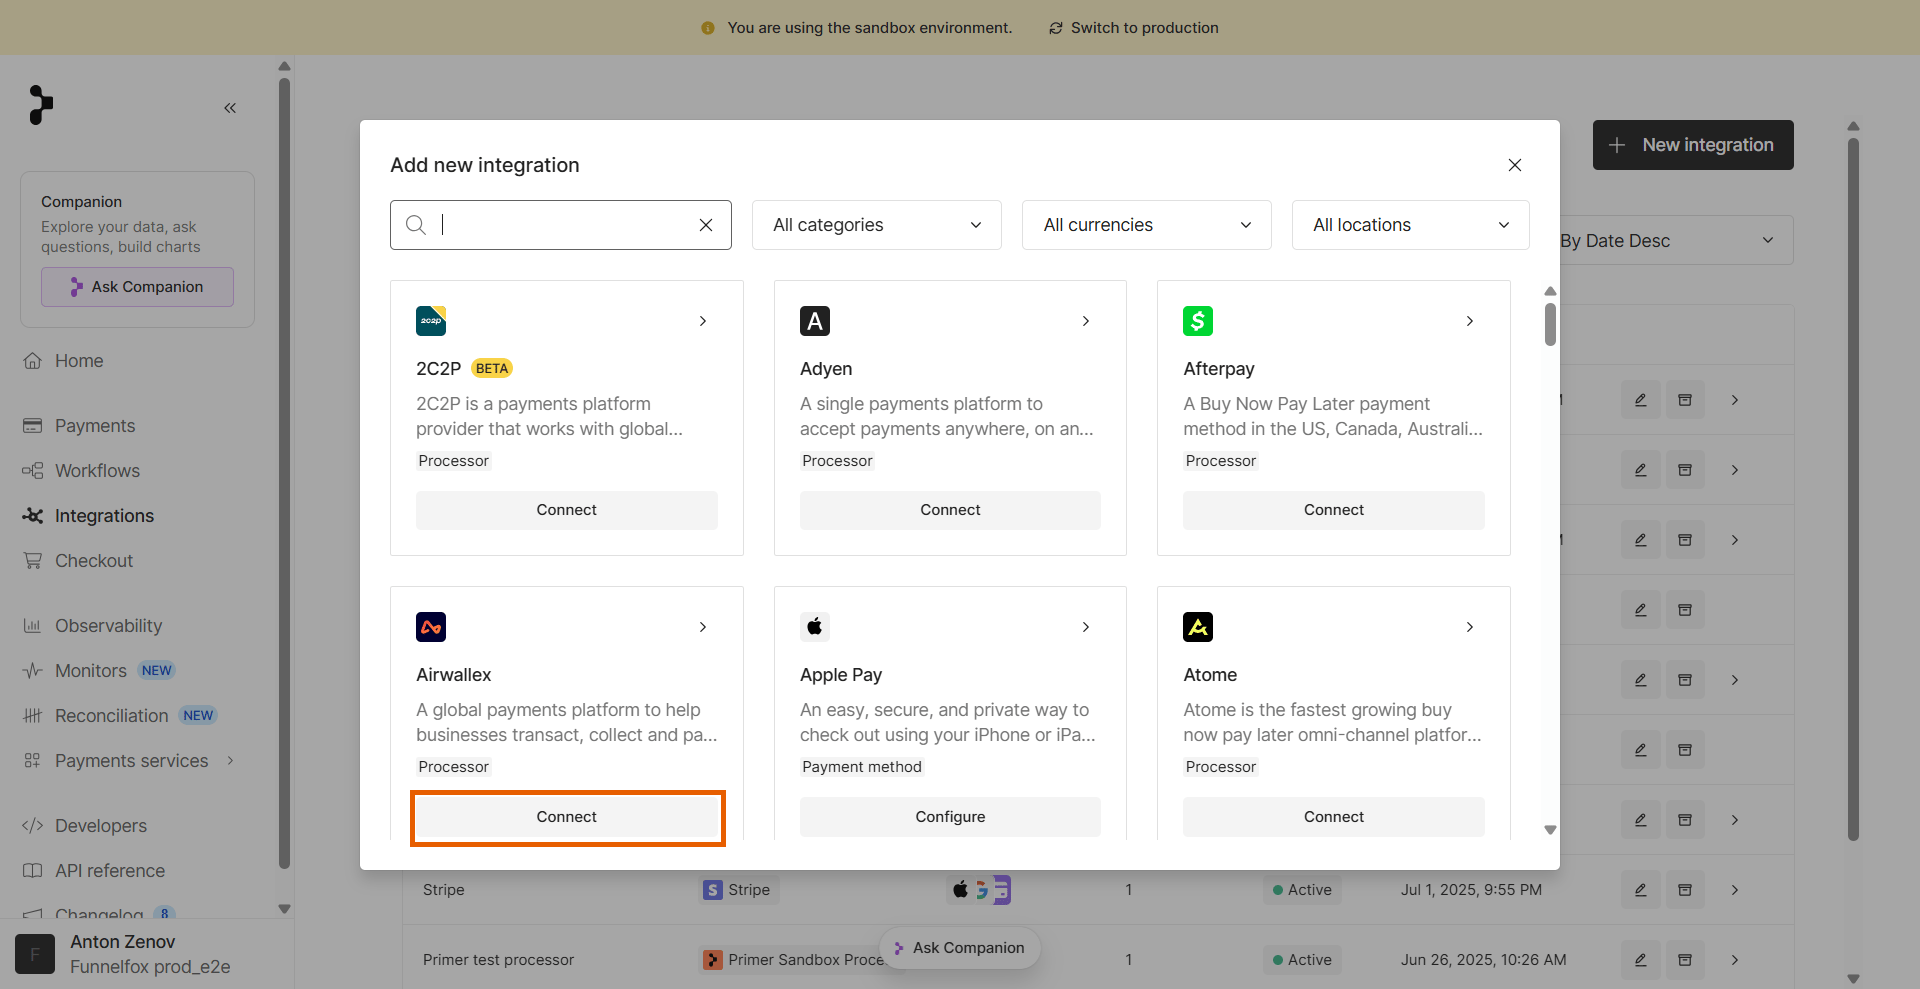
- Click Connect under Airwallex.
- Keep Primer open and go to your Airwallex account in another browser tab.
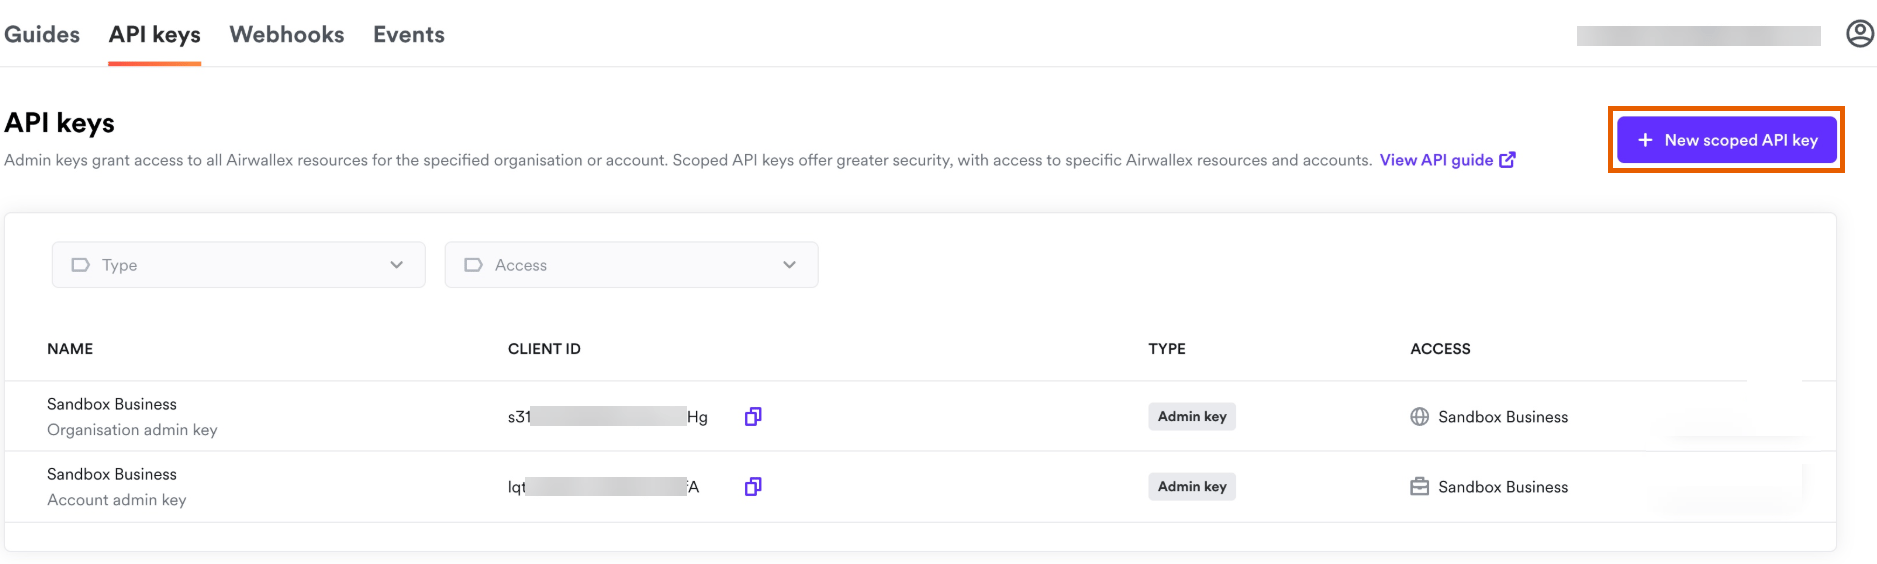
- Go to Settings > Developer > API keys in Airwallex.
- Click New scoped API key at the top right.
- Name your key and configure its scope. It needs the Payment Acceptance and Payment Disputes scopes.
-
Click Create to generate the key, then copy it.
Copy the API key now. Airwallex shows it once, and you cannot retrieve it later. If you lose it, create a new key.
- Go back to Primer and paste the key into API key.
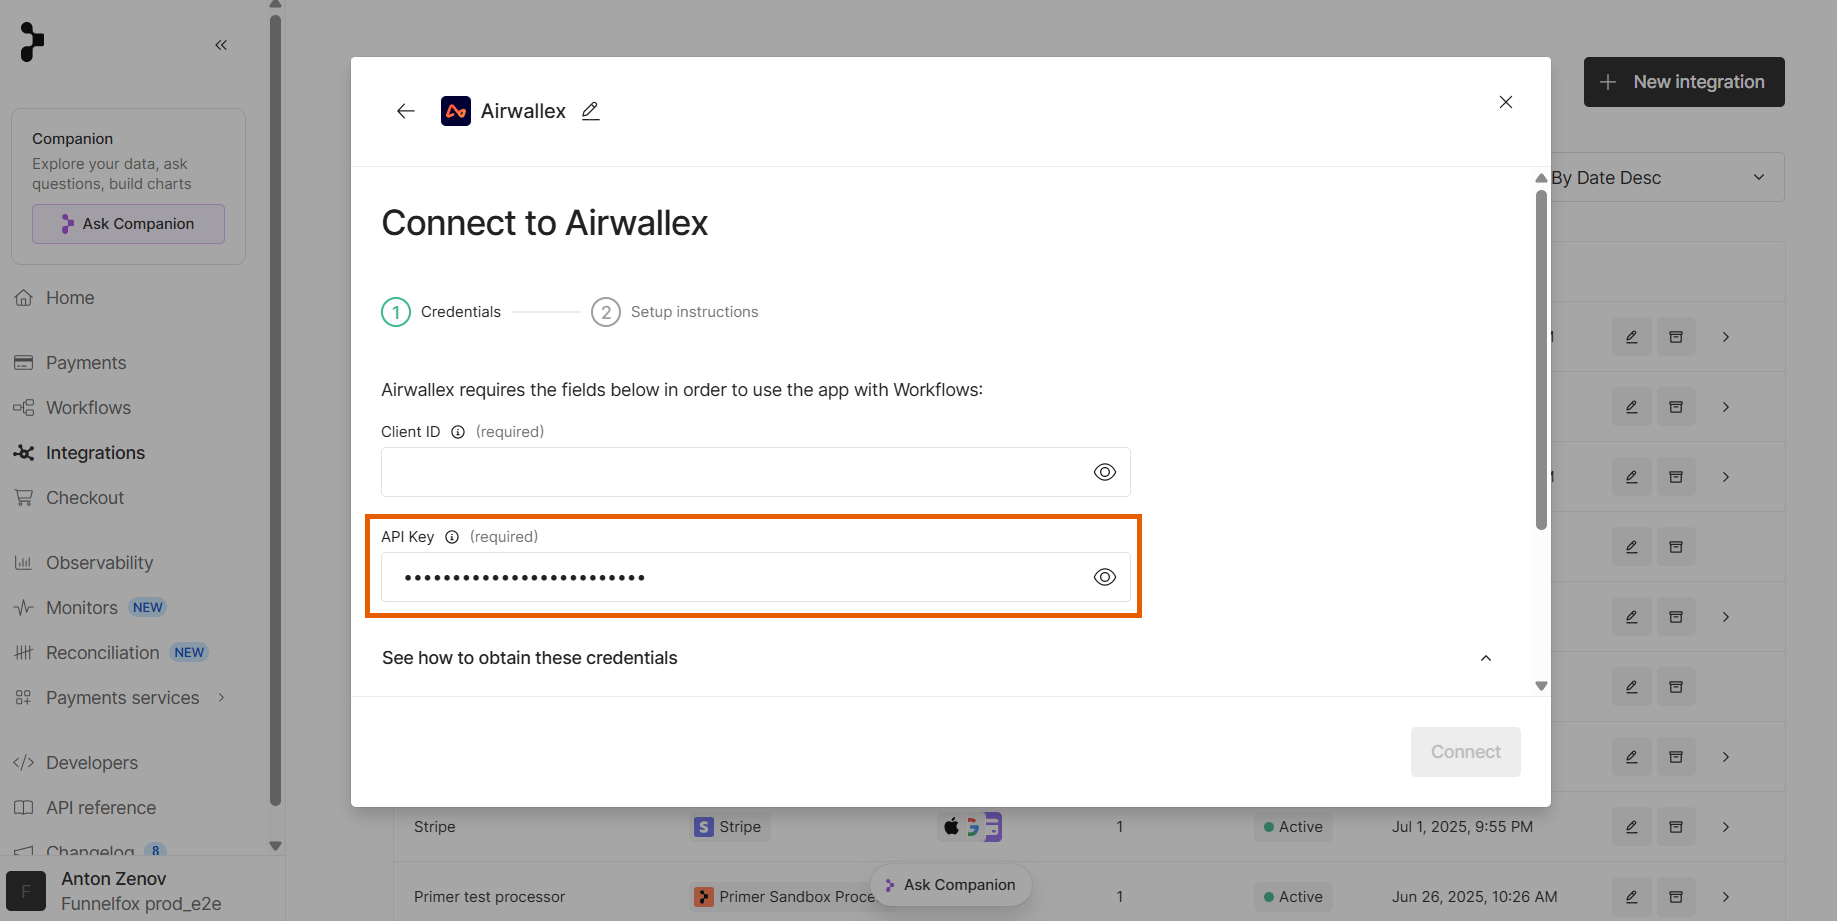
- Go back to Airwallex and copy the Client ID for the key you created.
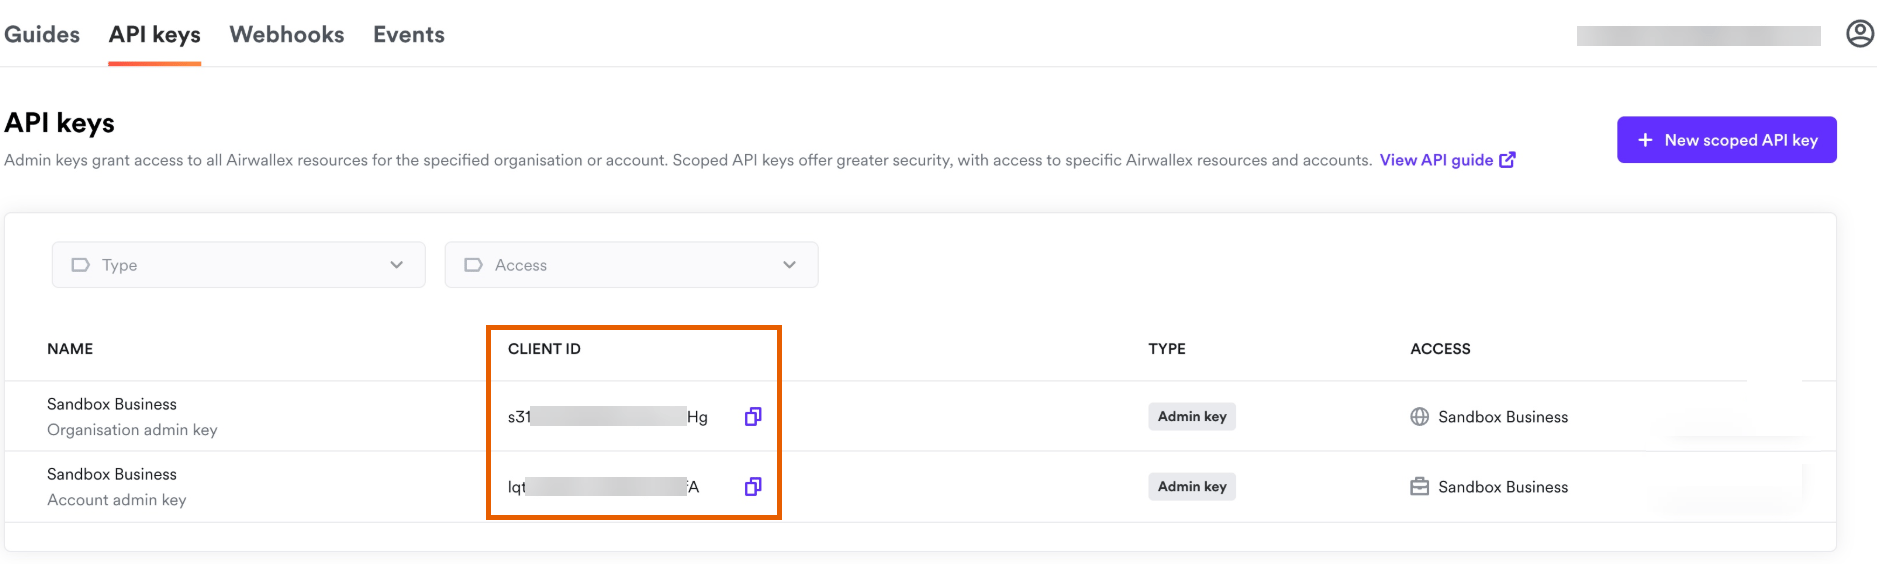
- Go back to Primer and paste the ID into Client ID.
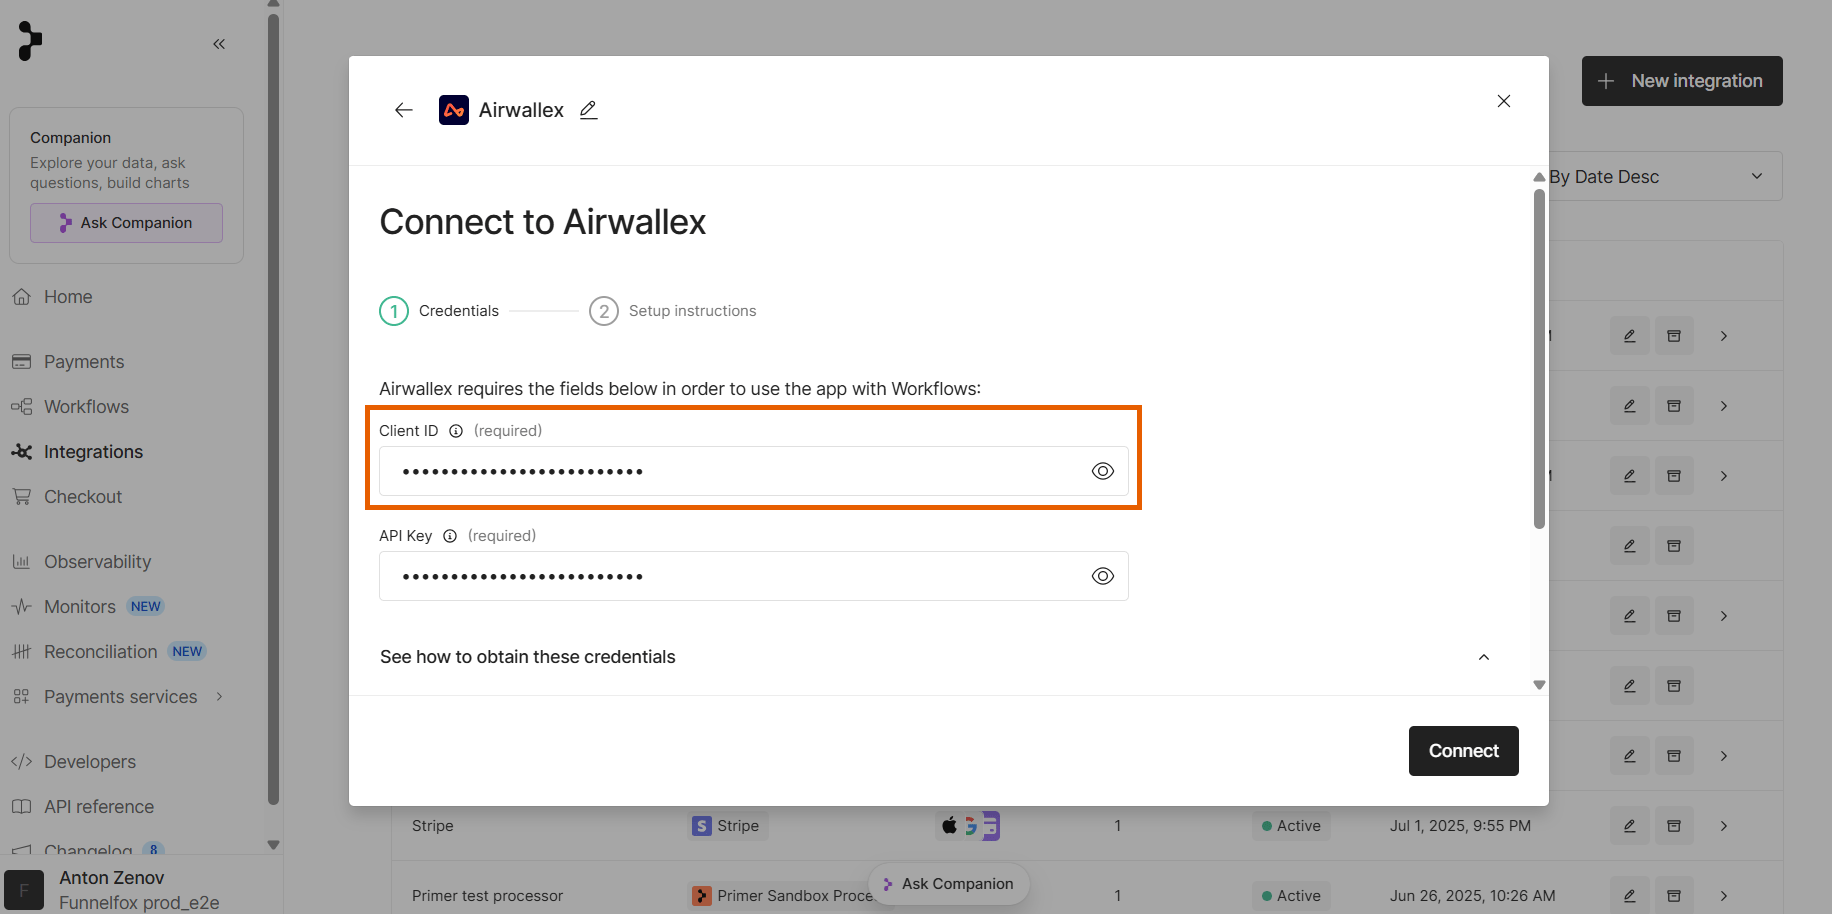
- Click Connect.
2. Set up Primer webhook in Airwallex
This webhook tells Primer about refunds and disputes that happen in Airwallex.- Go to Settings > Developer > Webhooks in Airwallex.
- Click New webhook at the top right.
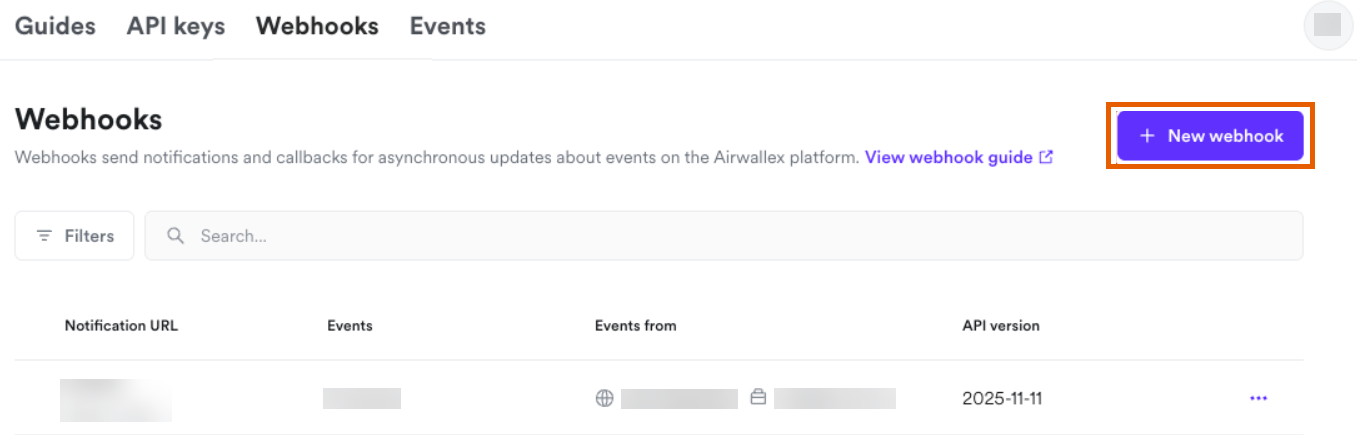
- Name your webhook.
- Go back to the Airwallex integration in Primer and copy the endpoint URL under Set up webhook.
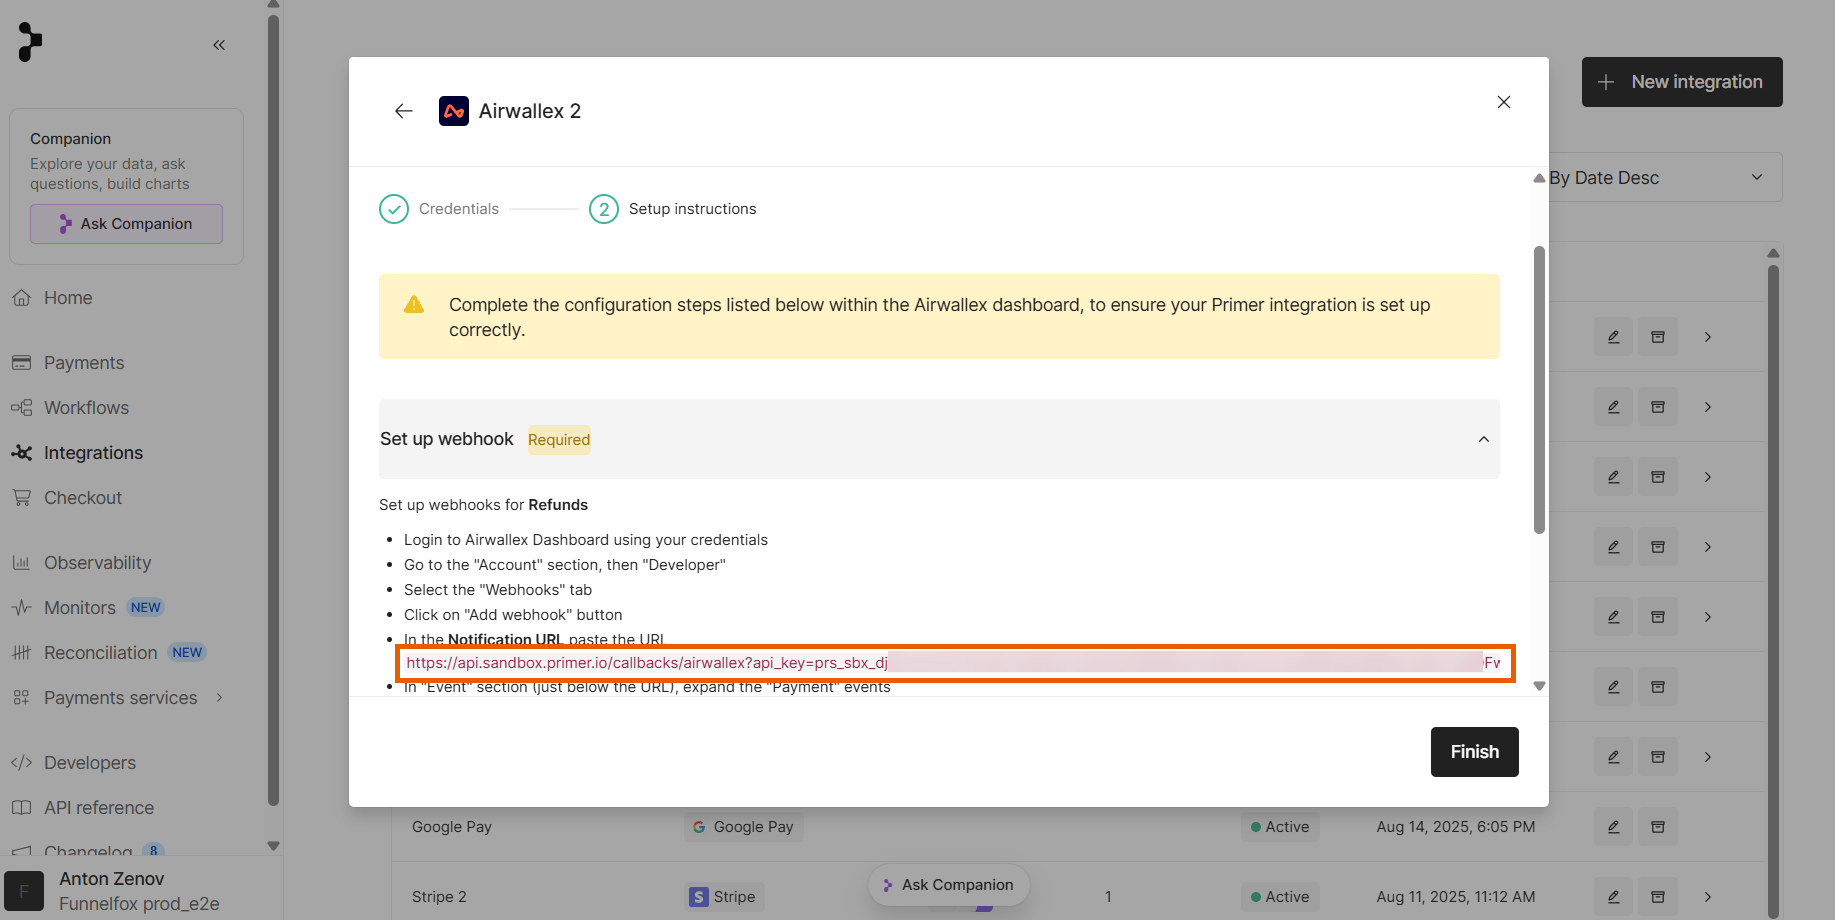
- Go back to Airwallex and paste the URL into Notification URL.
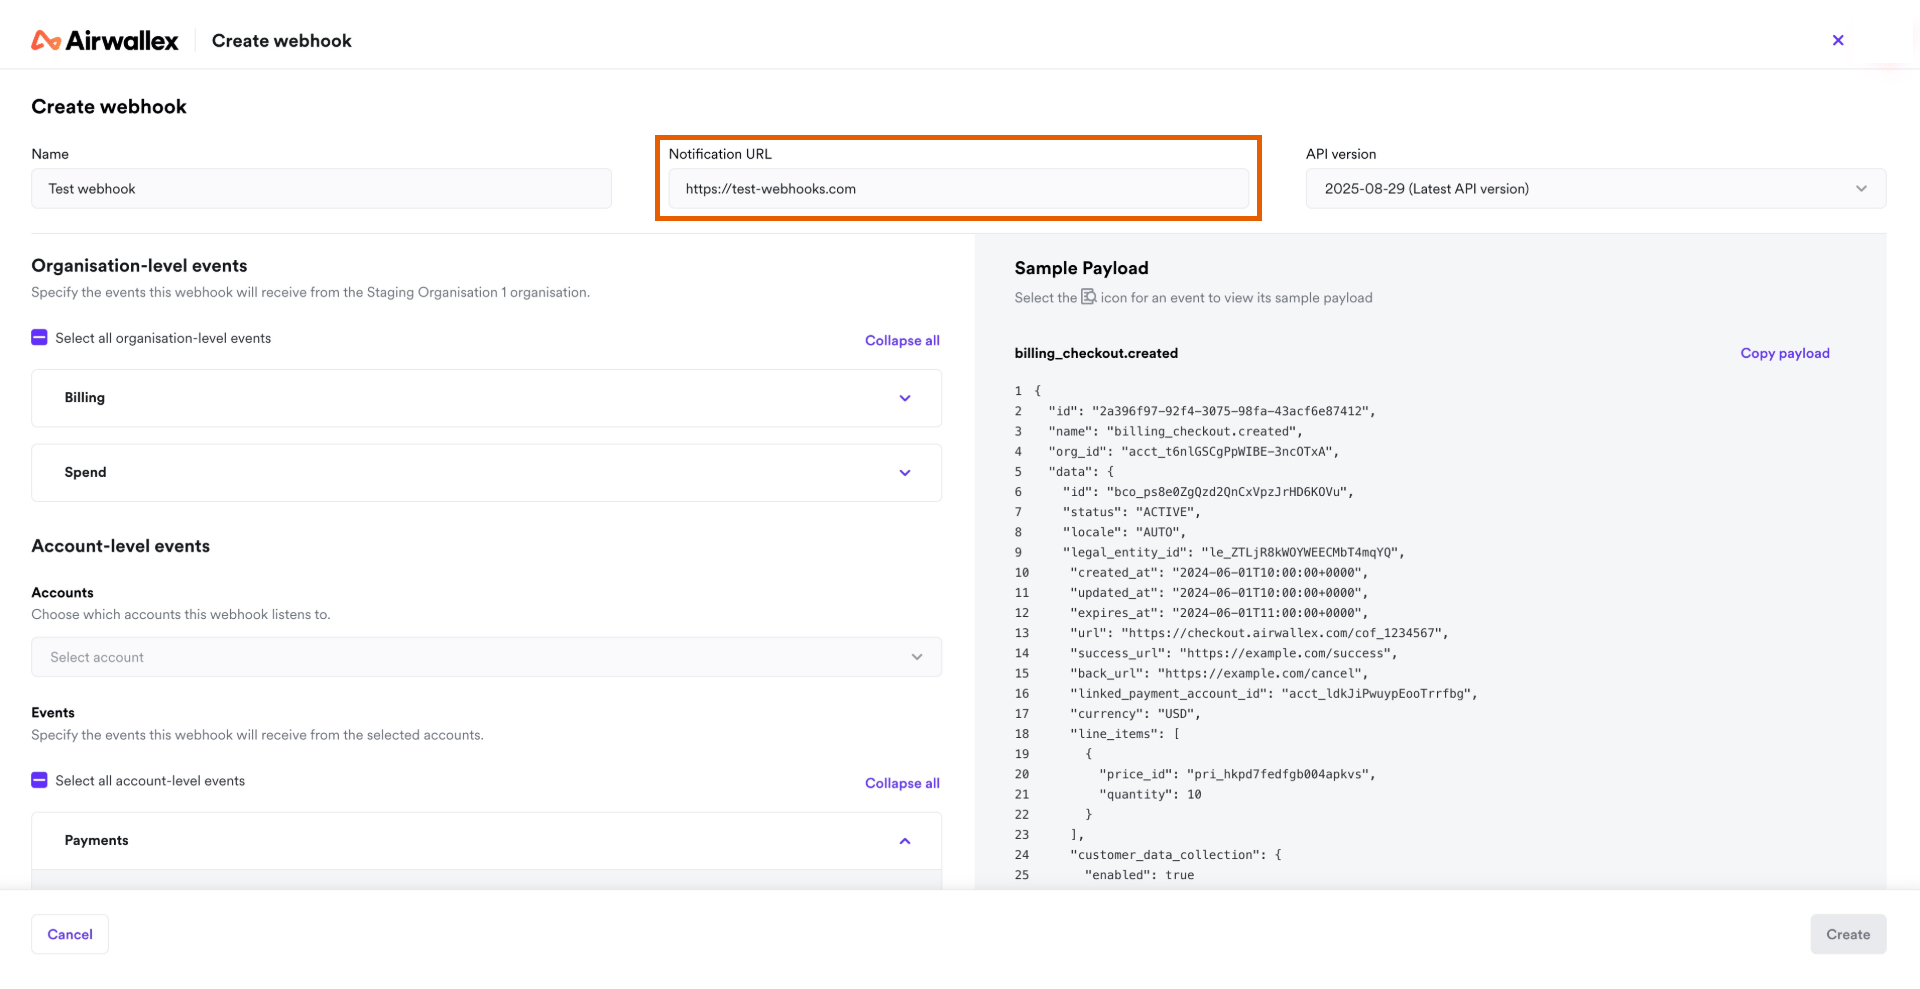
- Go to Payment events under the Events section and enable
Refund.Failed,Refund.Accepted, and all Payment Dispute events.
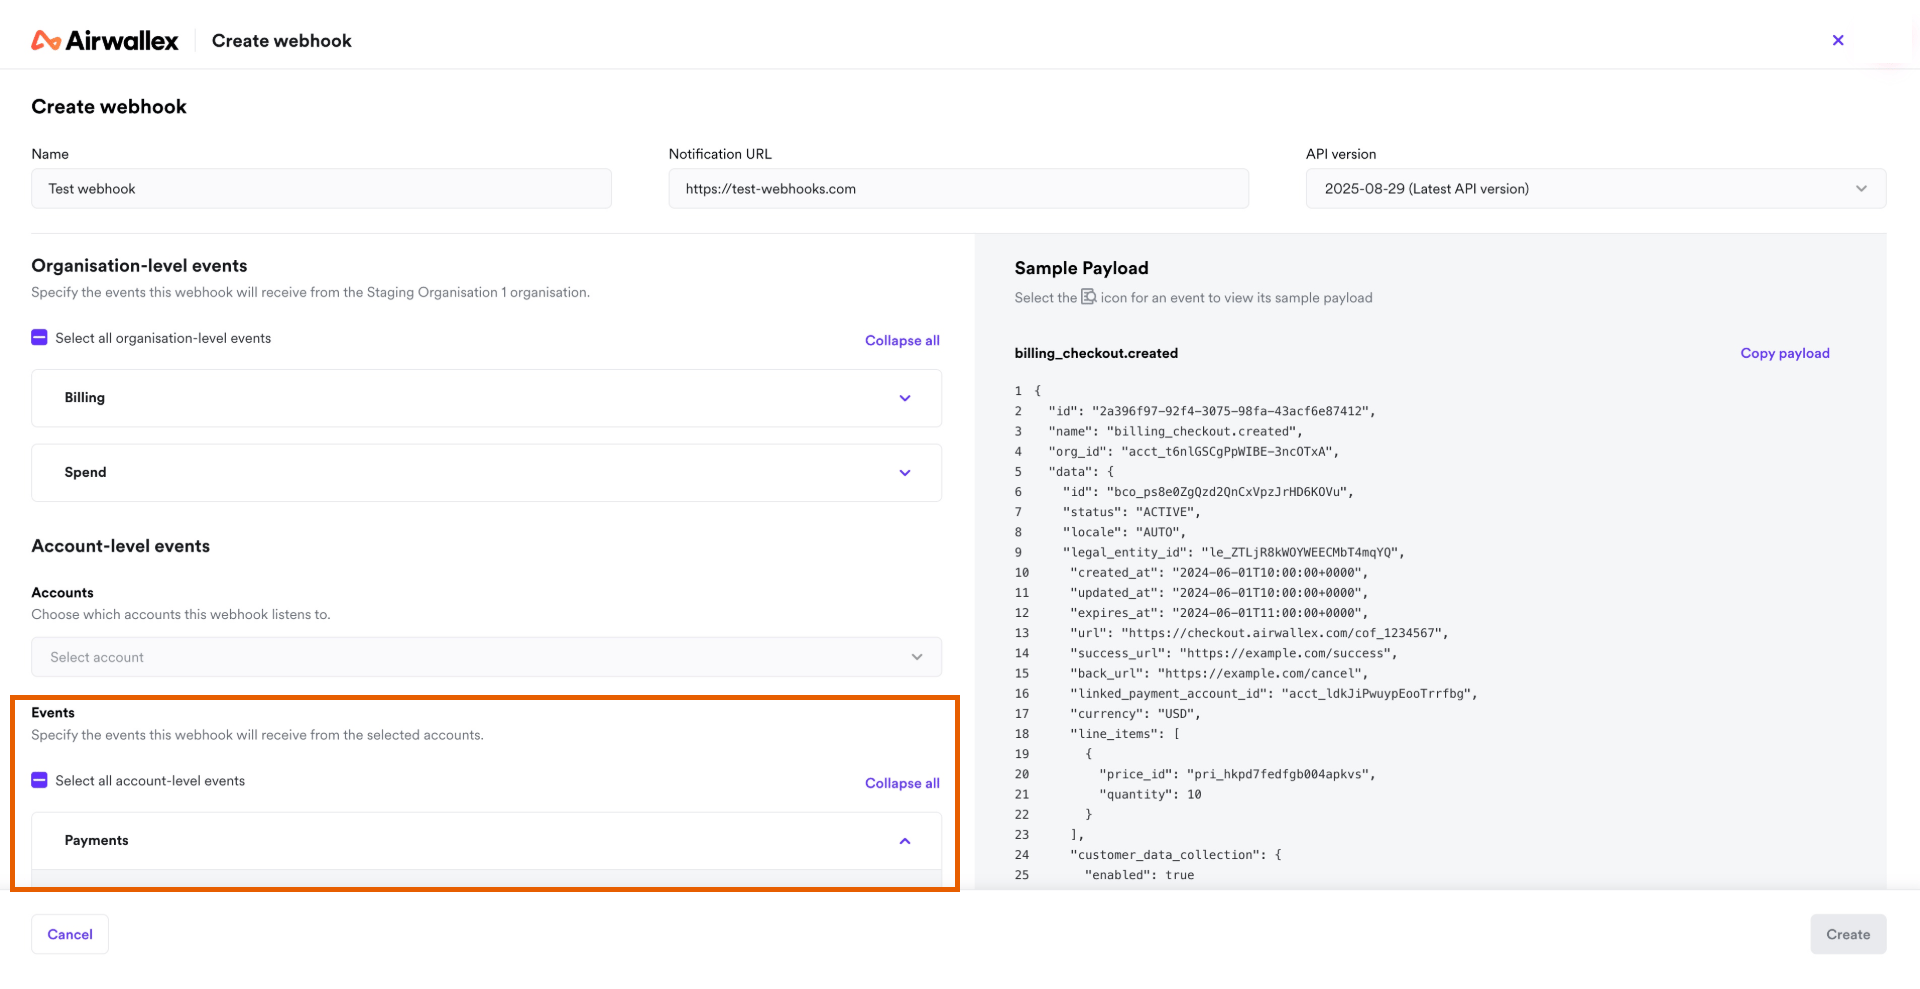
- Click Create.
- Click Finish in the Airwallex integration in Primer.
3. Set up FunnelFox Payments webhook in Airwallex
Airwallex needs a second webhook that posts refund and capture events straight to FunnelFox Payments.- Go back to Settings > Developer > Webhooks in Airwallex and click New webhook.
- Name your webhook.
-
Paste your FunnelFox Payments webhook endpoint into Notification URL:
Replace
{org_id}with your organization ID, which looks likelive_xxxx000000. The result looks like this: -
Go to Payment events under the Events section and enable
Refund.Acceptedandpayment_attempt.capture_requested.
- Click Create.
- Open the webhook you just created and copy its Secret key.
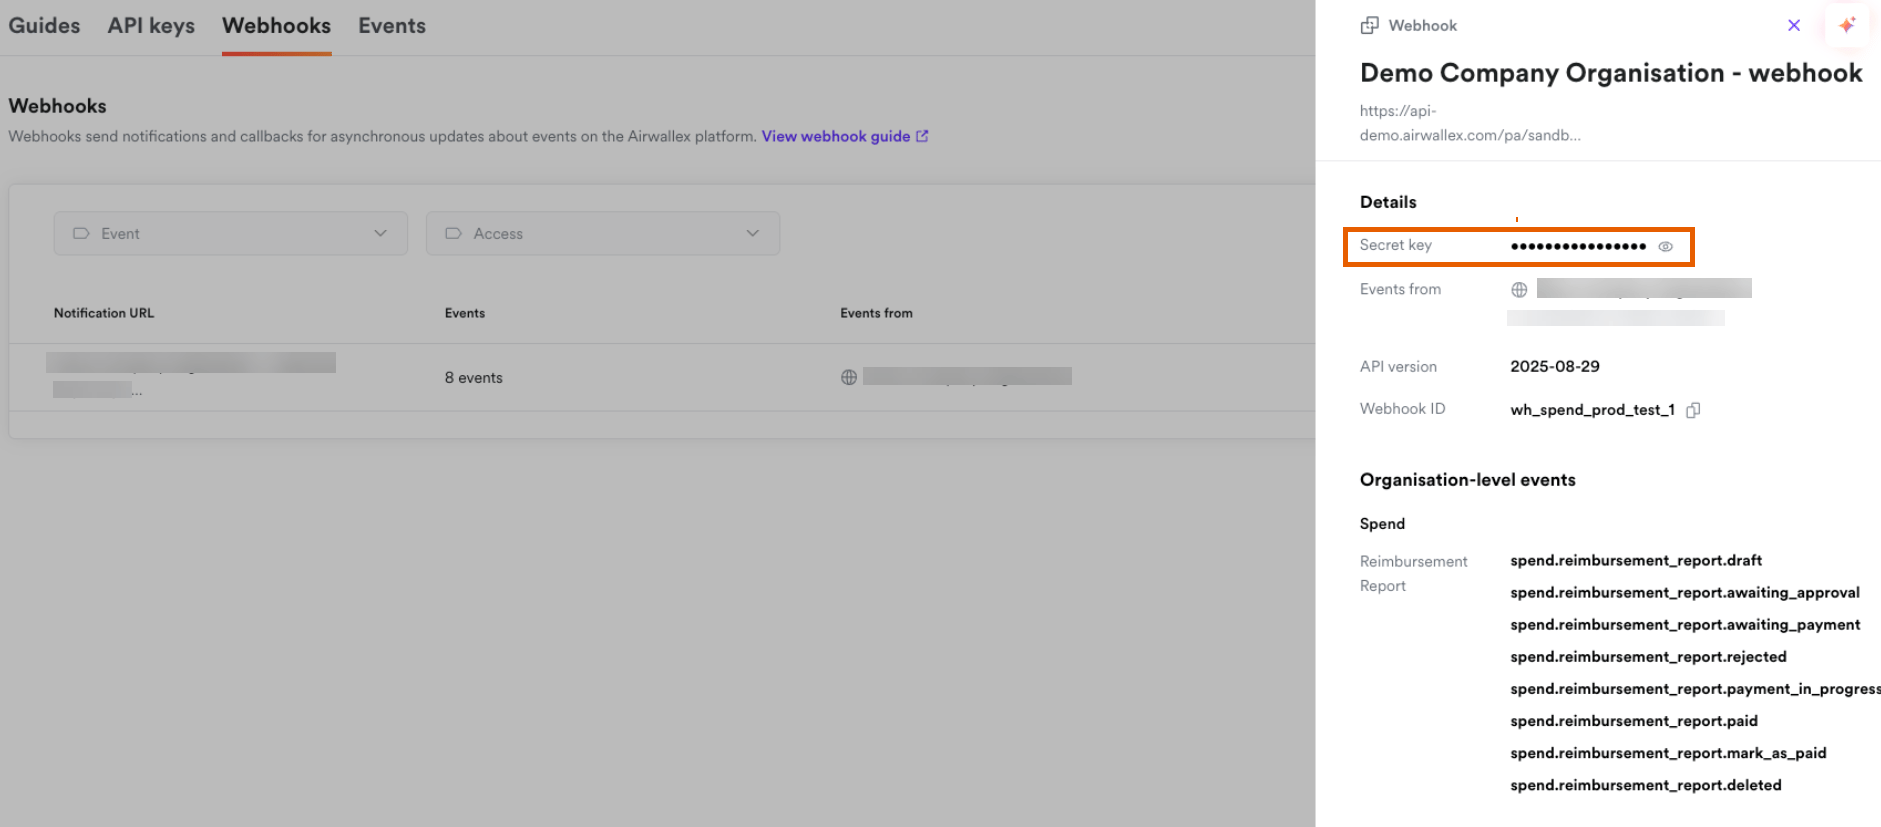
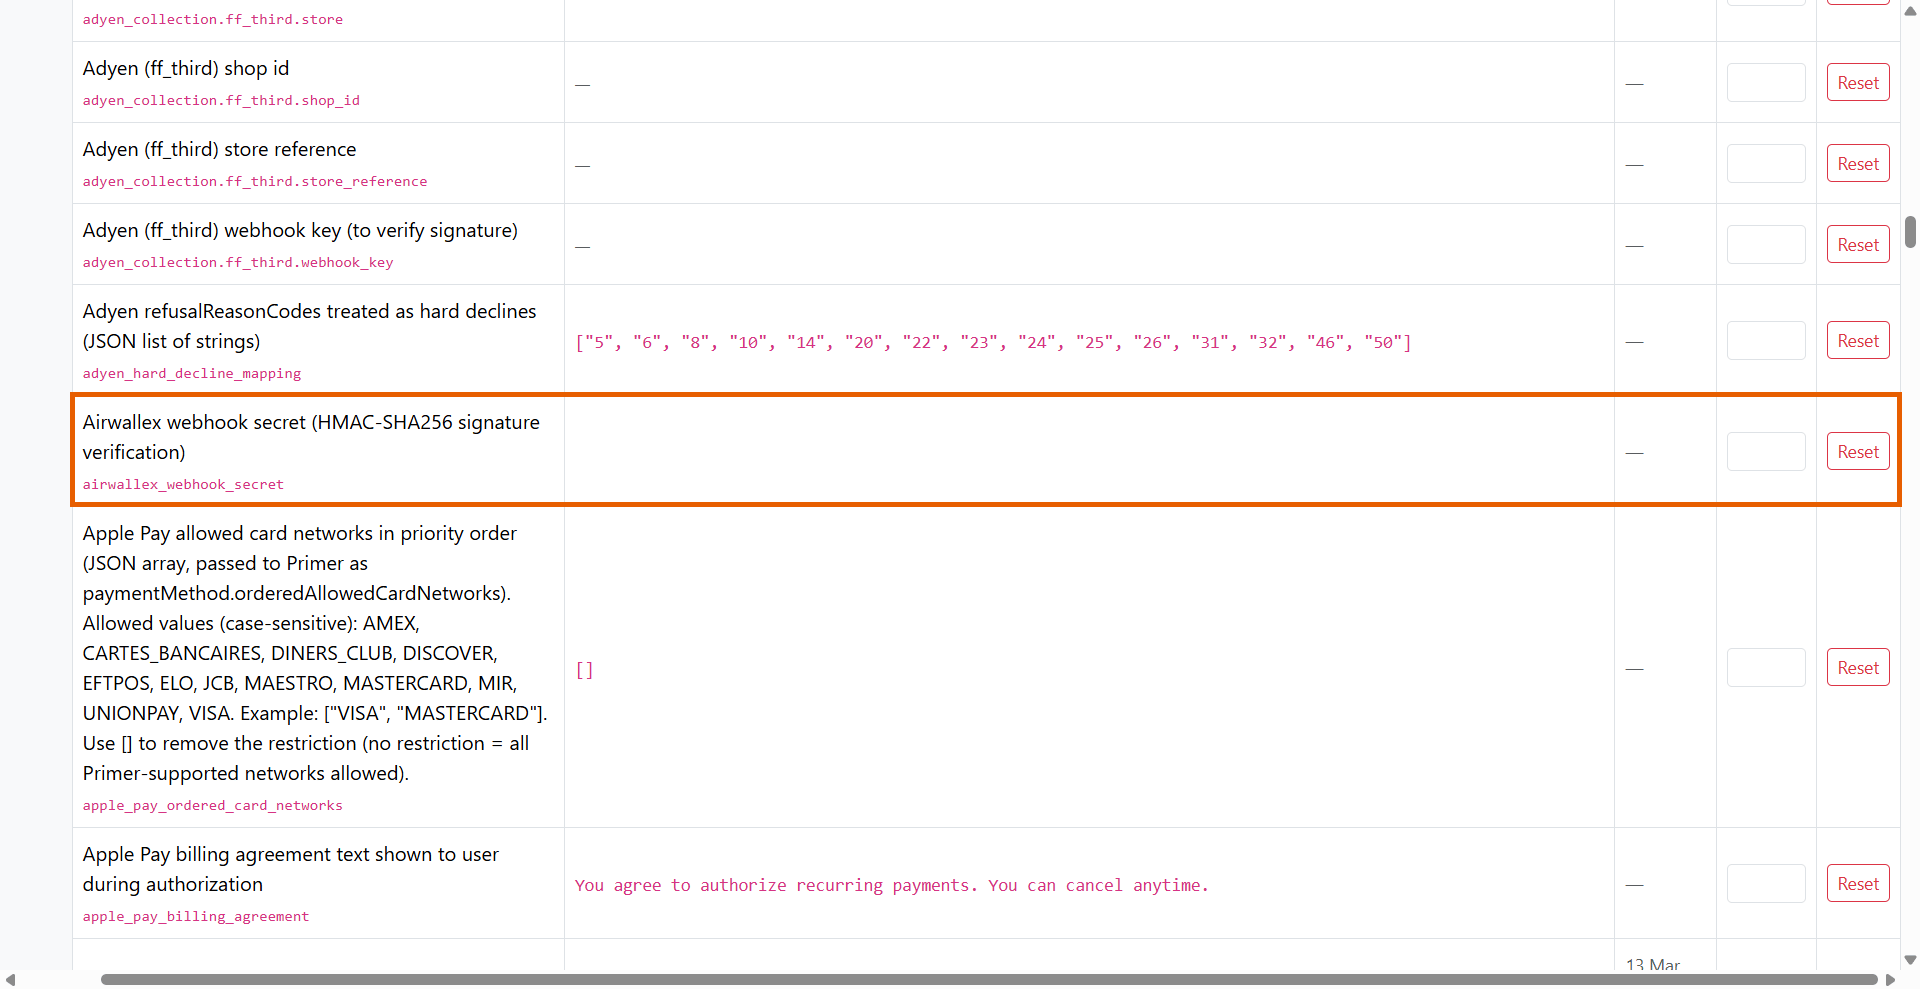
- Go to the Settings page of your FunnelFox Payments dashboard, paste the key into Airwallex webhook secret, and press Enter.
4. Set up 3DS
Adaptive 3DS applies authentication only when a payment needs it. Airwallex needs its own 3DS profile. First, collect these values from Airwallex:- Acquirer BIN: One per card network (Visa, Mastercard, AMEX, UnionPay).
- MID: One per card network.
- Merchant name
- Merchant URL
- Merchant country code: ISO 3166-1 alpha-2, for example
US. - Merchant Category Code (MCC)
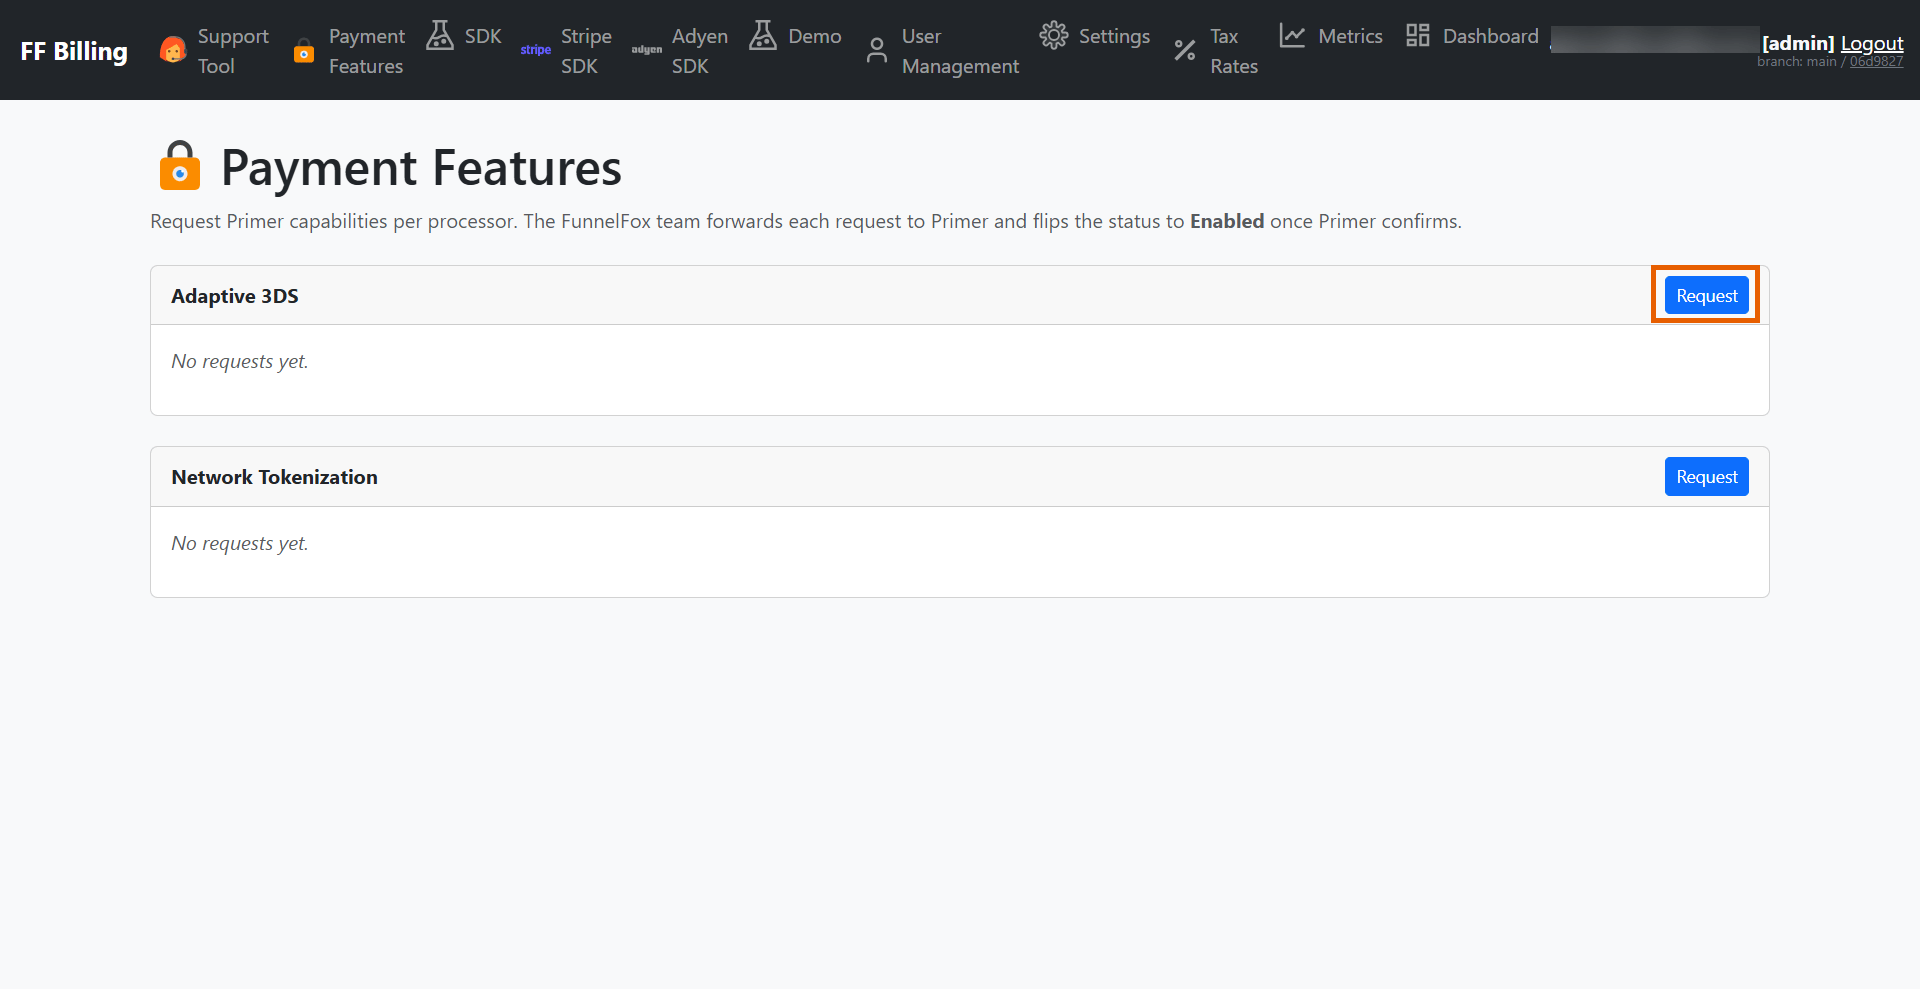
- Go to the Payment Features page.
- Click Request to the right of Adaptive 3DS.
-
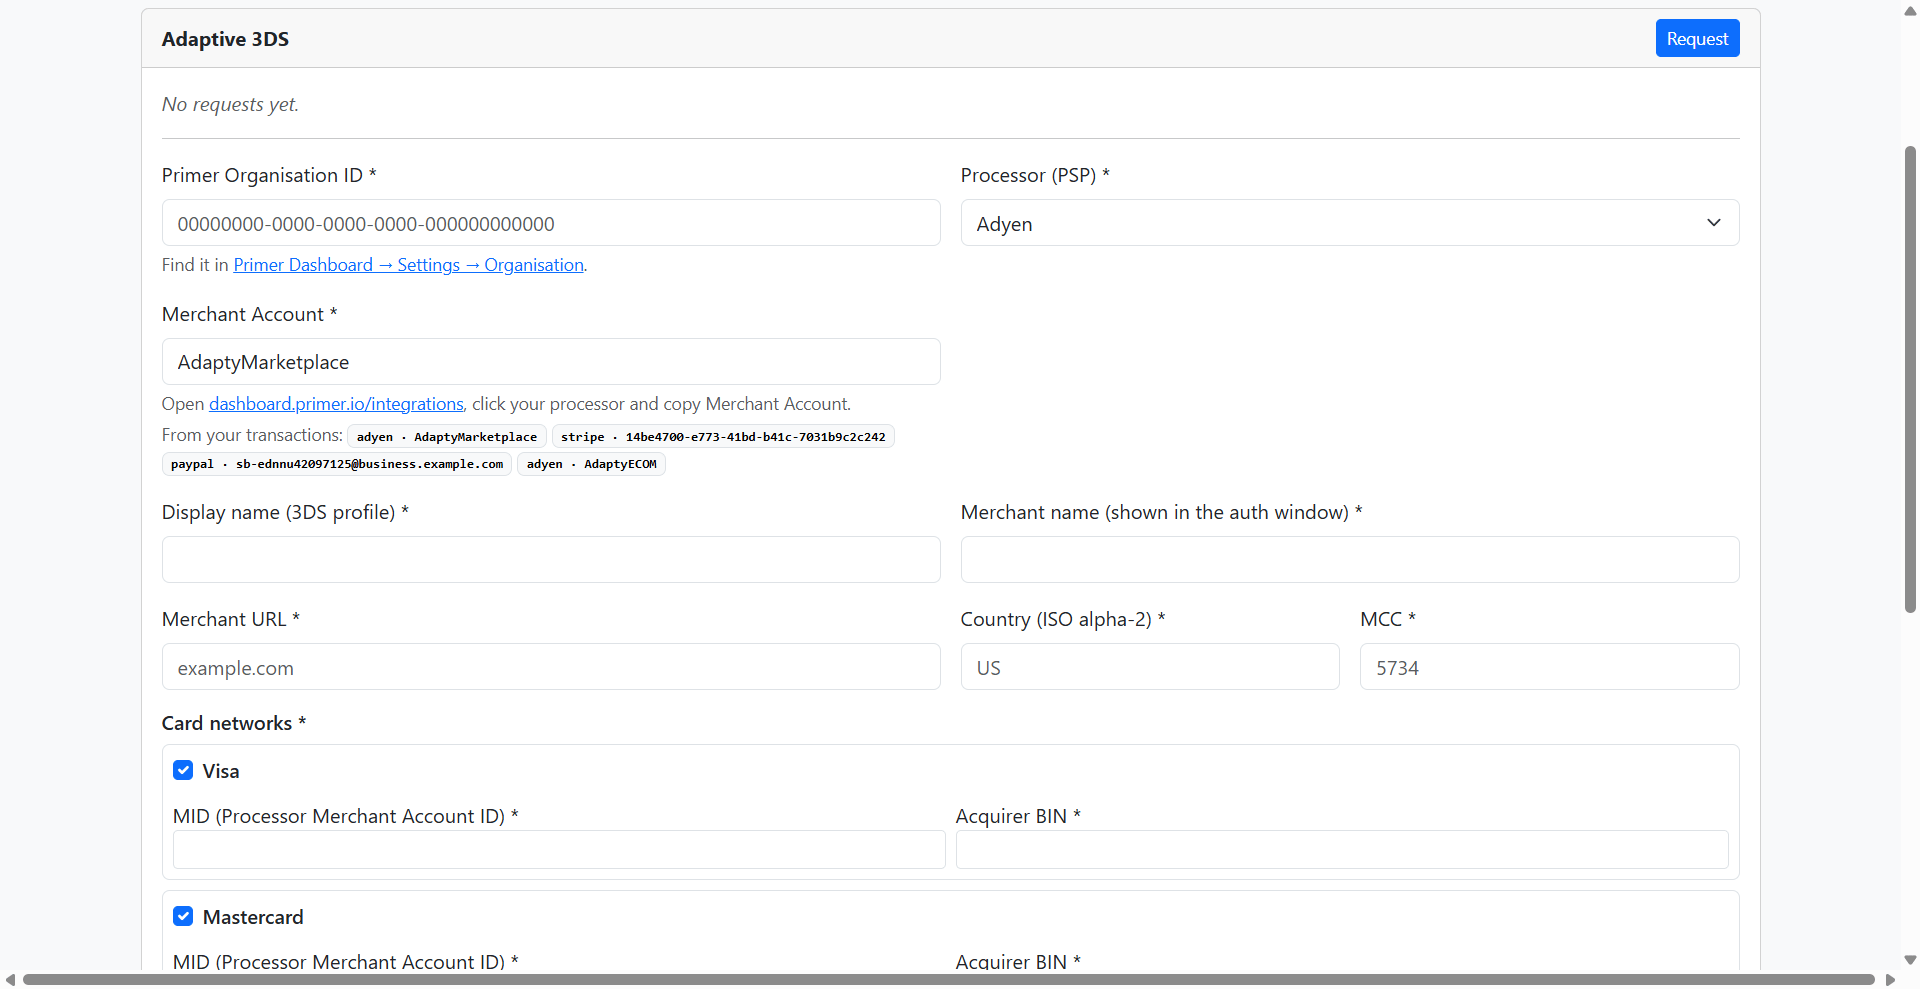
Complete the form:
- Primer Organisation ID: Find it in the Primer Dashboard under Settings > Organisation.
- Processor (PSP): Select Airwallex.
- Merchant Account: Find it in the Primer Dashboard under Integrations > Airwallex > Merchant Account.
- Display name: Name for the 3DS profile.
- Merchant name: Name shown in the authentication window.
- Merchant URL: A bare domain like
example.comis fine. - Country code: ISO 3166-1 alpha-2, for example
US. - Merchant Category Code (MCC): Exactly 4 digits, for example
5734. - Card networks: Select at least one (Visa and Mastercard are selected
by default). For each selected network, enter:
- Processor Merchant Account ID (MID)
- Acquirer BIN
- Click Submit request.
5. Pass device data
This step applies only if you build your checkout with the
FunnelFox Payments Web SDK. If you use FunnelFox
funnels, skip to the next step.
metadata field of your
createClientSession request:
6. Turn on device fingerprinting
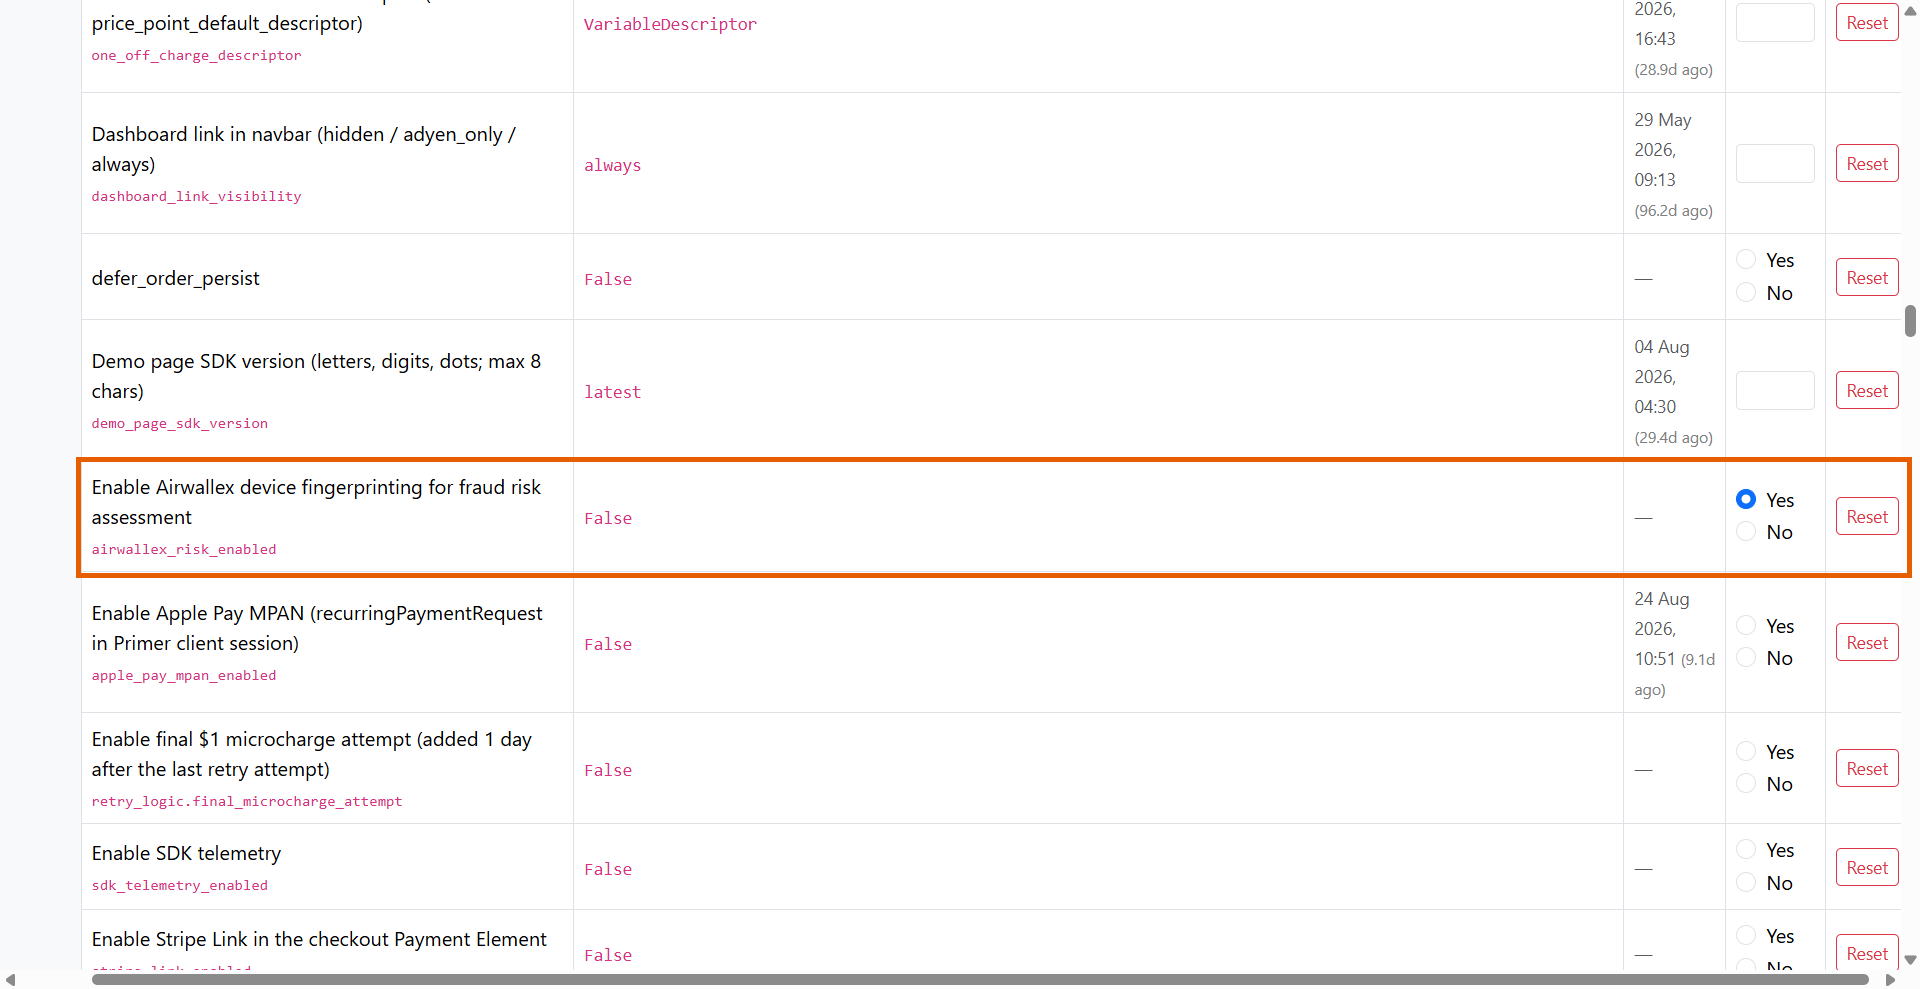
- Go to the Settings page of your FunnelFox Payments dashboard.
- Set Airwallex device fingerprinting for fraud risk assessment to Yes, then press Enter.
Your Airwallex integration is now complete. Primer can route payments to
Airwallex, and Airwallex reports refunds and disputes back to Primer and
FunnelFox Payments.