> ## Documentation Index
> Fetch the complete documentation index at: https://funnelfox.com/docs/llms.txt
> Use this file to discover all available pages before exploring further.
# How to set up TikTok Pixel
> Step-by-step guide to adding TikTok Pixel to your FunnelFox project. Configure event tracking and conversion optimization.
The [TikTok Pixel integration](/docs/integrations/tracking/tiktok-pixel) sends events like `CompletePayment` and `CompleteRegistration` to TikTok Events Manager, helping you optimize your ads on TikTok.
Events API also sends events directly from FunnelFox servers to TikTok, which bypasses browser limitations. This guide walks you through the complete setup process.
We strongly recommend using Events API. If you're unsure whether you need it, read our guide on
[why use Events API](/docs/integrations/tracking/tiktok-pixel#use-events-api).
## Setup
Follow these steps to create a TikTok dataset, get your Pixel ID, and connect it to FunnelFox.
### 1. Connect data source
1. Go to [TikTok Events Manager](https://ads.tiktok.com/i18n/events_manager/home) for your TikTok Advertiser account.
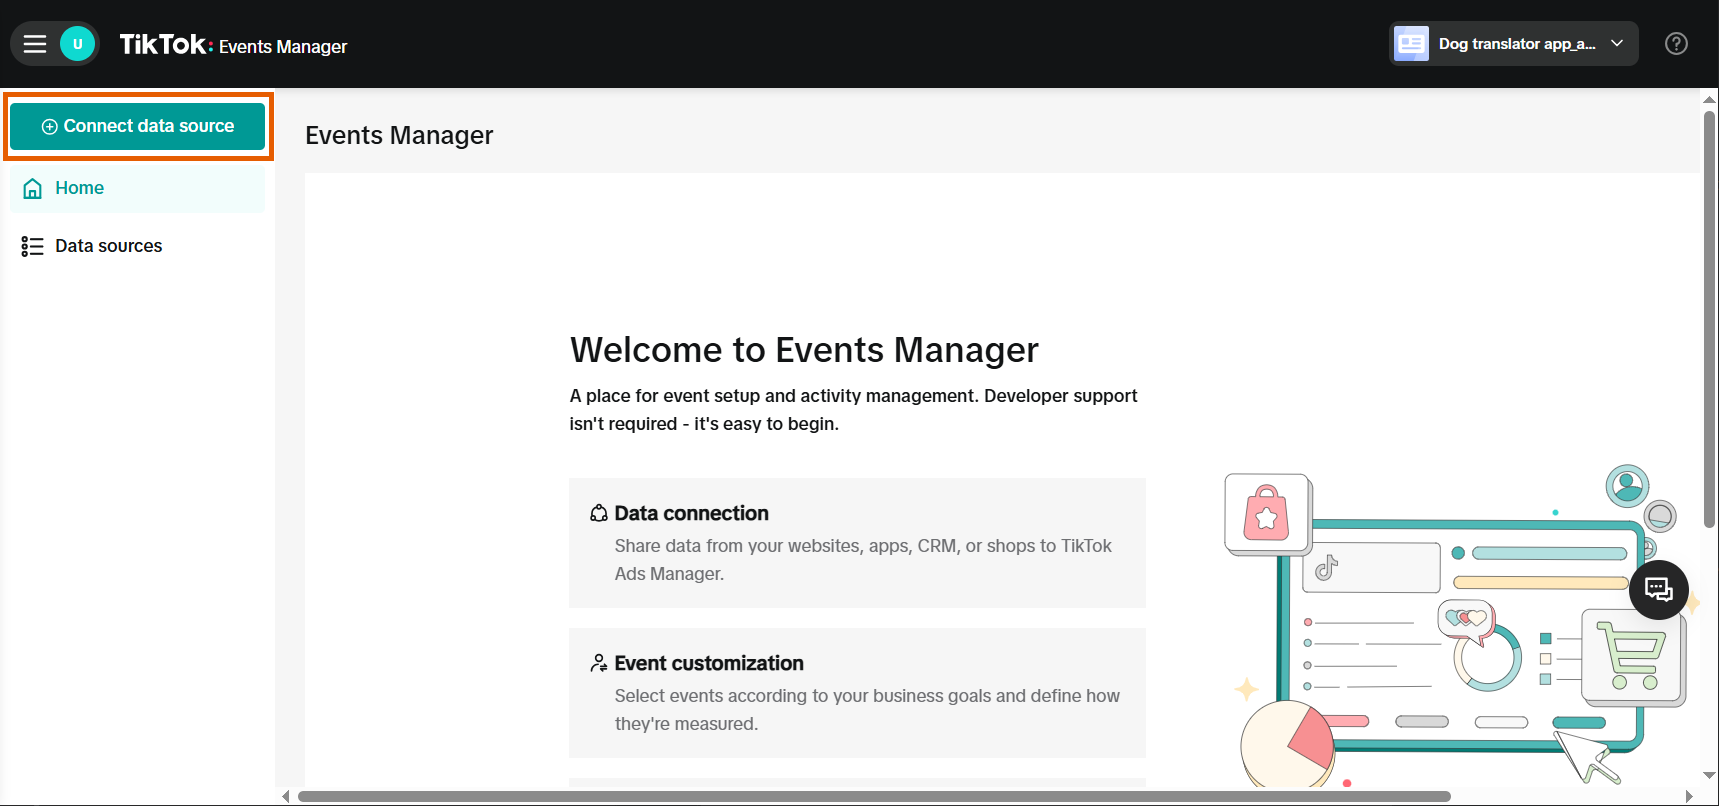
2. Click **Connect data source**.
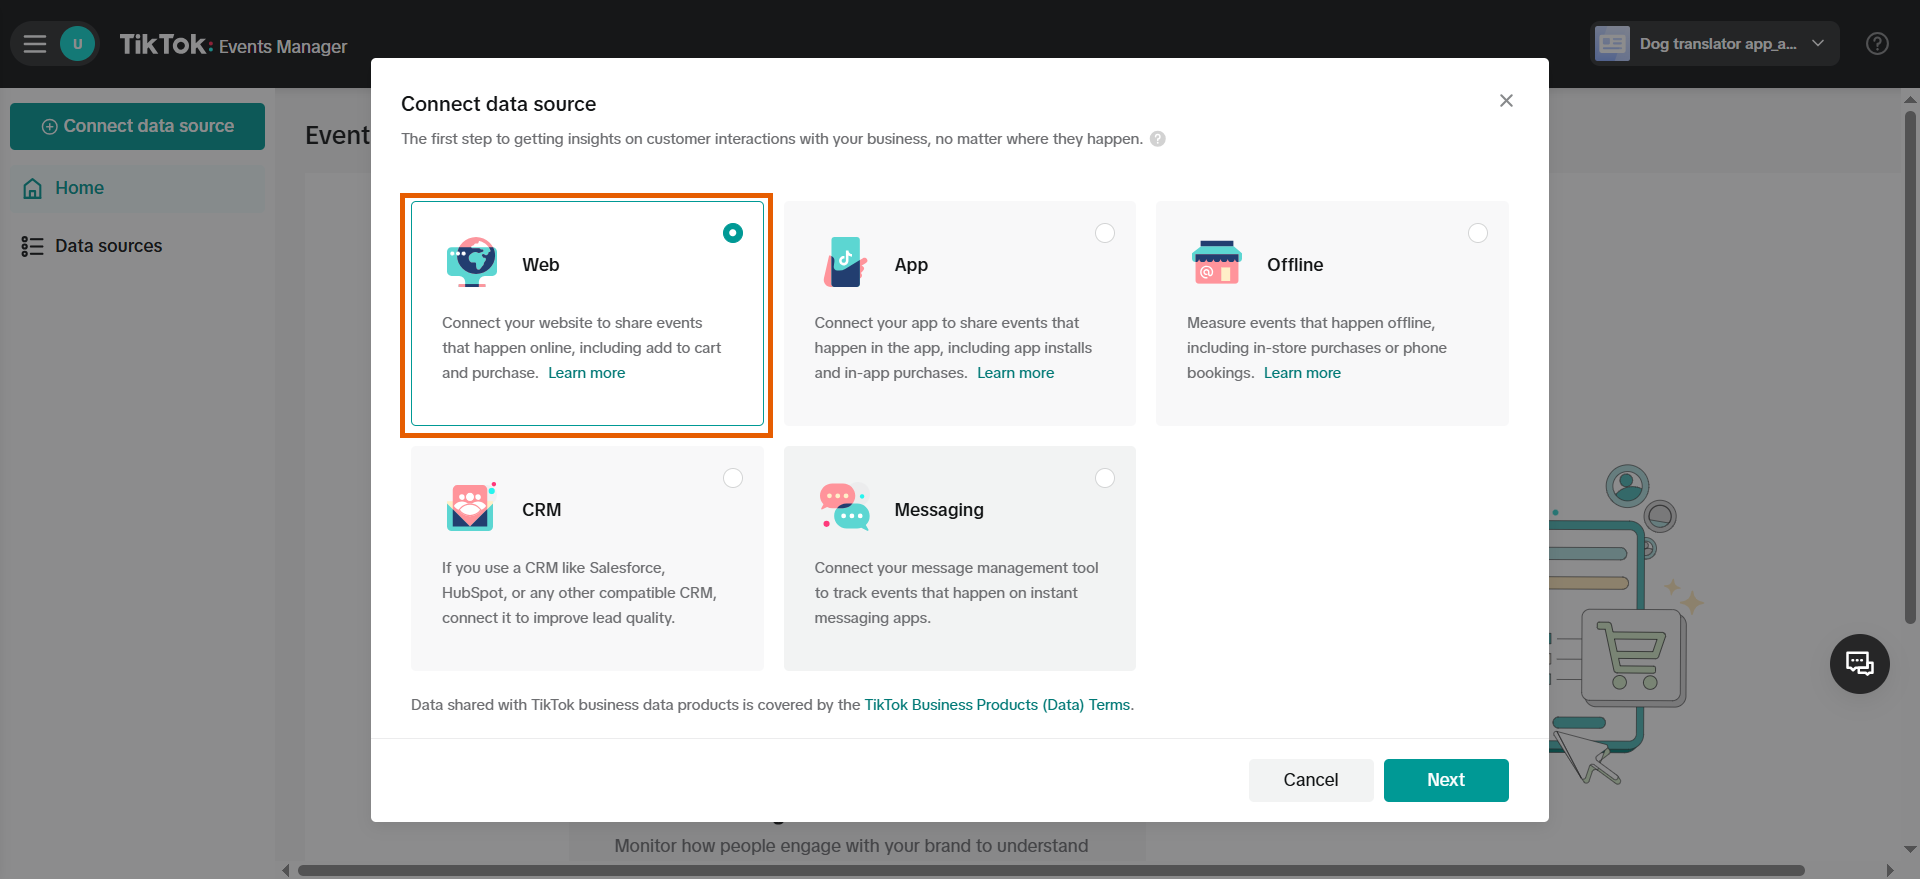
 3. Select **Web** and click **Next**.
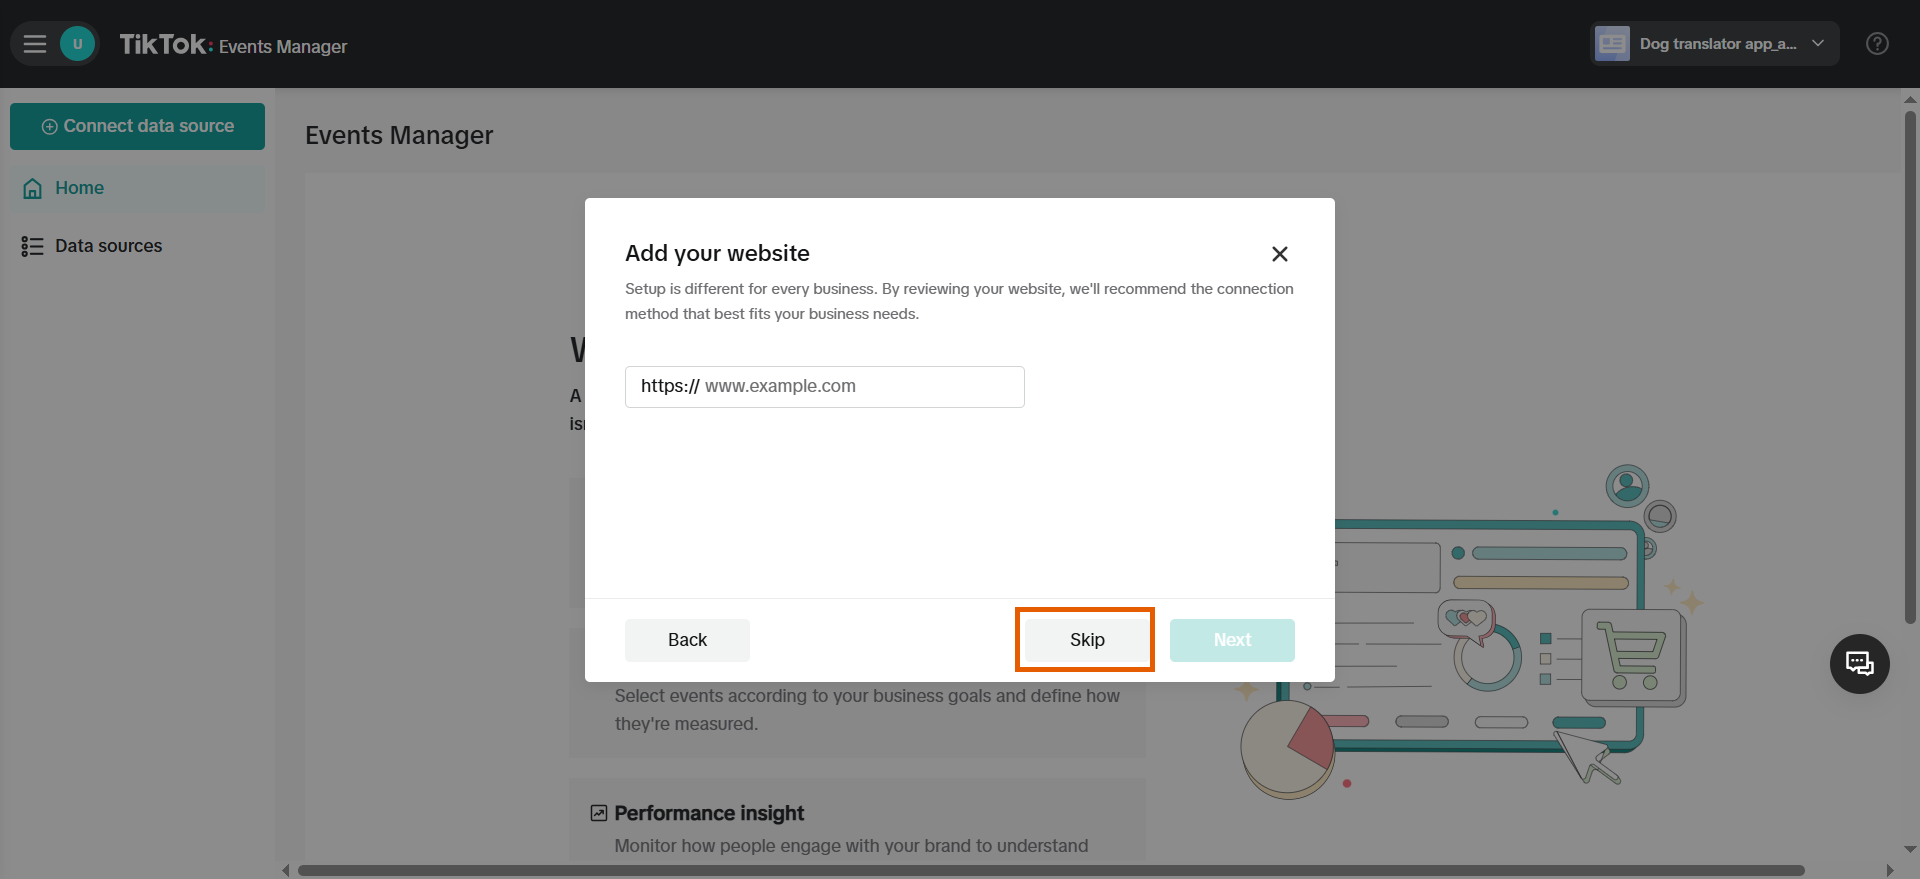
 4. Click **Skip** for adding the website URL.
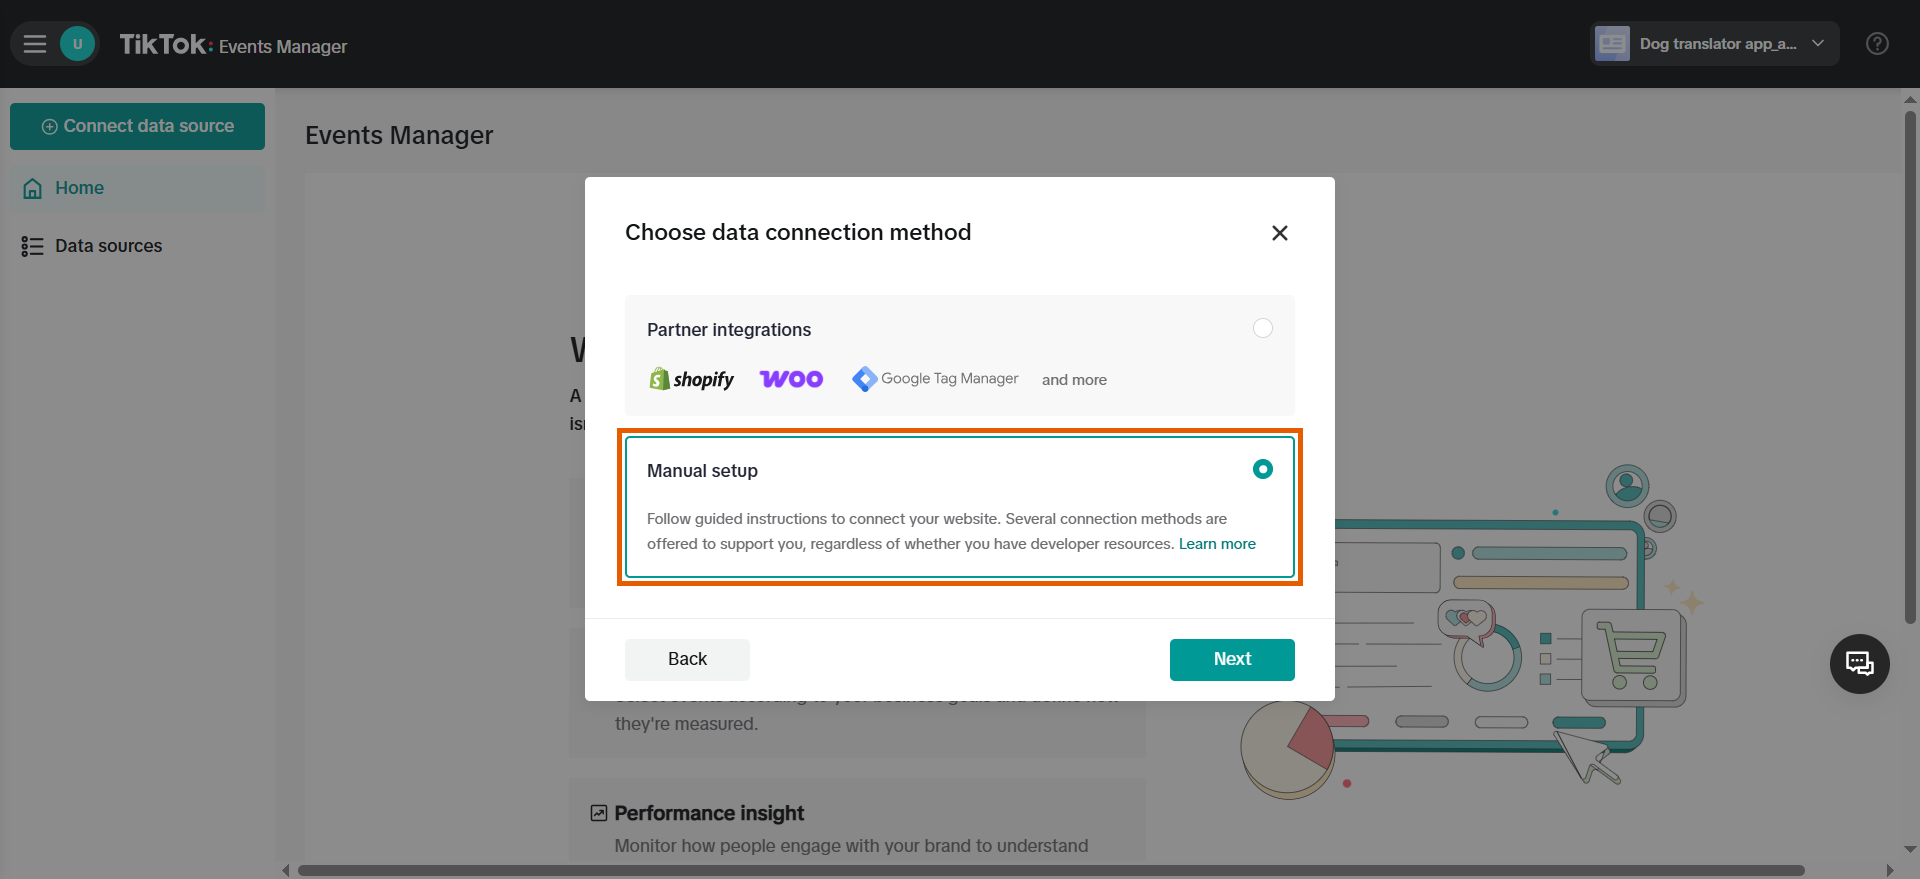
 5. Select **Manual setup** and click **Next**.
 ### 2. Create Pixel
1. Select **TikTok Pixel + Events API** and click **Next**.
### 2. Create Pixel
1. Select **TikTok Pixel + Events API** and click **Next**.
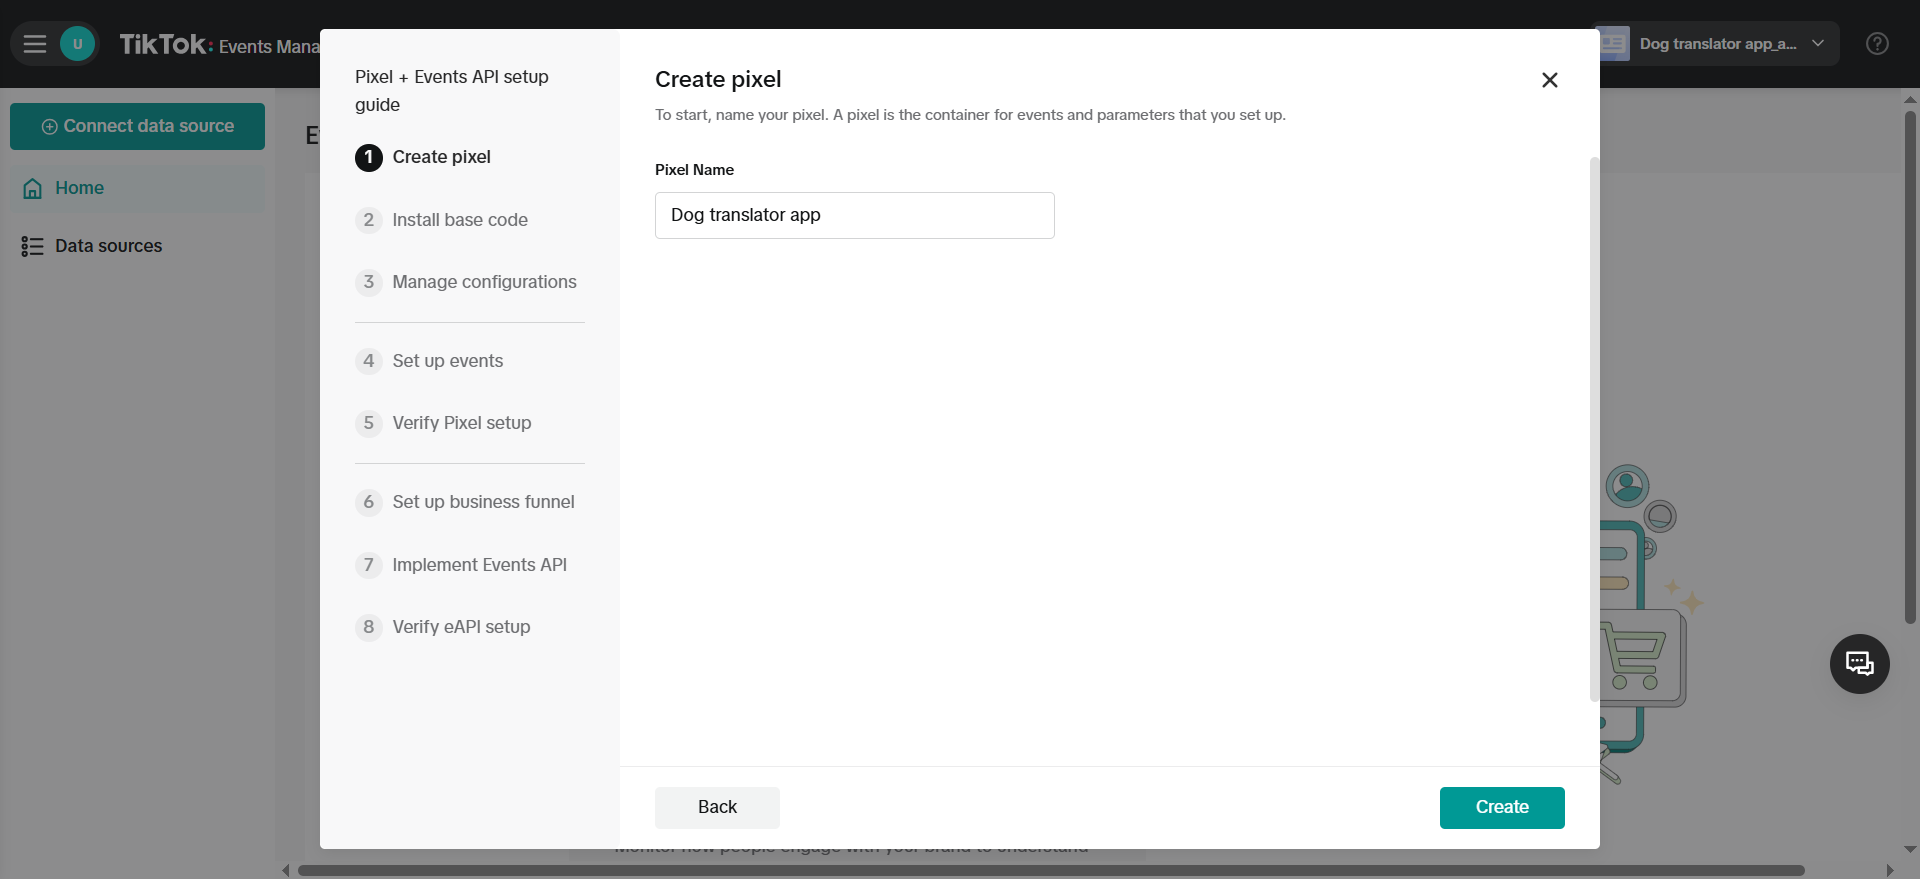
 2. Name your pixel and click **Create**.
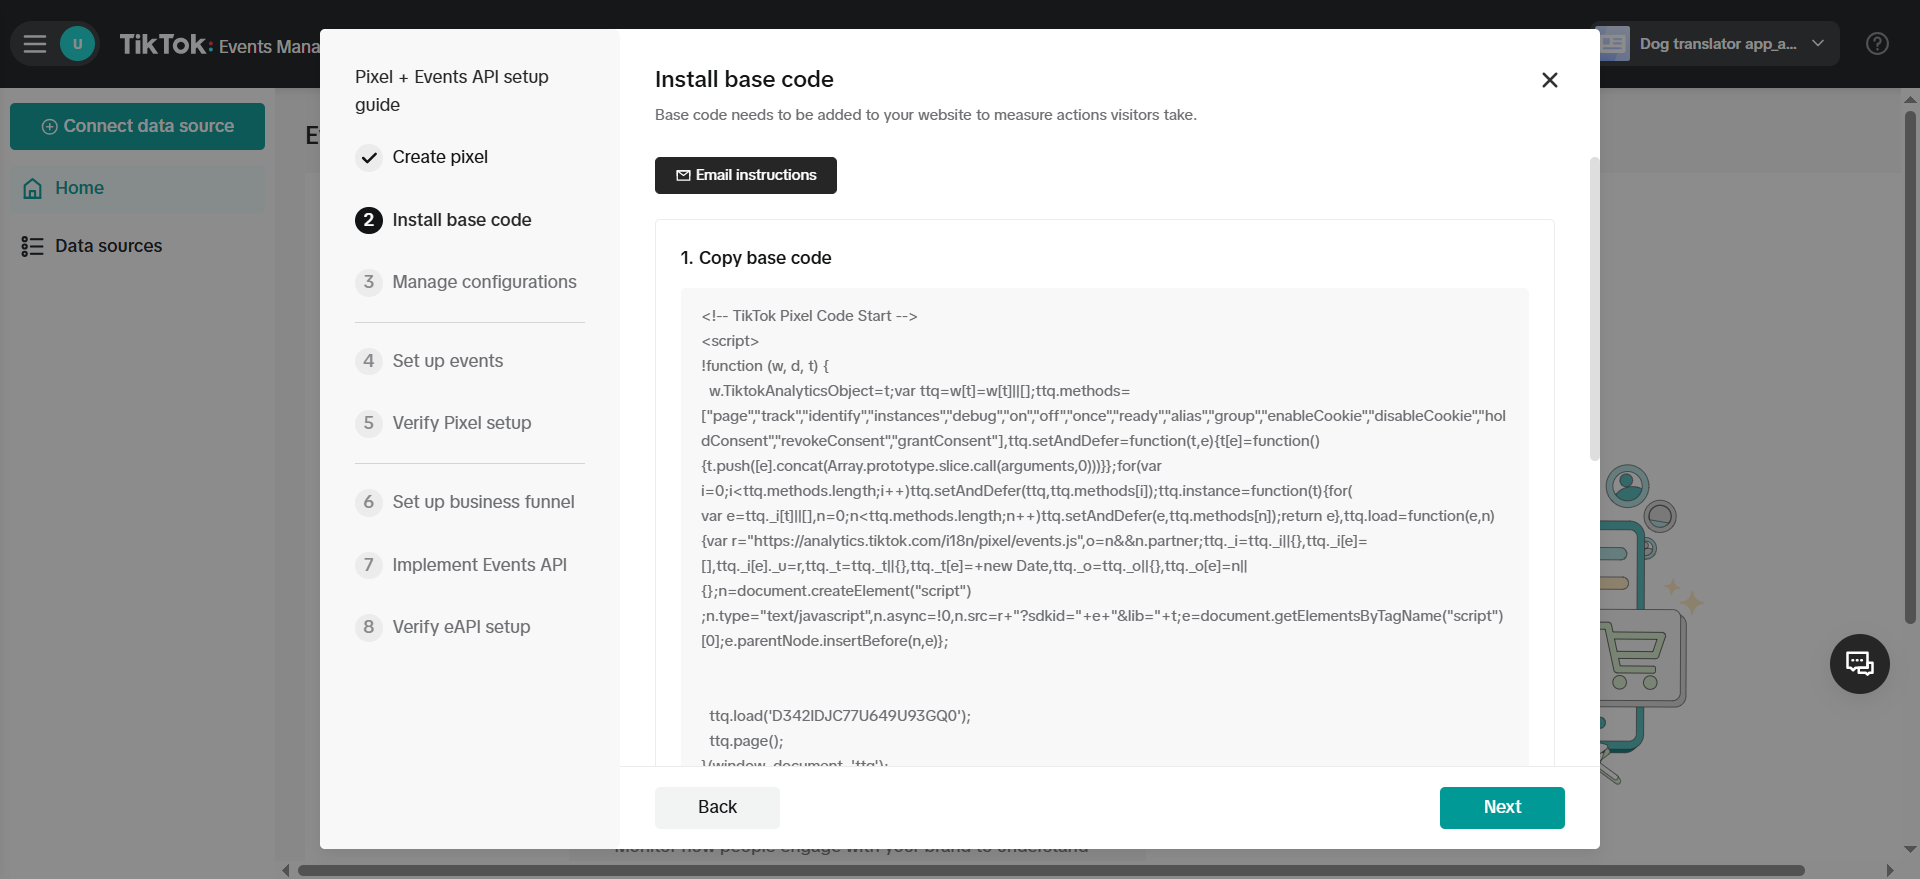
 3. You don't need to install the base code since FunnelFox has already implemented it for all your funnels.
Click **Next** under **Install base code**.
3. You don't need to install the base code since FunnelFox has already implemented it for all your funnels.
Click **Next** under **Install base code**.
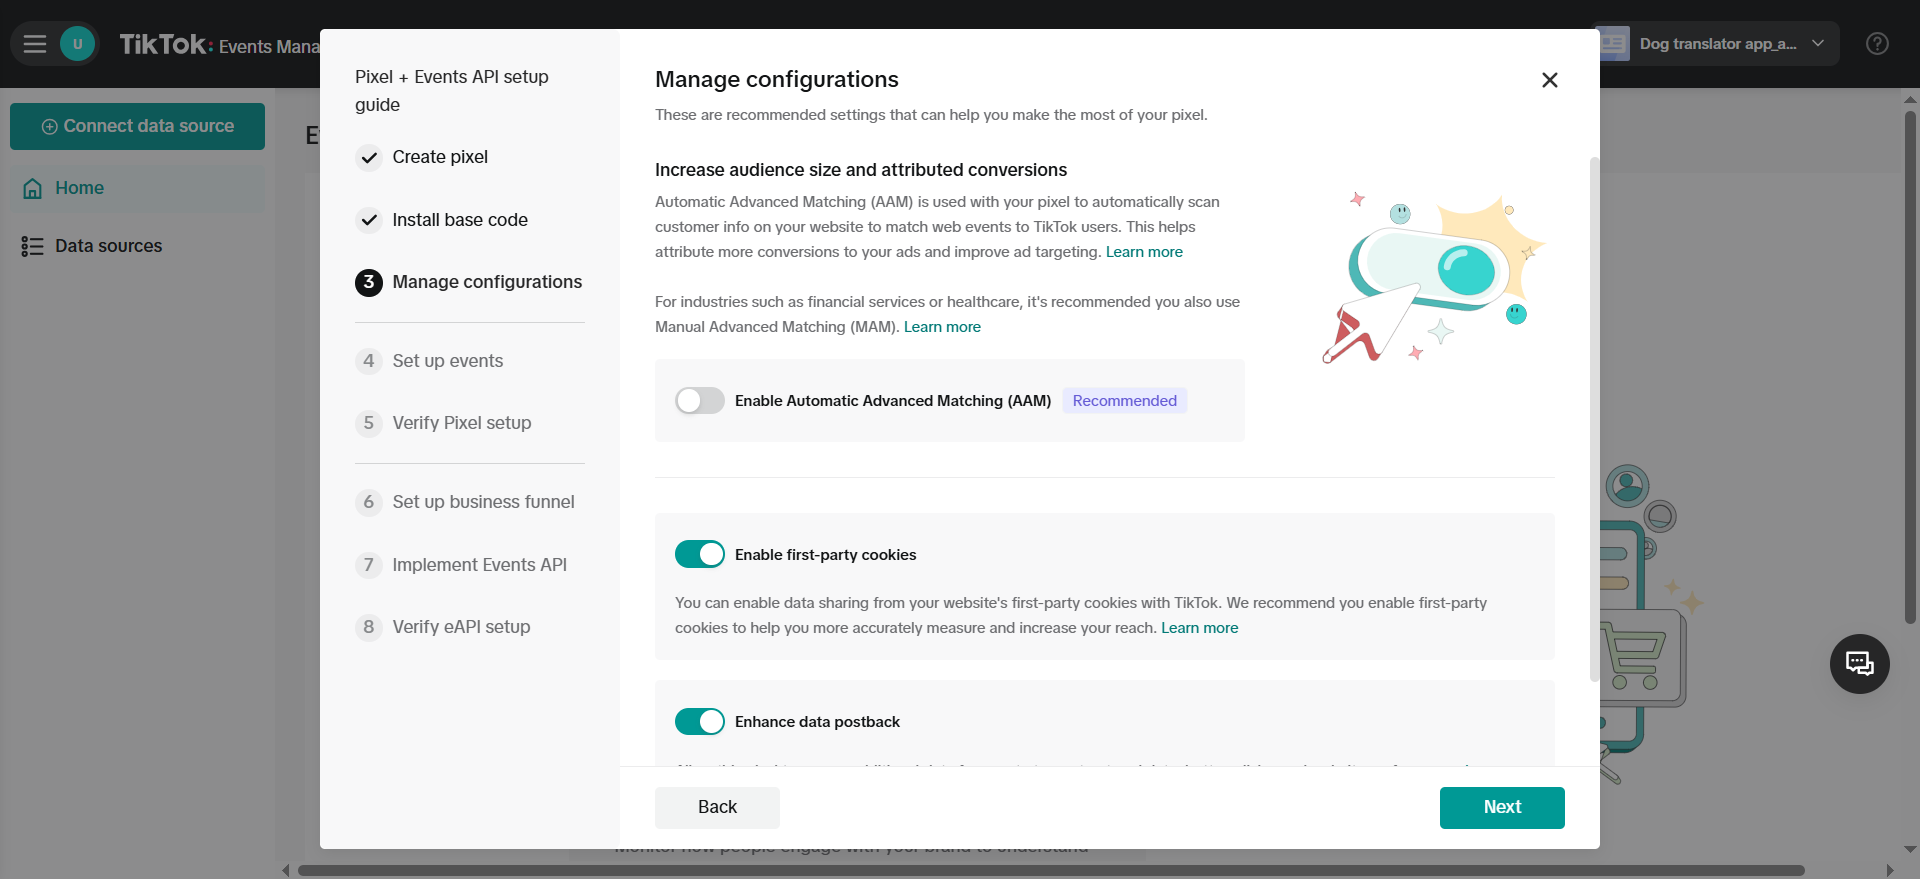
 4. You don't need to edit anything under **Manage configurations**.
Keep the selection as is and click **Next**.
4. You don't need to edit anything under **Manage configurations**.
Keep the selection as is and click **Next**.
 ### 3. Set up events
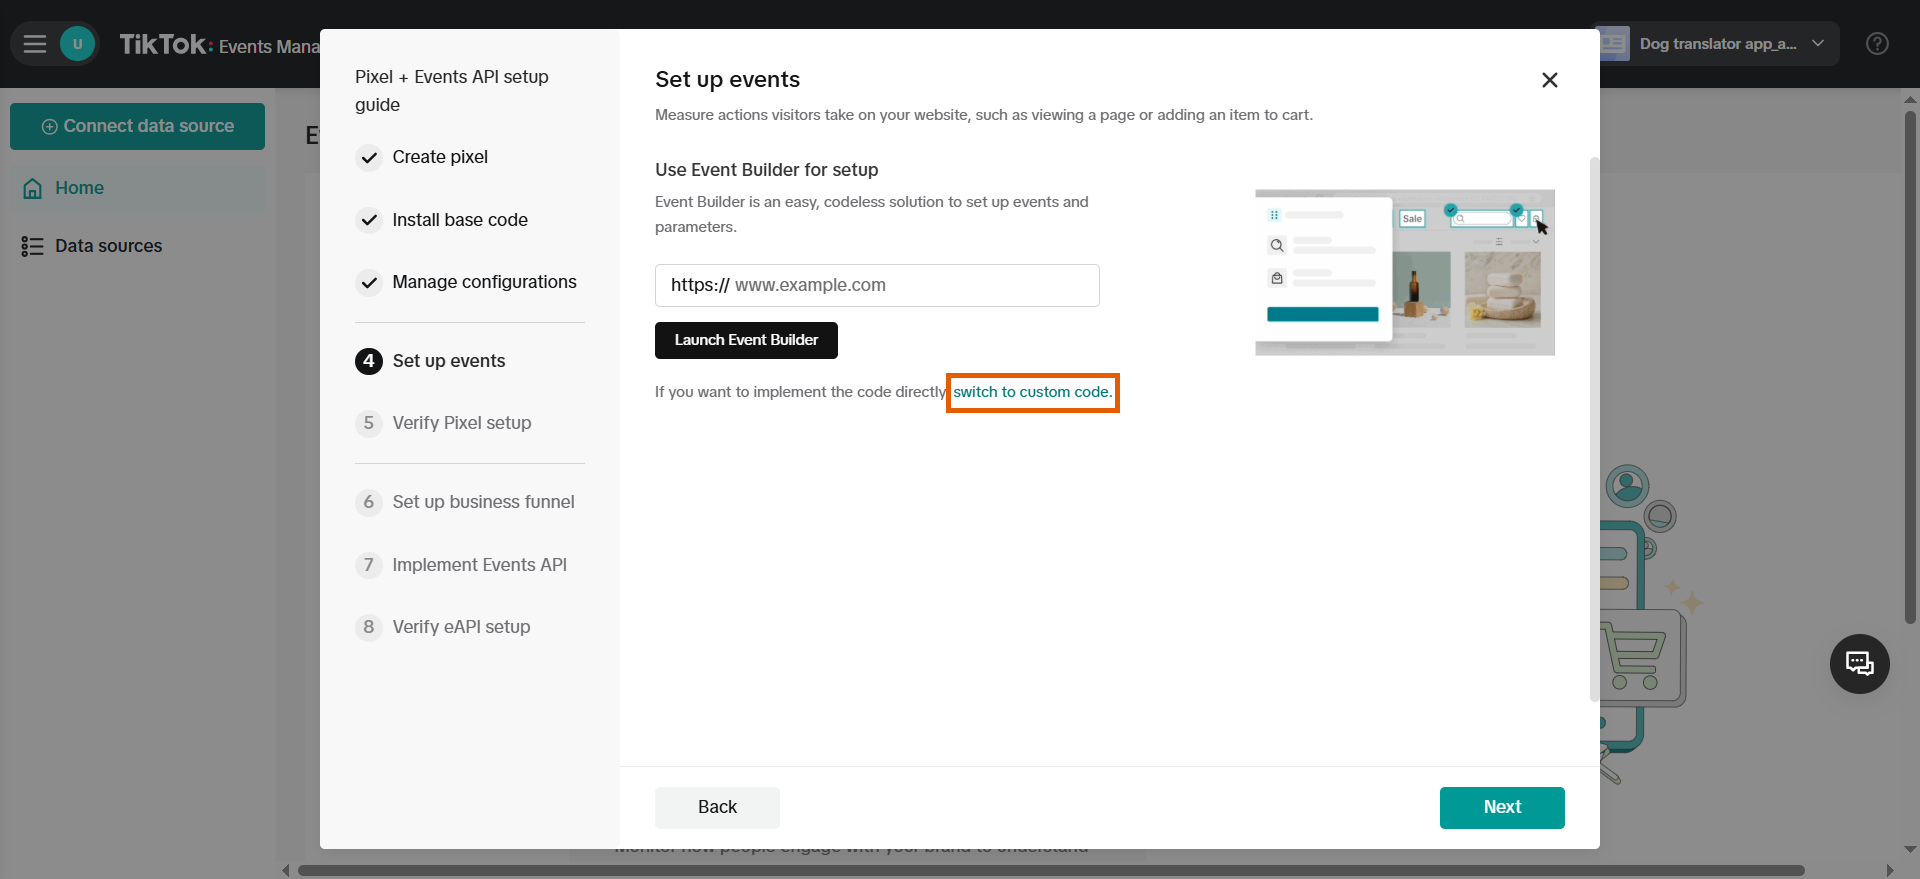
1. Click **switch to custom code** under **Set up events**.
### 3. Set up events
1. Click **switch to custom code** under **Set up events**.
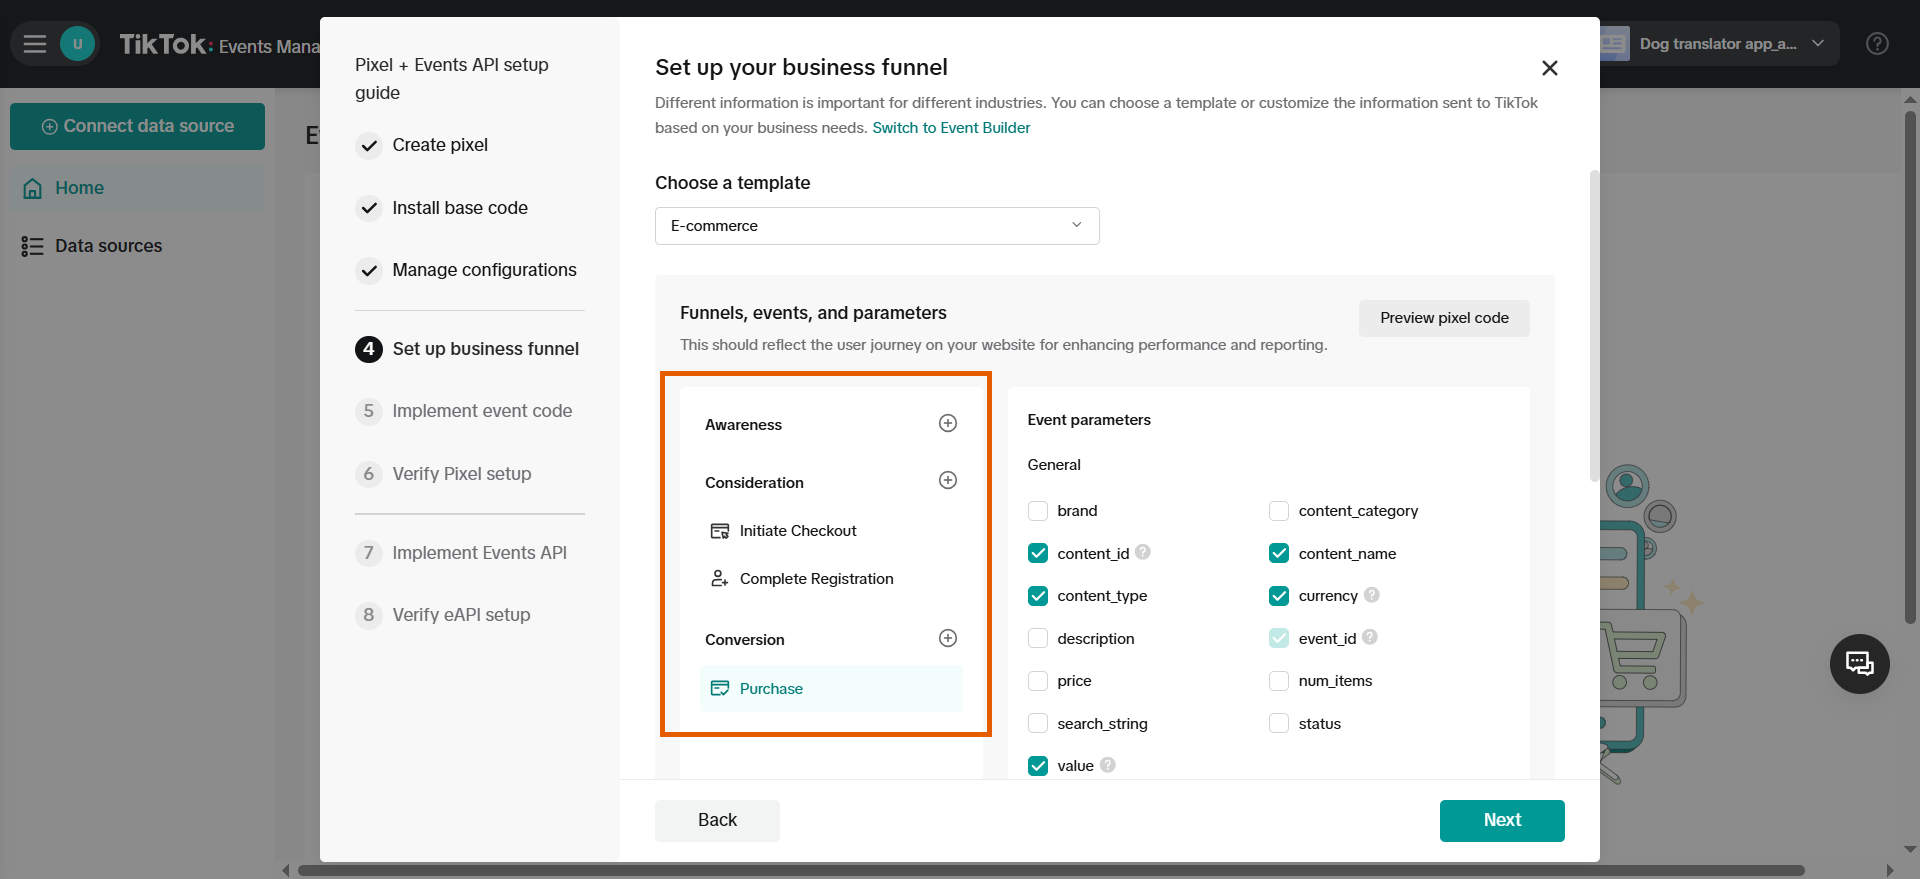
 2. Add **Initiate Checkout**, **Complete Registration**, and **Purchase** events, then click **Next**.
You don't need to edit **Event parameters** since they are predefined.
2. Add **Initiate Checkout**, **Complete Registration**, and **Purchase** events, then click **Next**.
You don't need to edit **Event parameters** since they are predefined.
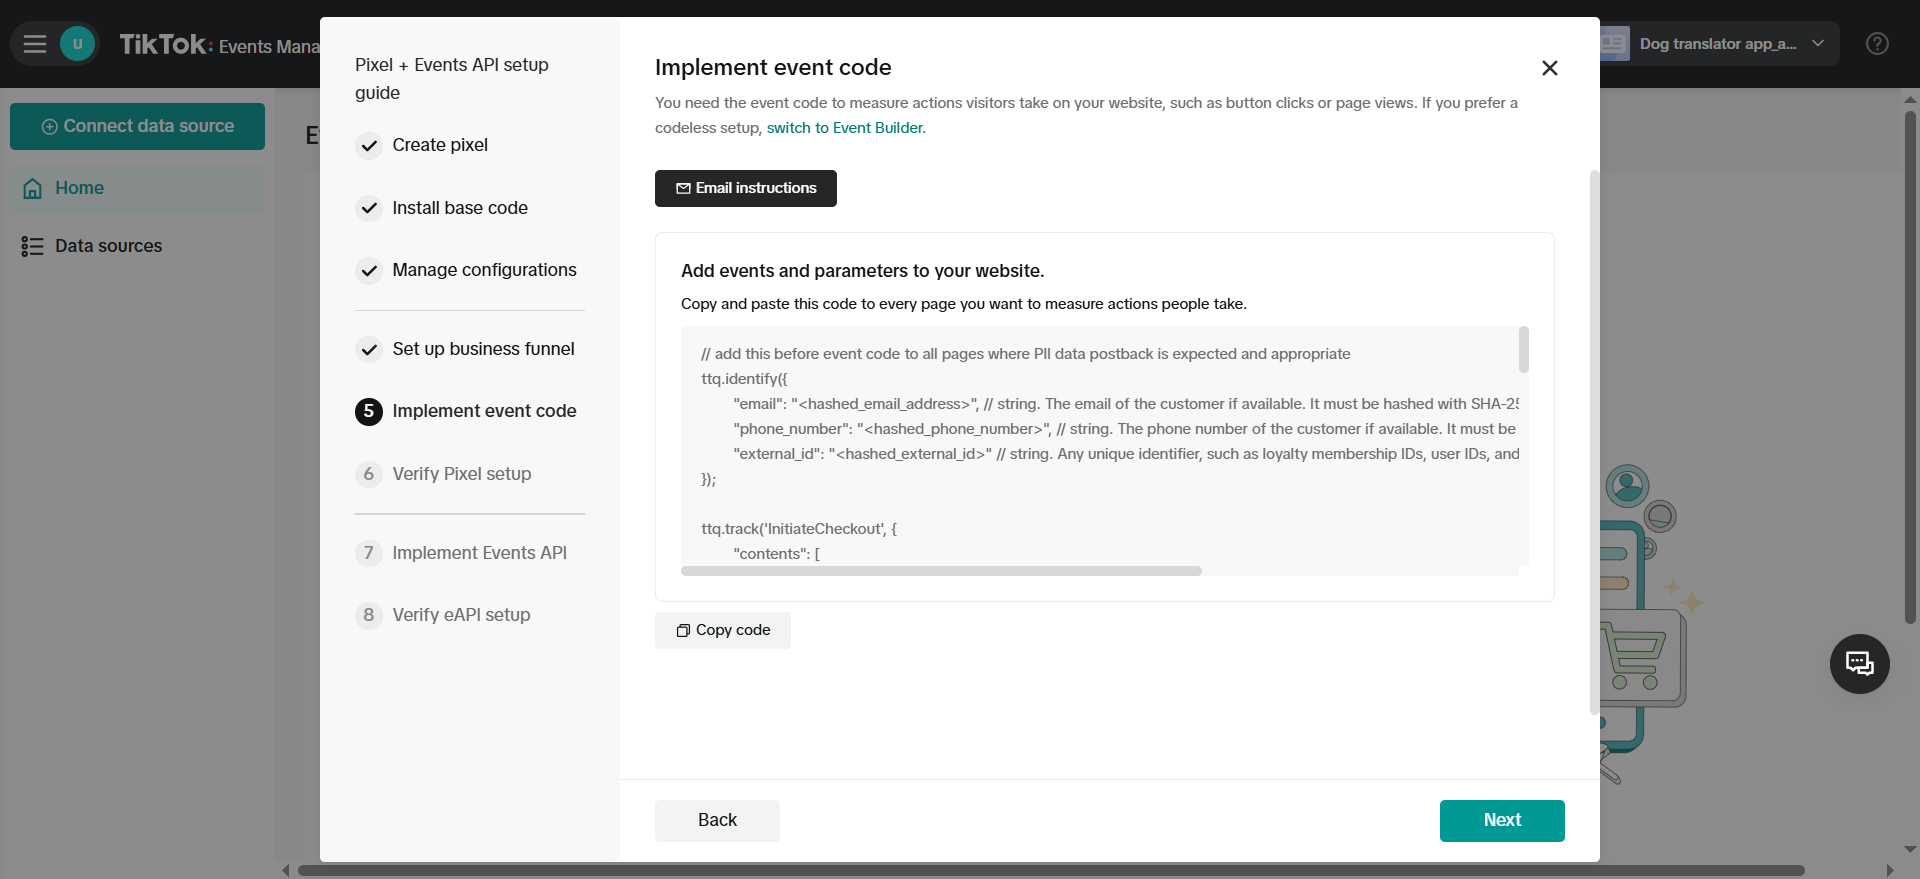
 3. You don't need to implement the event code since FunnelFox has already implemented it for all your funnels.
Click **Next** under **Implement event code**.
3. You don't need to implement the event code since FunnelFox has already implemented it for all your funnels.
Click **Next** under **Implement event code**.
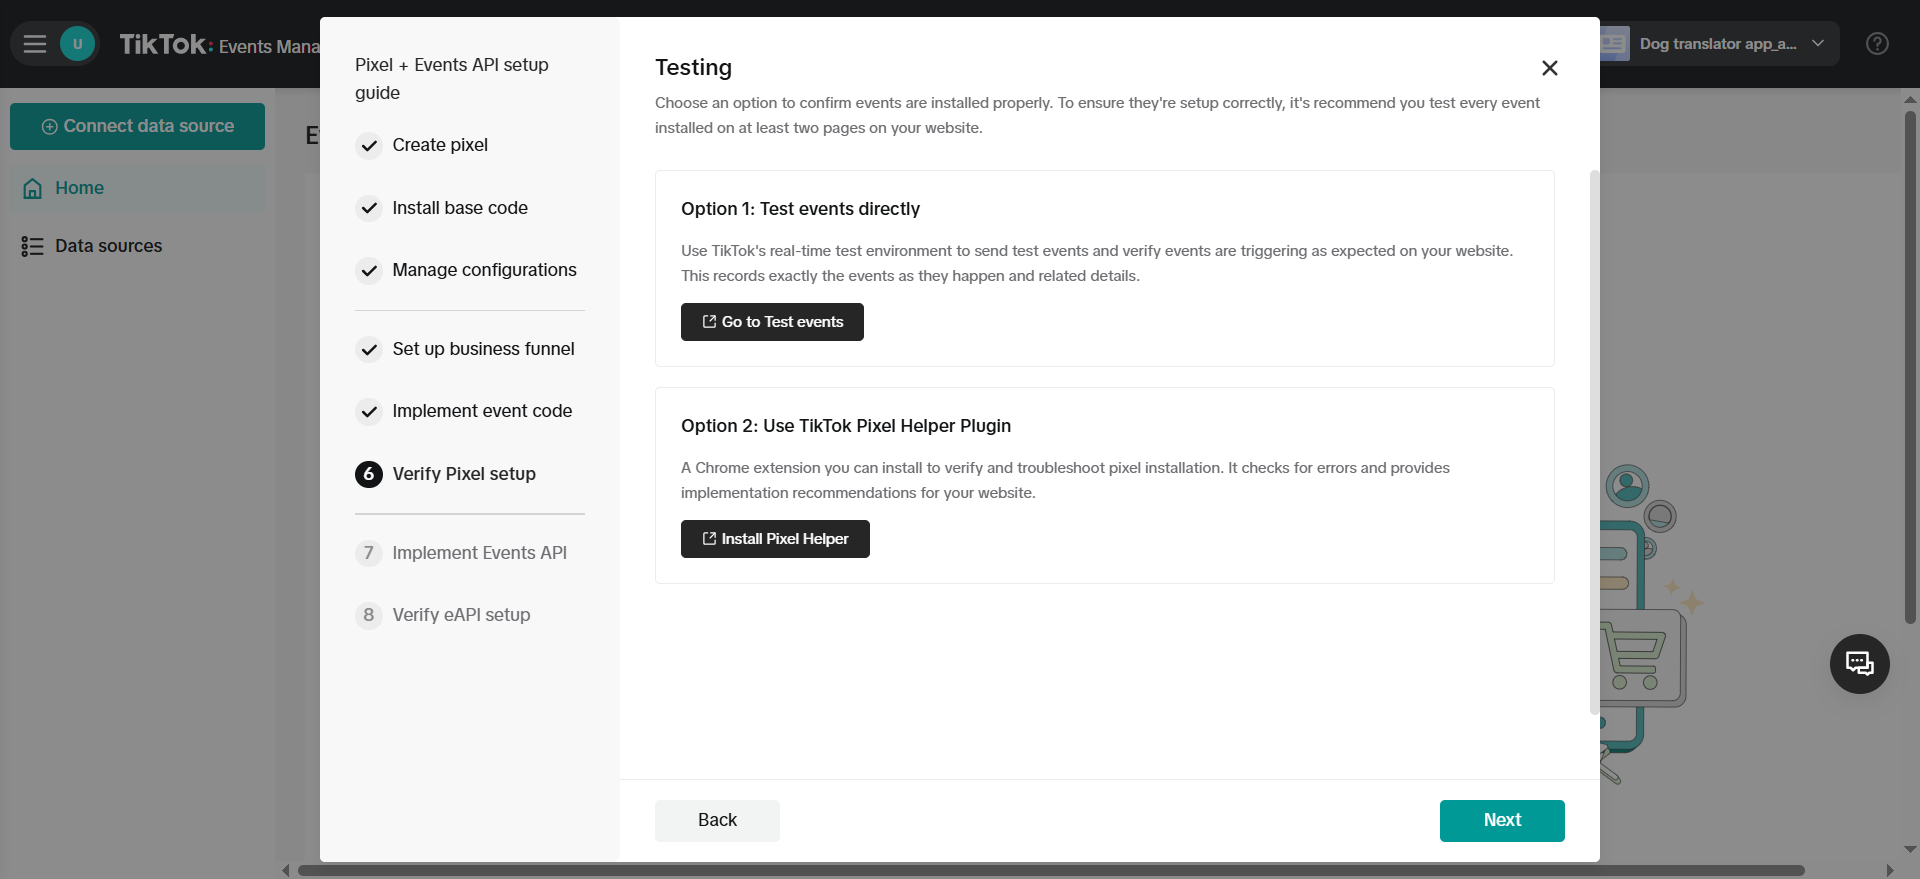
 4. You don't need to test the integration at this stage so click **Next** under **Testing**.
 ### 4. Generate token
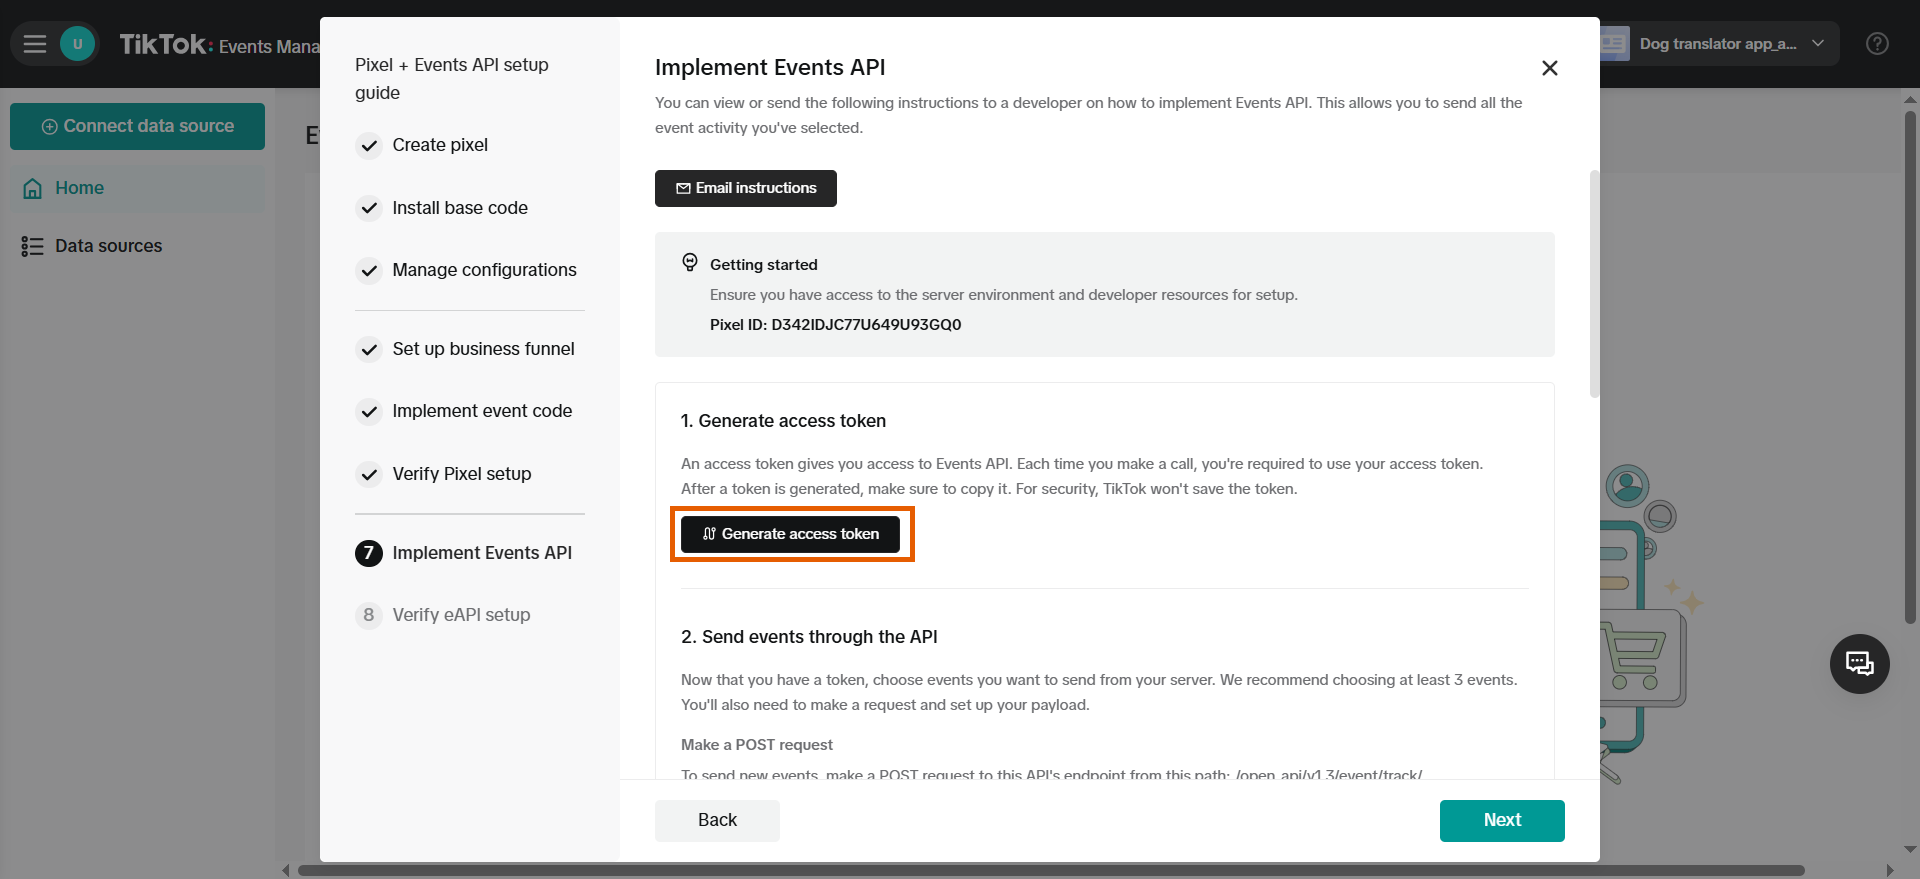
1. Click **Generate access token** under **Implement Events API**.
### 4. Generate token
1. Click **Generate access token** under **Implement Events API**.
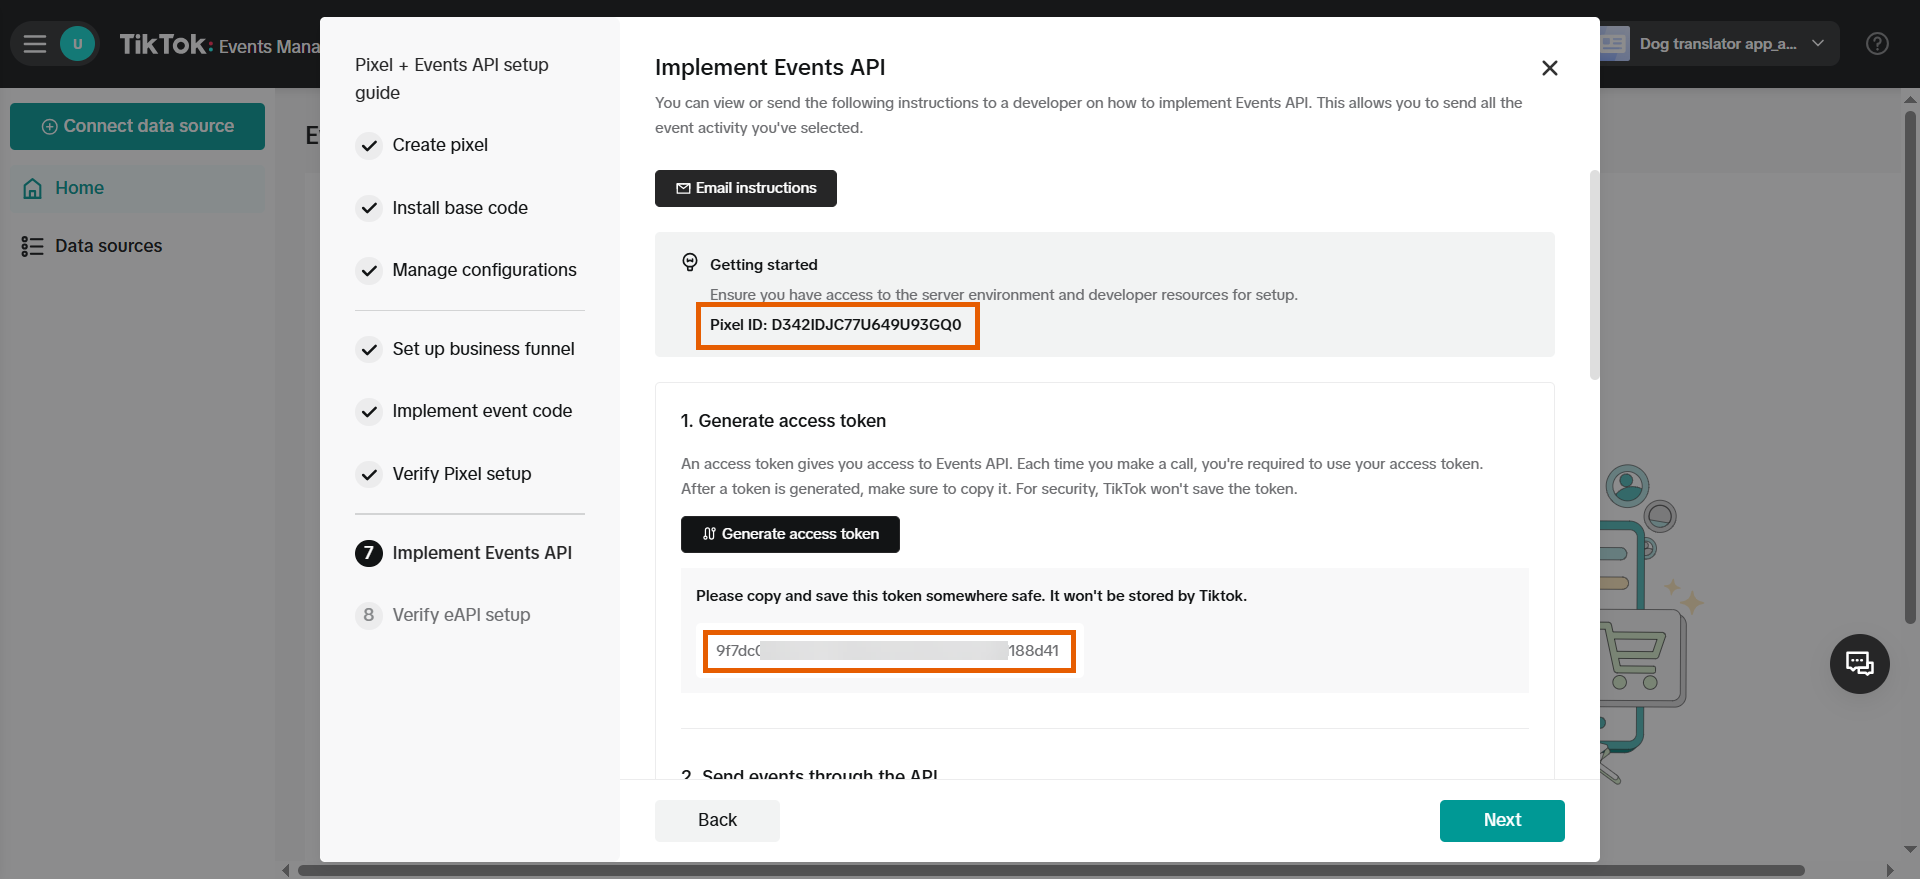
 2. Now you have both your Pixel ID and access token available.
Keep this page open since you'll need to copy and paste both values into FunnelFox.
2. Now you have both your Pixel ID and access token available.
Keep this page open since you'll need to copy and paste both values into FunnelFox.
 ### 5. Apply Pixel ID & token
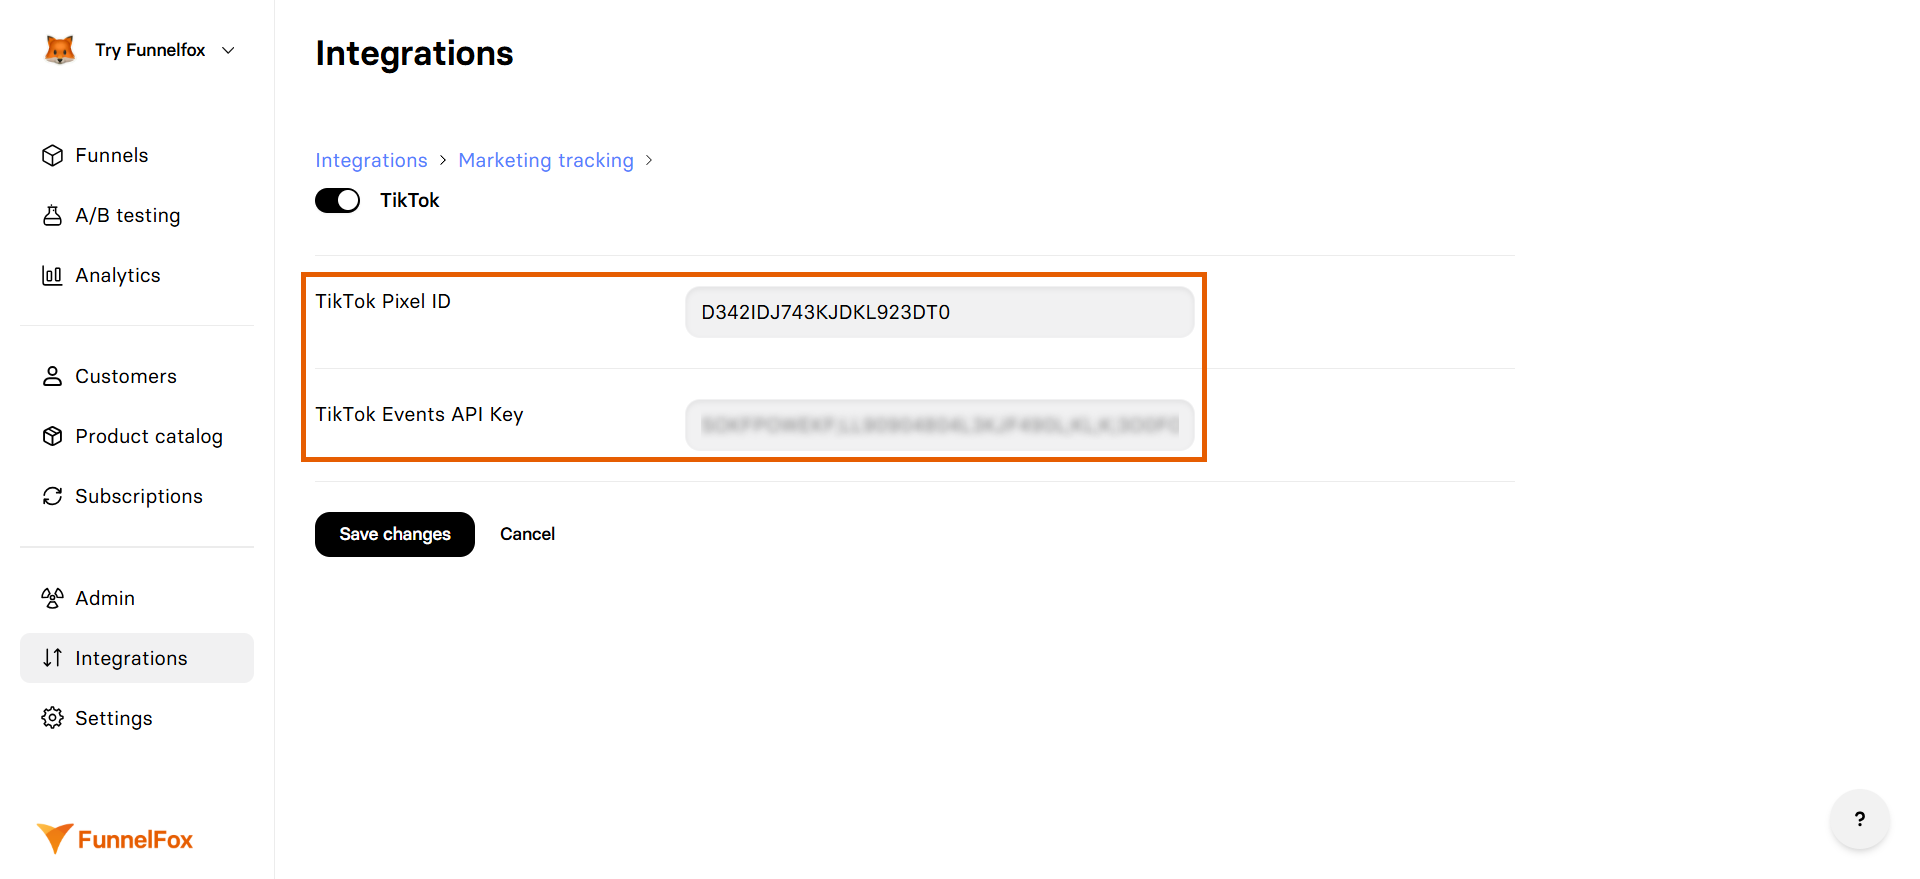
1. Go to [Integrations > TikTok](https://app.funnelfox.com/integrations/tiktok) in FunnelFox.
2. Paste your Pixel ID and token into **TikTok Pixel ID** and **TikTok Events API Key** fields.
3. Click **Save changes**.
### 5. Apply Pixel ID & token
1. Go to [Integrations > TikTok](https://app.funnelfox.com/integrations/tiktok) in FunnelFox.
2. Paste your Pixel ID and token into **TikTok Pixel ID** and **TikTok Events API Key** fields.
3. Click **Save changes**.
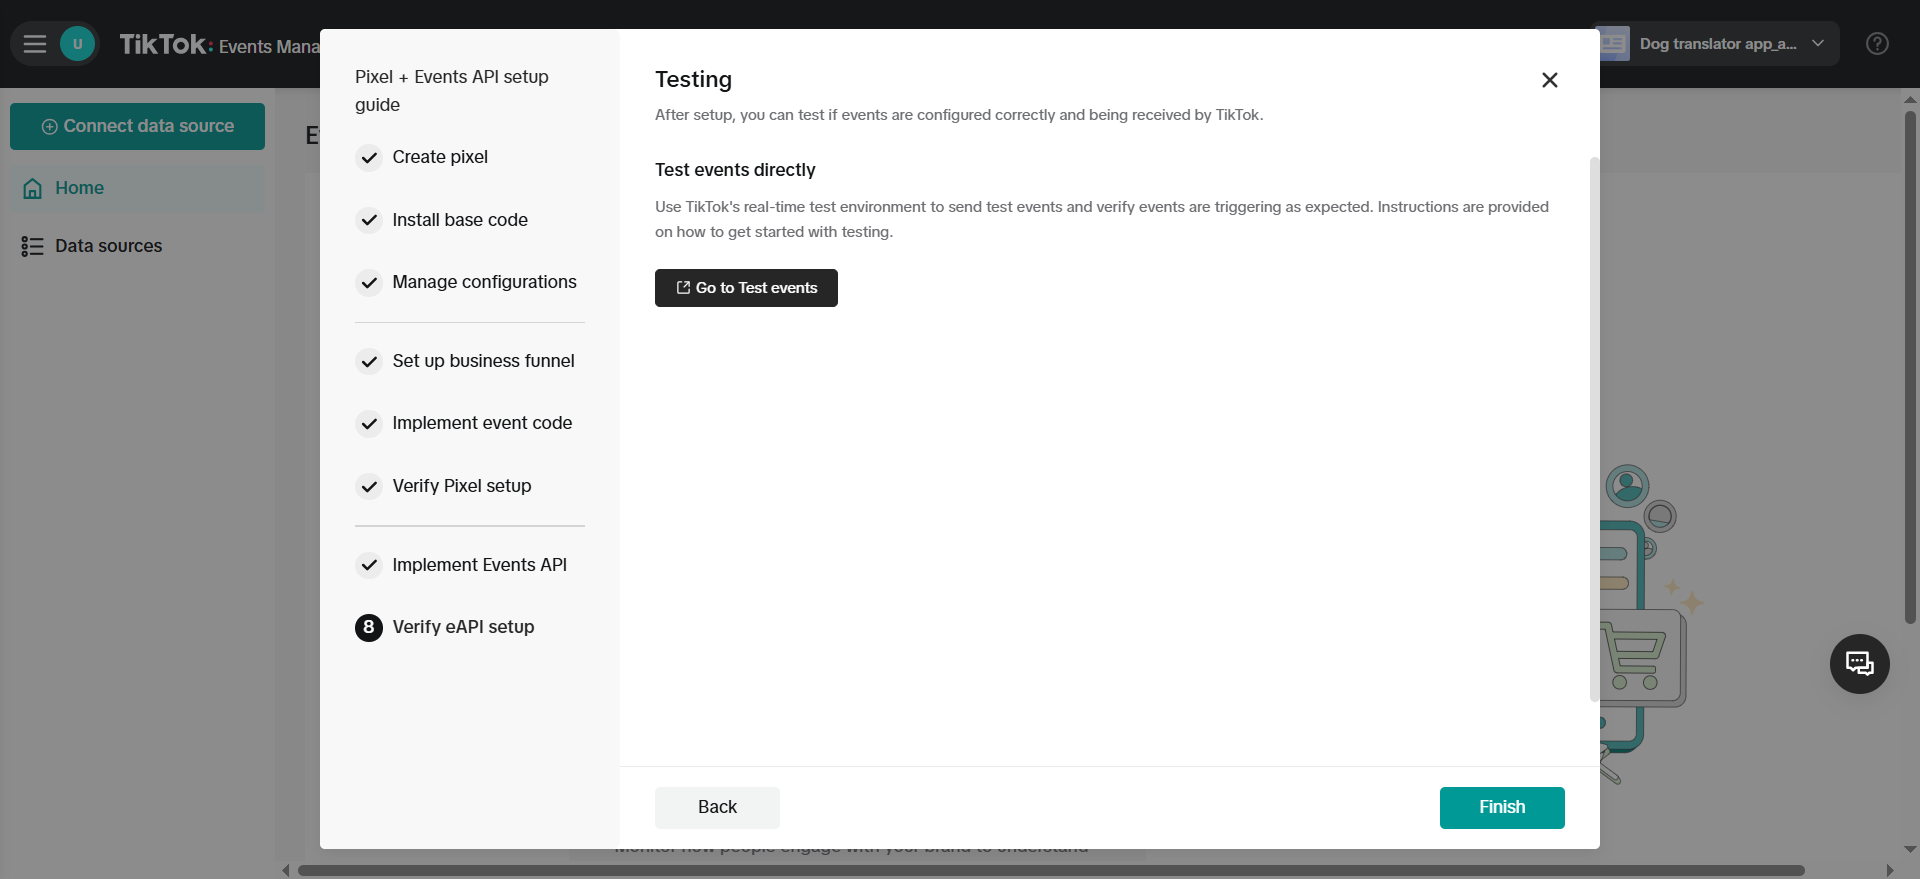
 4. Go back to the TikTok setup page and click **Next**.
5. Click **Go to Test events** under **Testing**. You can click **Finish** after completing our [testing guide](/docs/integrations/tracking/set-up-tiktok-pixel#test-your-integration) below.
TikTok Pixel and Events API are now active! Republish your funnels to start tracking.
TikTok will consider your setup incomplete and ask you to continue until you [test](/docs/integrations/tracking/set-up-tiktok-pixel#test-your-integration) the integration.
4. Go back to the TikTok setup page and click **Next**.
5. Click **Go to Test events** under **Testing**. You can click **Finish** after completing our [testing guide](/docs/integrations/tracking/set-up-tiktok-pixel#test-your-integration) below.
TikTok Pixel and Events API are now active! Republish your funnels to start tracking.
TikTok will consider your setup incomplete and ask you to continue until you [test](/docs/integrations/tracking/set-up-tiktok-pixel#test-your-integration) the integration.
 ## Test your integration
If you accidentally closed the setup page before testing, go to the **Test events** tab of your Pixel (data source) to continue.
Test that your event tracking works by sending test events from your funnel:
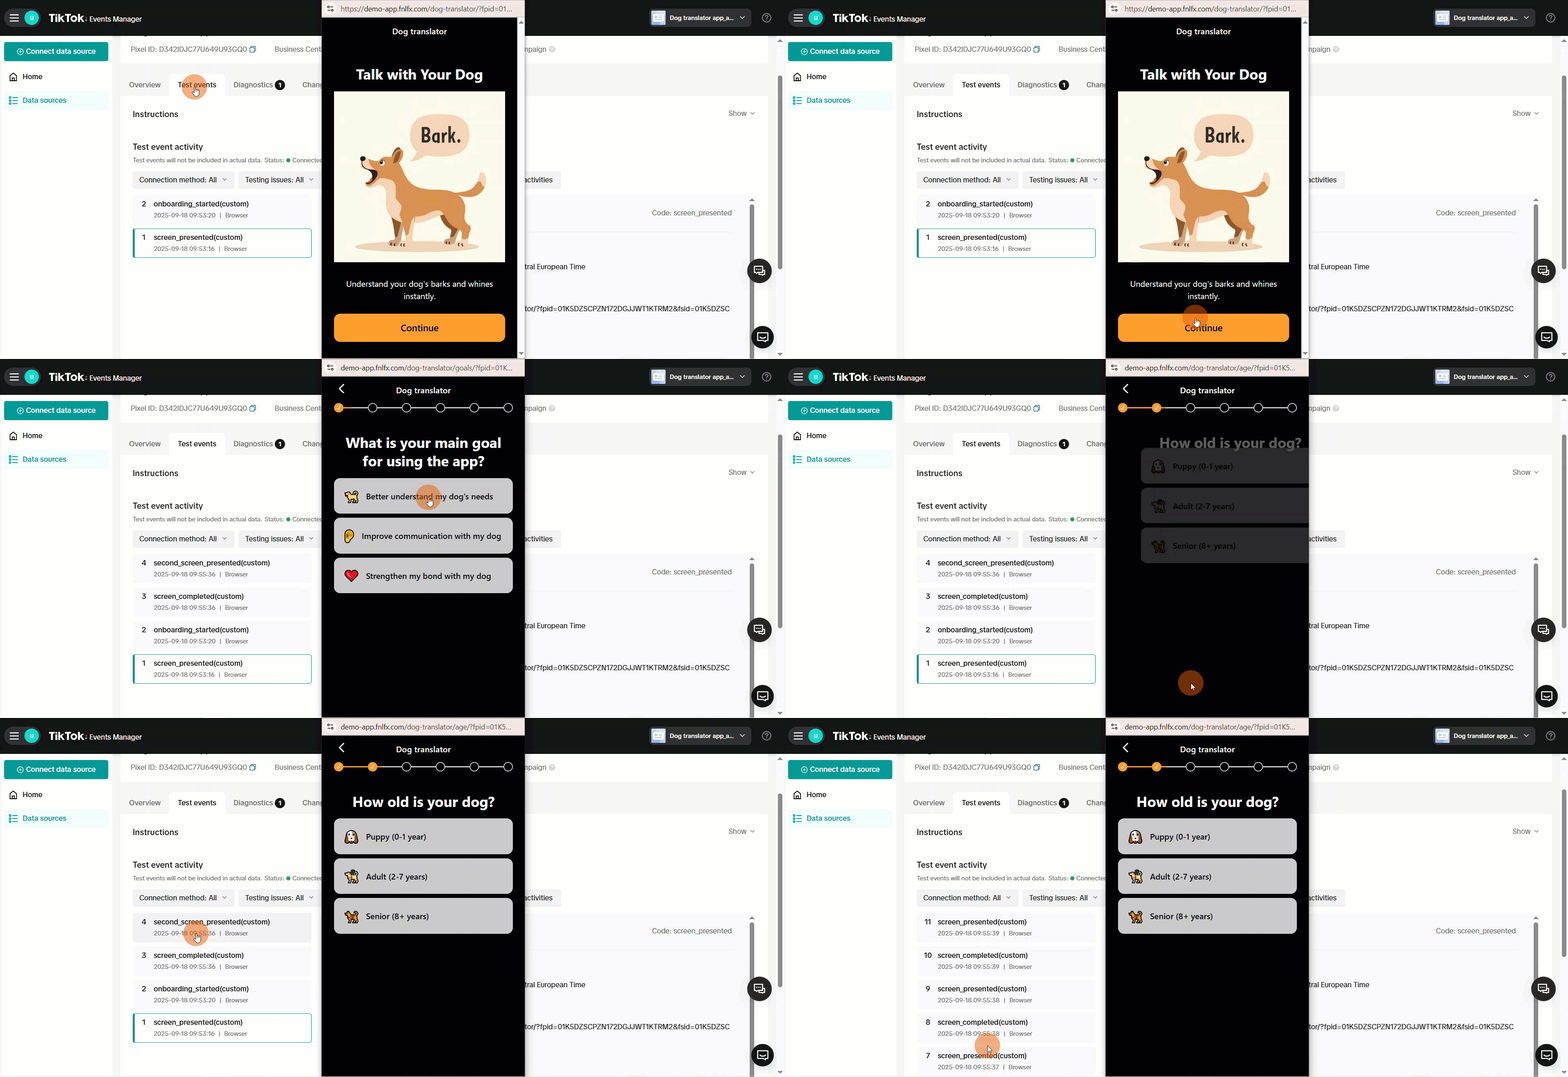
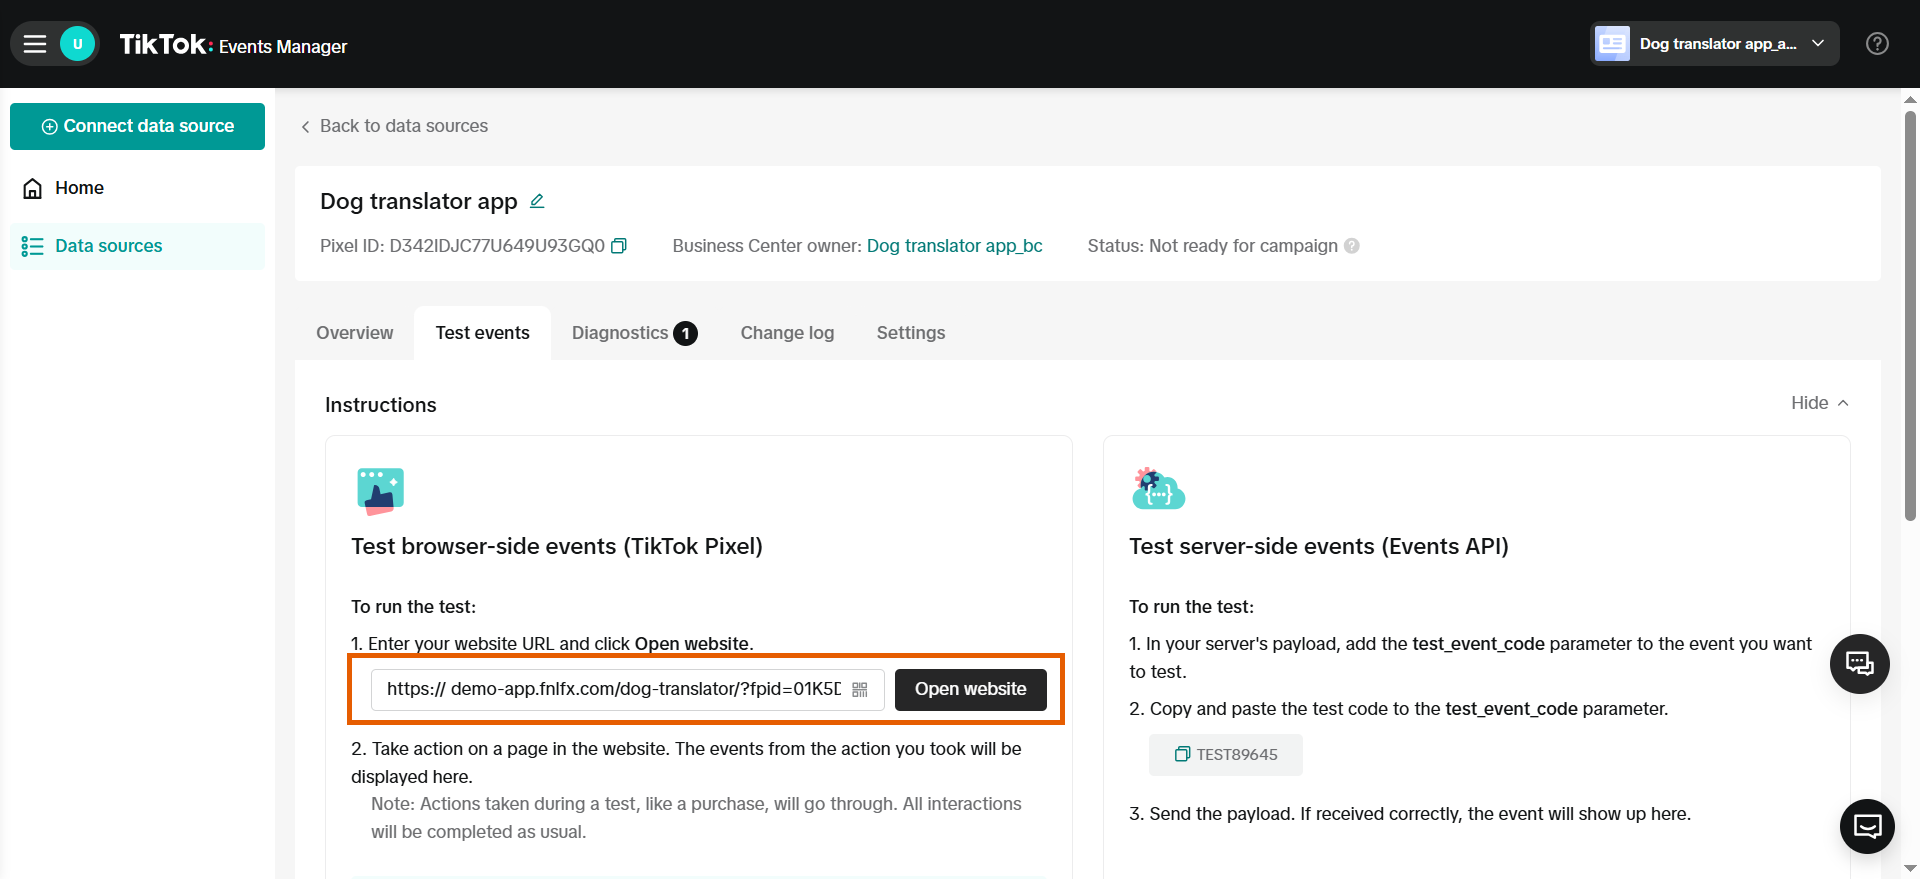
1. Paste your funnel URL and click **Open website** under the **Test events** tab.
## Test your integration
If you accidentally closed the setup page before testing, go to the **Test events** tab of your Pixel (data source) to continue.
Test that your event tracking works by sending test events from your funnel:
1. Paste your funnel URL and click **Open website** under the **Test events** tab.
 2. Interact with your funnel. Events will appear under **Test event activity**.